
How to make Minnie Mouse cake and cupcakes is what today’s blog is about! If you are looking for ideas, a tutorial, or just enjoy cake making, then you will like today’s post.
How to Make Minnie Mouse Cake and Cupcakes
It has been a while since I have made a cake. Disney themed or not! However, my friend’s daughter was turning three, (insert sobbing here), and she asked for a purple Minnie Mouse cake! Auntie could not disappoint this little one. Keep reading below to find out how to make this cake and cupcakes.

Design
First on how to make Minnie Mouse cake and cupcakes, is coming up with a design of what you want to make. Mostly, for me, is what is possible for me to make with my skills and physical stamina. (I had surgery this year with lasting issues that are limiting. At the moment.)
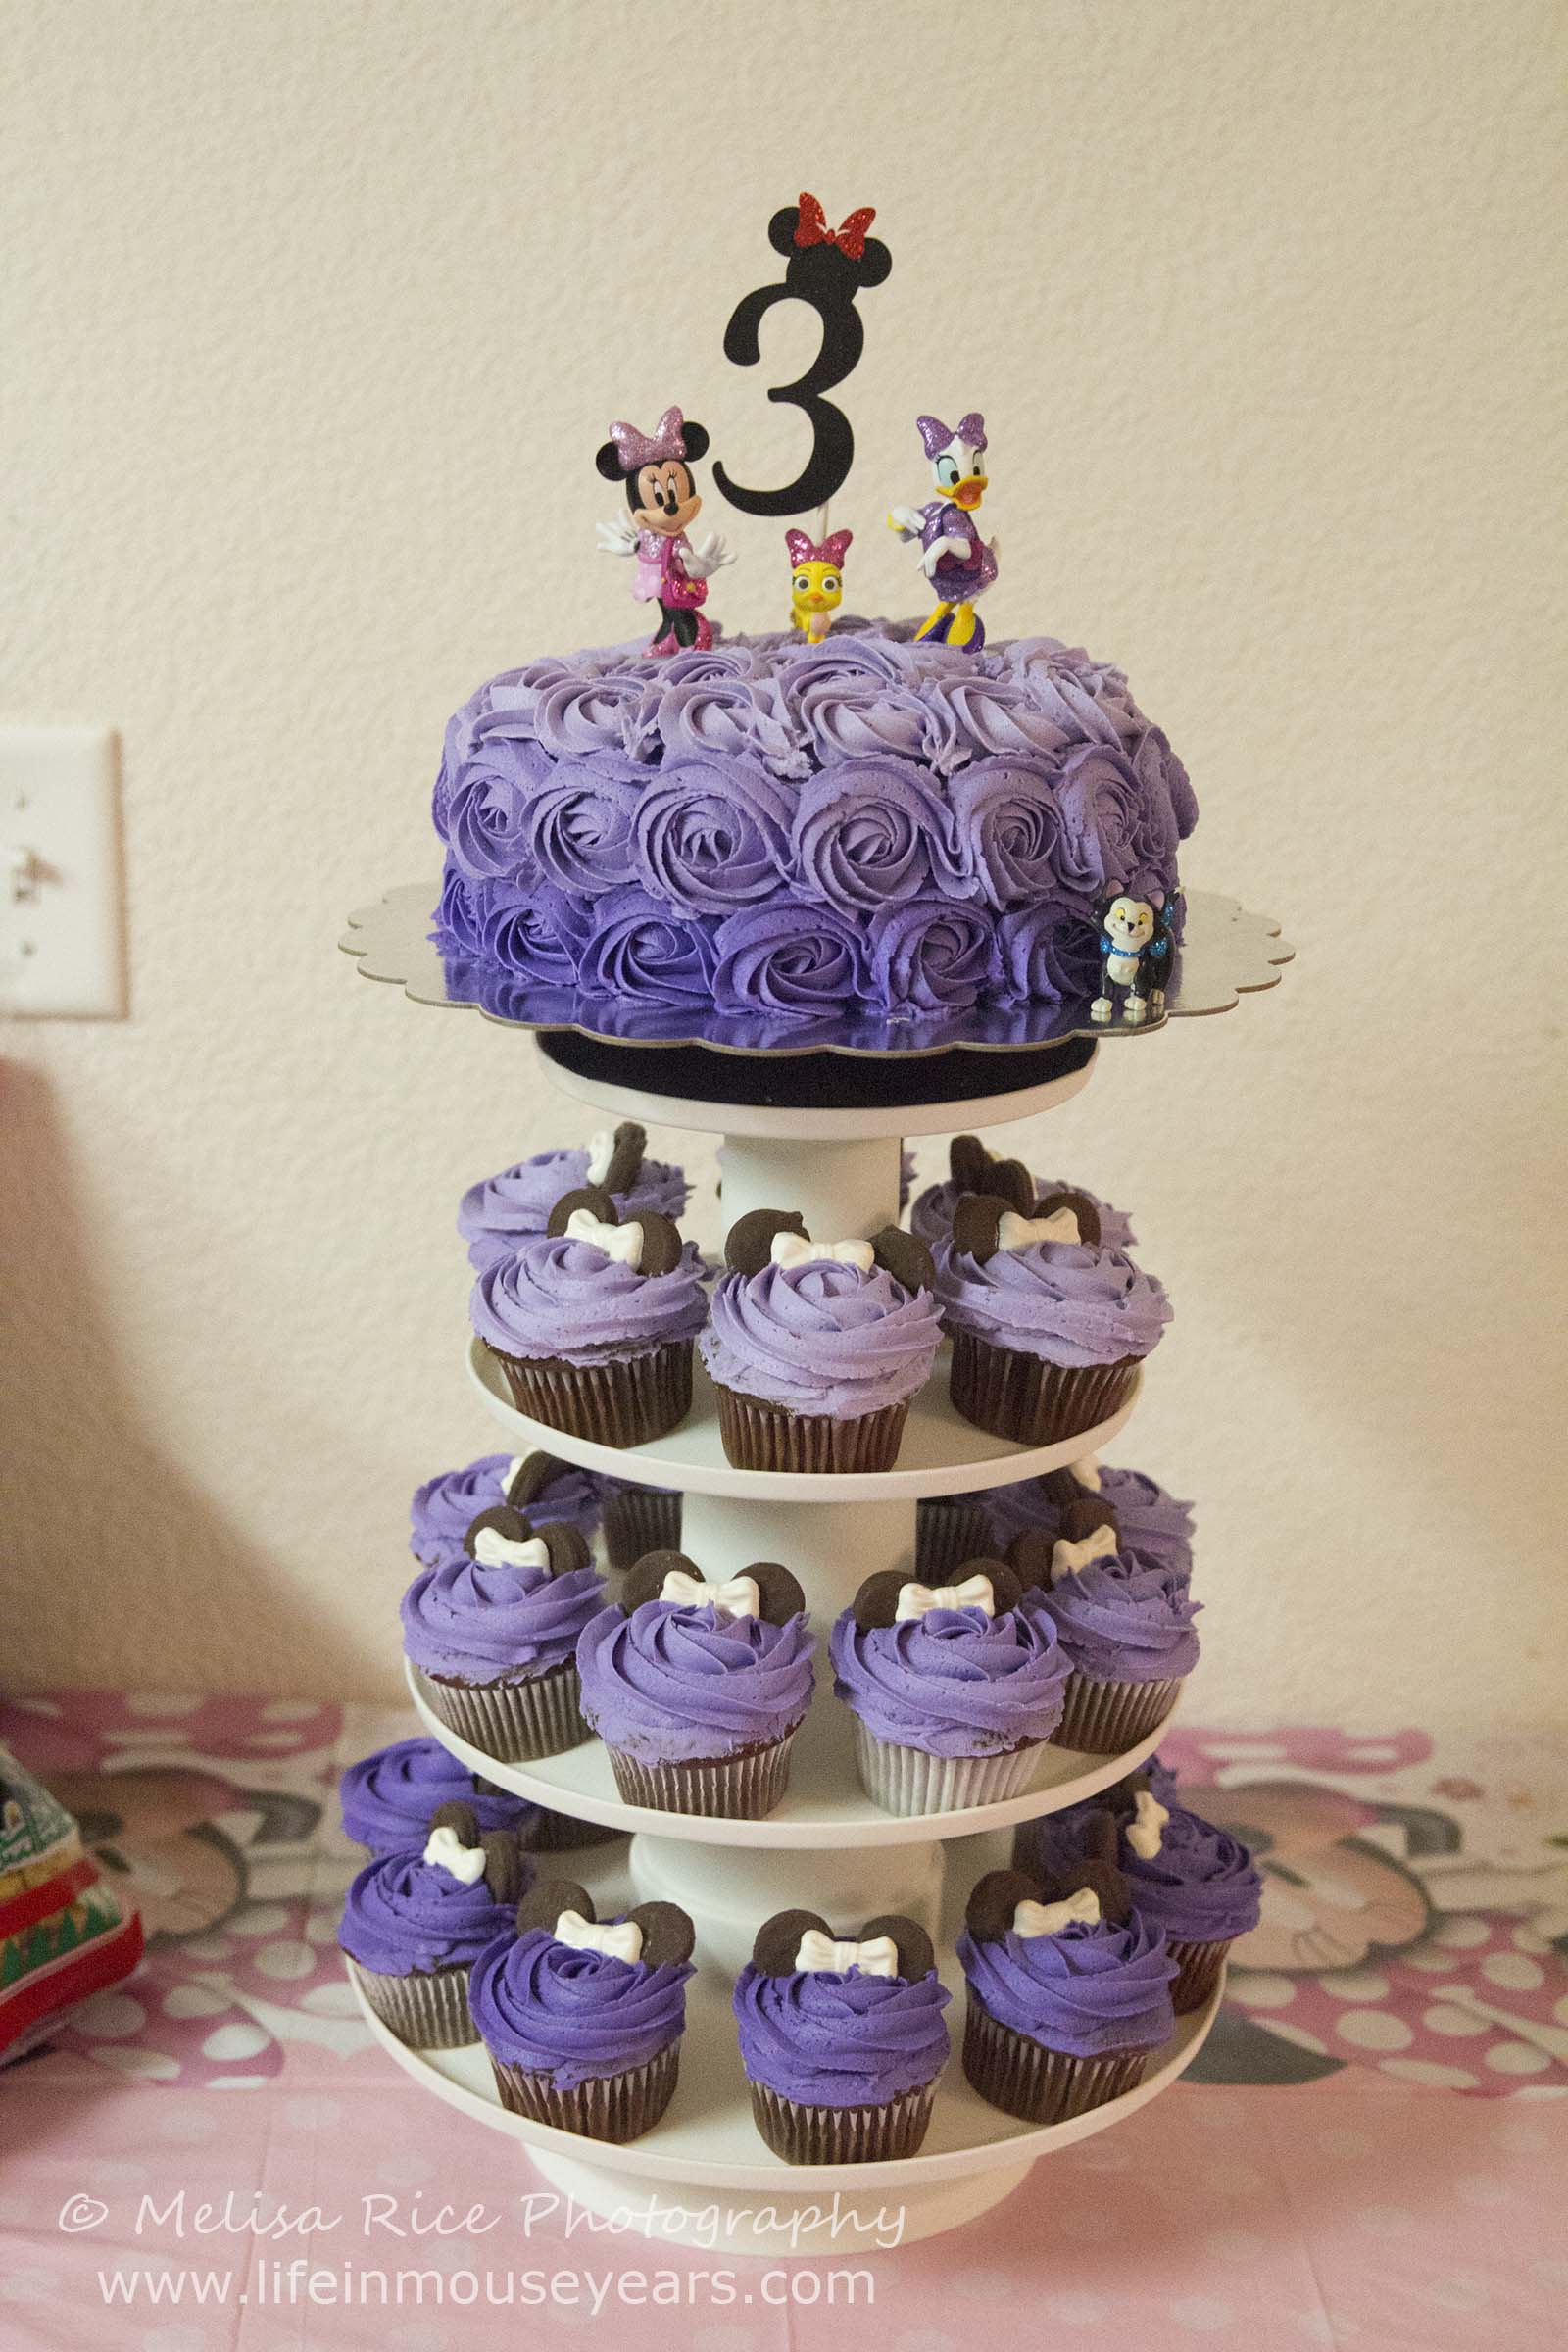
For this Minnie Mouse cake and cupcakes, I decided to do a cake round with purple ombre rosettes. In addition to Minnie Mouse cupcakes.
Supplies
Second, on how to make Minnie Mouse cake and cupcakes, is to get all the supplies you will need. This list may seem like a lot. However, you may already have a lot of these items. (Some are optional.) I will link what I can through Amazon to help you out!
*As always, as an affiliate, I may make a small commission with no additional cost to you! I thank you for helping me keep this site going.
- Wilton Candy Melts
- Bow Candy Mold
- Wilton Melting Bowls (optional)
- Wilton Cake Pans
- Cupcake Pan
- Cupcake Liners
- Piping Bags
- Wilton 1M Tip
- Wilton Batter Dispenser (optional)
- Cake Board
- Cake Boxes
- Duncan Hines Cake Mix
- Extra Light Olive Oil
- Powdered Sugar
- Butter
- Shortening (This is what I use, however, Fred Meyer’s has it WAY cheaper!)
- Real Vanilla Extract (If you are a Costco member, I recommend what they sell. Real vanilla, bulk price.)
- Milk
- Food Coloring (Americolor)
- Fudge Dipped Oreo Thins
- Minnie Mouse and Friends Figurines
- Minnie Mouse Cake Topper
- Cupcake Stand (I used the Wilton stand, however, I found THIS STAND that looks awesome, sturdy and great reviews!)
- Sifter
- Wilton Cake Leveler (optional)
- Mixer (optional Kitchenaid)
- Cake Frosting Knives
Making Minnies Bows
Next up is to make Minnies Bows. I decided to go with white bows so that they go with the purple frosting.
In the past, I have heated the Wilton candy melts in the microwave with the melting cups or the candy bags. We no longer have a microwave… Therefore, I used the double boiler method. Being careful to not let the steam come up around the bowl. Otherwise, it will ruin the candy melts.
Take a pot and add water to it. Put a glass bowl on top. (bigger than the pot so it does not touch the water) Then, turn on the stove and get the water just about to boil and turn the stove off. Add some candy melts to the bowl and stir occasionally until they are melted.
Add the melted candy melts to the bow mold. Tap gently on the counter to release any air bubbles. Put in the fridge until completely cooled and hardened. Remove mold from the fridge and turn over. Gently tap until candies are released from the mold.
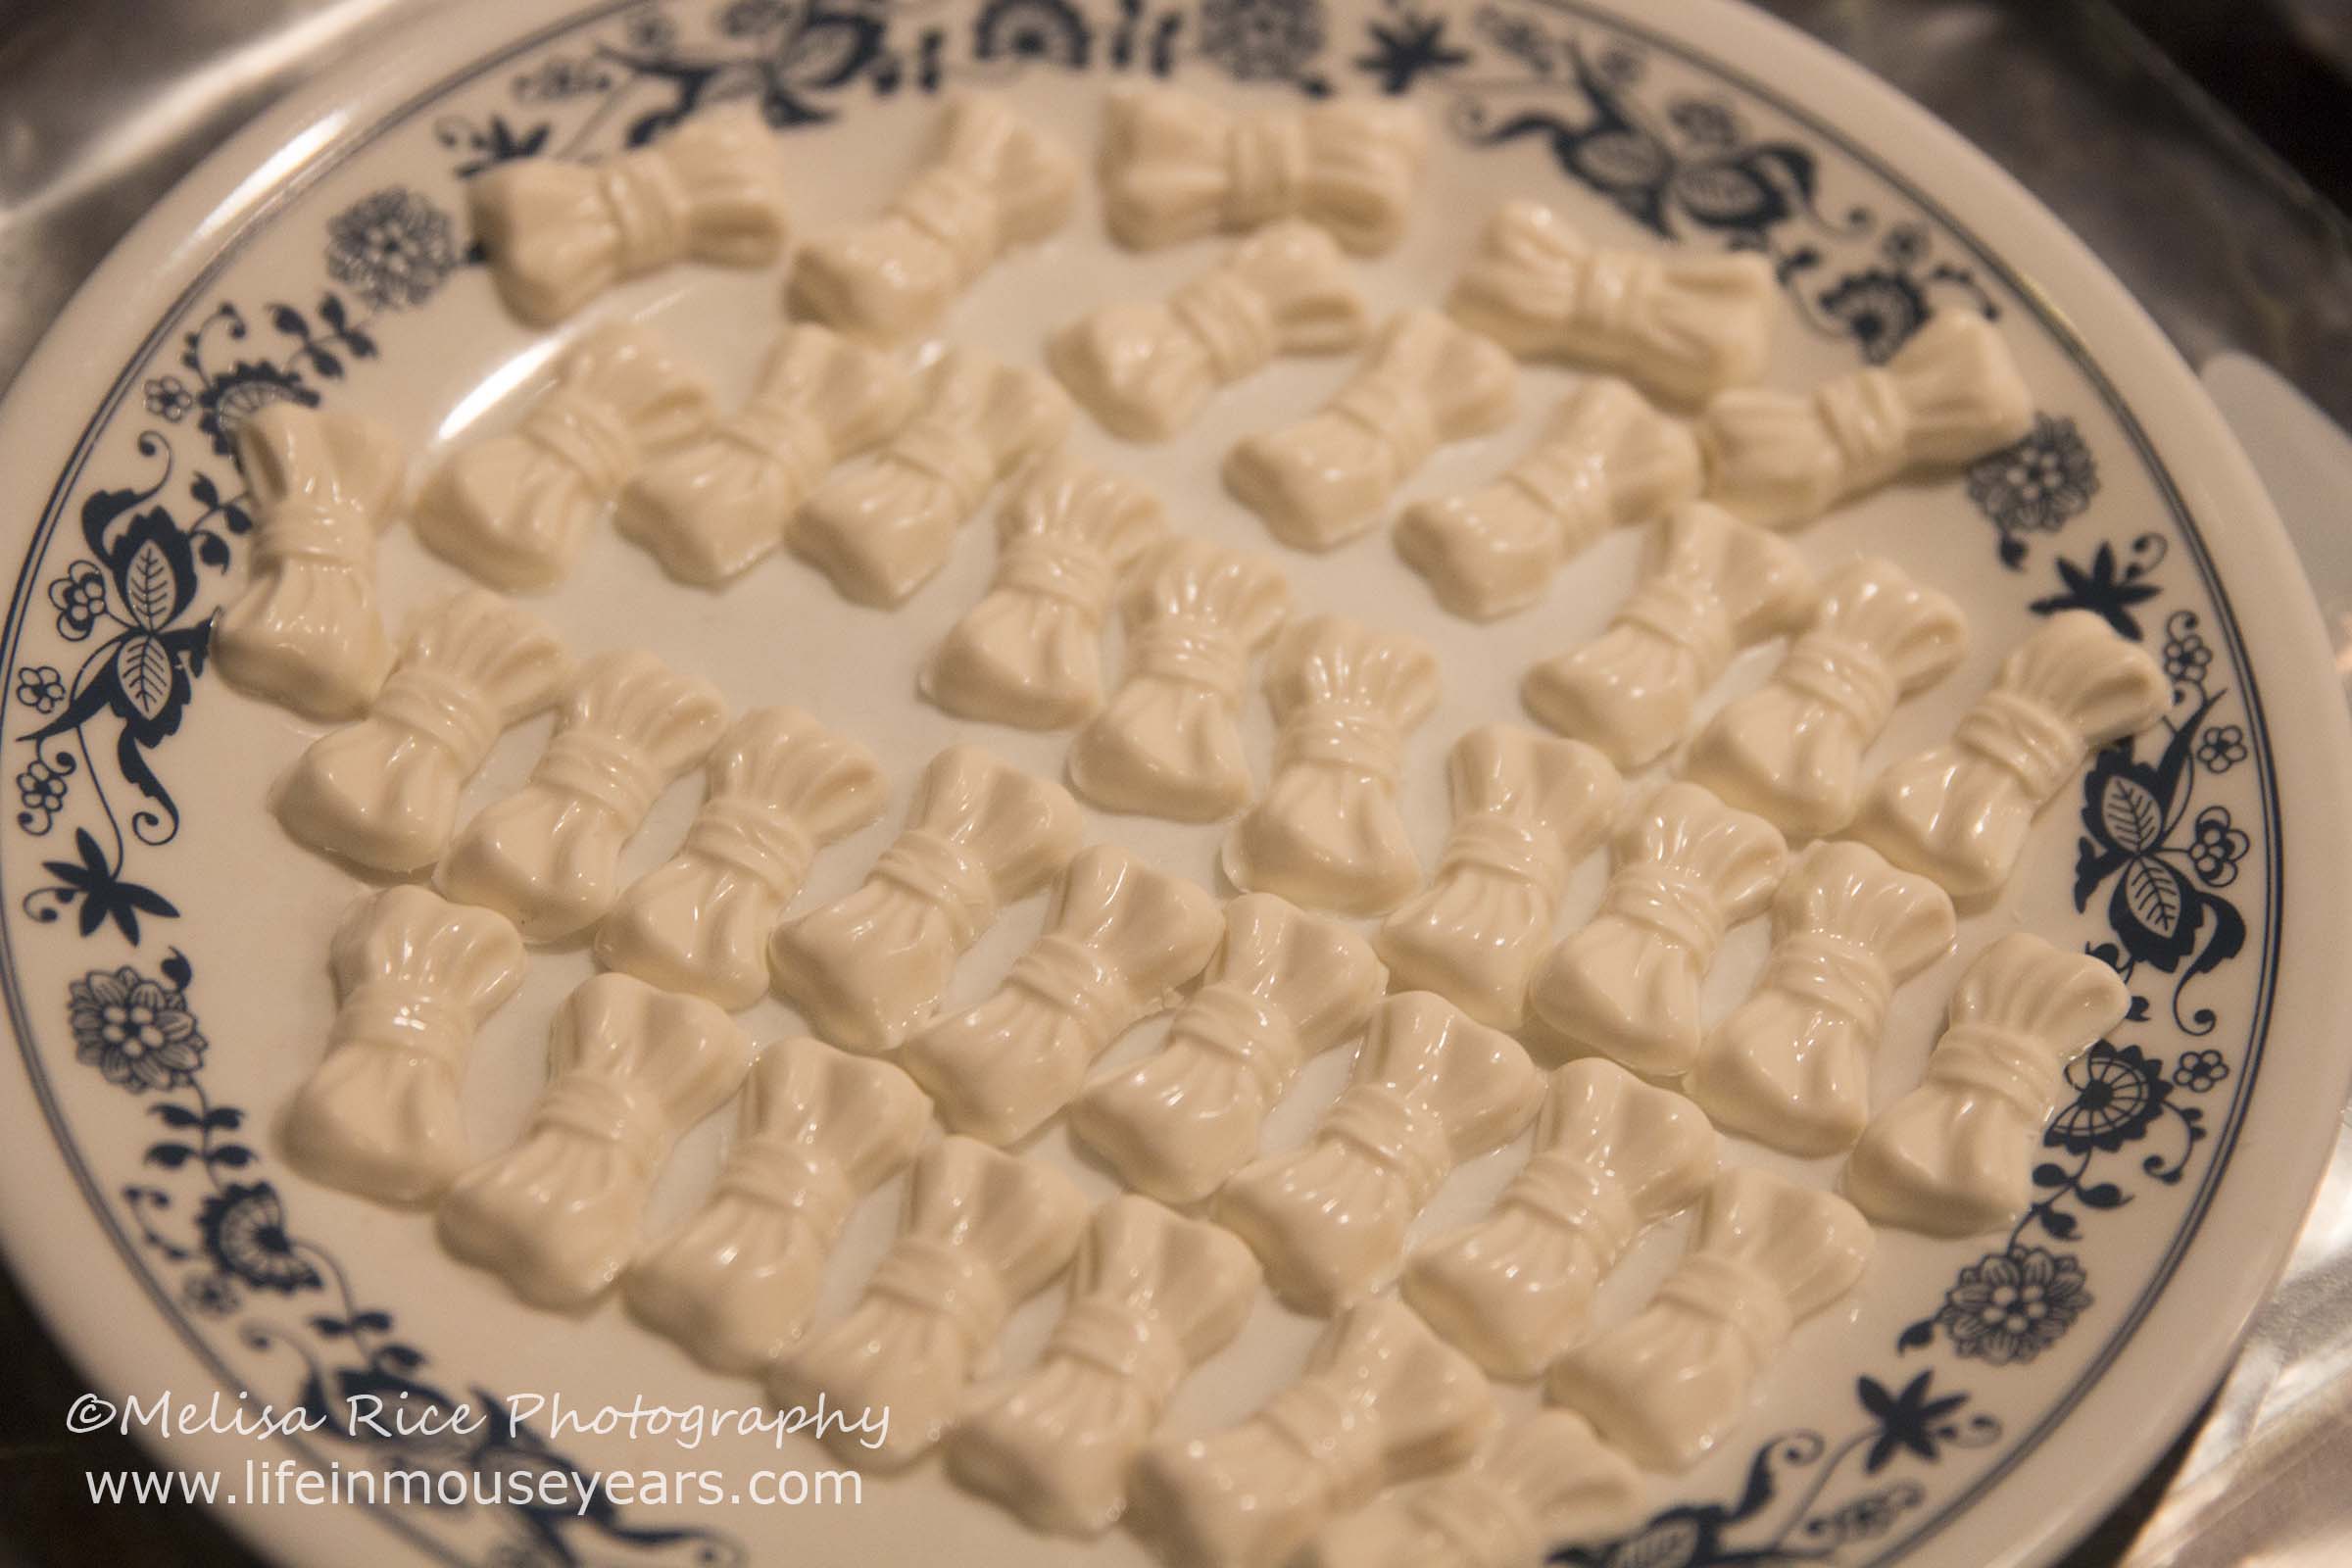
Tip:
I only used the top bow portion of the mold and not the ribbons that hang down. As a result of the reviews of them breaking off, and wanting the classic Minne Mouse bow look.
Candy Melt Storage
Being that I made these days in advance, I needed to store them until they were needed. I placed them on a plate and put them in a Ziploc bag. This way they stay shiny and looking great. Do not store in the fridge or freezer. Just as with chocolate, the ingredients will start to separate and have spots. Also, do not store the candies near heat. The candy melts will melt very easily.
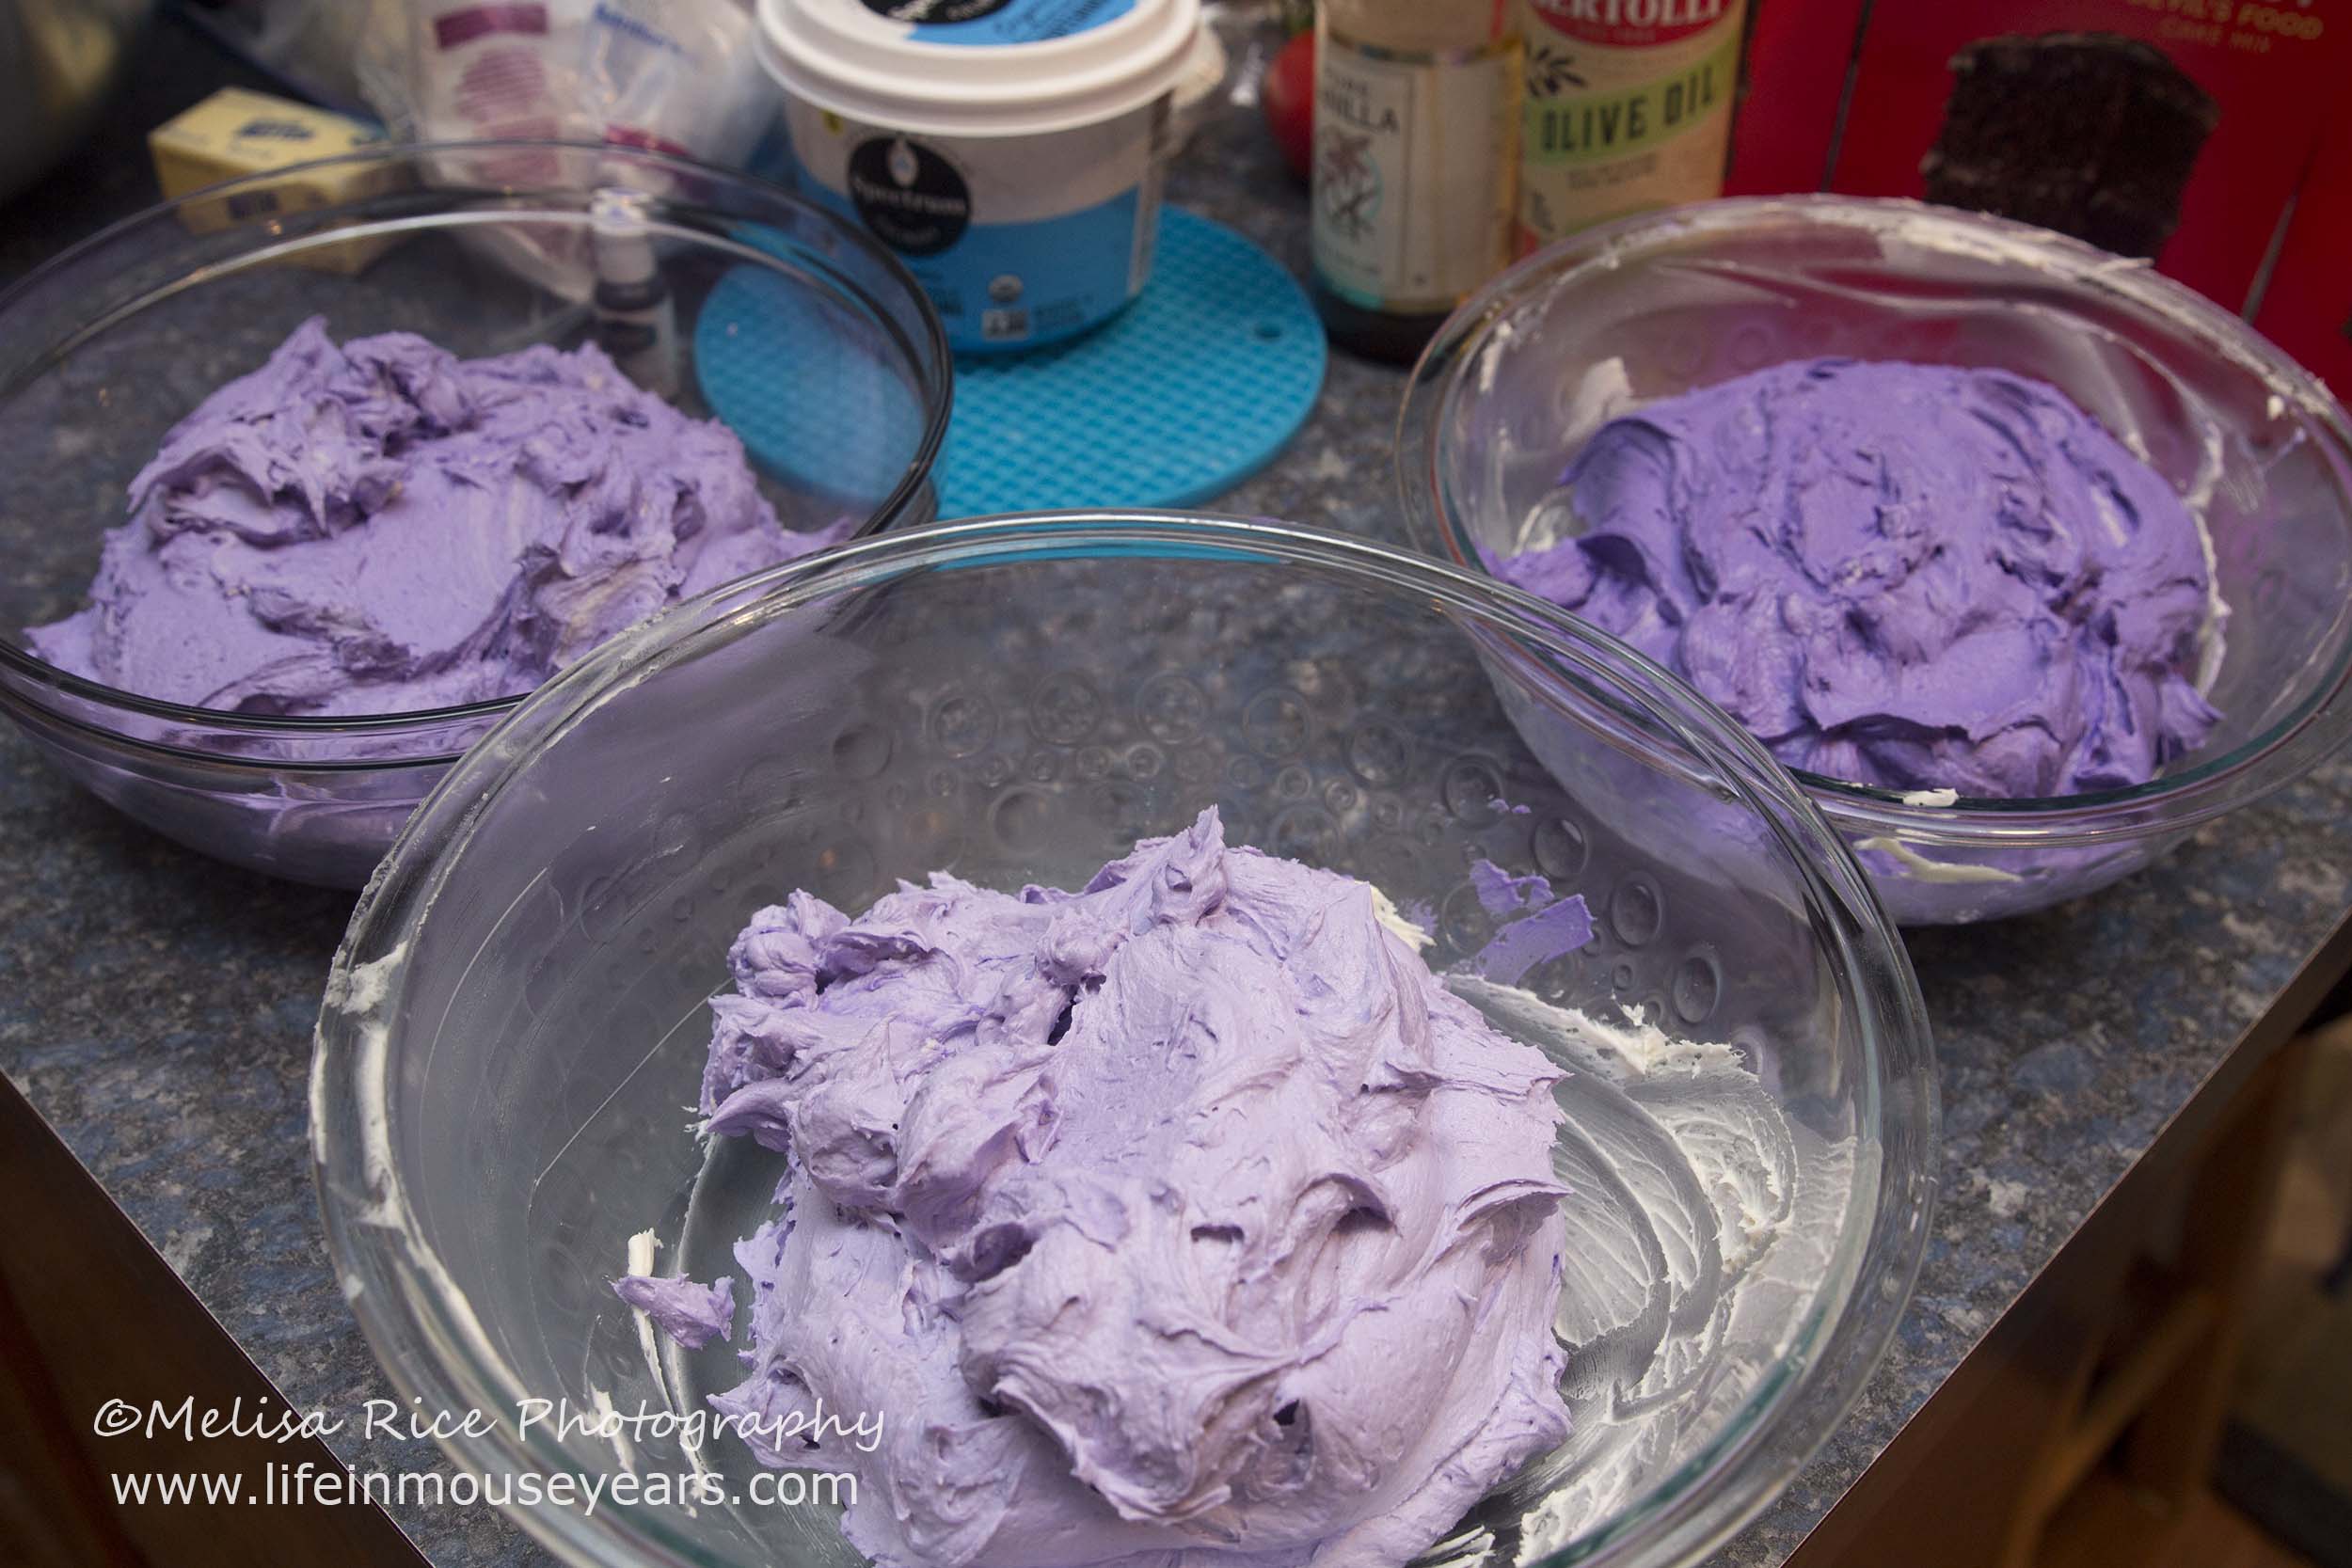
Frosting Time
Next on how to make Minnie Mouse cake and cupcakes, is to make the frosting. Do this at least a day in advance of when you need it. This is because it takes time for the color to fully develop. It is also nice to have the frosting ready to go and not make everything in one day. Also, milk is important. Whether dairy or dairy-free. I completely forgot to get milk. So I attempted heavy whipping cream. I researched and it was recommended to mix at a slower speed to reduce air bubbles. Well… there were way too many air bubbles when I pipped the frosting. Learn from my mistake! Get milk.
The frosting I make is Wilton Buttercream Frosting. This has been my go-to for years! I get compliments on it all the time.
Tips:
- Use pure vanilla extract.
- If you have a stand mixer, use it! It has been easier to use the KitchenAid ever since we got one.

Take one stick unsalted butter (at room temp) and half a cup of organic vegetable shortening. Put it in the bowl of the mixer and turn it on medium speed until well mixed. Next, add a teaspoon of REAL vanilla extract and mix well. Add the three cups powdered sugar (a little at a time) until mixed together. It will be extremely thick. Add one Tablespoon of milk at a time until frosting is a spreadable consistency.
I made 6 batches of frosting to make sure I had enough of each color. Because I always go overboard… I had enough to frost 4, 8-inch cake rounds (2 finished cakes) and 24 cupcakes. Including using the frosting as a filling and dirty icing the cake and cupcakes.
There are two ways to get your colors of the frosting. First, the way I did it, was to add the Americolor Violet gel color to 2 batches of frosting. Making the darkest color first. Next, I did the middle shade by adding the color to 2 batches of frosting as well. Finally, I made the lightest shade in 2 batches of frosting.
Tip:
After I had made the frosting, I watched some Youtube videos on how to do rosettes. (To refresh my mind.) Then found out another way is to make your darkest color. Then take white frosting and add some of the darkest colors to it to get the middle color. Next, add some of the middle colors to the white frosting to get the lightest shade of color you need. (That would probably have been easier to do. Live and learn right?)

Baking the Cake and Cupcakes
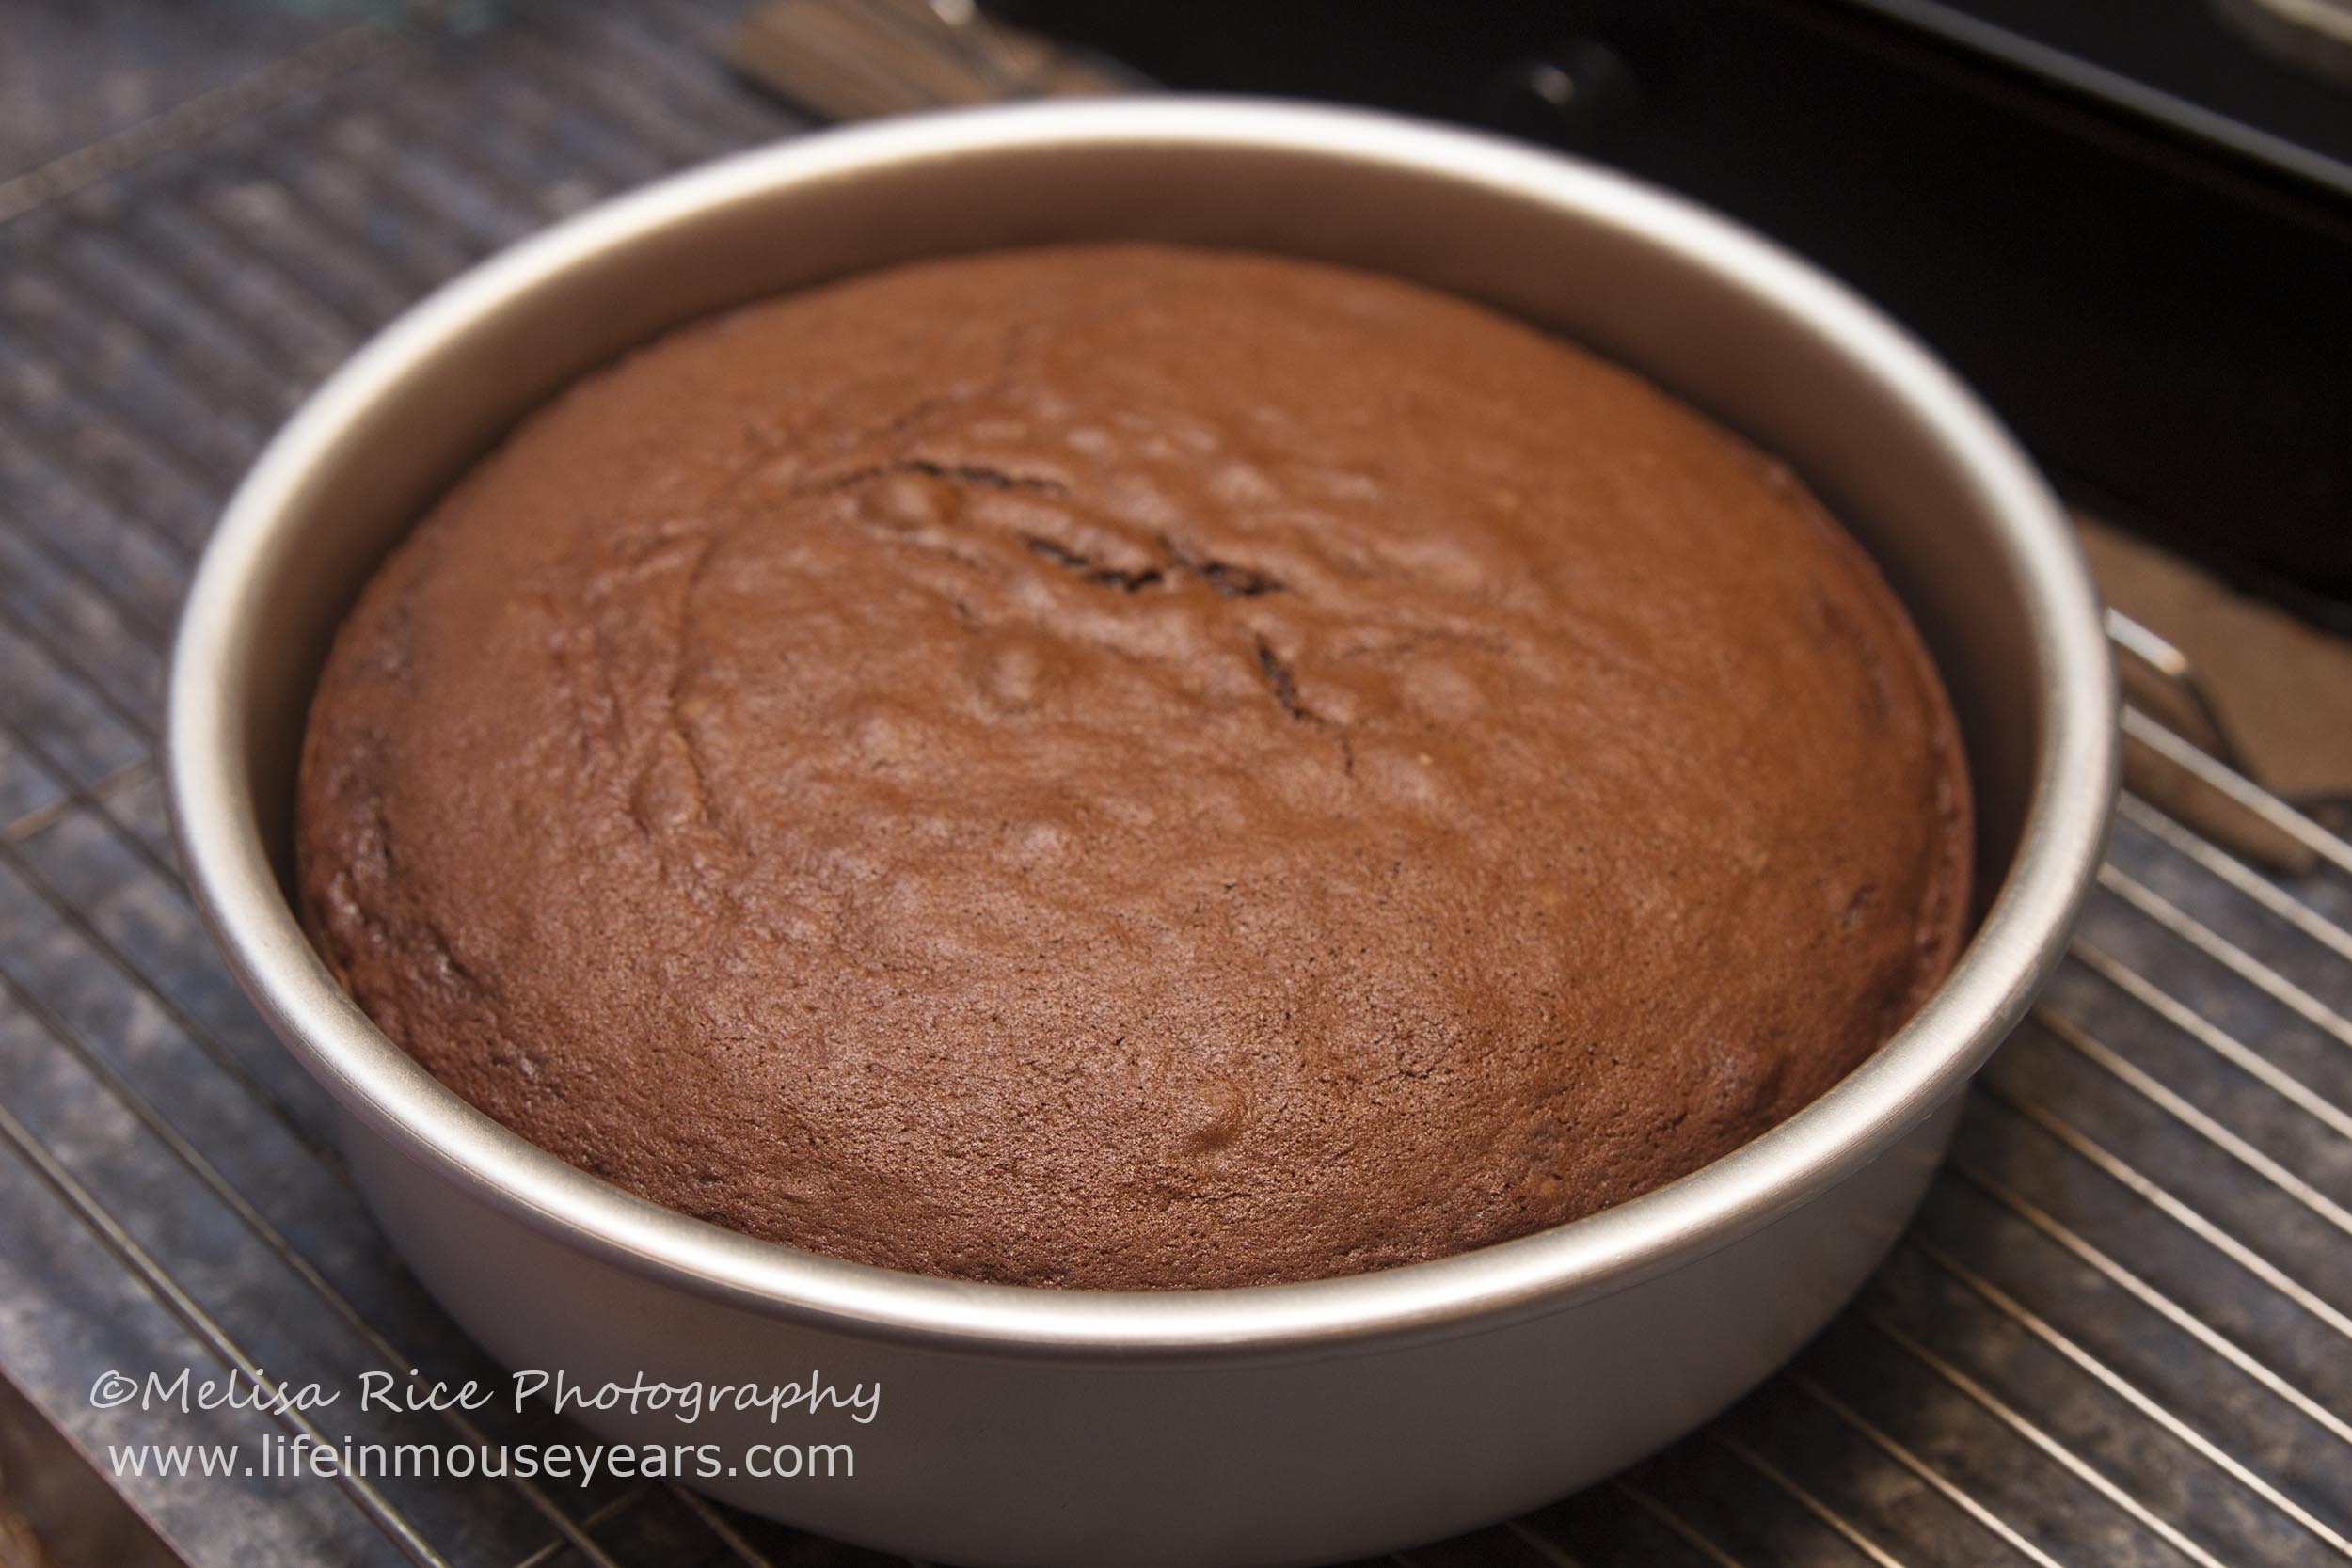
Next on how to make Minnie Mouse cake and cupcakes is to bake the cake and cupcakes! I did this the night before the party due to having a prior commitment on the morning of the party. It works just fine to do the cake ahead. Just make sure to put the cake and cupcakes in the refrigerator. (I put them in cake boxes.) Also, wait to add the cookies and chocolate bows until after being in the refrigerator. Just make sure to let the cake and cupcakes to warm up before adding the toppers. Otherwise, the frosting will crumble.
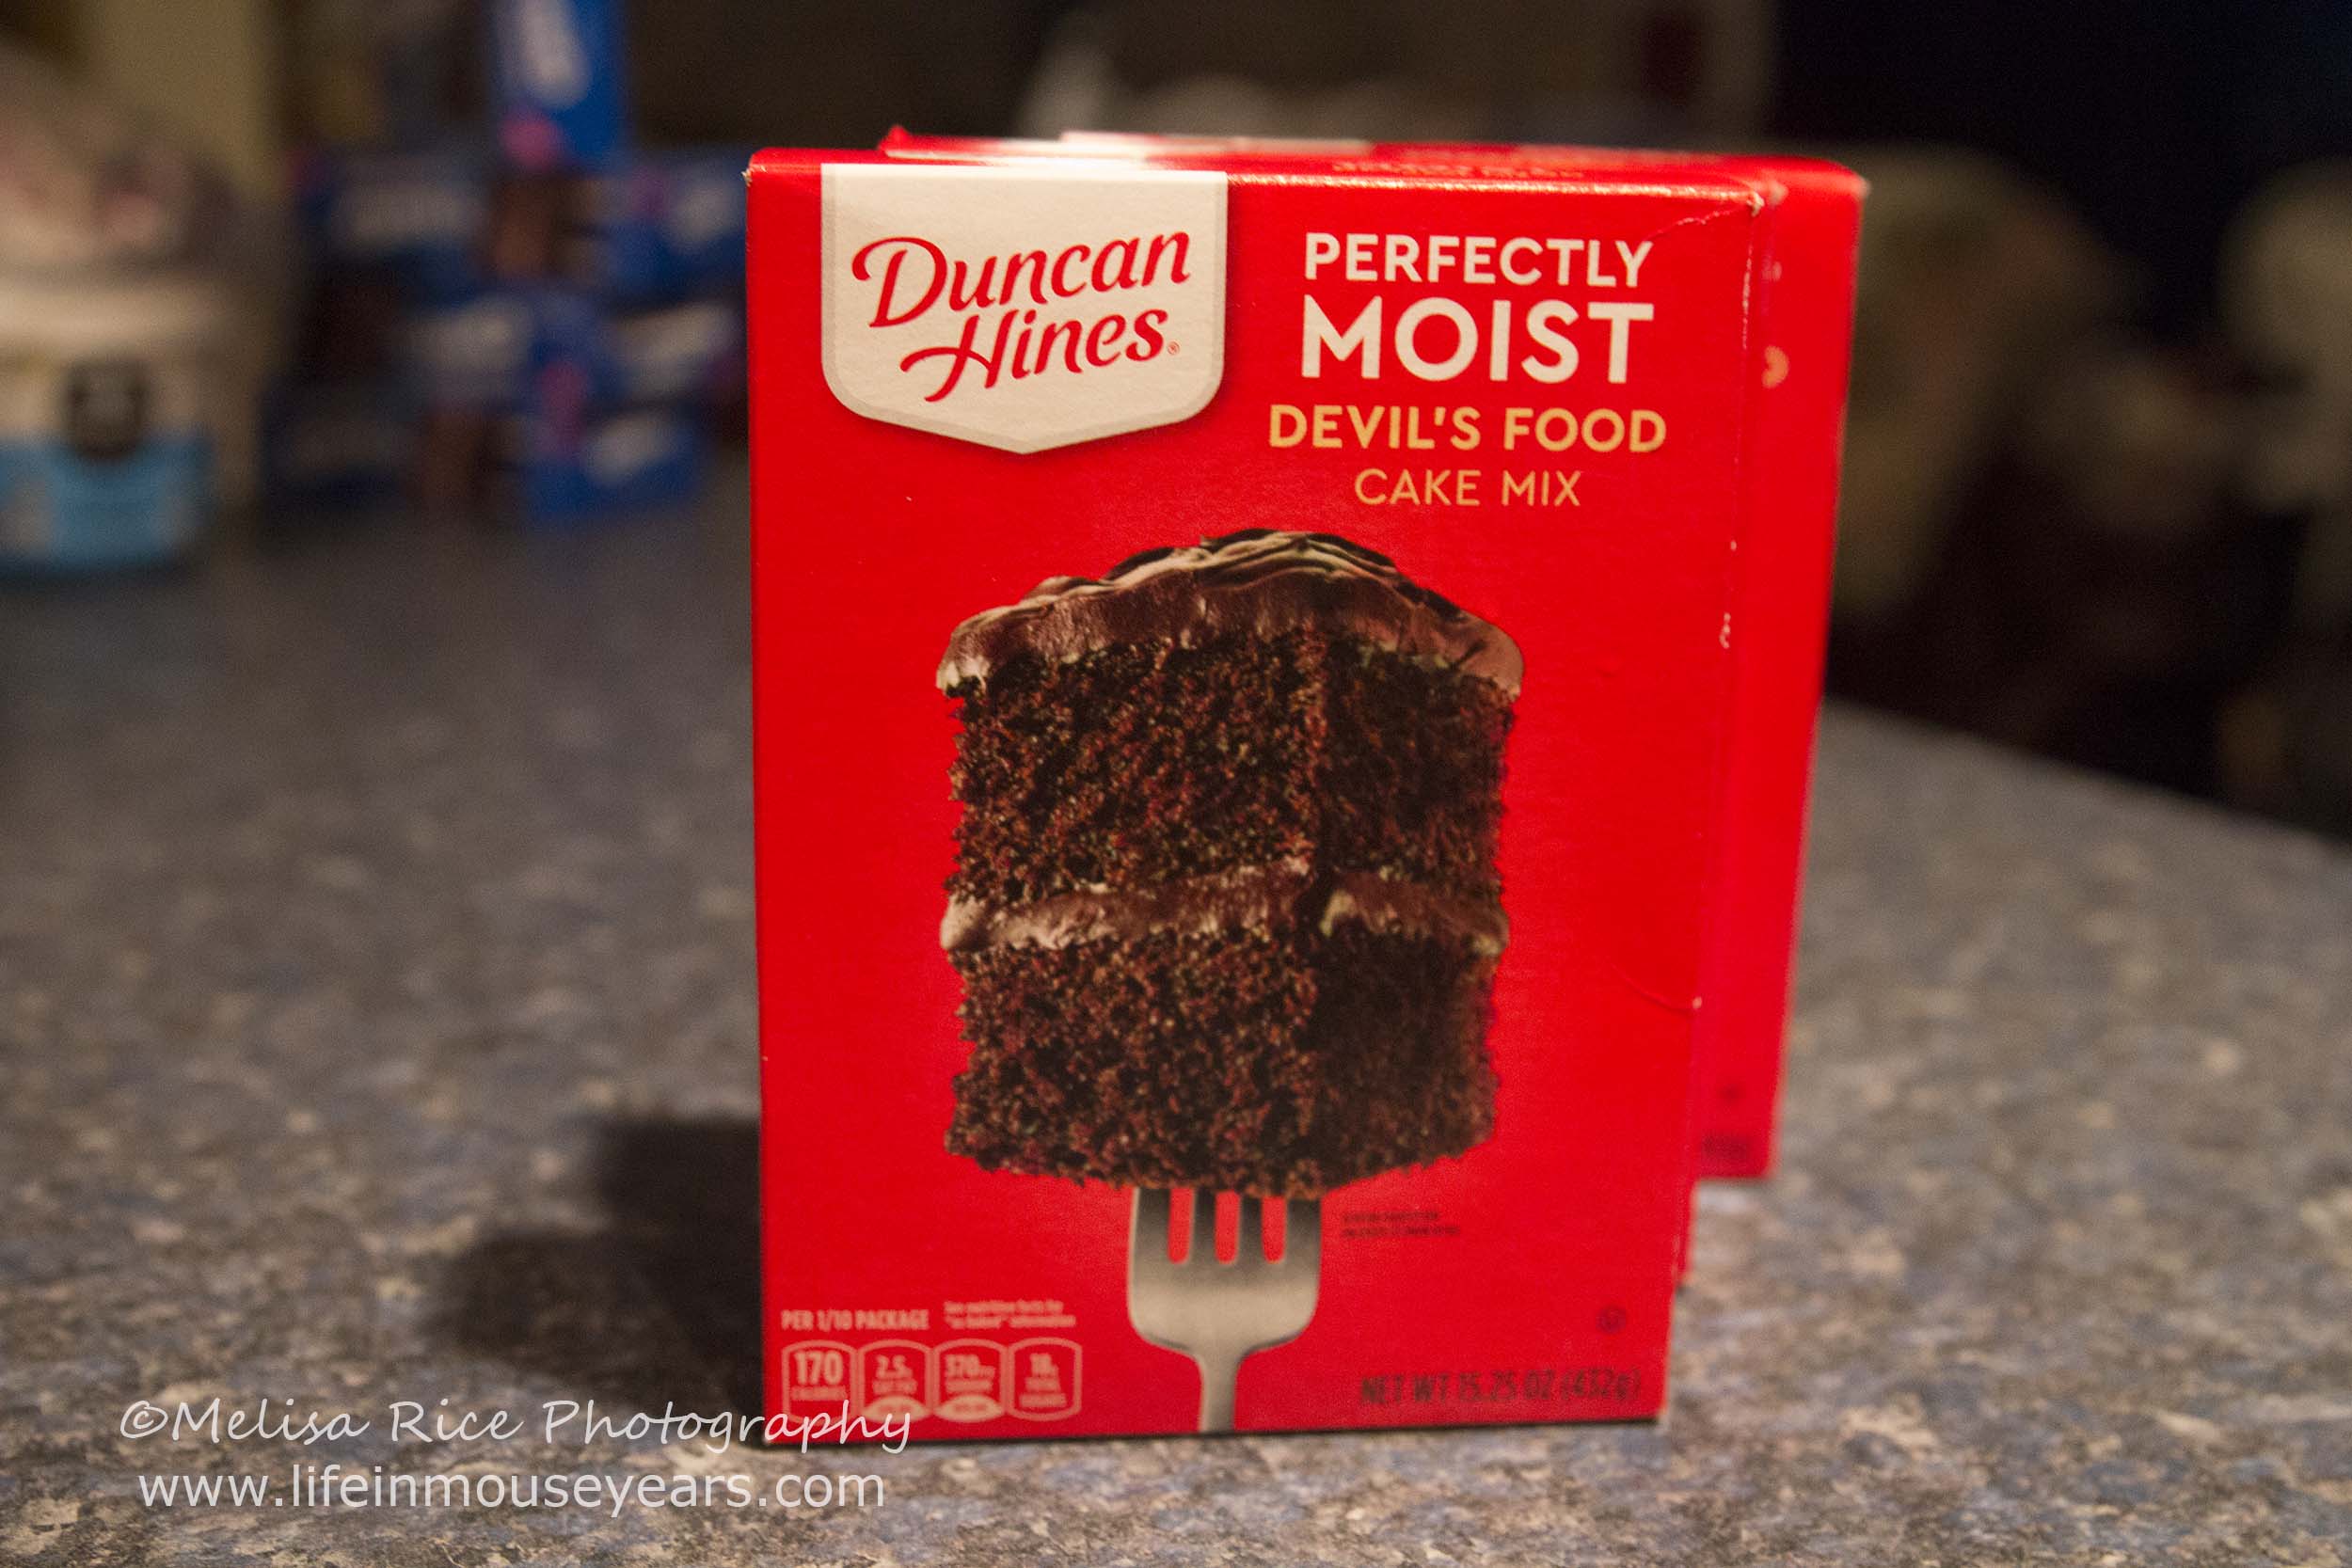
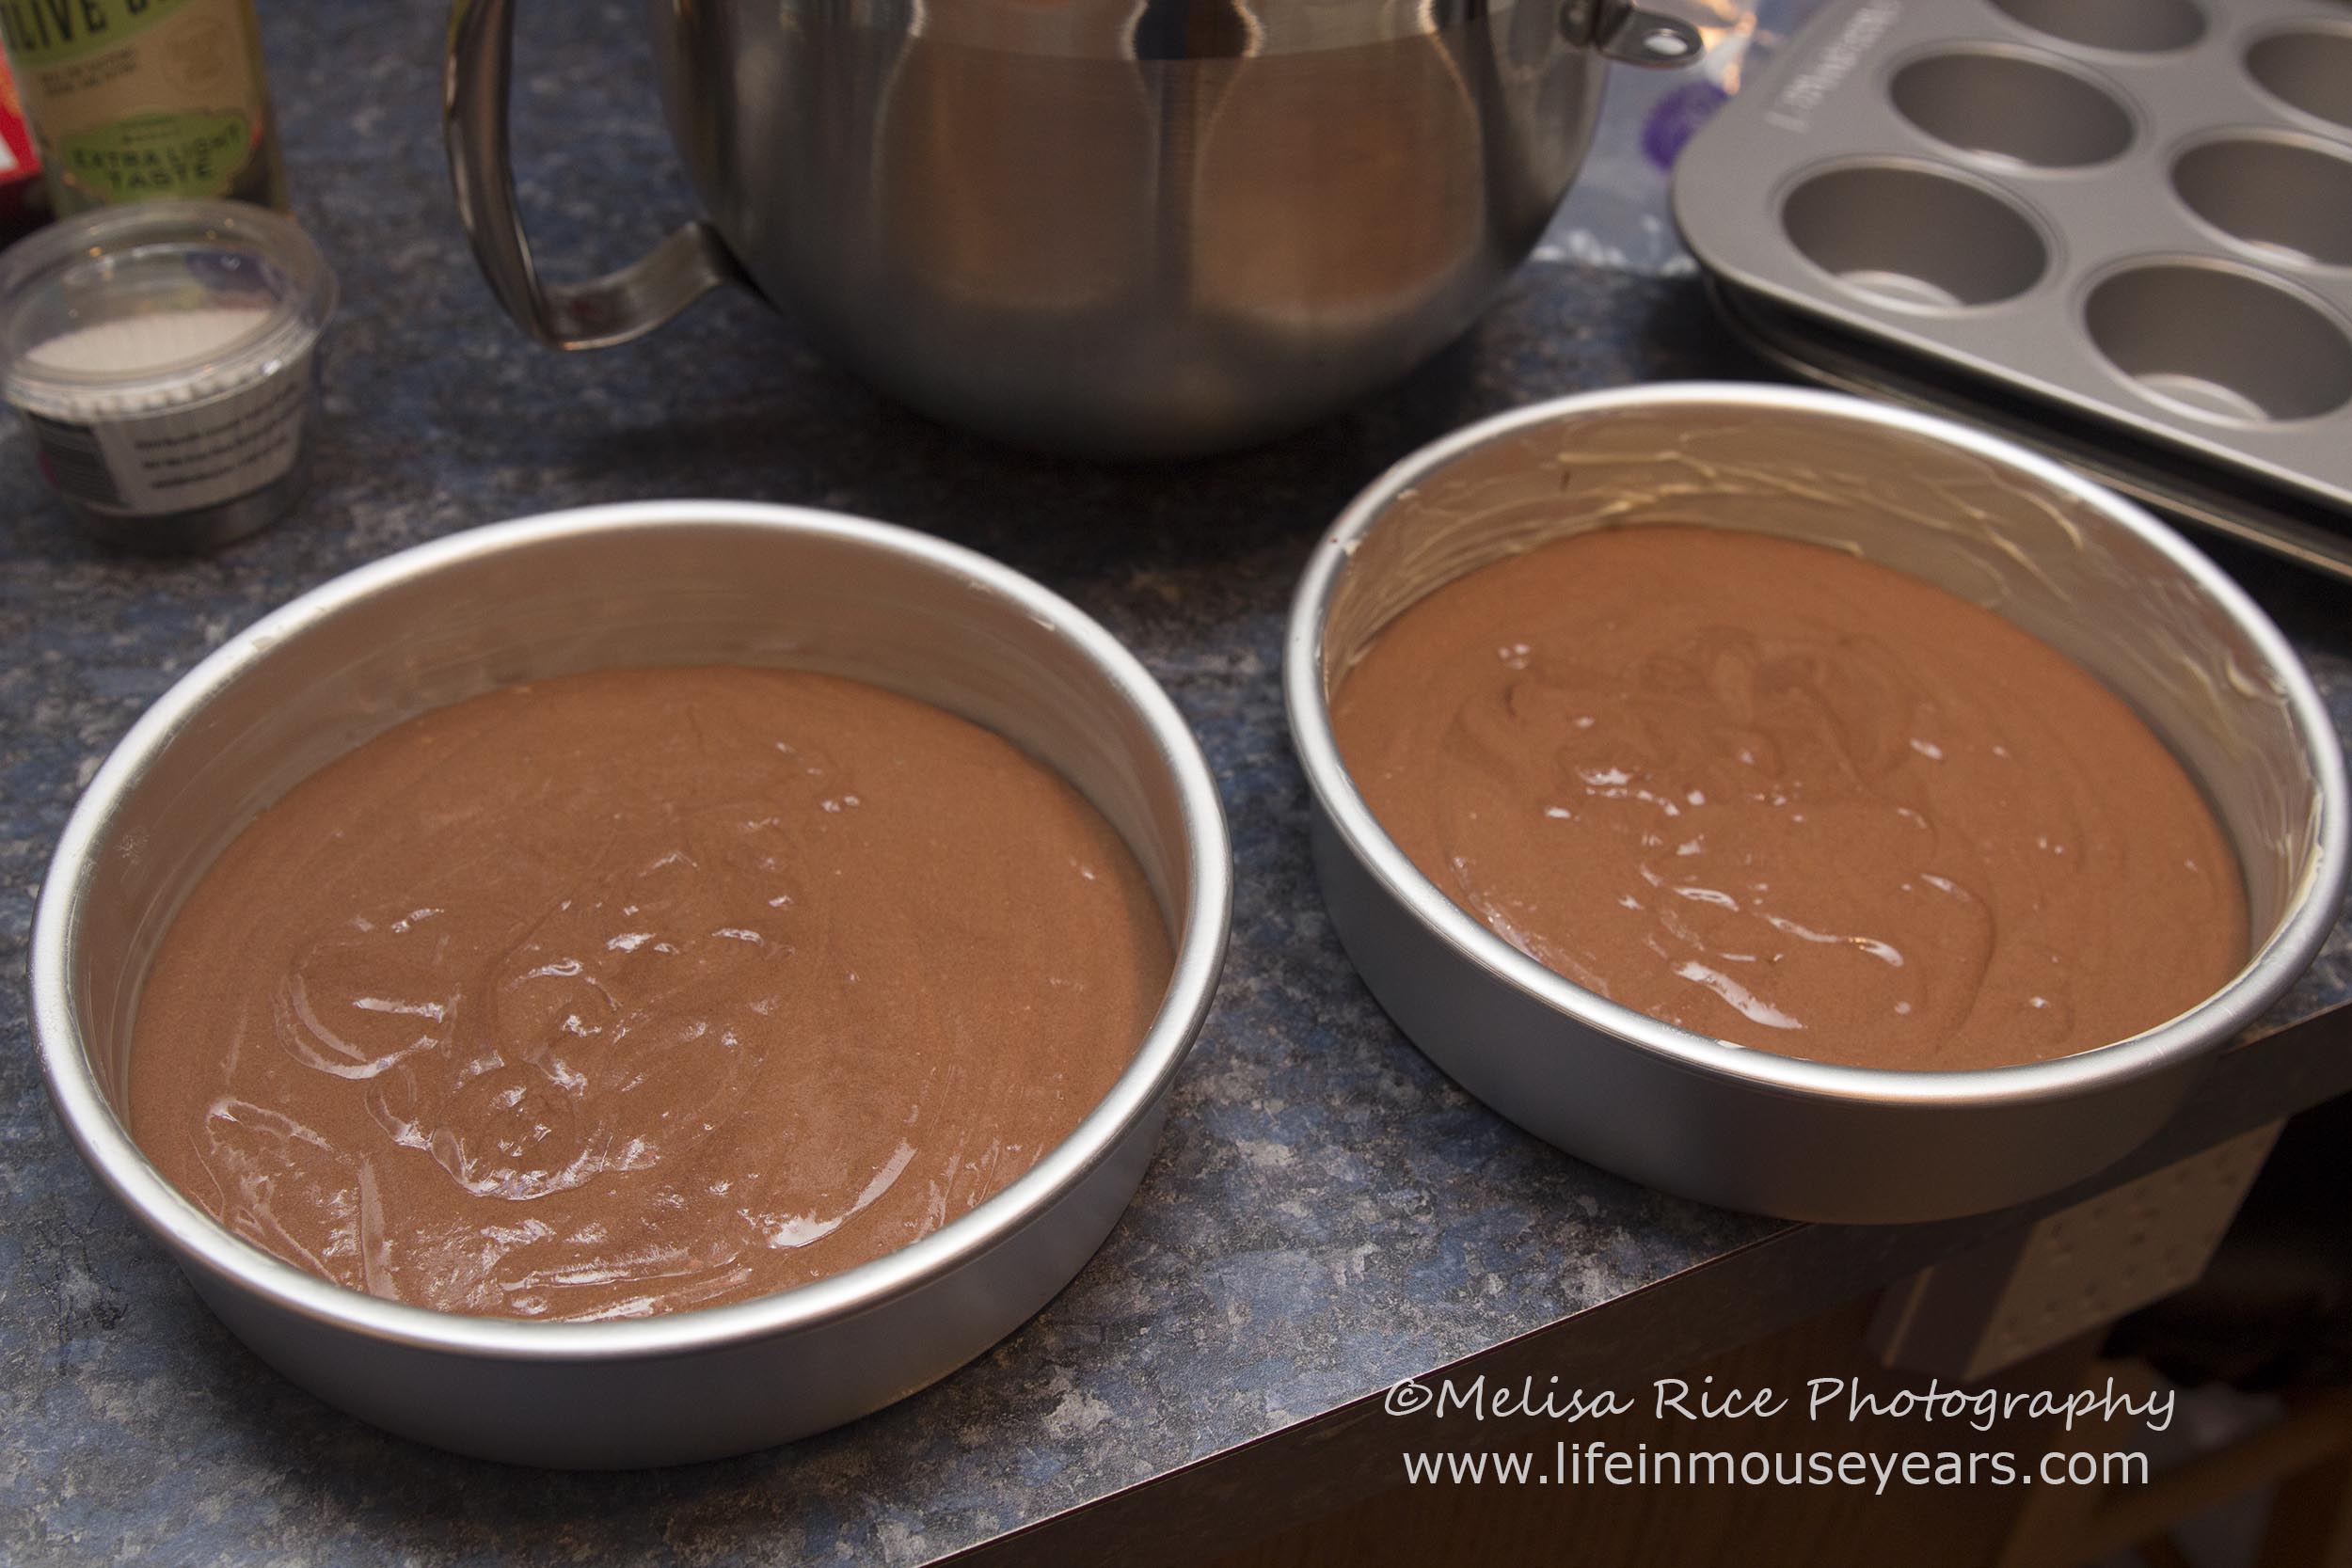
First, coat the cake rounds in butter so that your cake won’t stick to the pans. Add cupcake liners to the cupcake pans. Next, sift your cake mix in a sifter. This really helps to get out any lumps. Add the water, oil, and eggs and mix according to package directions. Once ready, put half in each cake round. Bake. Do the same with the second box of cake mix and put it into the cupcake liners. Bake.
Tips:
Use light olive oil instead of vegetable oil. This really helps to make the cake moist.
If you have a batter dispenser or like to get one, using one with a piping bag really helps to get the batter into the cupcake liners and mess-free!! This has been a tremendous help ever since I purchased one.
Make sure to cool completely before frosting!

Cake batter dispenser.

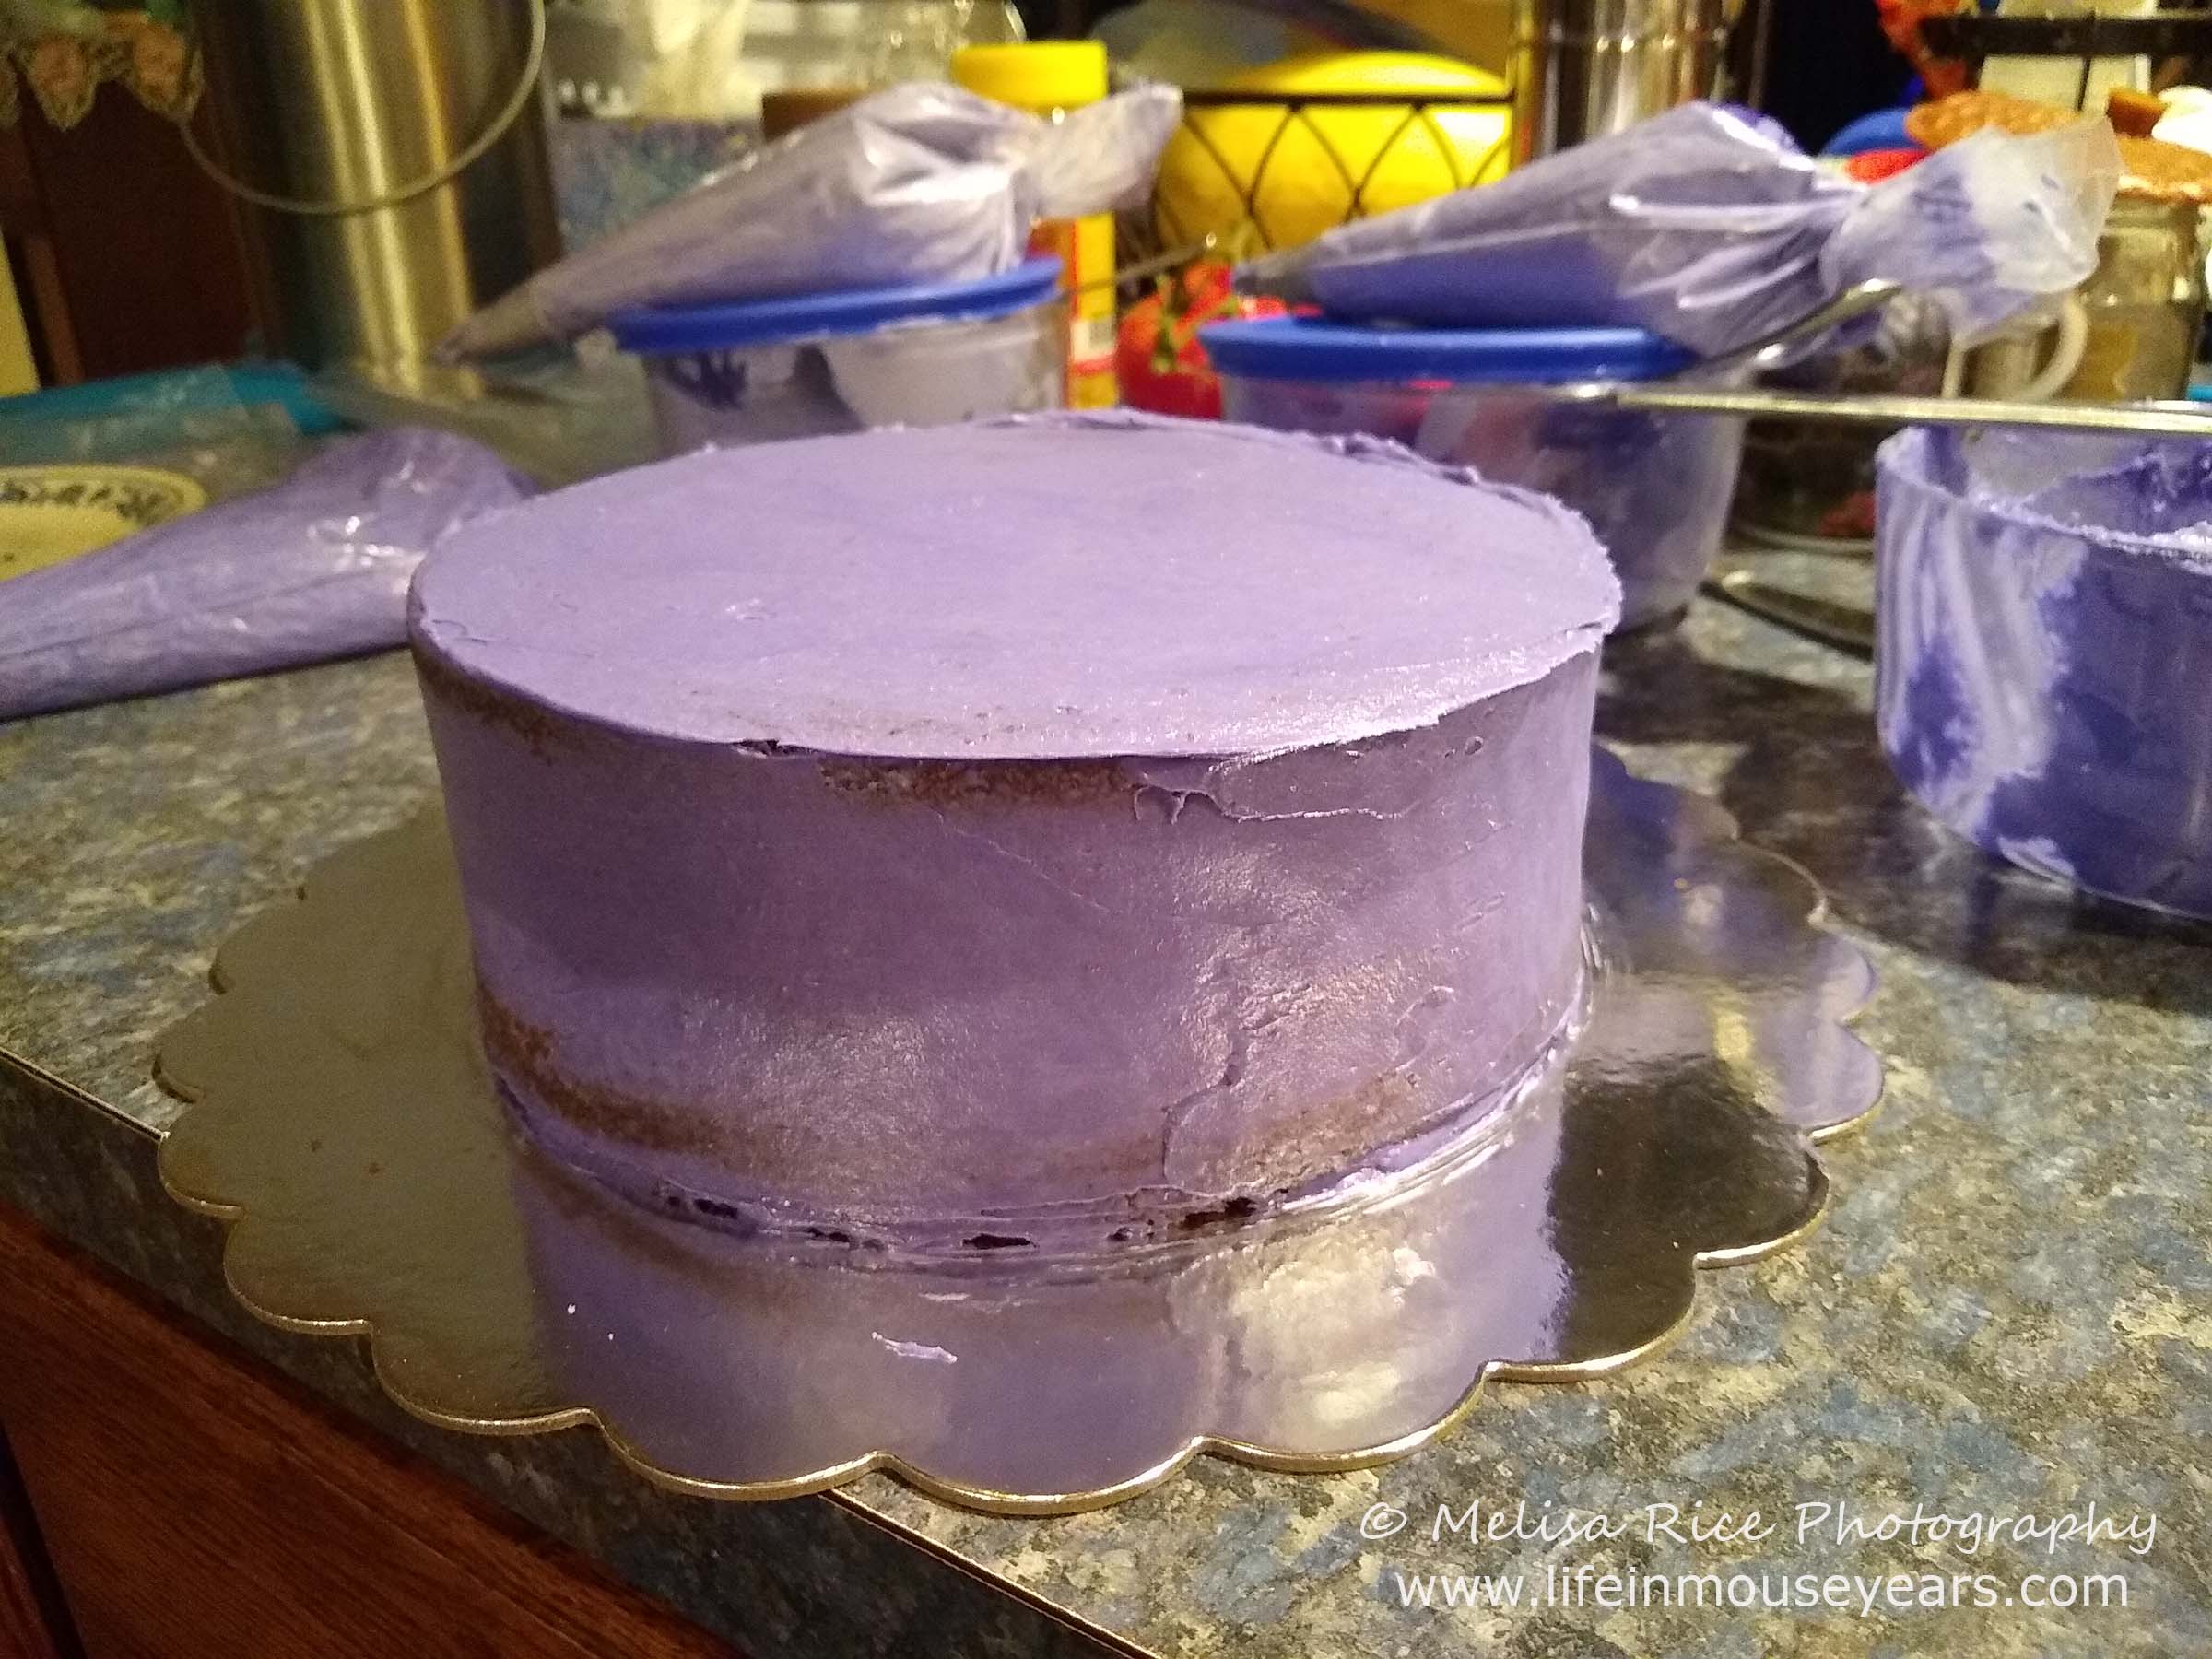
Dirty Ice/Crumb Coat the Cakes
Another step on how to make Minnie Mouse cake and cupcakes is to dirty ice/crumb coat the cake and cupcakes. This is a thin layer of frosting on the cake and cupcakes. This way it helps to hold in the moisture, but also, if the rosettes do not cover every little space, the dirty icing/crumb coat helps to hide any gaps.
First, I take the Wilton cake cutter and cut the cake rounds so that they are flat and even. Take a little bit of frosting and touch the center of the cake board. Next, place one of the cake rounds to the cake board. The frosting acts as a glue so that the cake doesn’t slide off of the cake board. Add frosting to the top and smooth it out. Place the next cake round on top of the first one. (cut side down.) Then add frosting to the top and sides and smooth out.
Tip:
You will want a thin coating here. As a result of adding the rosettes, you will have plenty of frosting on the cake and therefore, you won’t want to have too much on the crumb coating.
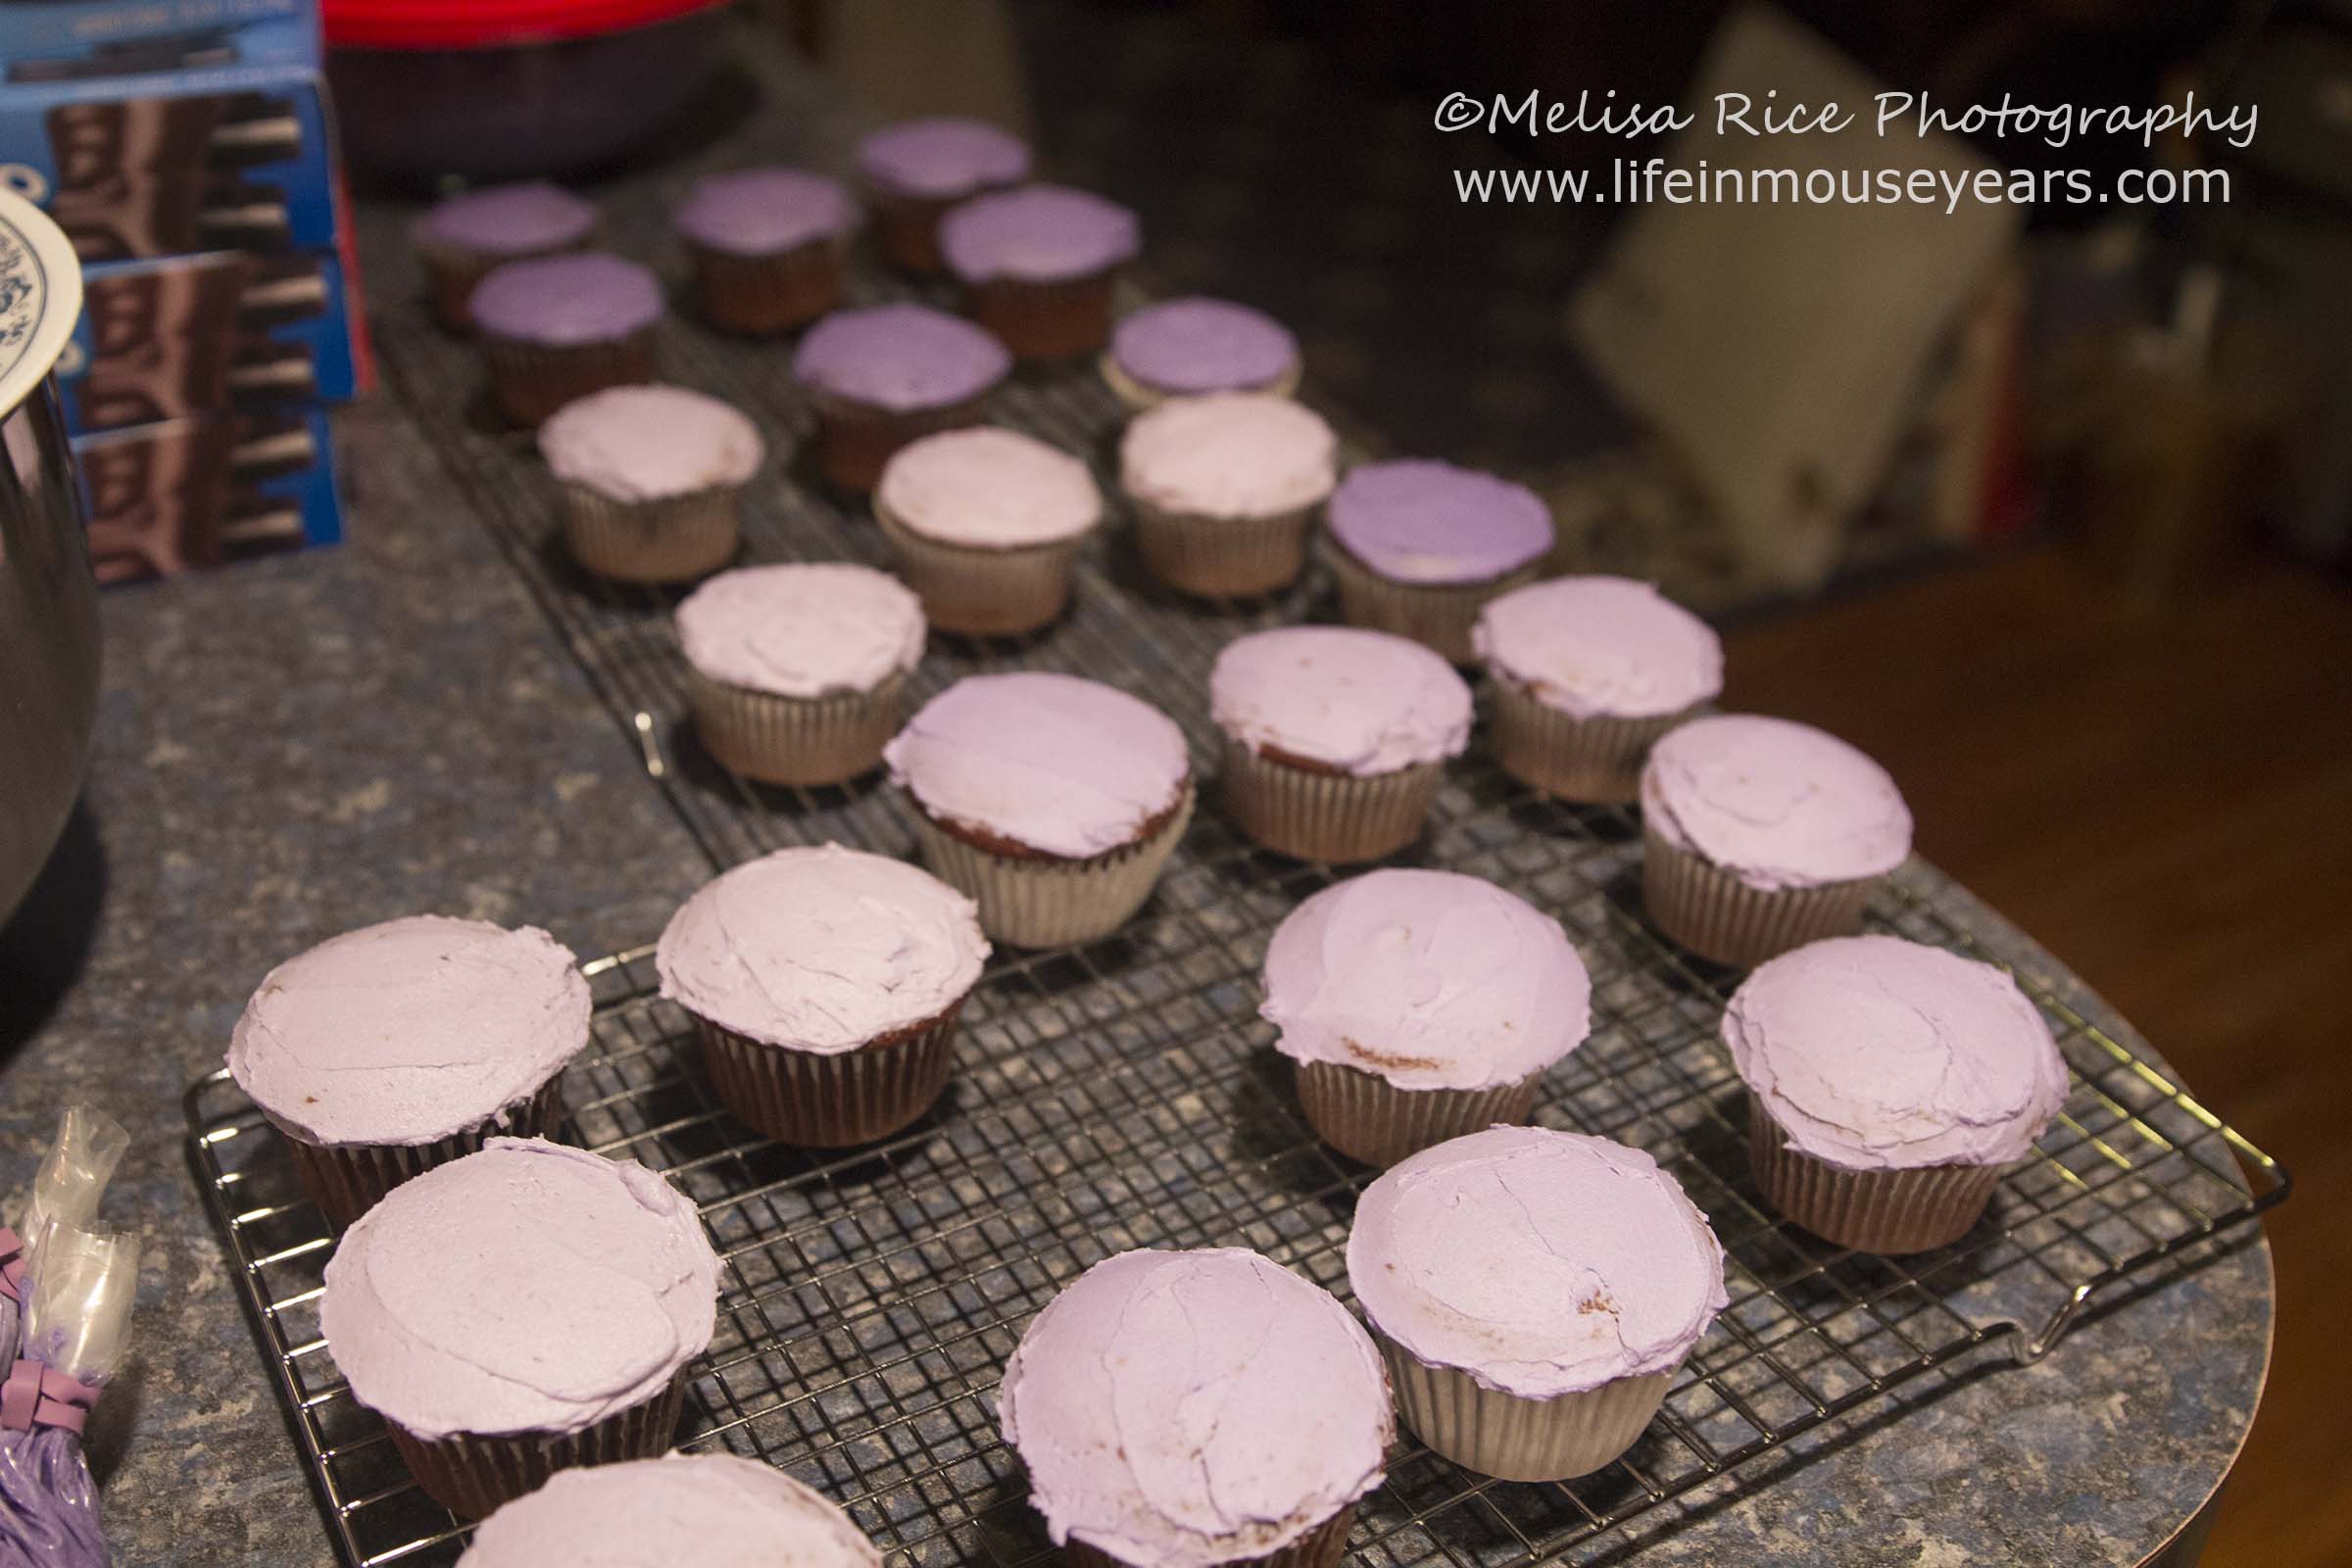
For the cupcakes, just apply a thin coating to the top of each cupcake.
Tip-What color should I use for the filling/crumb coat?
So after making this cake round for the birthday party, and then a second one for a church potluck, I recommend using the darkest shade for the filling and crumb coat. A lot of cake decorators recommend the lightest. However, after using the lightest color for one and the darkest on the second, I liked the look of the darkest one the most.
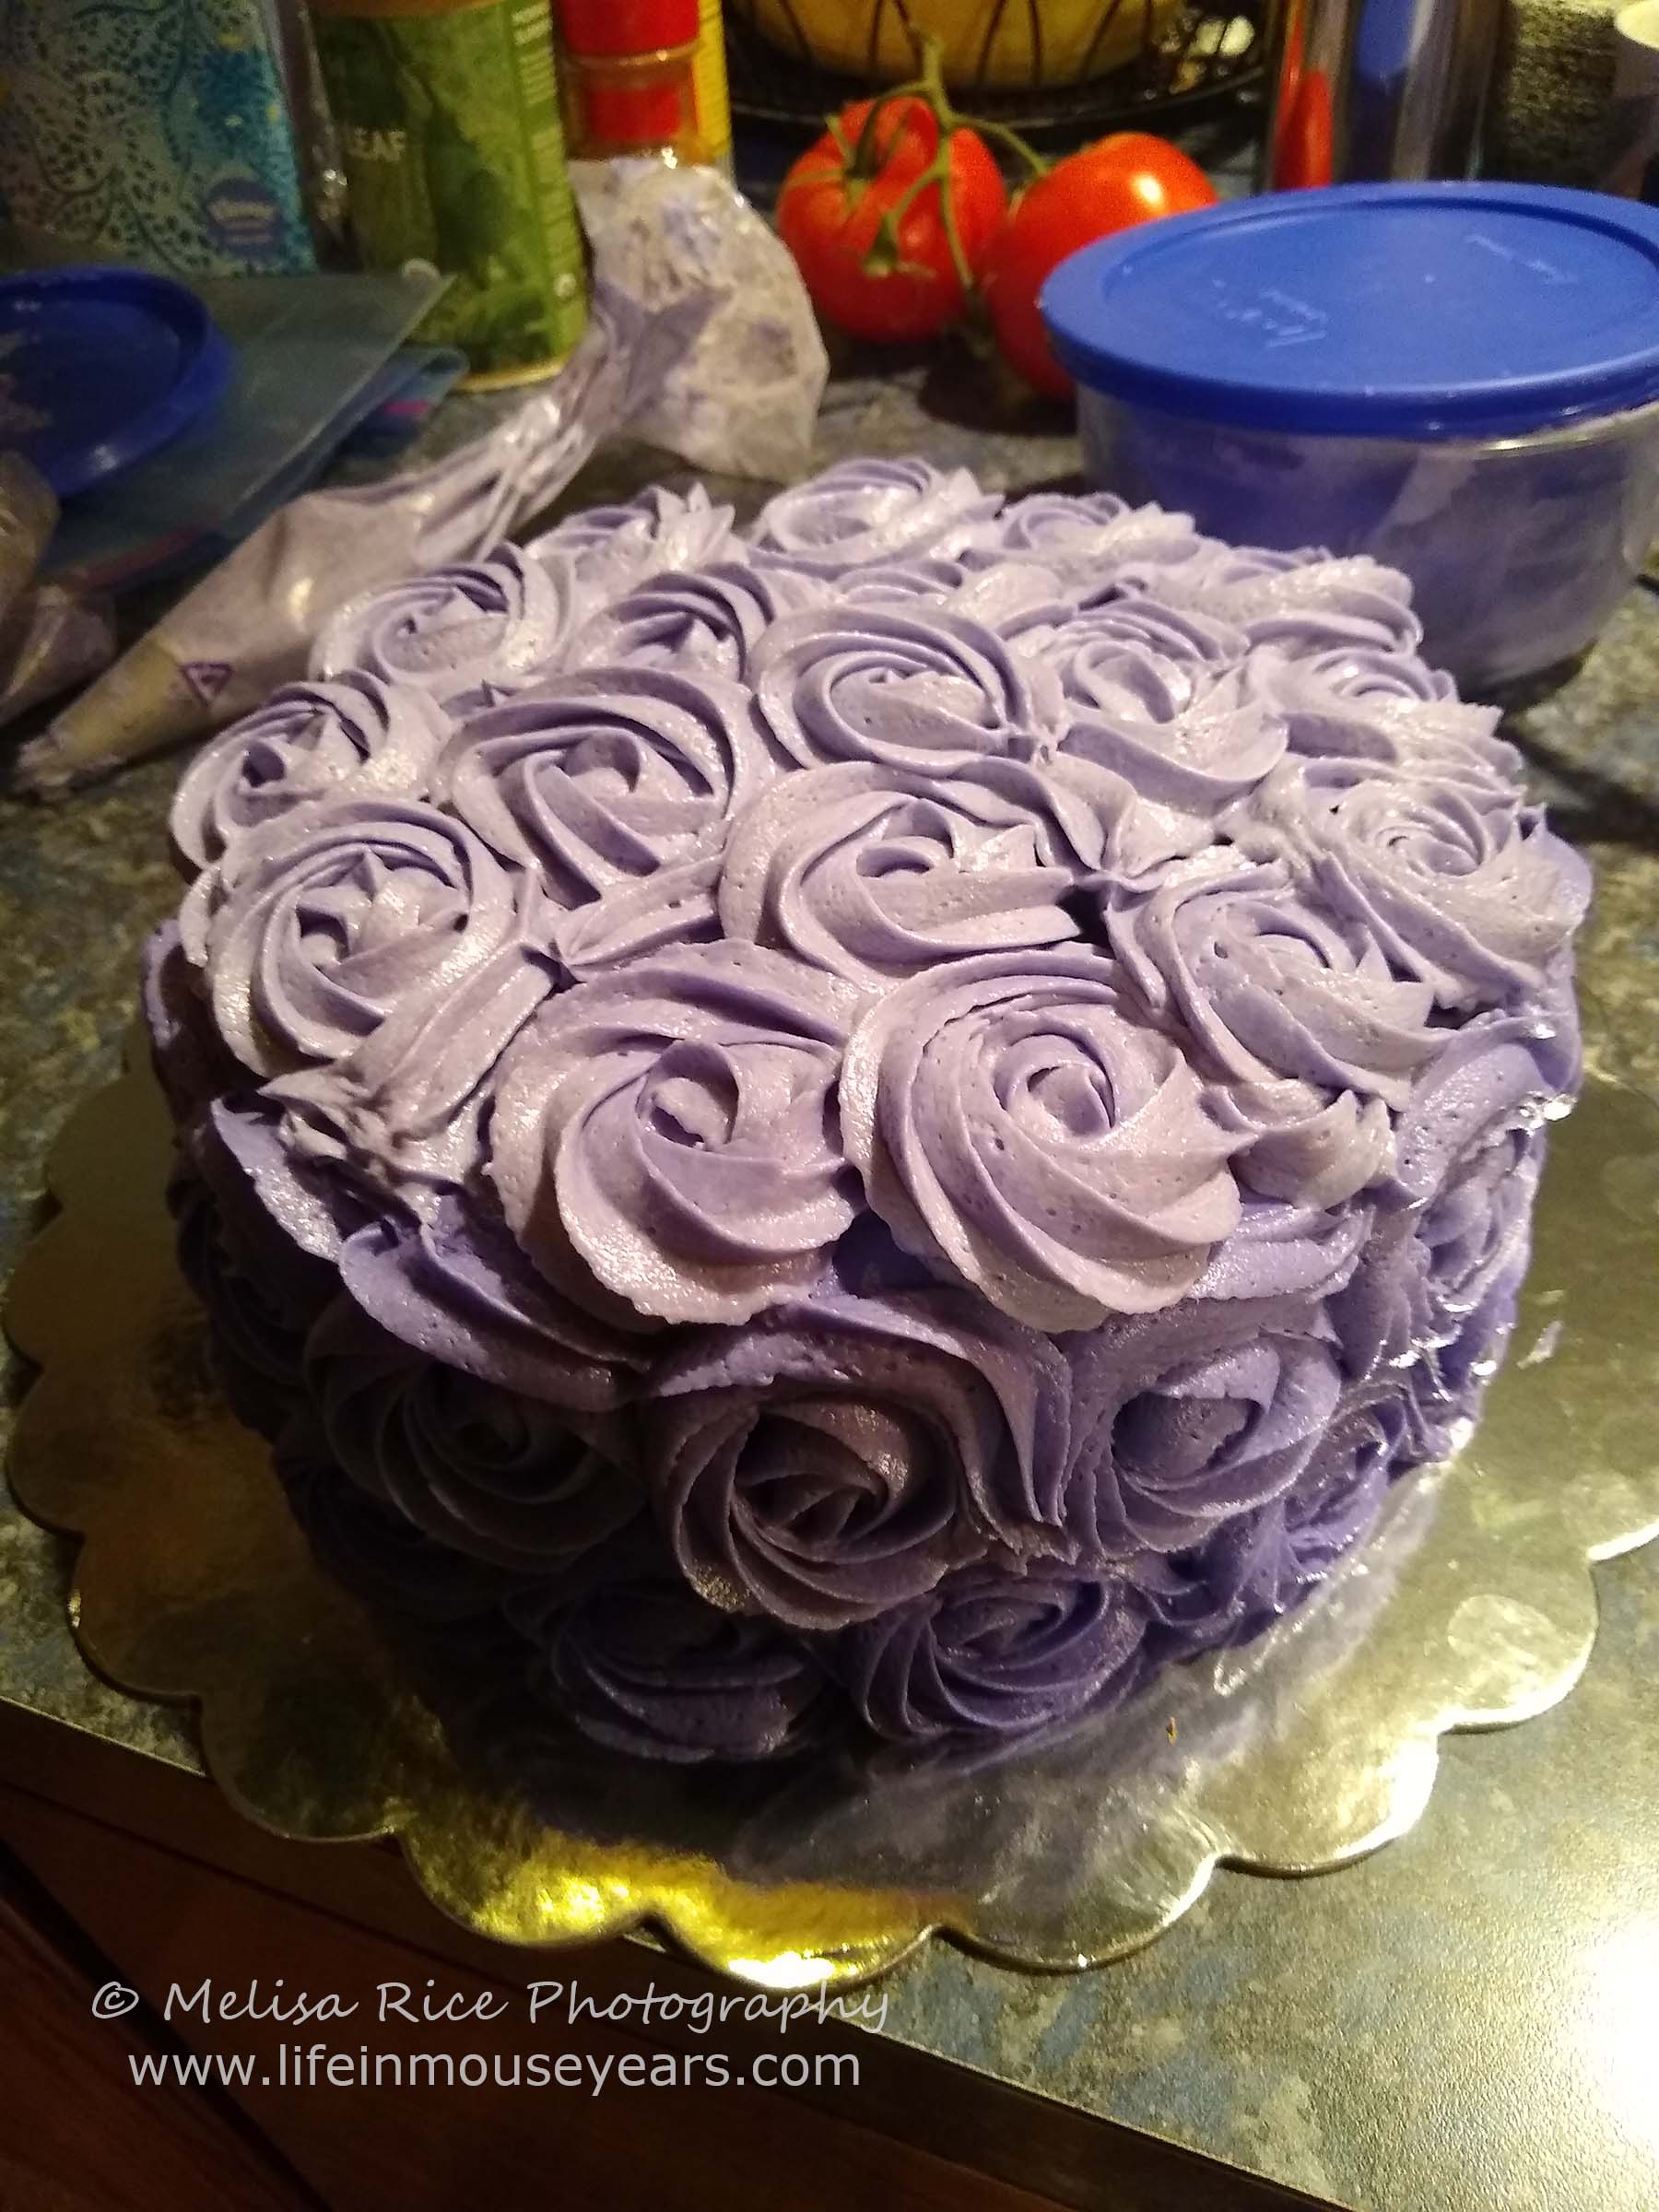
Piping Rosettes
Now it’s time to pipe the rosettes!
Starting with the darkest shade on the bottom row of the cake, thinking of a circle, start in the center of your circle. Start the frosting and go up a little, move clockwise around the center starting point. Go around 2 times. When you get to the bottom right, make a tail like when you do a cursive “e”. When you make the next one, you will end up covering that tail. Continue around.
The next row, using the middle shade, start in the middle of two rosettes. This way it fills in the cake to alternate the starting point of the rosettes. Depending on how tall your cake is, this may be your top layer of rosettes. If it is, then try to have a piece of the rosette top be above the top of the cake. You will be adding rosettes to the top of the cake, and this helps to hide the seam.
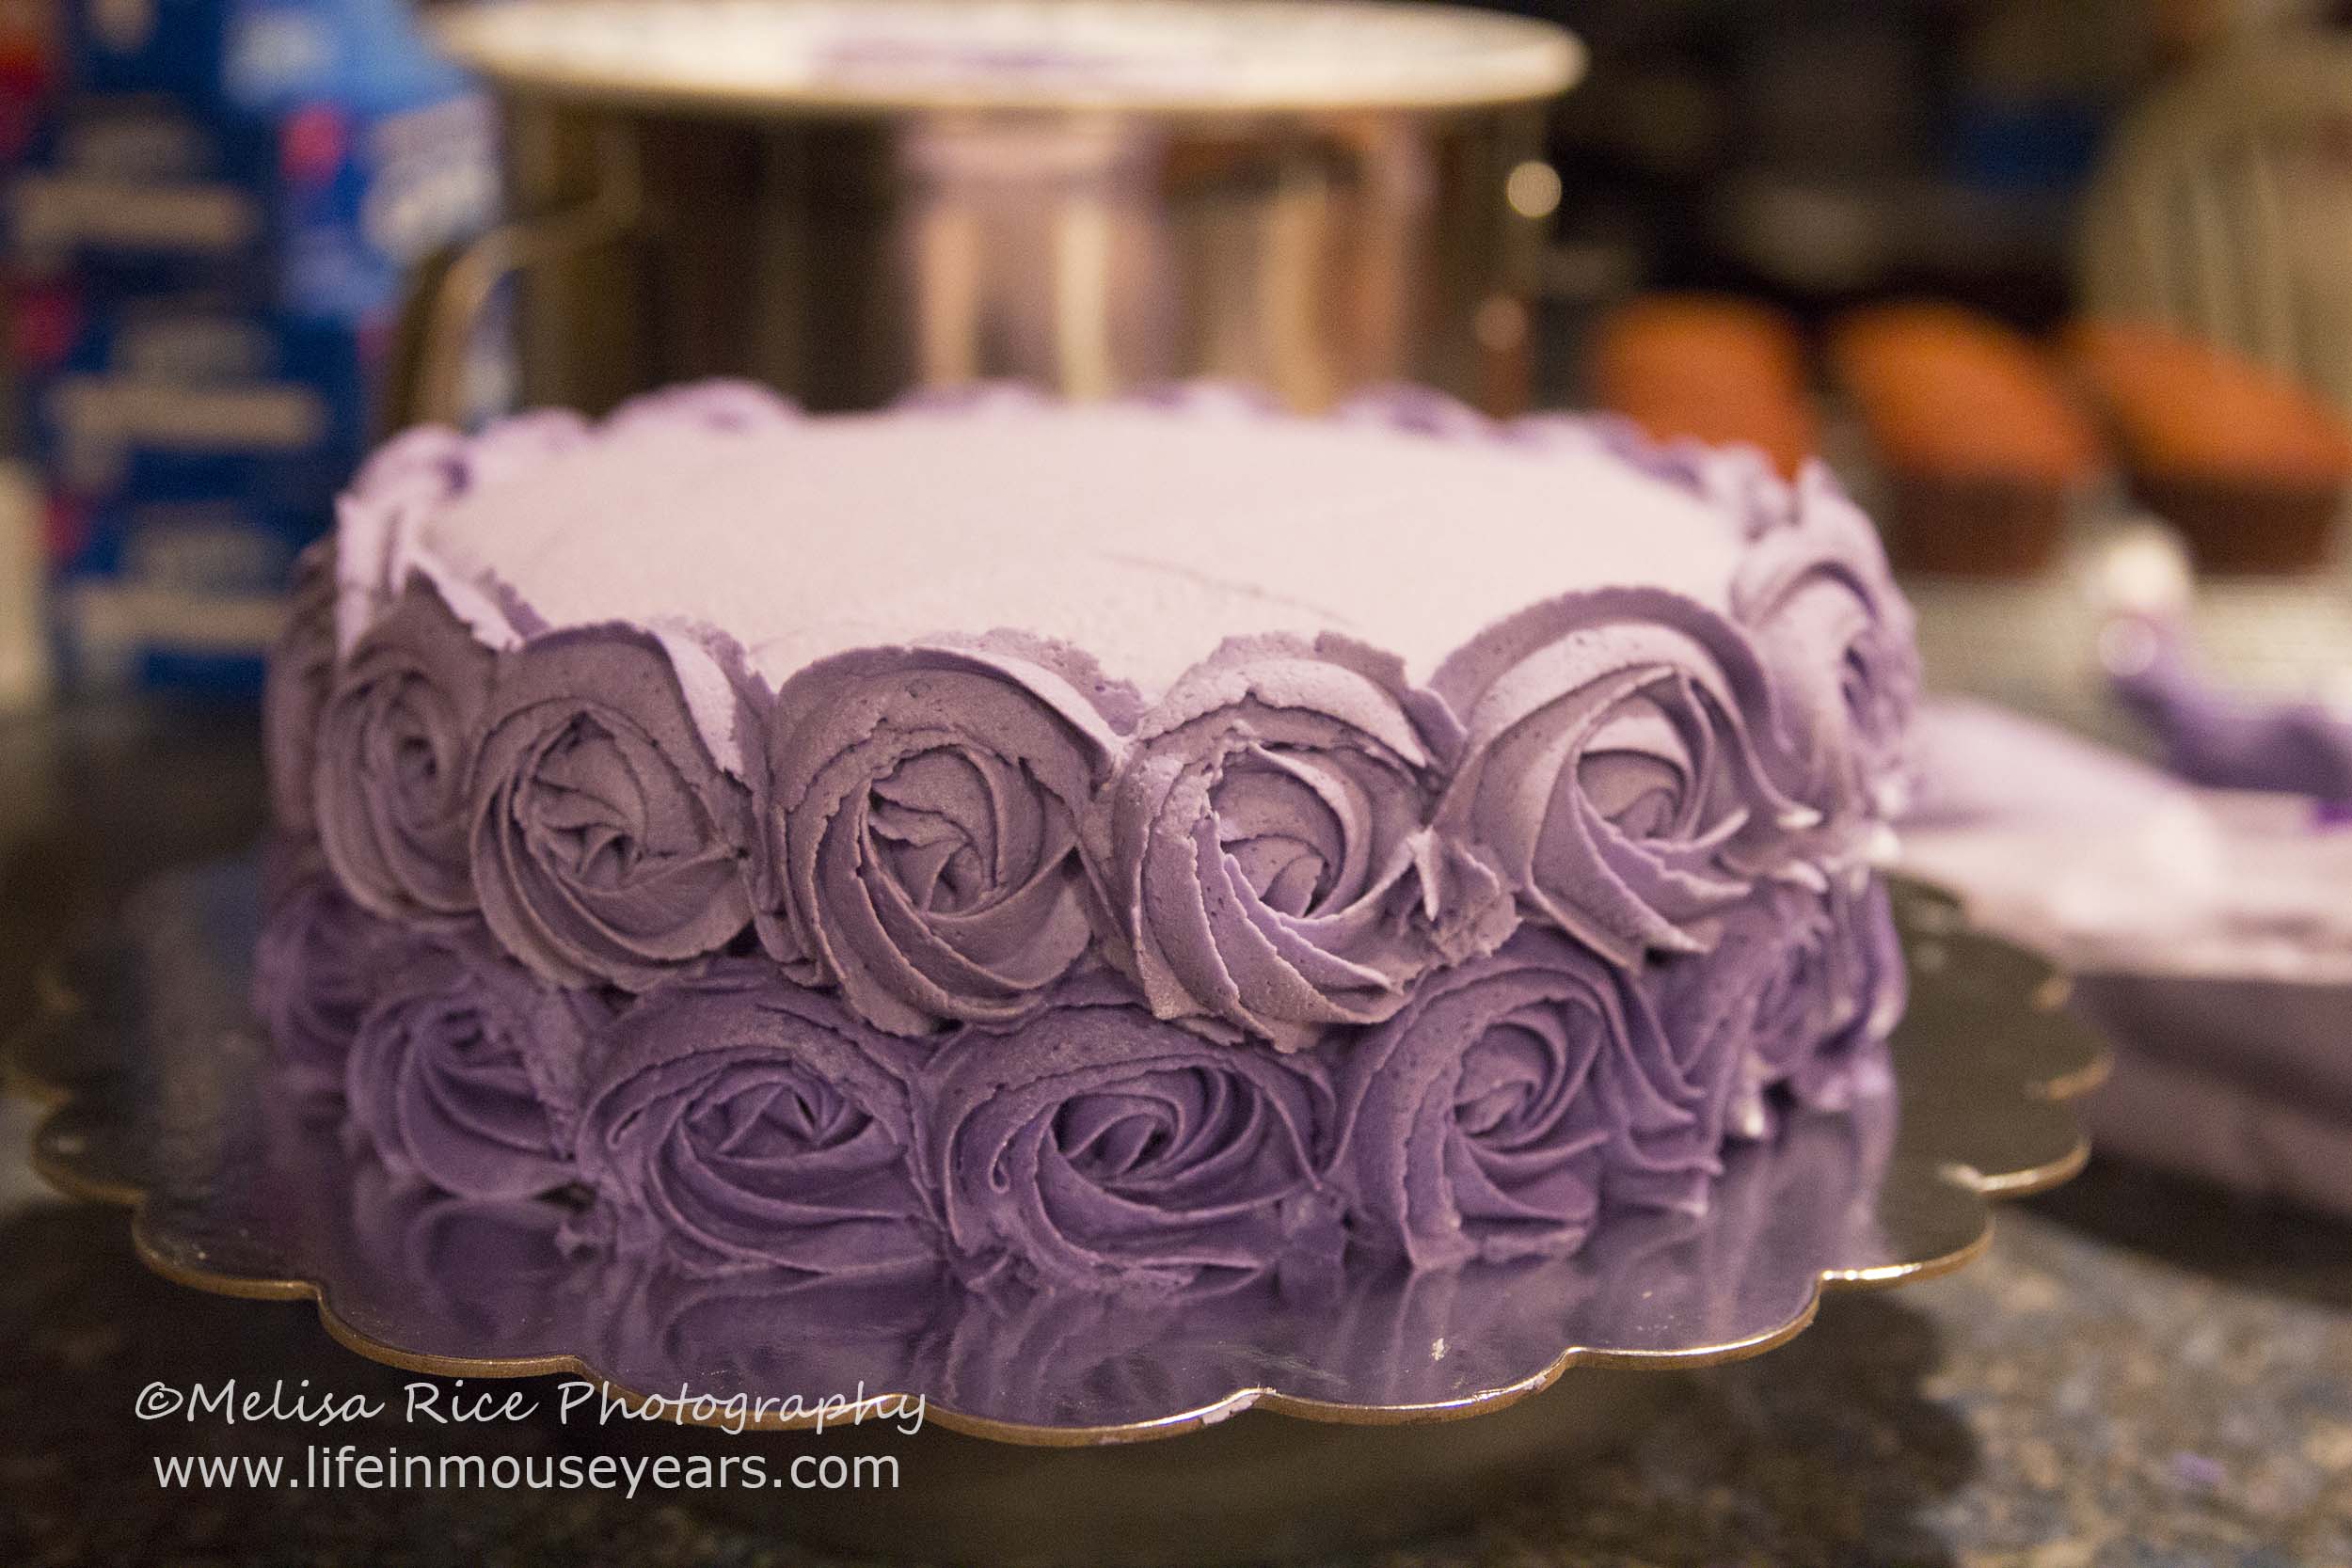
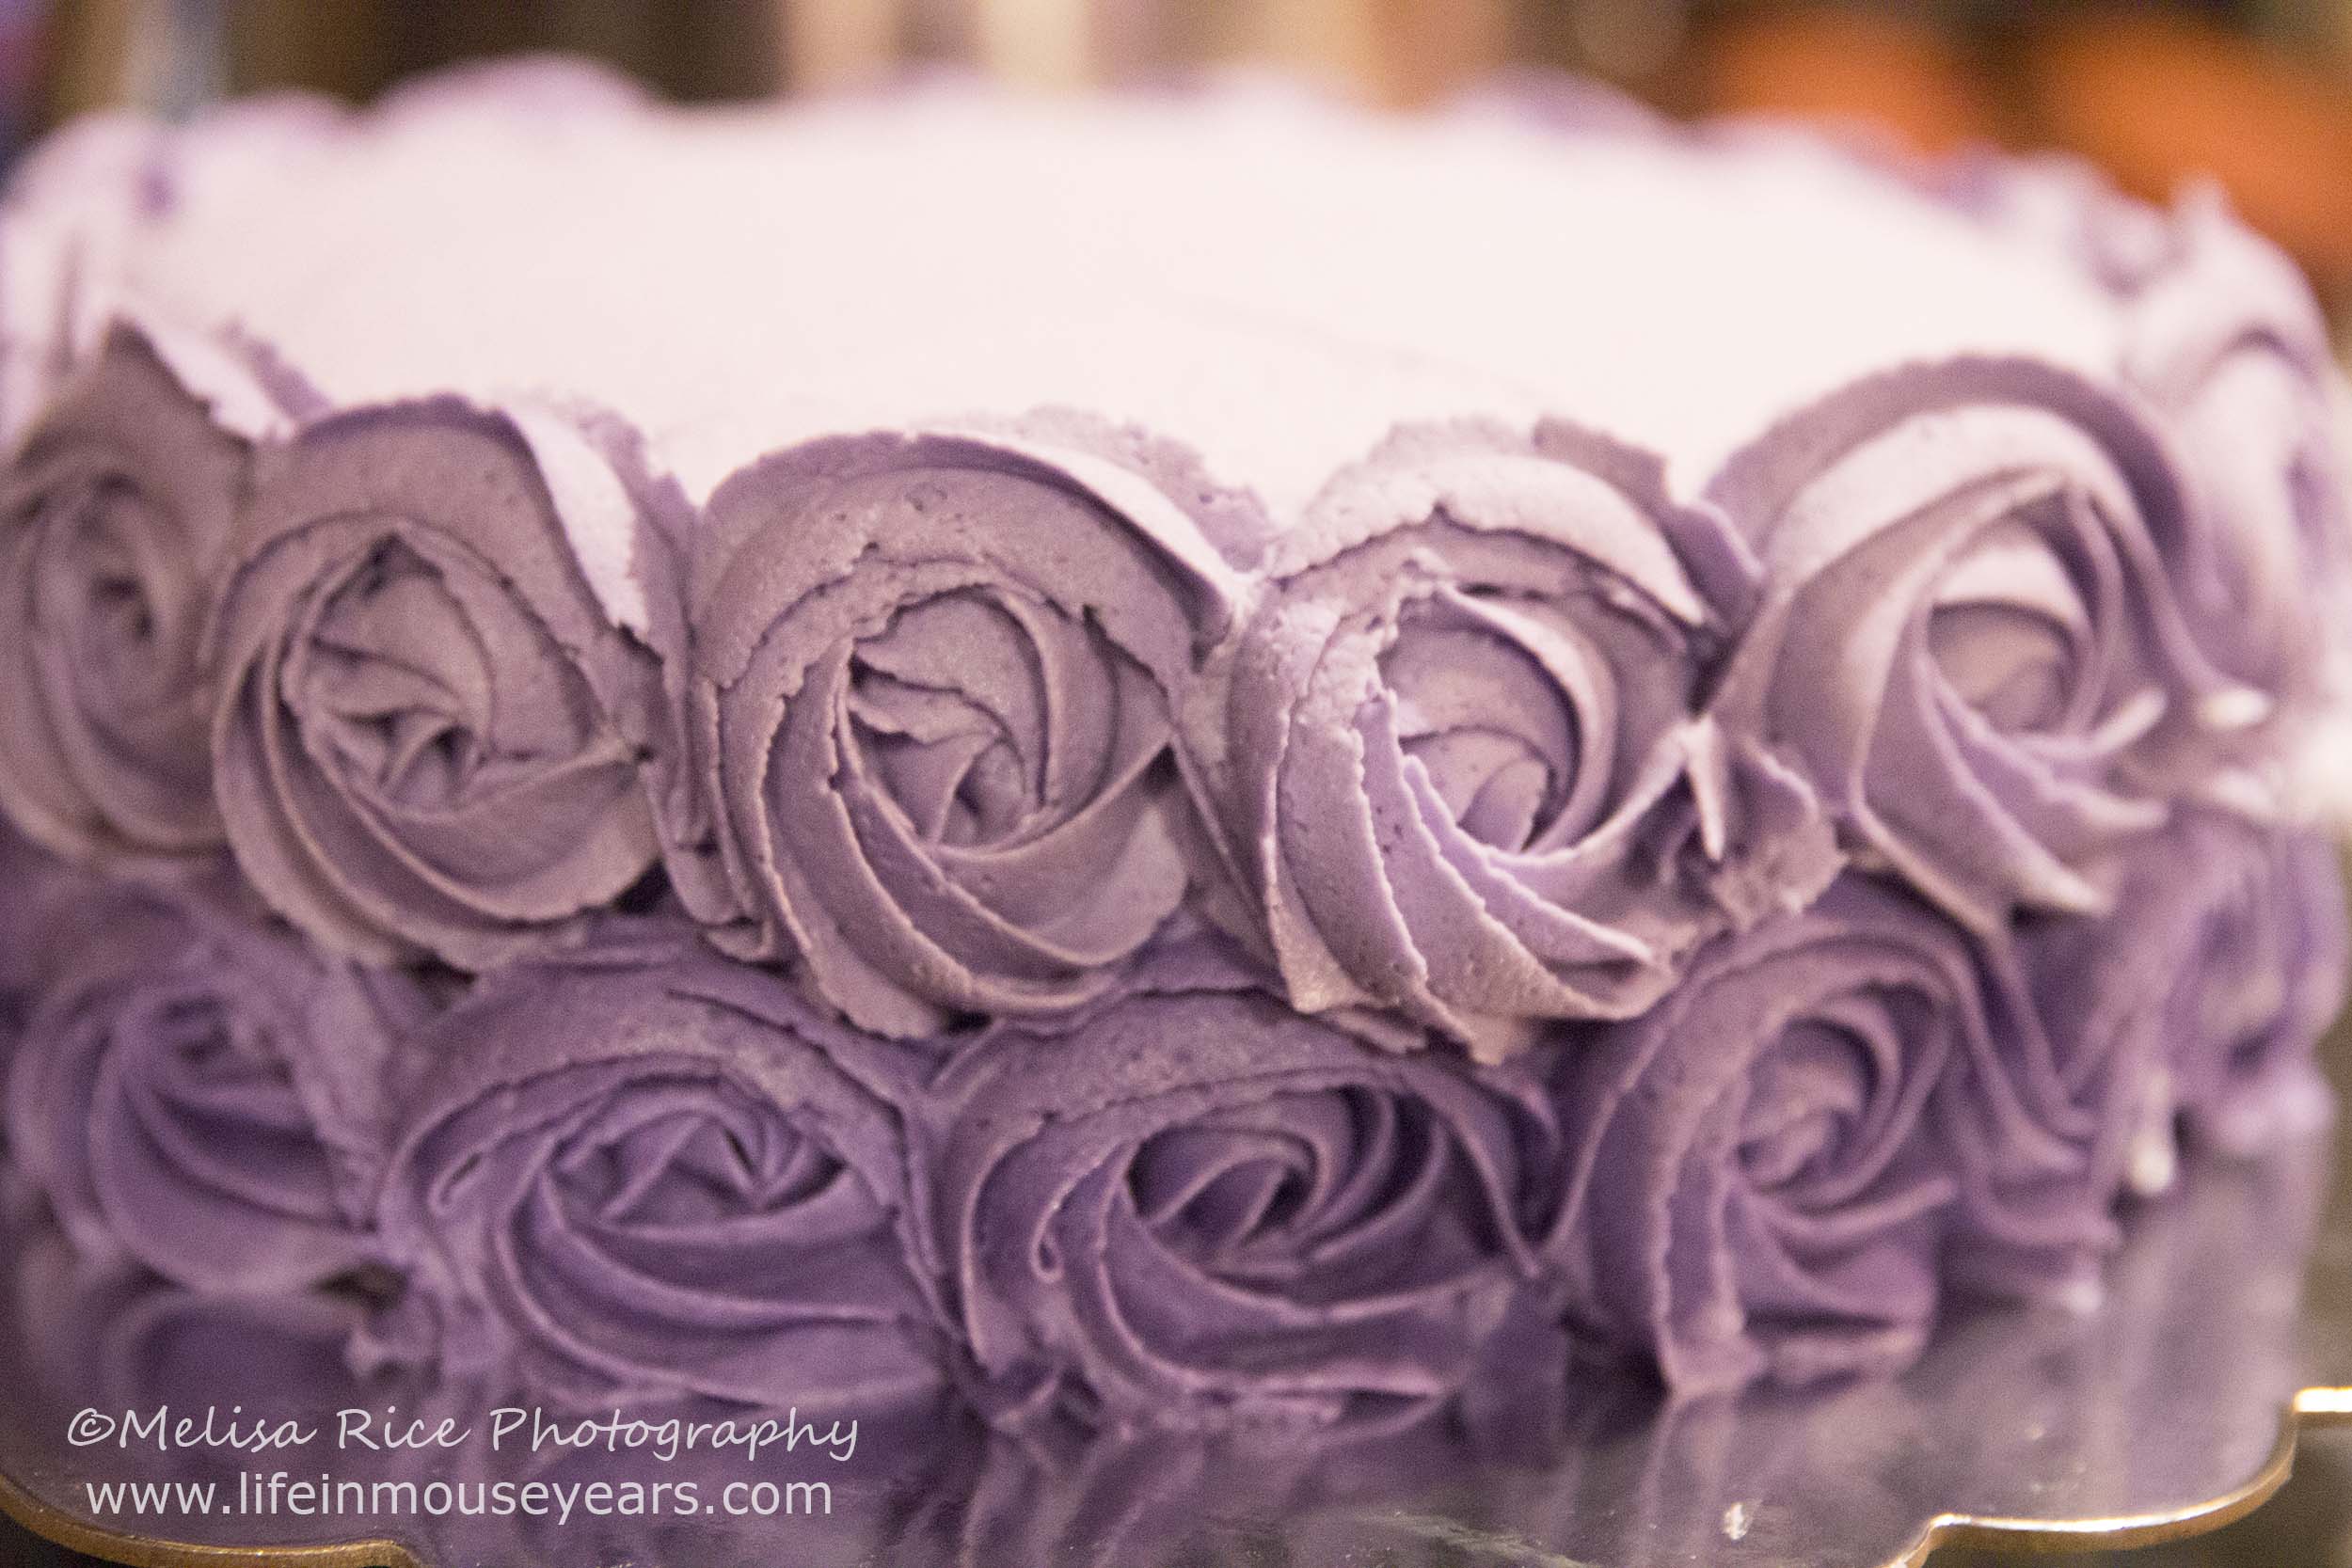
The final color, again, depending on the height of your cake, will be the top row (alternating the starting point) or just the top of the cake. For my cake, it was just on the top. It still looks great this way. Just like with the rows, start the rosettes in between two from the rows so that they are staggered. Start on the edge of the cake and work your way to the center. If you are not able to stagger the rosettes the further you get to the center, it is totally ok. Don’t stress it!
Tip:
If you can have three of the Wilton 1M tips, I highly recommend it! This way you can prep all three bags at one time and have all three colors ready to use when you want them.
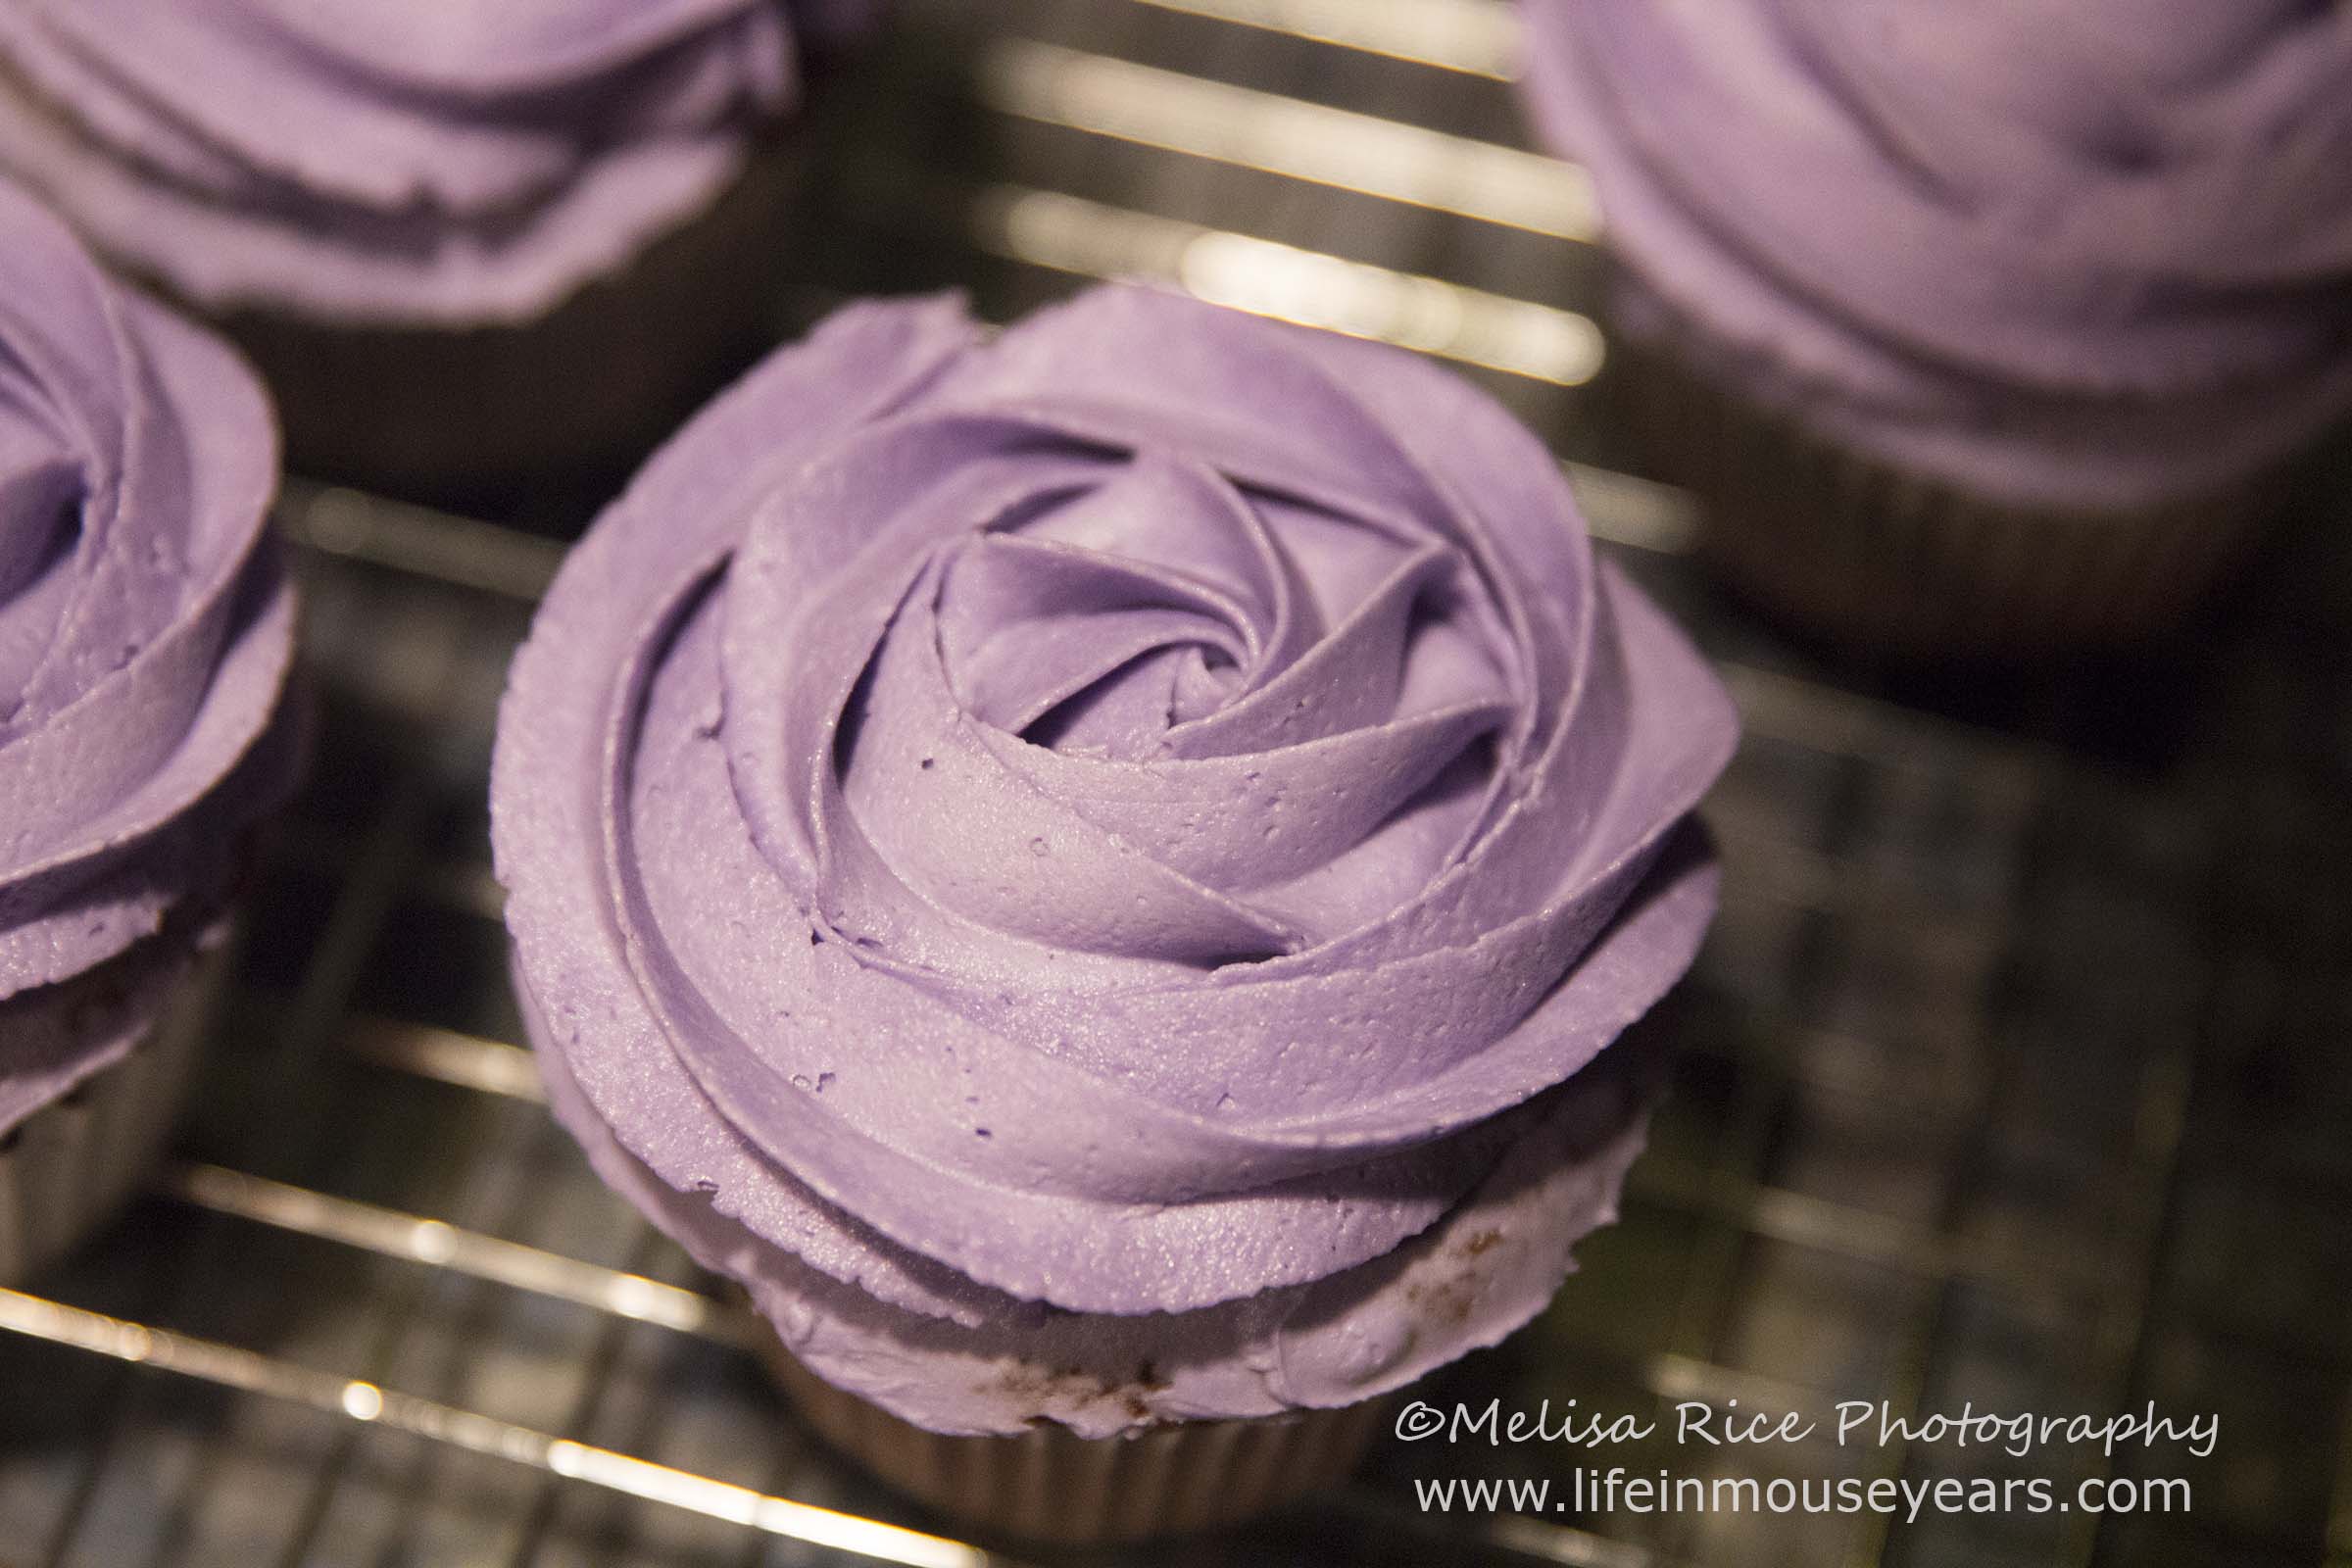
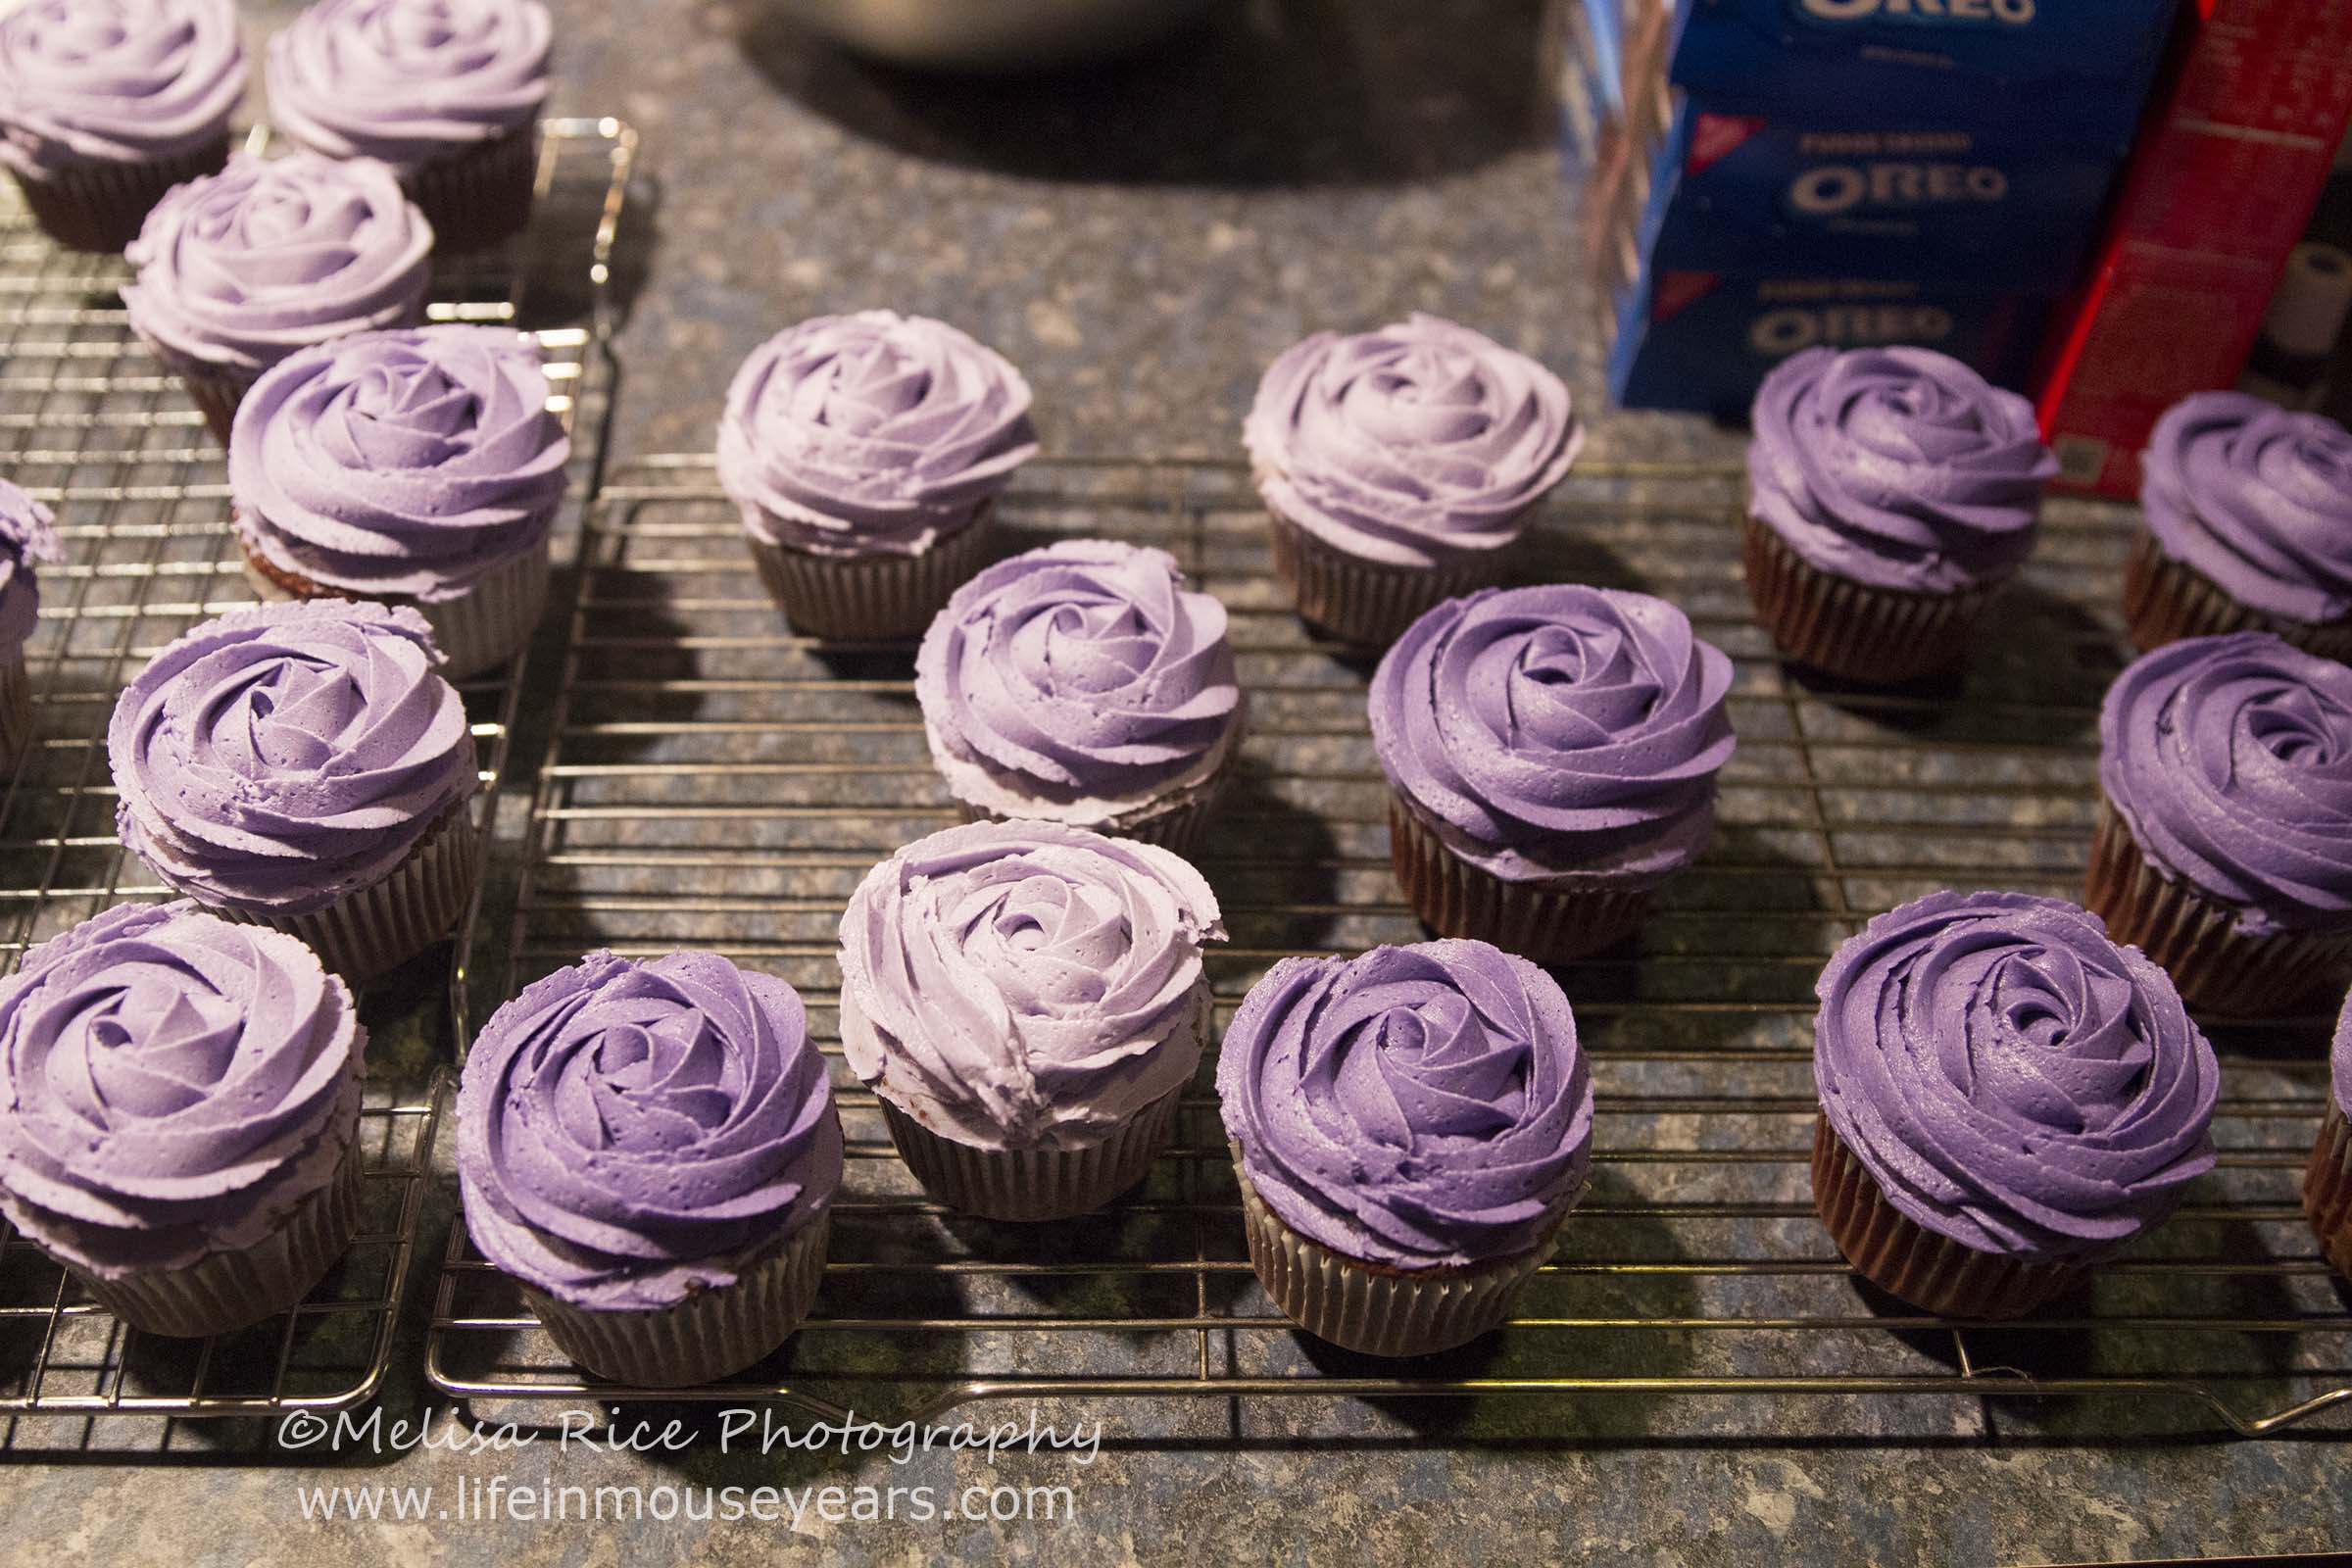
Piping Rosettes on the Cupcakes
For the cupcakes, add a rosette to the top of each cupcake. You may need to circle around more than two times. Depending on the size of the cupcake. Also, I was thinking after the fact, that maybe frosting from outside to inside, making it look like a soft-serve ice cream cone, may have changed the look of the cupcake. I didn’t try that, but you may want to try one of each to see which look you like better.
Tips:
When making rosettes, you can go either direction. Clockwise or counterclockwise. Either direction is fine! However, whichever direction you start, you will want to make sure and do that for the entire cake. Otherwise, it throws off the look.
Here are two Youtube tutorials I watched on how to make a rosette that I found helpful:
How to Pipe Buttercream Rosettes Global Sugar Art
CAKE TREND ~ Decorate an Ombré Rosette Cake – CAKE STYLE
Adding Ears and Bows to the Cupcakes
Now to add the ears and bows to the cupcakes.
Take the fudge covered oreo thins, add two towards the back end of the cupcake to be Minnie’s ears. Next, add a bow to the center of the two ears, on top of the frosting.

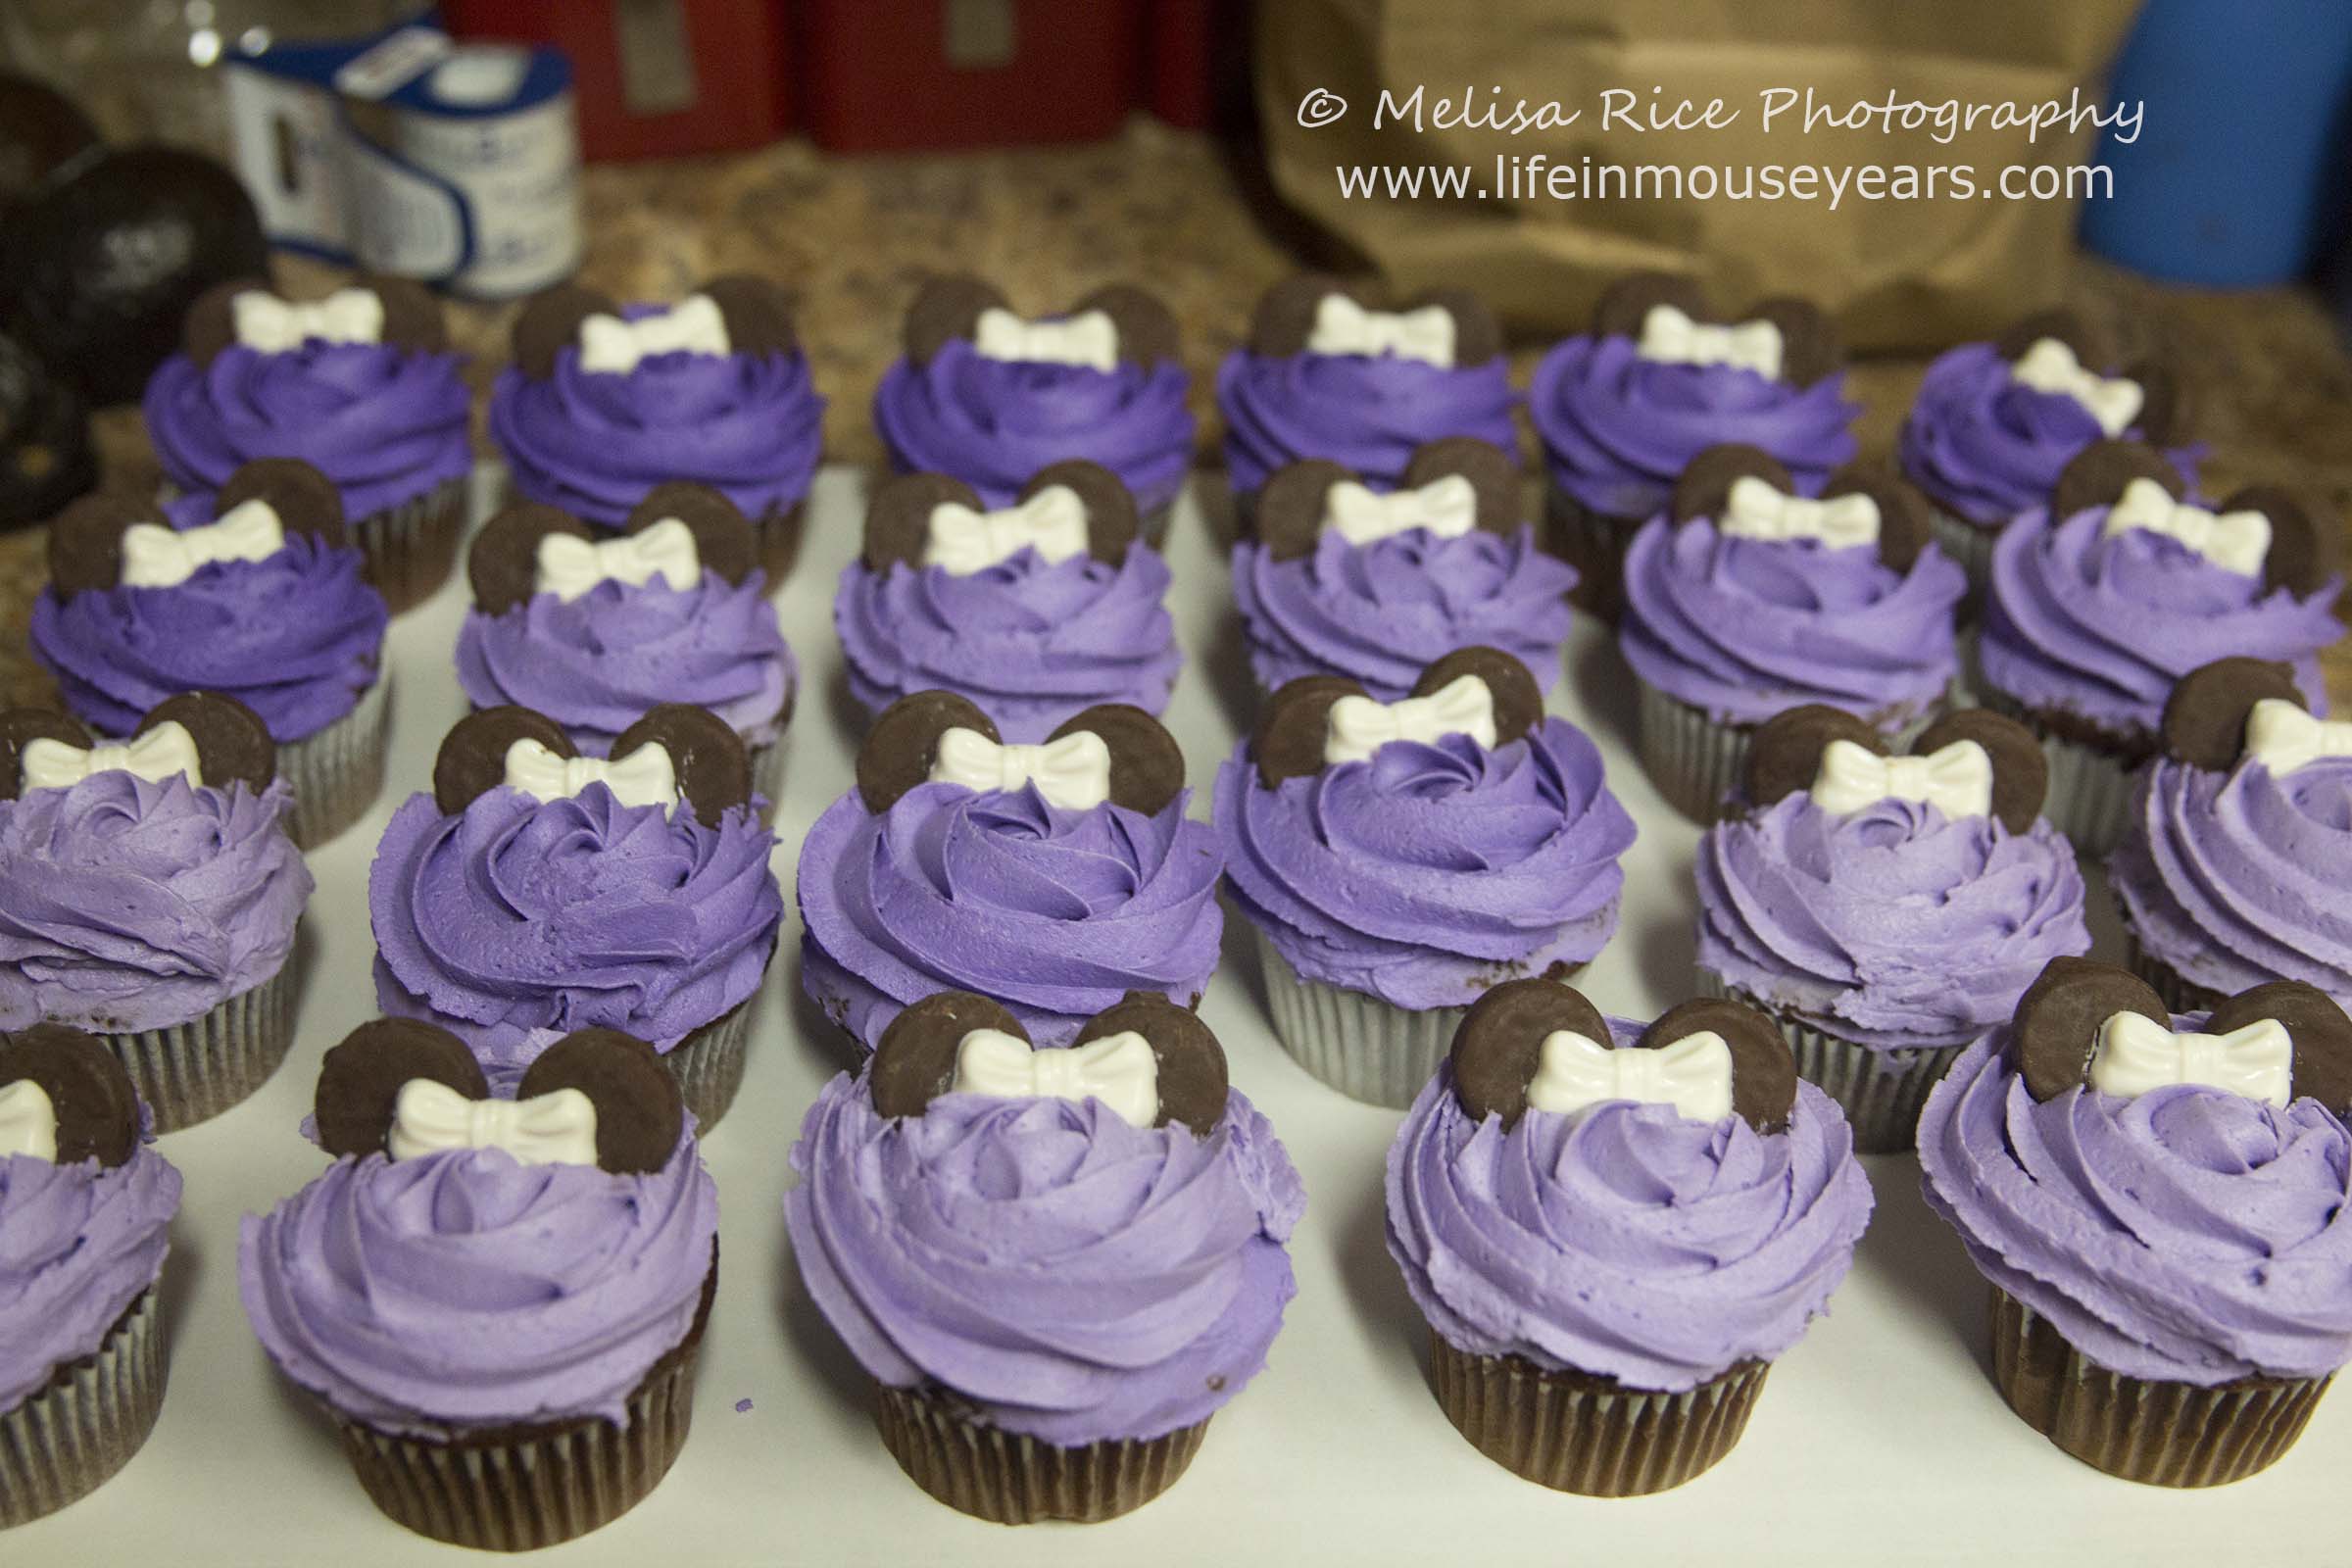
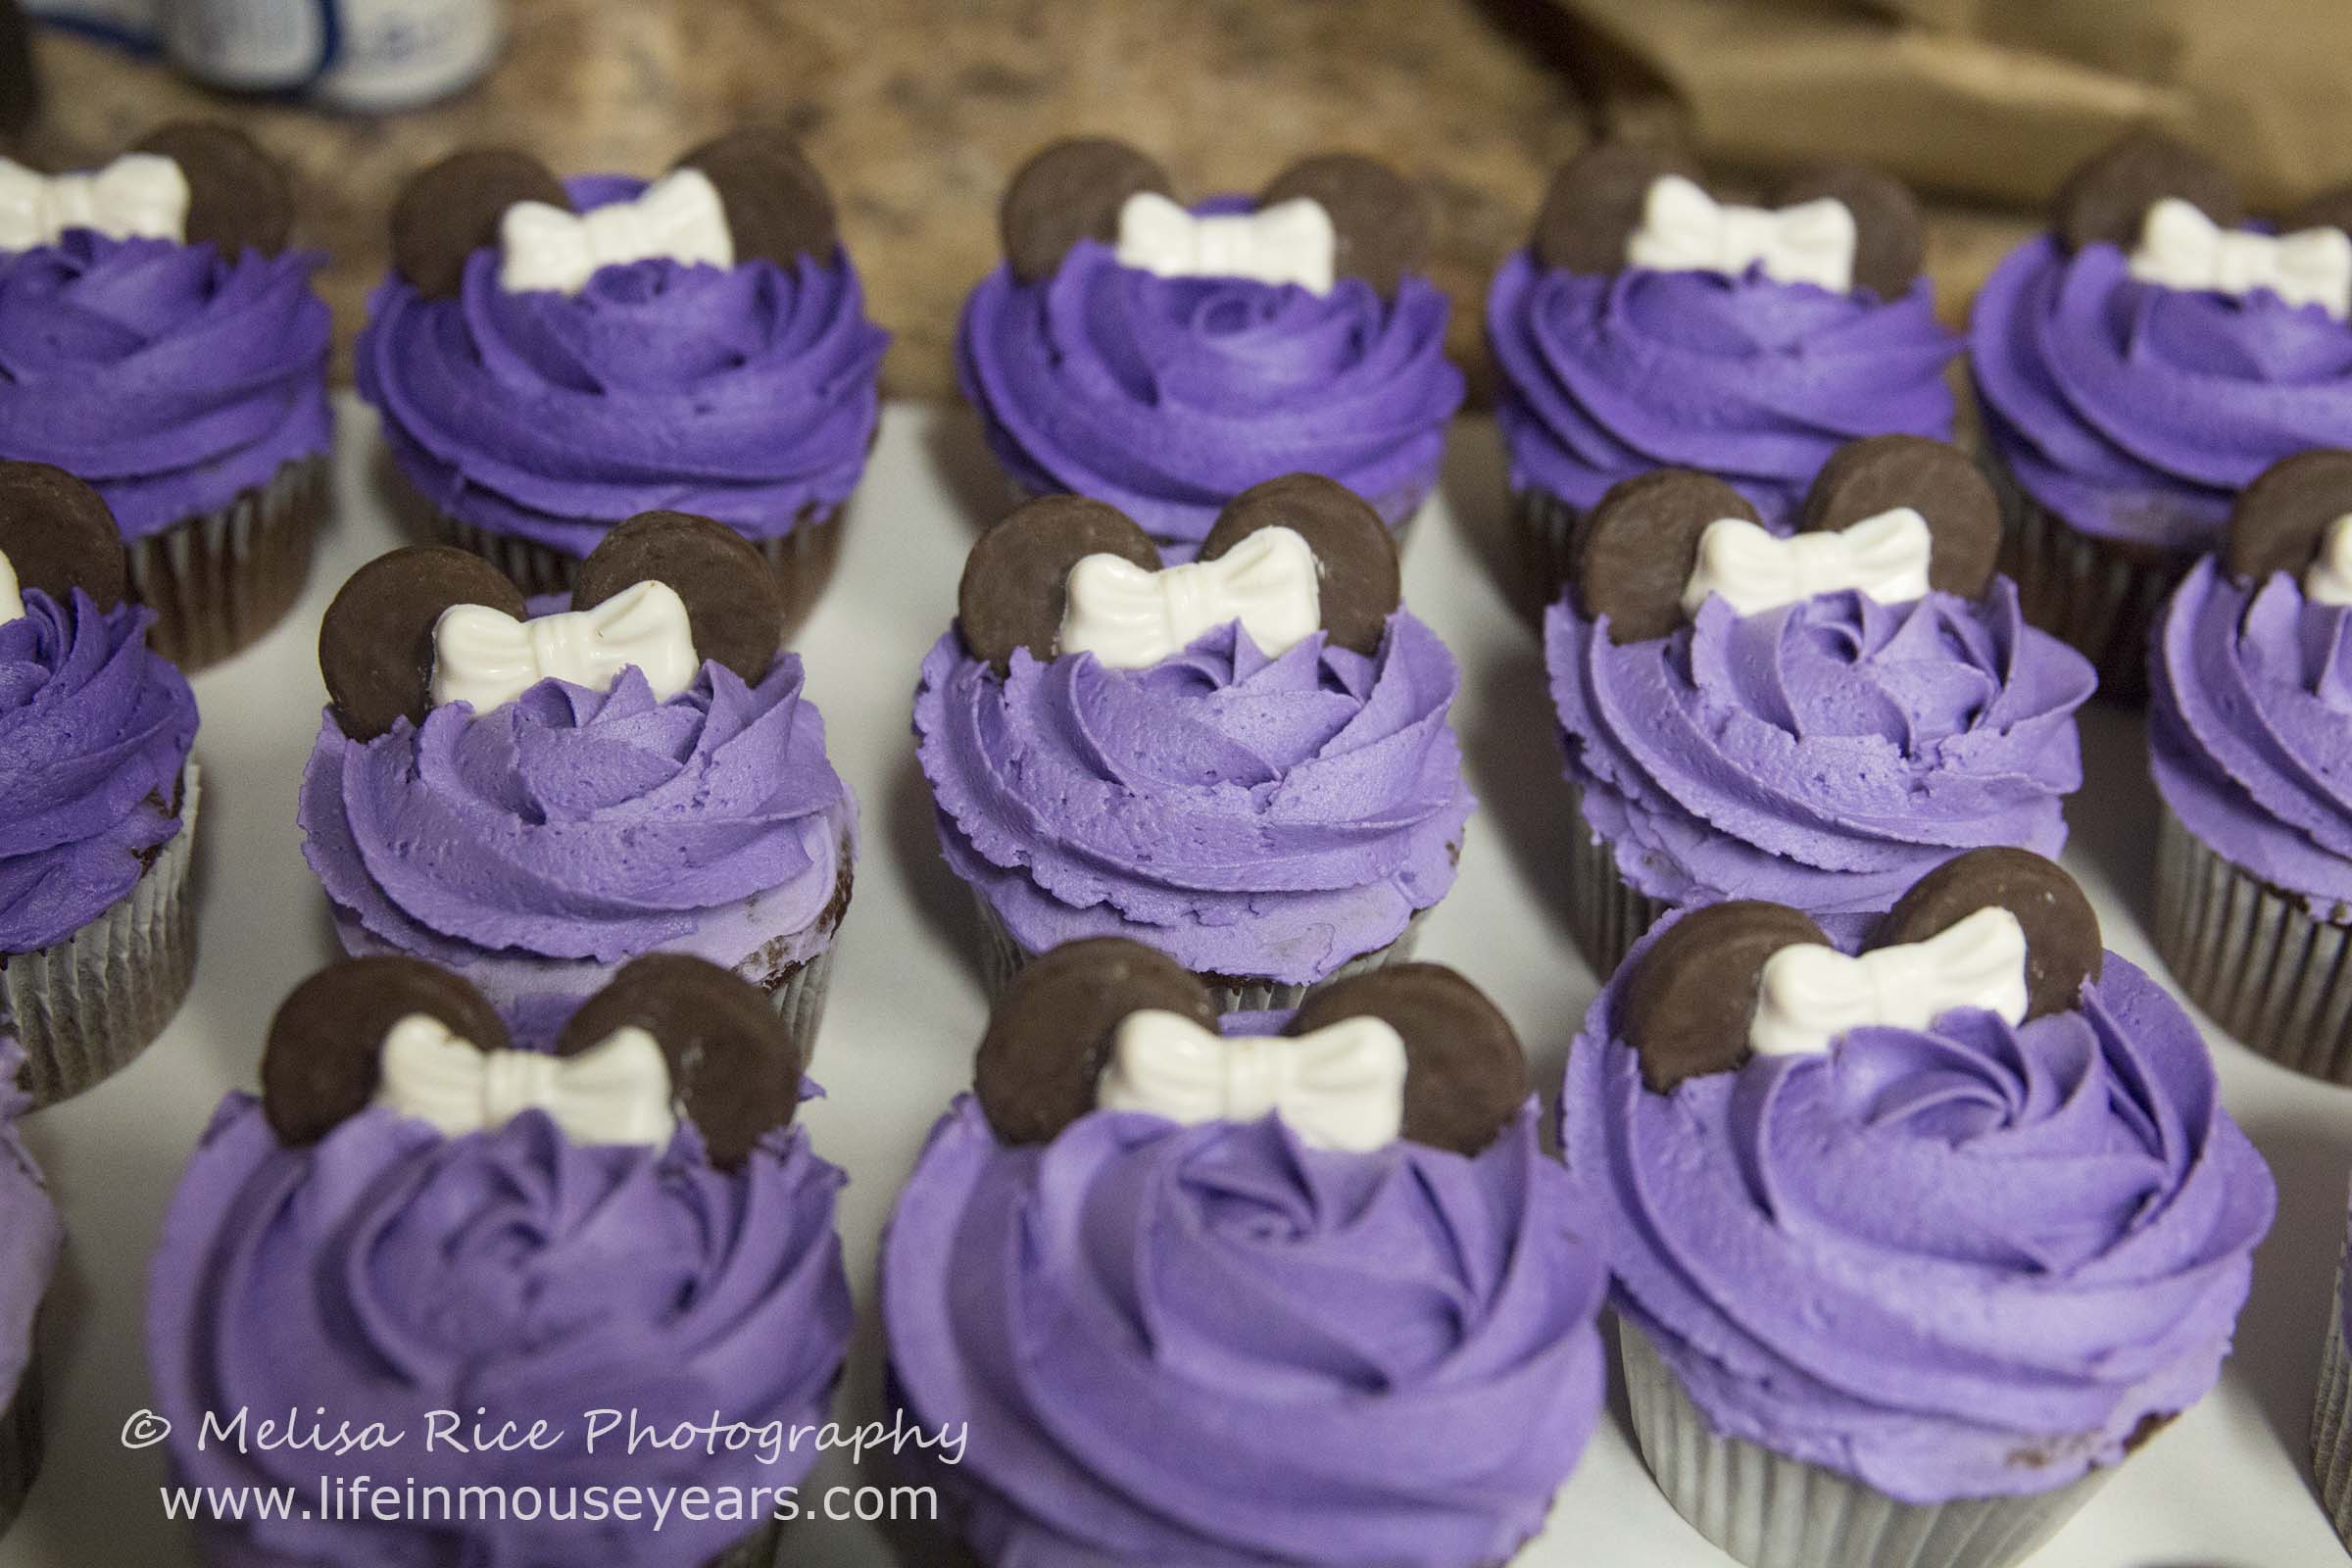
There you have your Minnie Mouse cupcake! Pretty easy right?
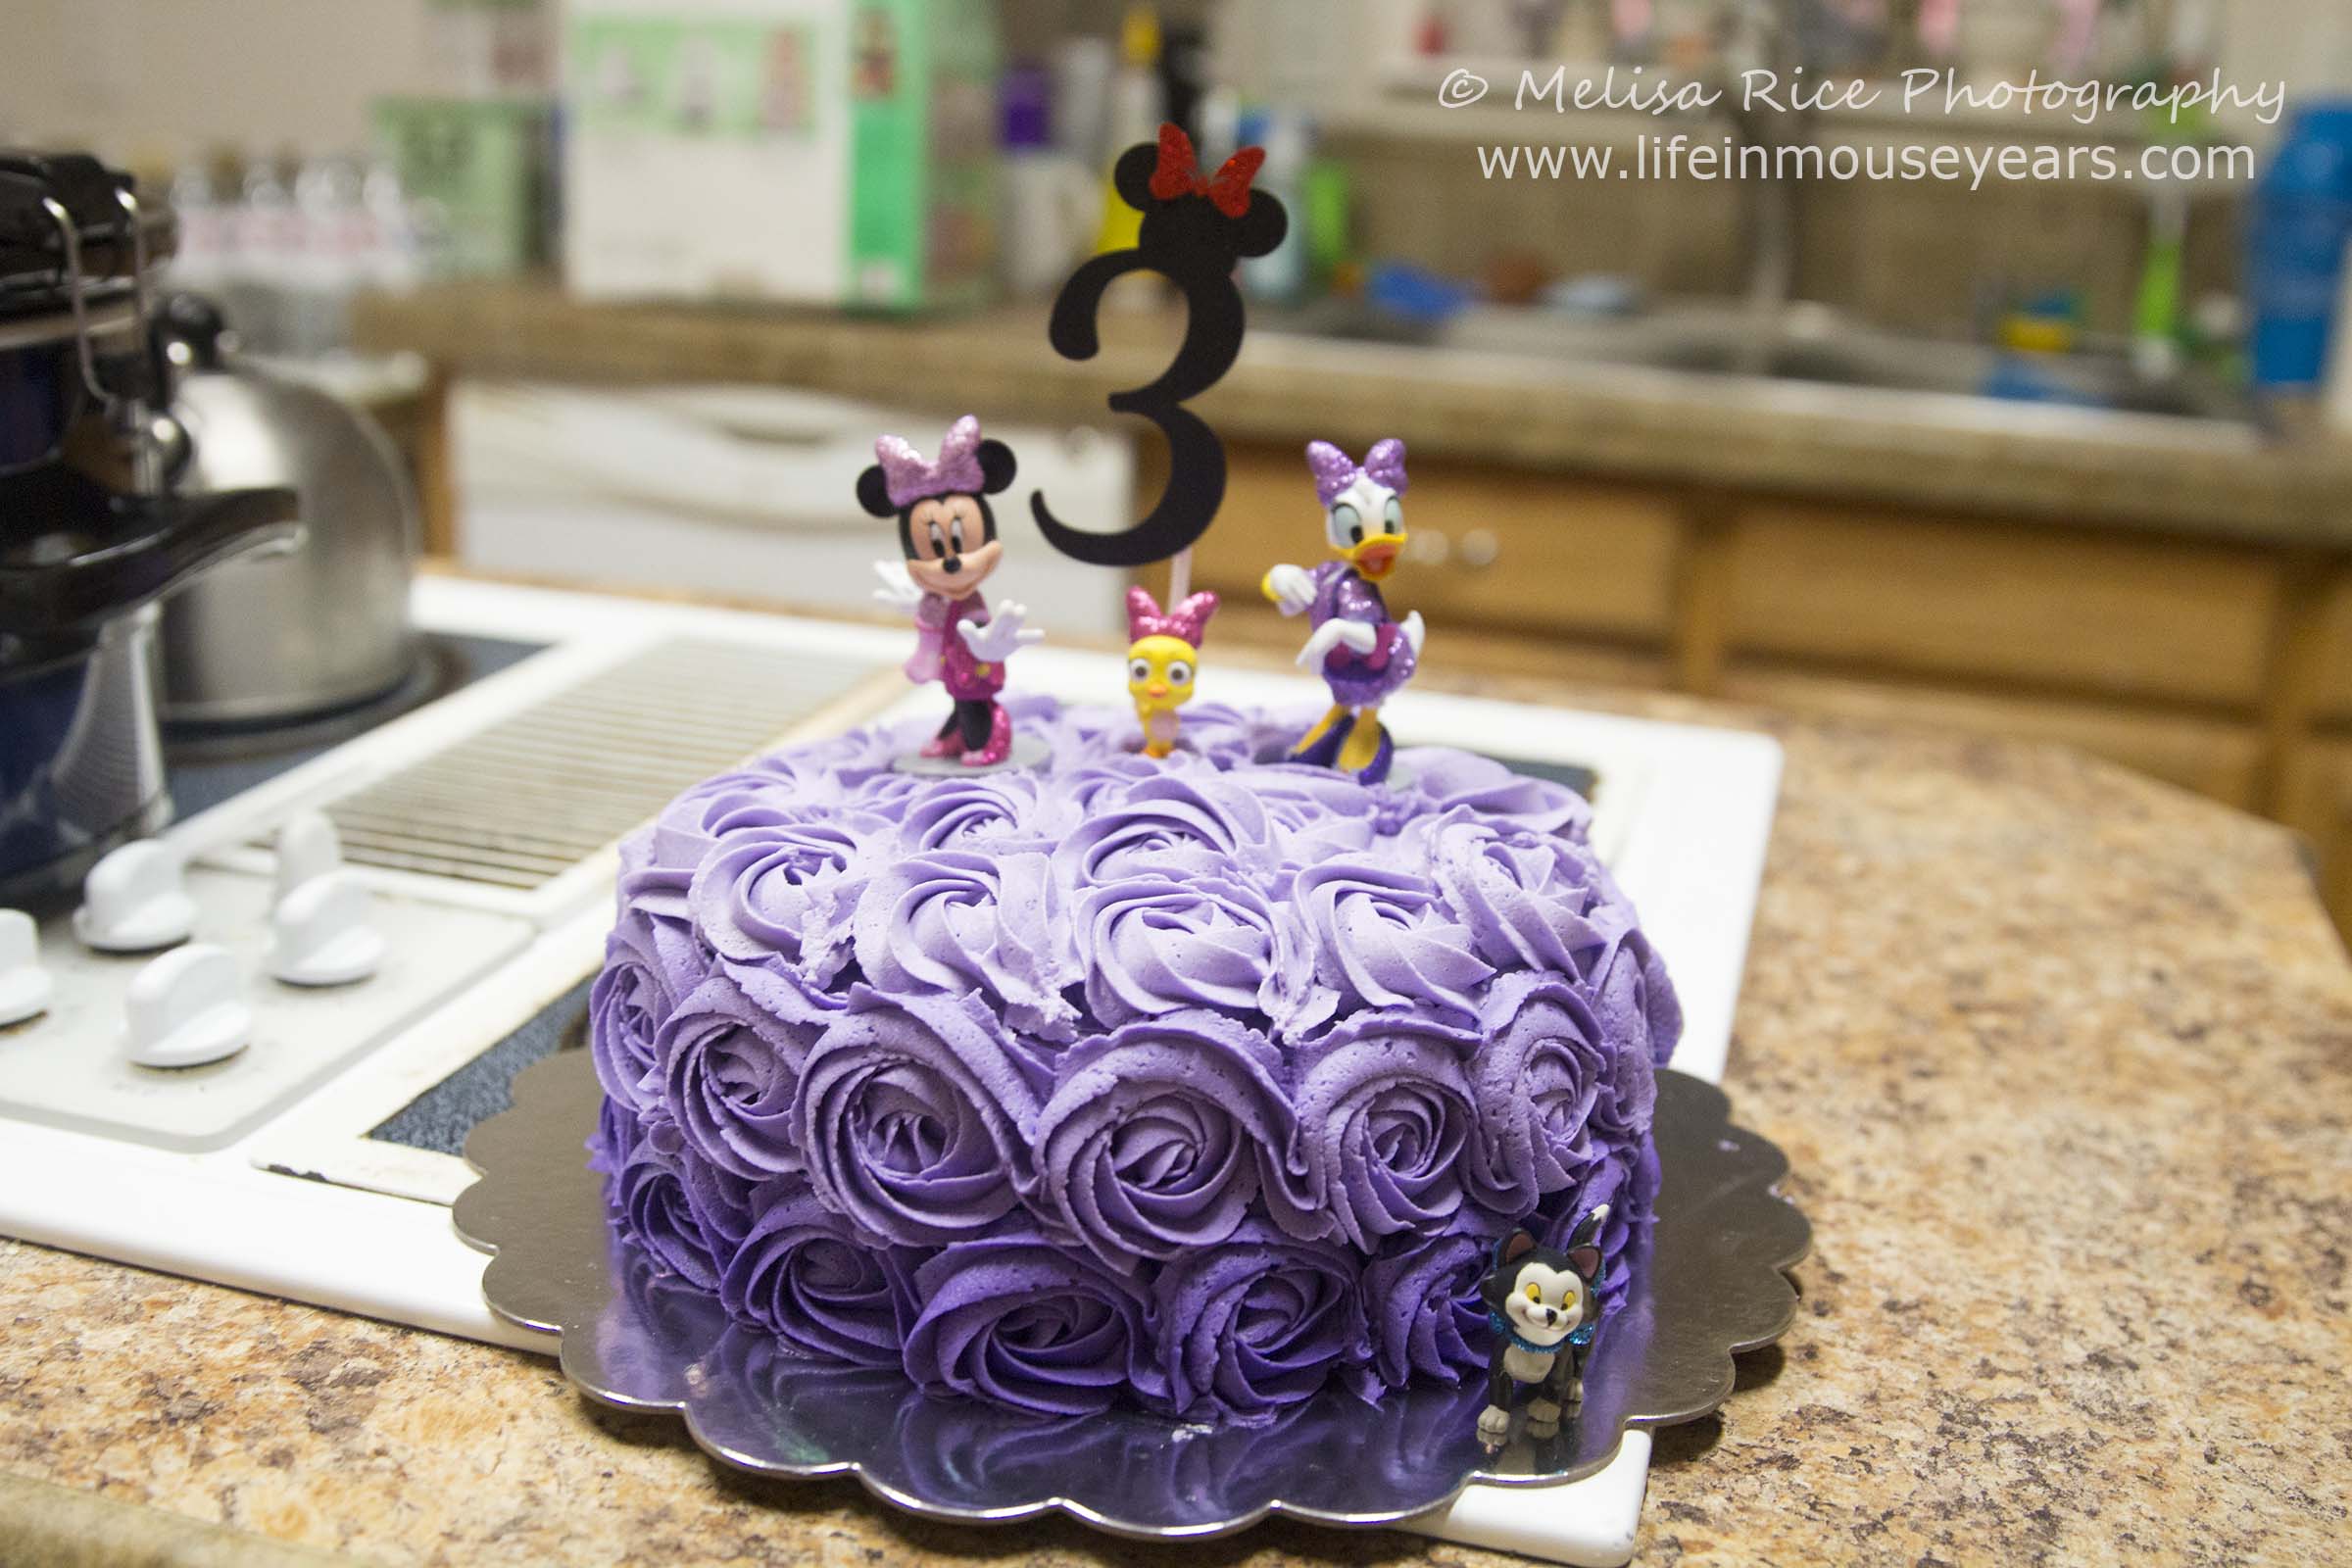
Cake Toppers
Finally, add the cake toppers to the cake round. For this cake, I put the Minnie Mouse 3 topper in the cake towards the back, centered. Then I added Minnie Mouse to the left, Daisy on the right, Cuckoo Loca to the middle. I added Figaro to the front right of the cake on the cake board.
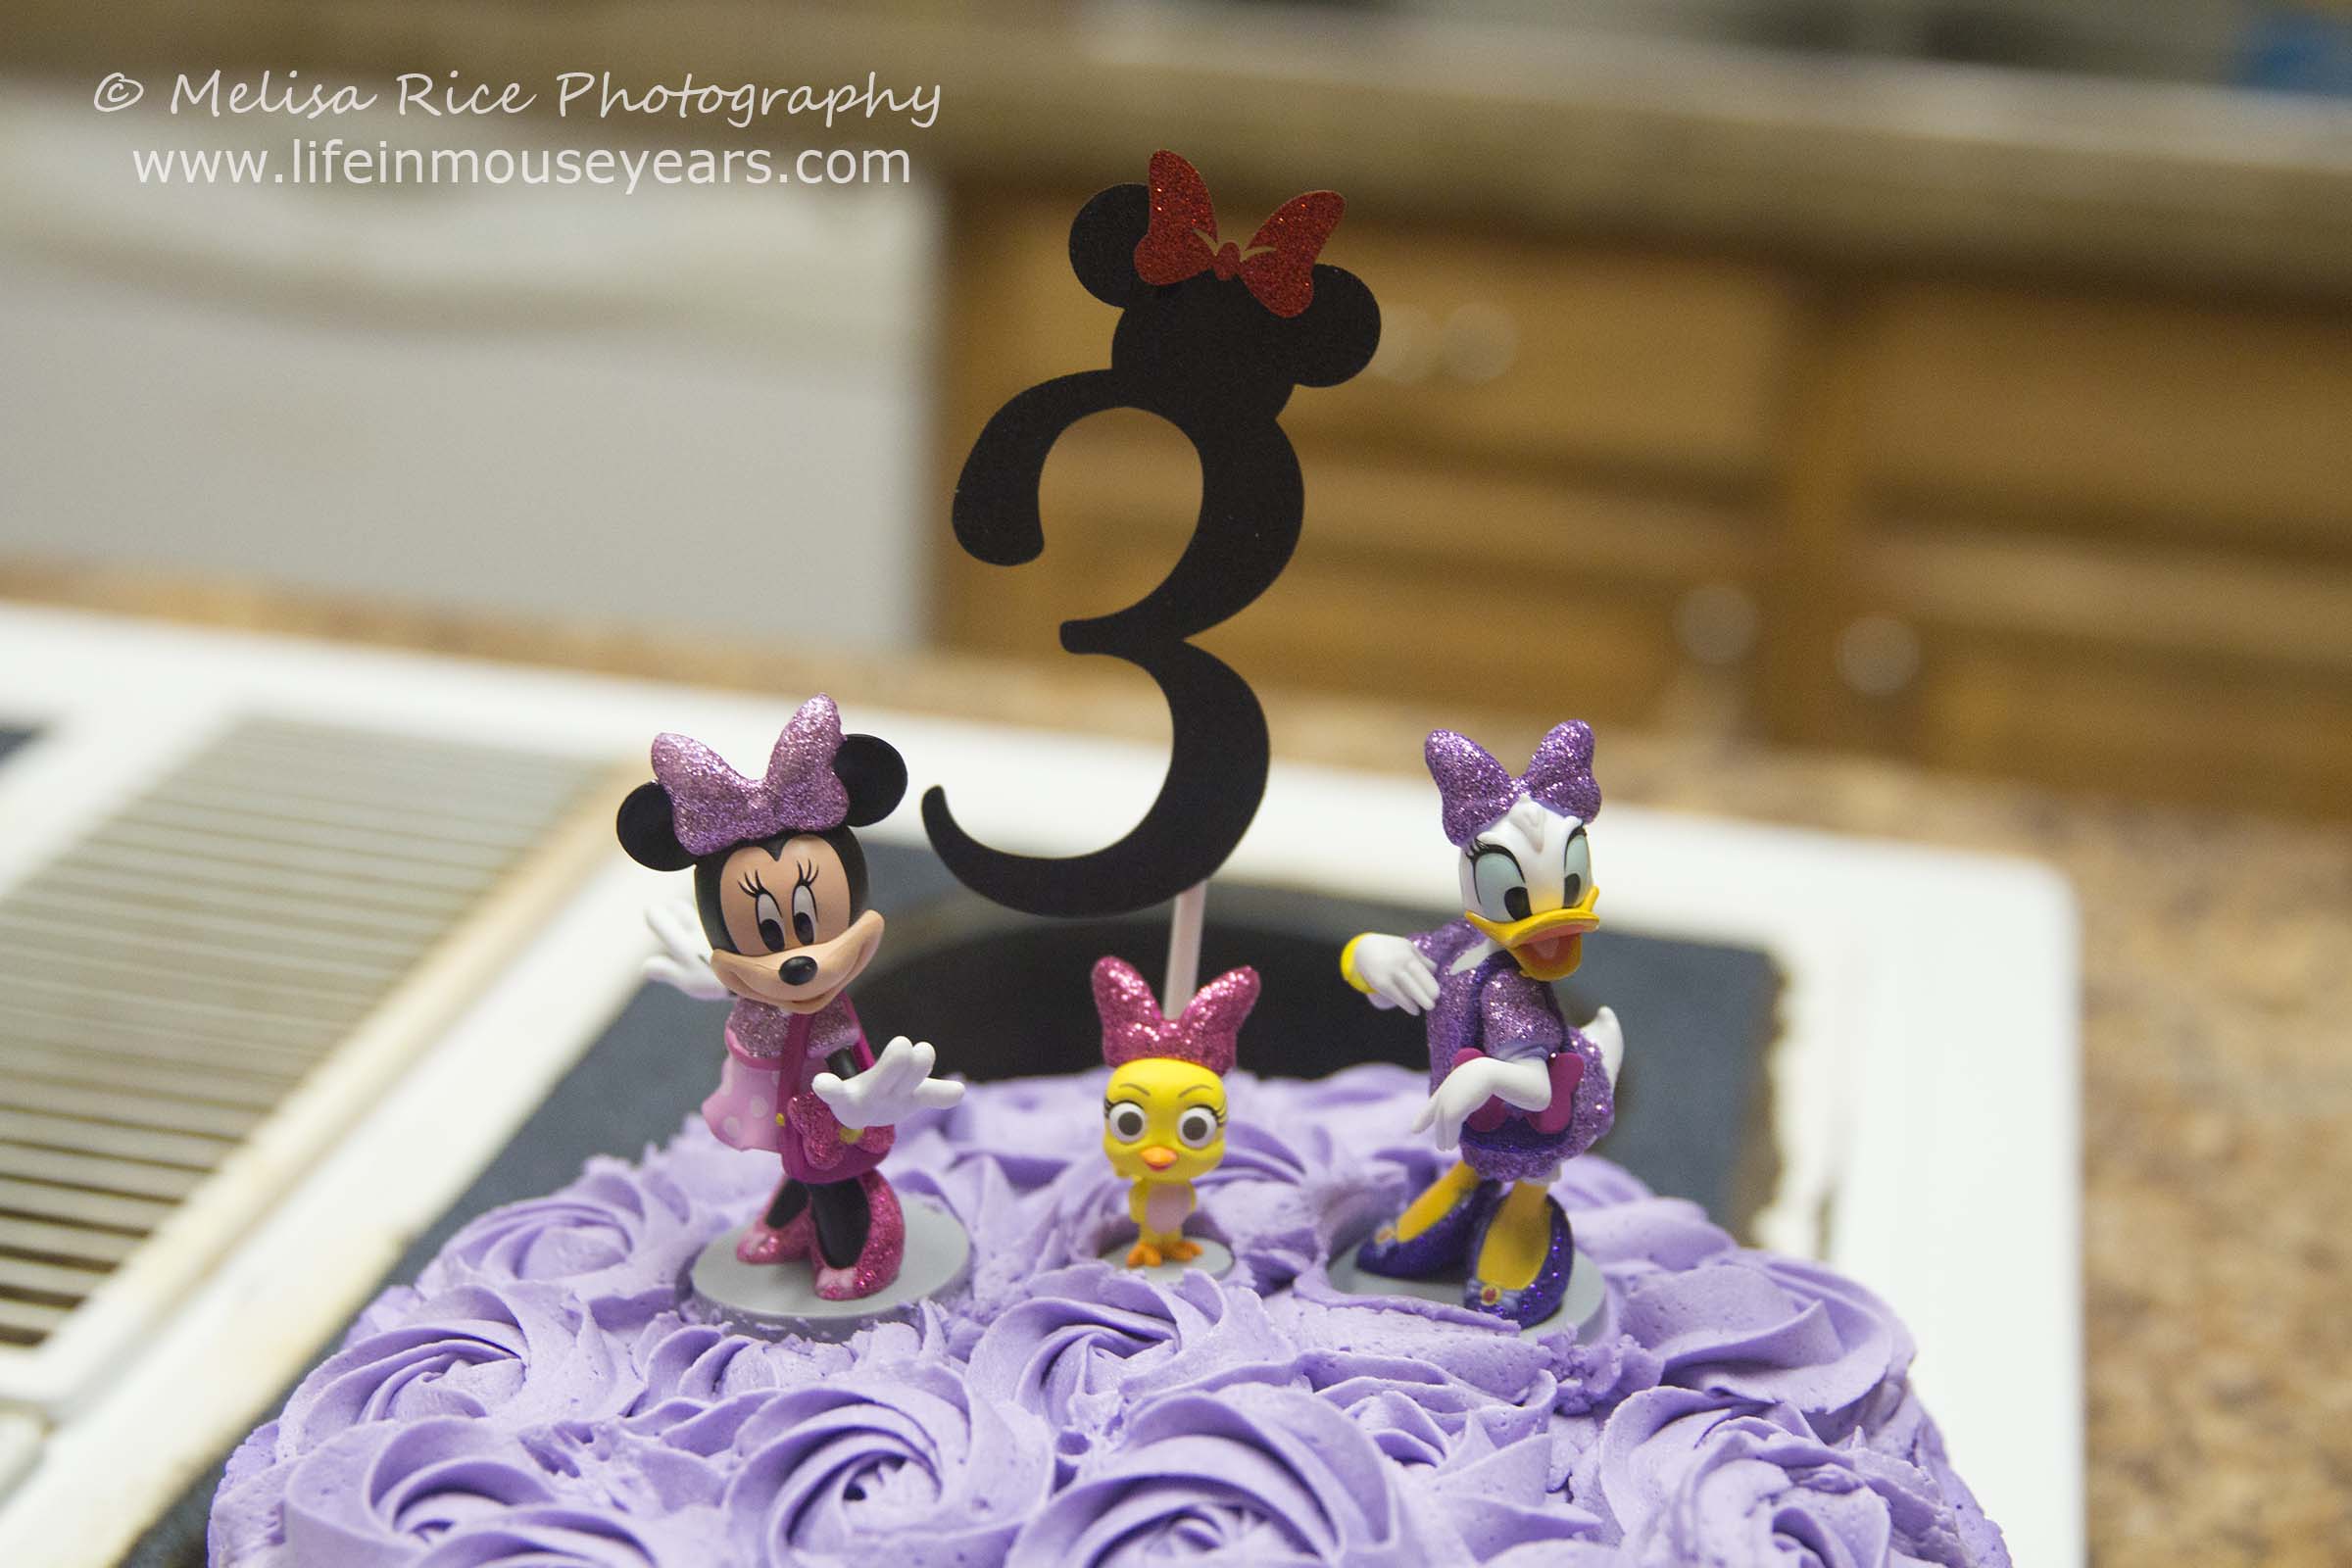
Tip:
I put the toppers towards the back of the cake (not centered) because I knew that she would be adding candles to the cake for her daughter to blow out. Accordingly, you can add the cake toppers to the center of the cake round if you would like.
In Closing
Making a Minnie Mouse cake and cupcakes can be a fun and easy way to make a birthday cake. I hope that today’s post How to Make Minnie Mouse Cake and Cupcakes, helps you to make your own Minnie Mouse cake and cupcakes for a Minnie themed party, or for any occasion!
Questions or Comments?
Do you have any questions or comments on today’s post-How to Make Minnie Mouse Cake and Cupcakes? Please feel free to share them below. I would love to help you out!
Thanks for stopping by Life in Mouse Years!
Want to learn more about Disney themed cakes? You may find these posts interesting:
Moana Cupcakes Chocolate Seashells
Alice in Wonderland Cheshire Cat Cupcakes
Alice in Wonderland Mad Hatter Cake
How to Make Alice in Wonderland Cupcakes

Leave a Reply