")
It has been cake central here over the last month. Not only have I been making tons of cakes, but my friend also made me my birthday cake! Therefore, today I thought that I would start by sharing the Moana birthday cake I made for my friend’s sons 5th birthday.
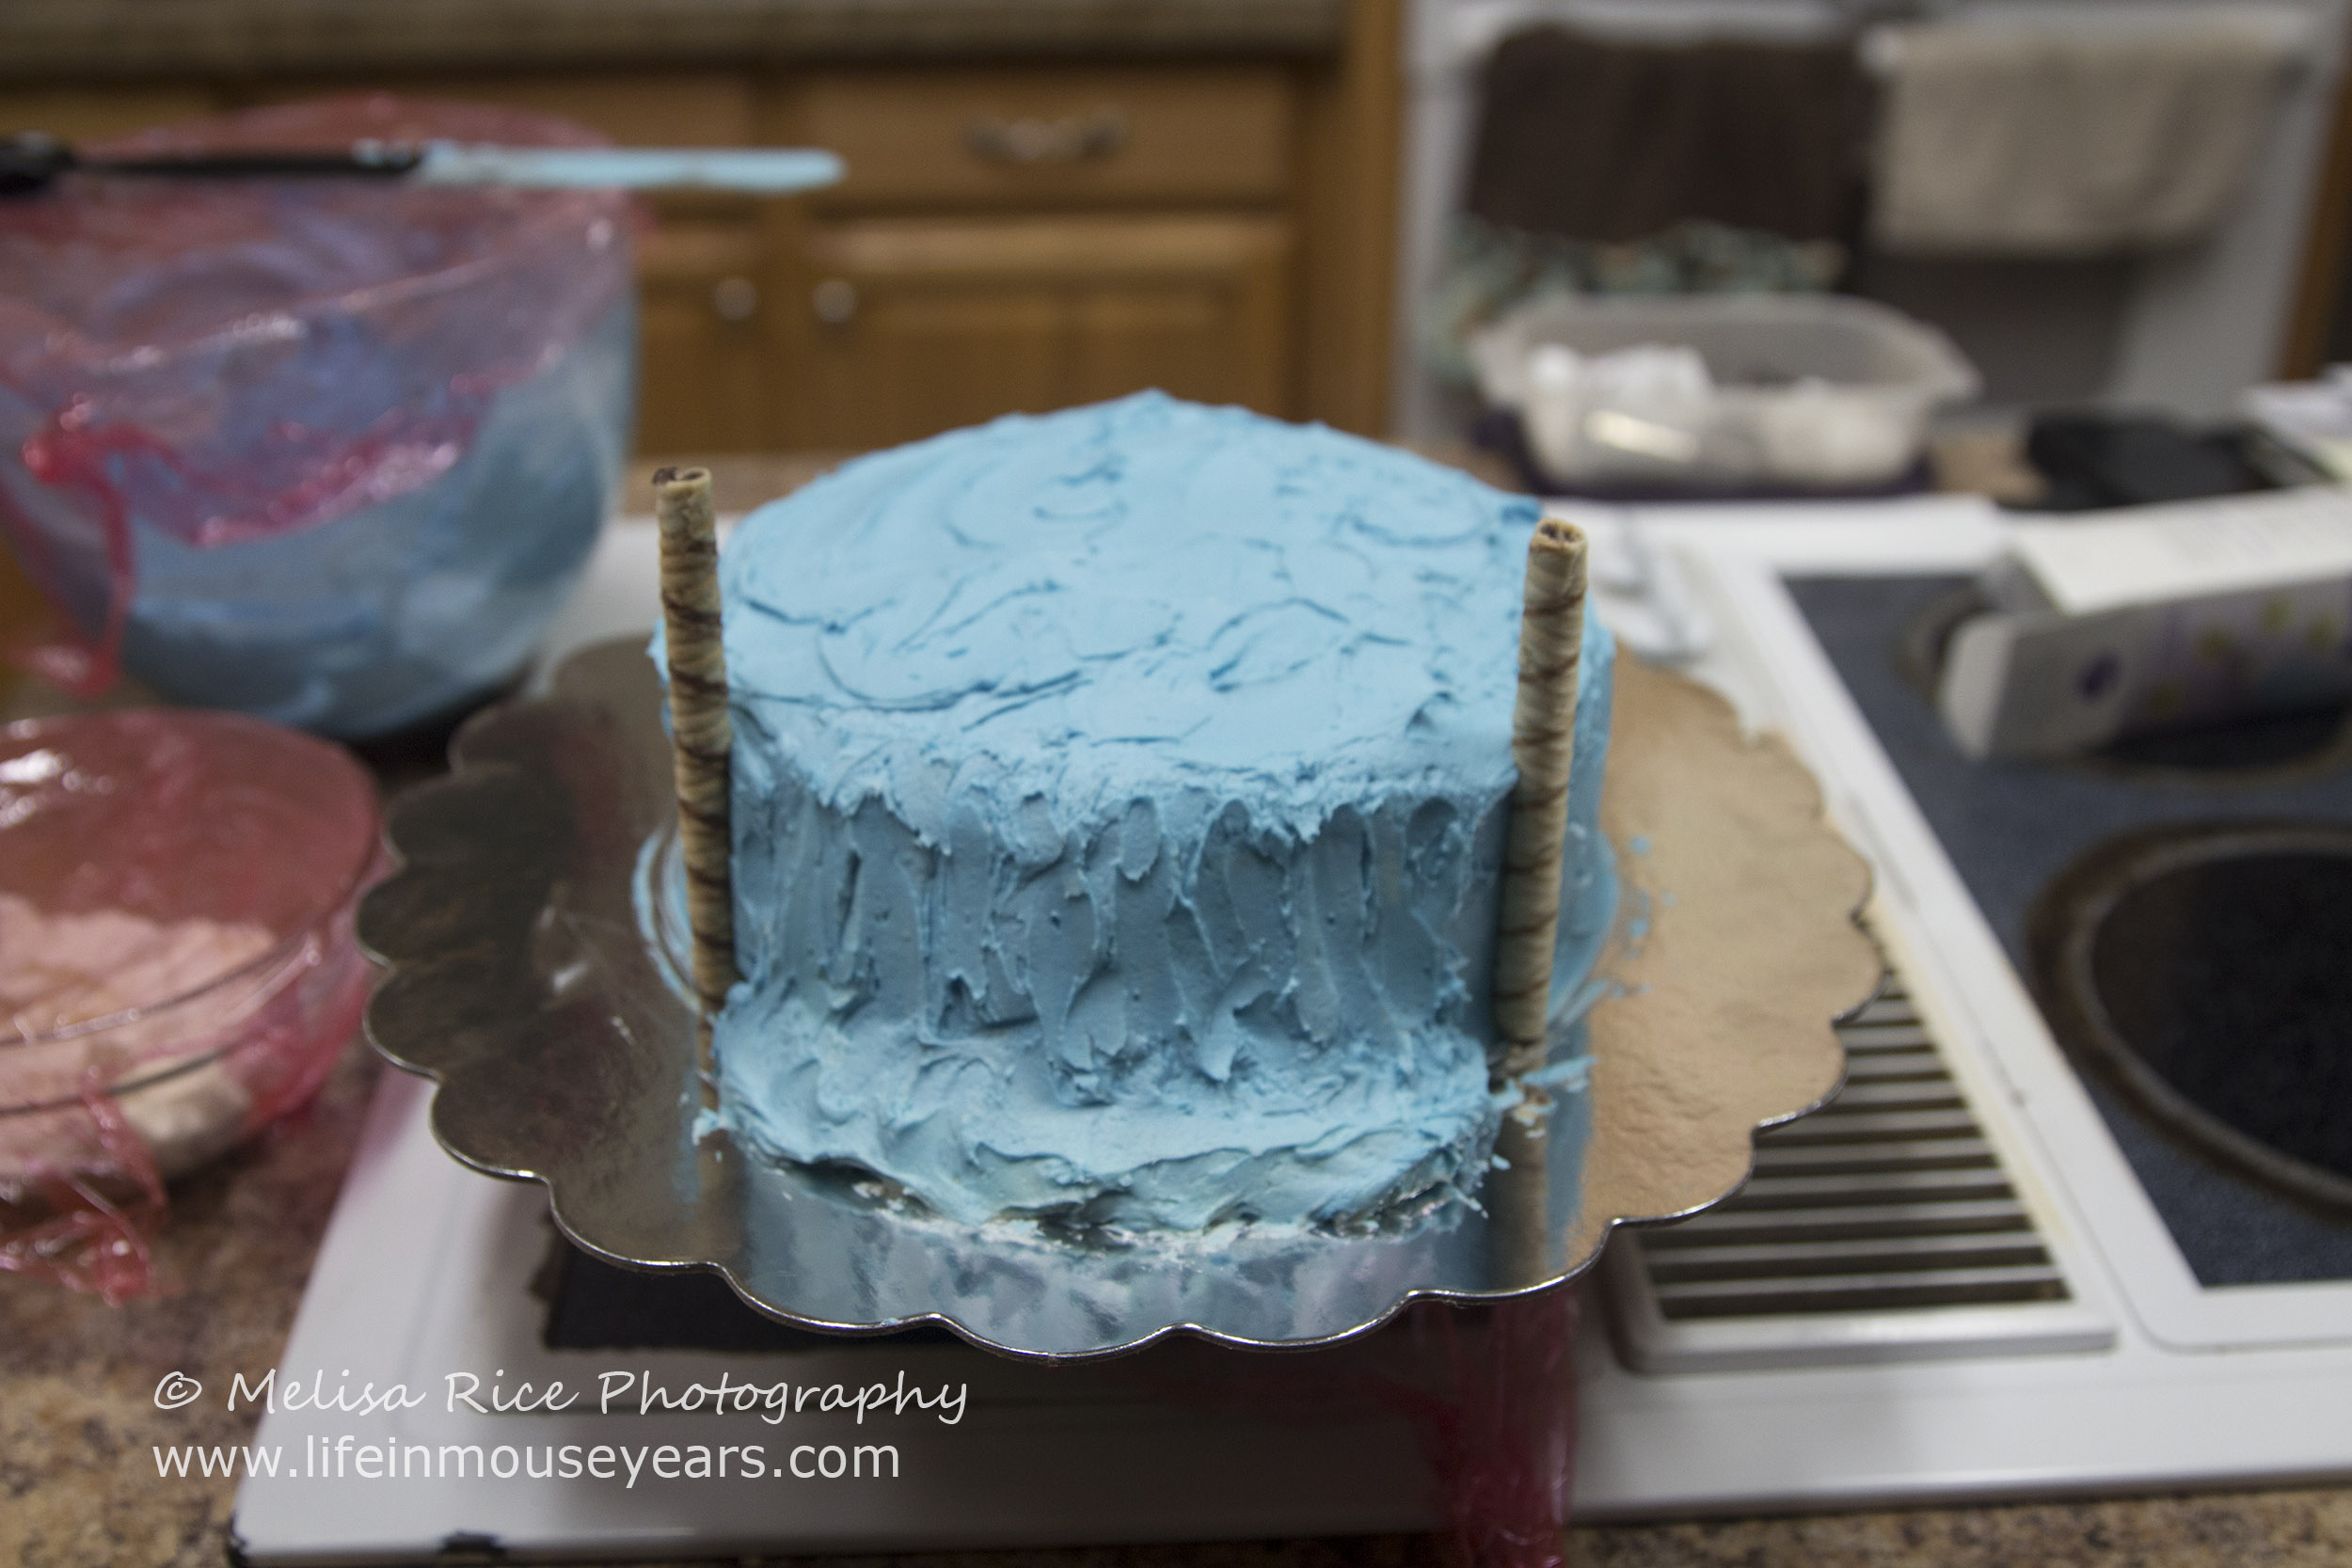
How to Moana Birthday Cake.
The movie Moana has been pretty popular since it came out in the movie theatres. There are tons of merchandise everywhere and party after party has been done. Including both of my friends throwing a Moana birthday party for their oldest children.
I shared what my one friend did here. It opens on a separate page. But don’t miss it! Her cake was awesome too!
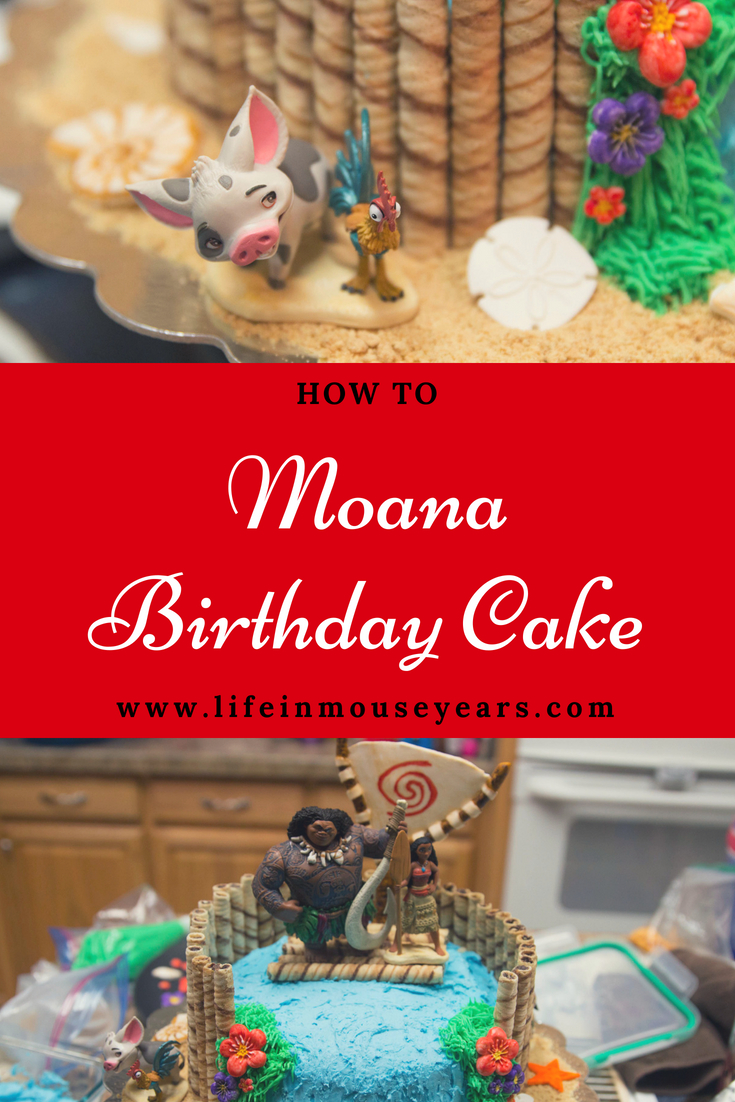
Moana Birthday Cake
My friend’s son asked for a Moana birthday cake. It is a lot of work to do a themed cake, and I stress like crazy when I am making it. However, when it is done, I am so happy! Furthermore, now that my friend’s son is older, he is appreciating the fact that I make his cakes. He even vocalized it to me this year which made my heart melt.
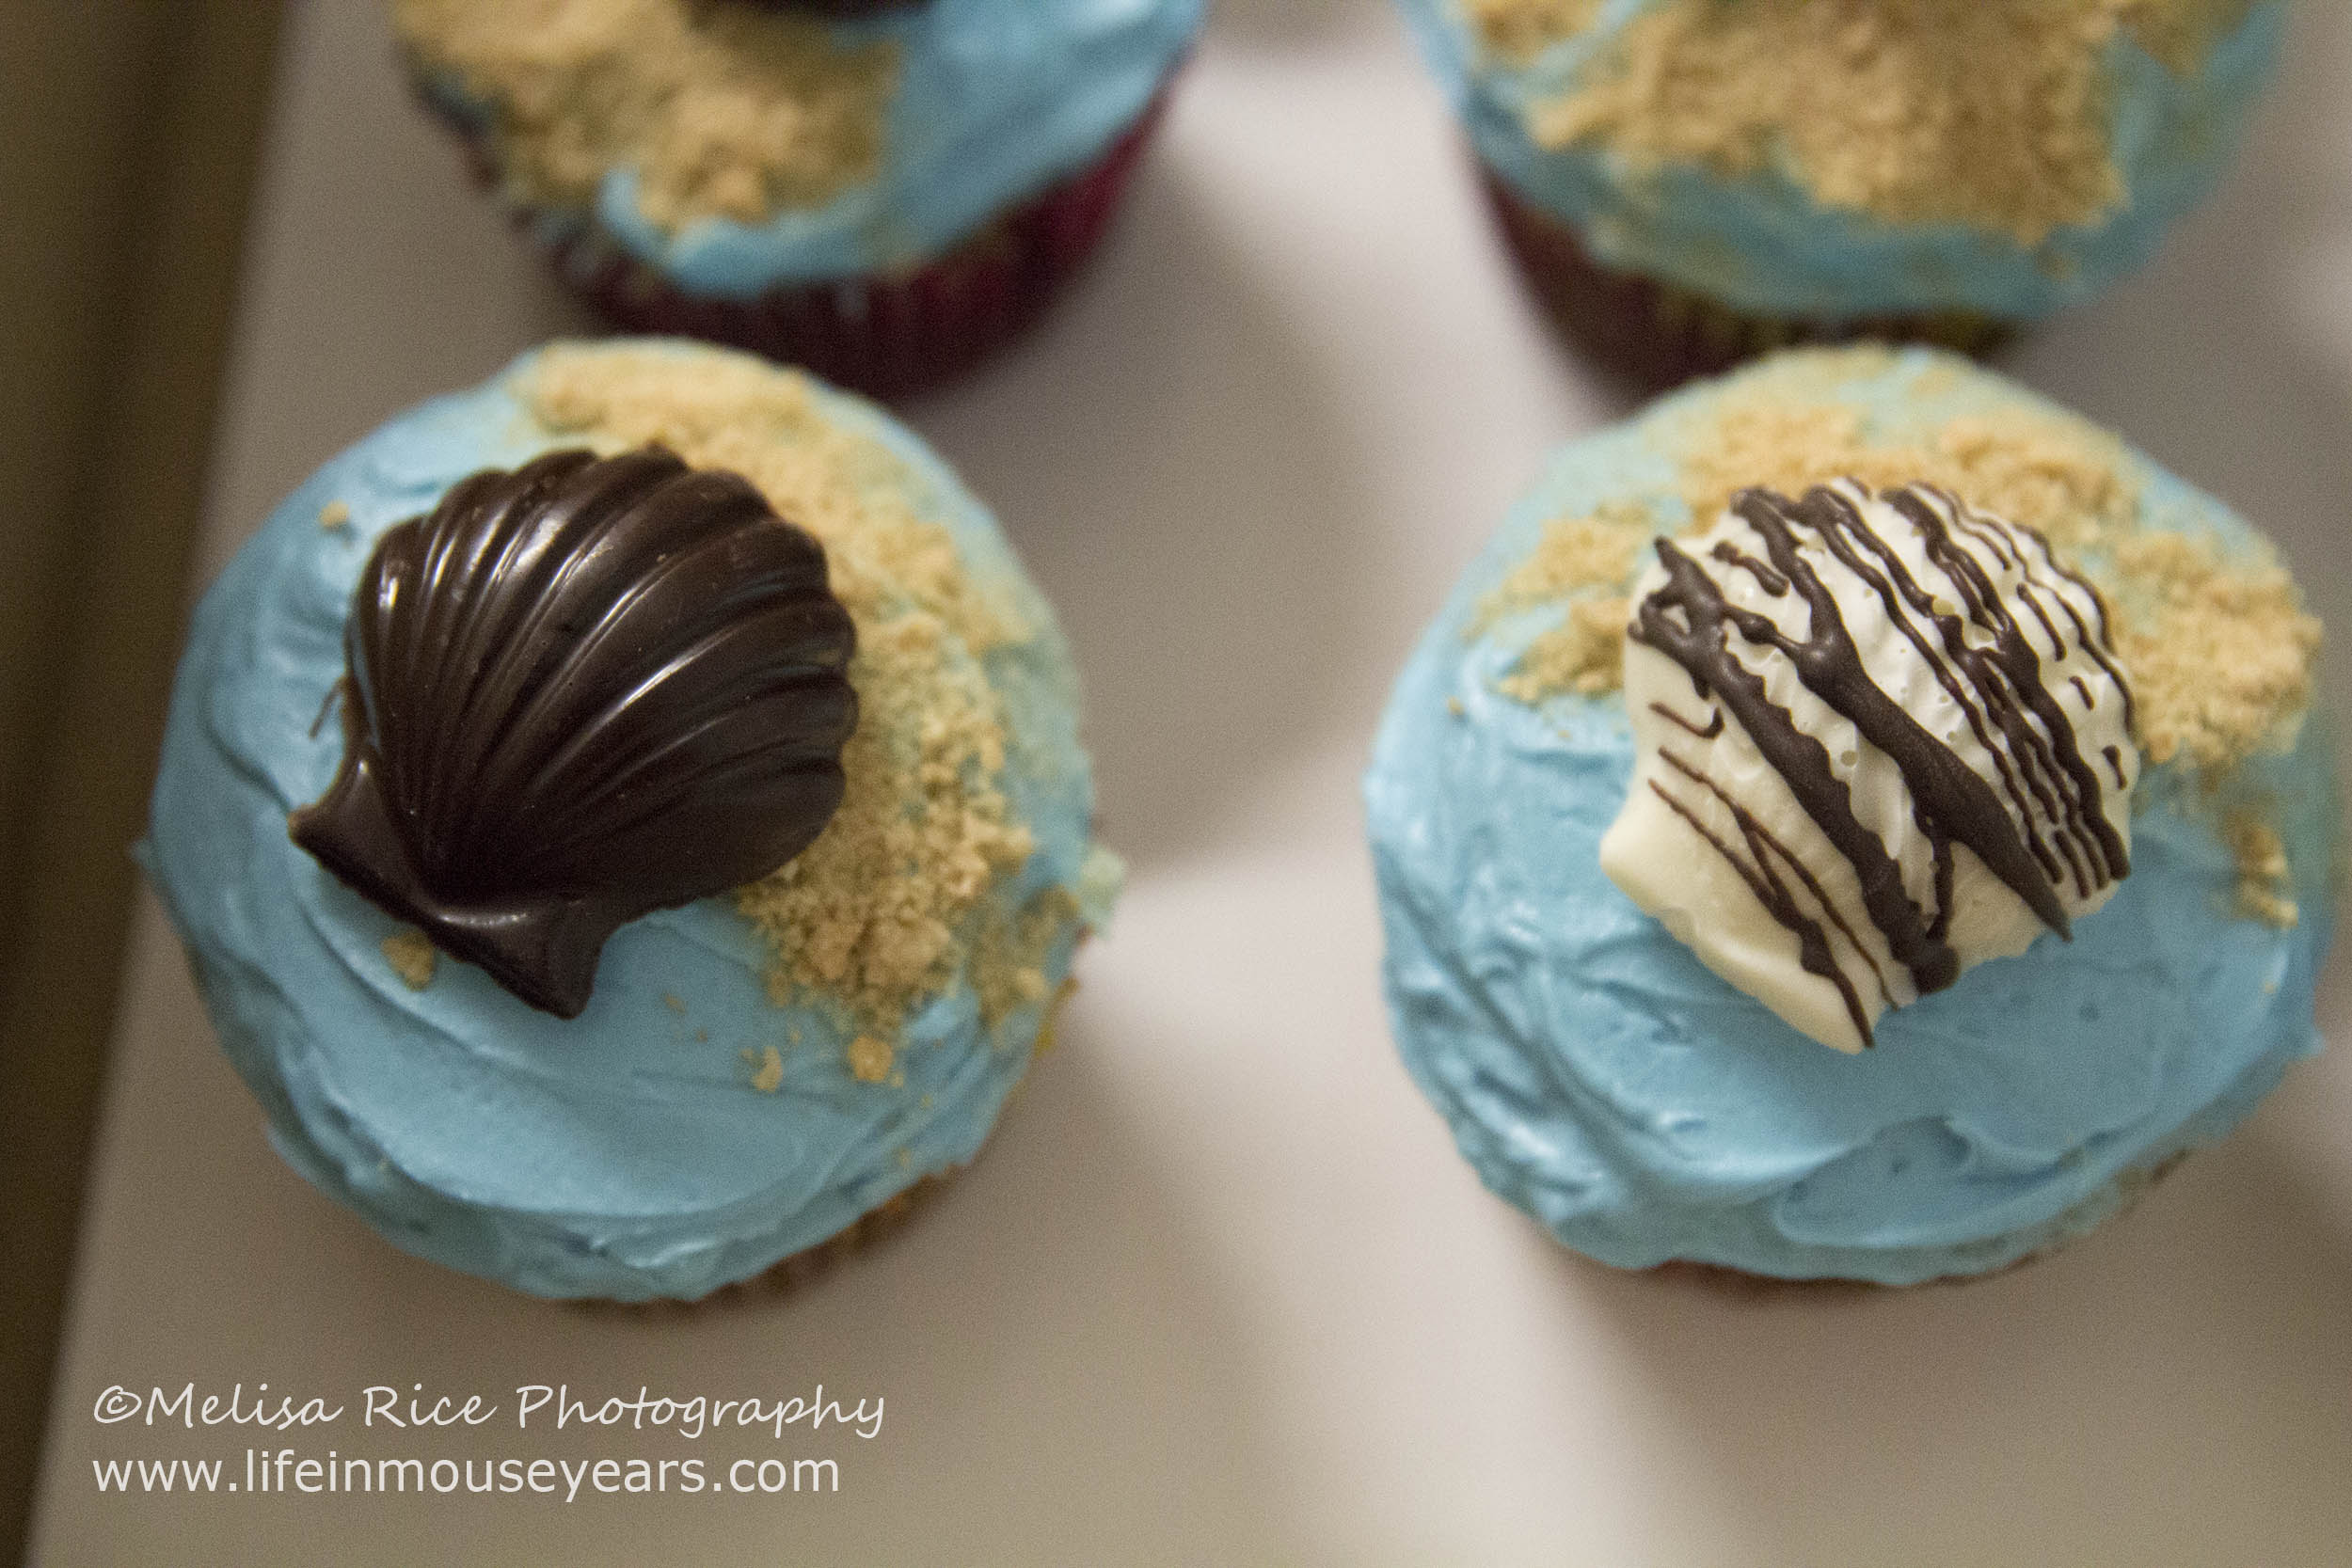
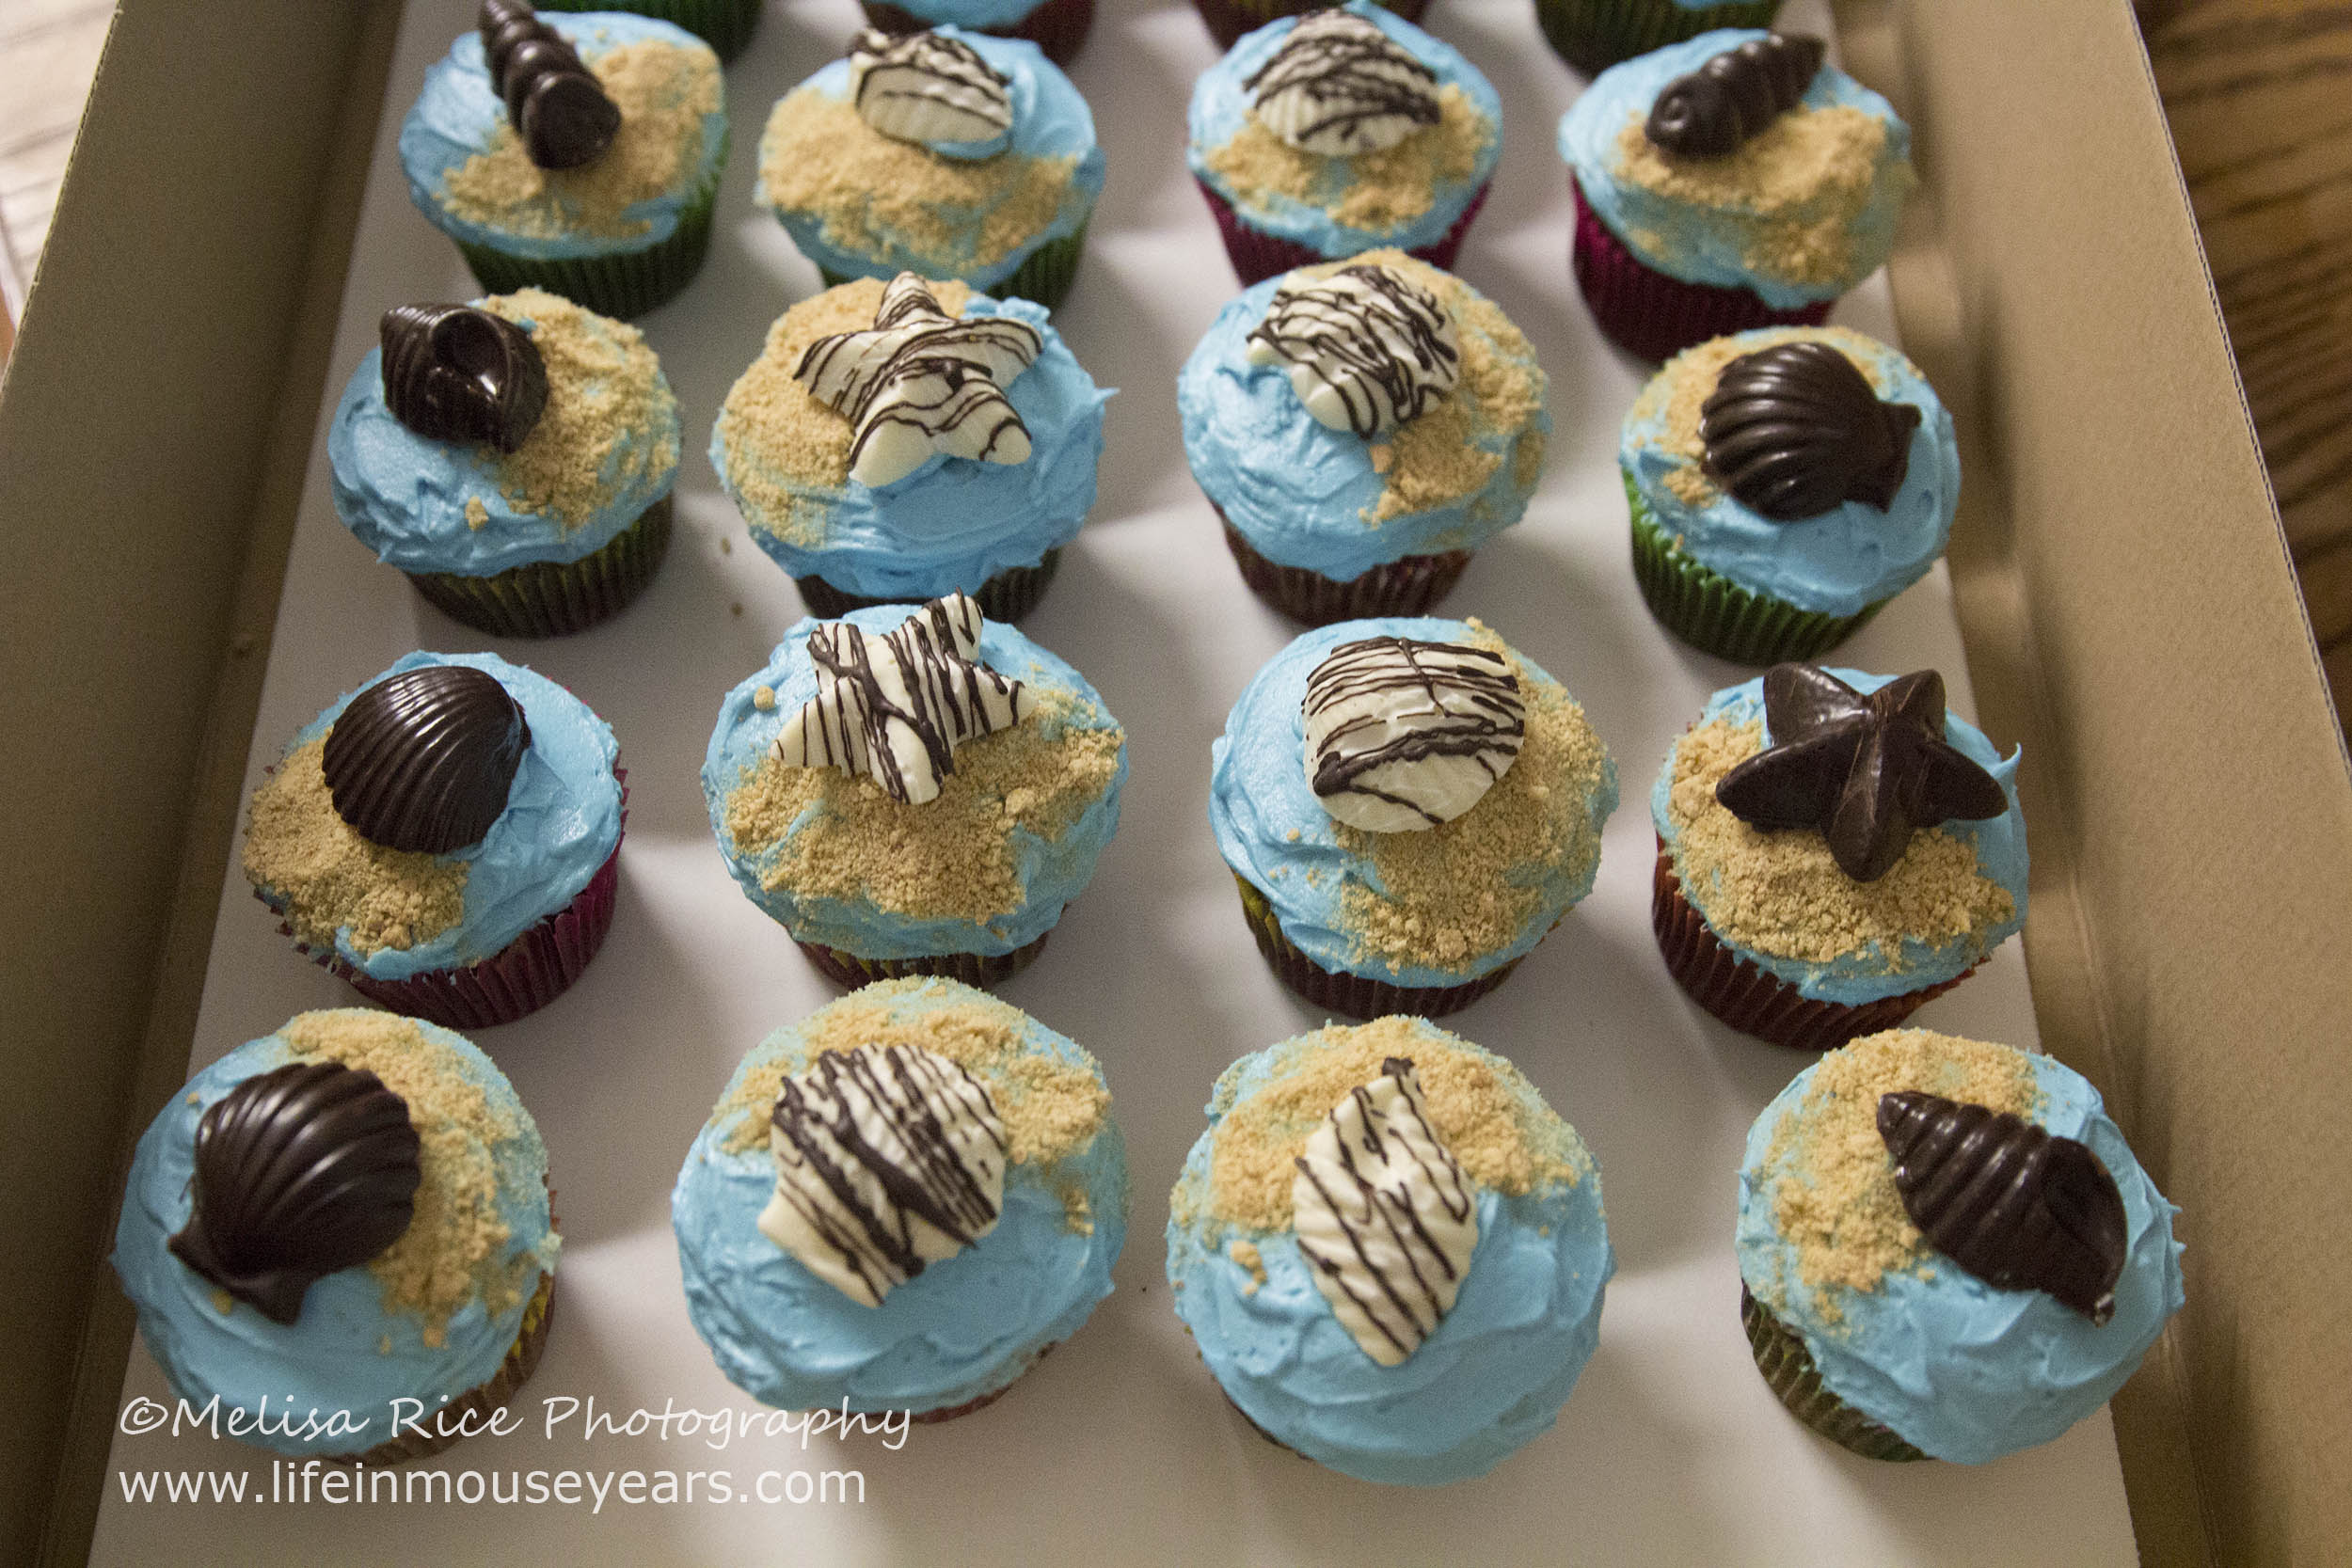
Chocolate Seashells
First of all, days in advance, I started by making chocolate seashells for the cupcakes. These were different from the other seashells I made. (You can find my candy melts experience here.) This time I decided to use real chocolate. There are positive reason’s to use real chocolates versus the candy melts. However, there are negative reasons as well.
If you are wanting to go the quick and easy route, I highly recommend the candy melts. If you want to go with real ingredients, I recommend the real chocolate route. Find out my real chocolate experience here.
Crushing Graham Crackers
Next, to save time later on, I crushed the graham crackers to make sand for the Moana birthday cake and cupcakes. If you have a food processor, it will make it a really fast process. I was making most of the cake at my friend’s house and I didn’t know if she had one, (although when she reads this she will probably let me know, lol,) therefore, I did it by hand. A Ziploc bag and a rolling pin. This is a great stress reliever btw.
Gum Paste Time
Another part of the Moana birthday cake I did in advance is to make all the gum paste items. In addition to making them in advance for saving time, it also needs to dry before you use it on the cake.
I was given a Wilton silicone mold that is ocean-themed, in addition to a flower and vine one. These molds came in handy for this Moana birthday cake. Another time-saver is that I purchased ready-made Wilton Gum Paste. For this cake, I made flowers, seashells, sand dollars, and the sail for the boat.
Tip: Make more than you plan on using. You never know what may happen. Always make extras for those just in case moments.
To find out the details on making the gum paste pieces, tips and more, you can find my recent post on that here.
Baking the Moana Birthday Cake
Now that it is closer to the day of the party, I started to bake the Moana birthday cake. I did 2 eight-inch rounds with chocolate cake mix. Mix, bake and cool the cakes.
Making the Frosting
Next, I made a bunch of frosting. For this Moana birthday cake, I made white, light blue and green frosting.
My go-to frosting recipe is the Wilton Buttercream Frosting. I recommend using water instead of milk. It makes a difference in the taste! Trust me.
Find some fun items for your kitchen at the ShopDisney link below.
Frost the Cake
First, for the white frosting, I spread some on top of the bottom cake layer for the filling. Next, I added the top cake layer and then I dirty iced the entire cake. The dirty icing is where you add a thin layer of frosting to the entire cake to hold the crumb pieces on the cake. That way when you do your final layer of frosting, it won’t have crumbs all over it.
Refrigerate the cake to set the dirty icing.
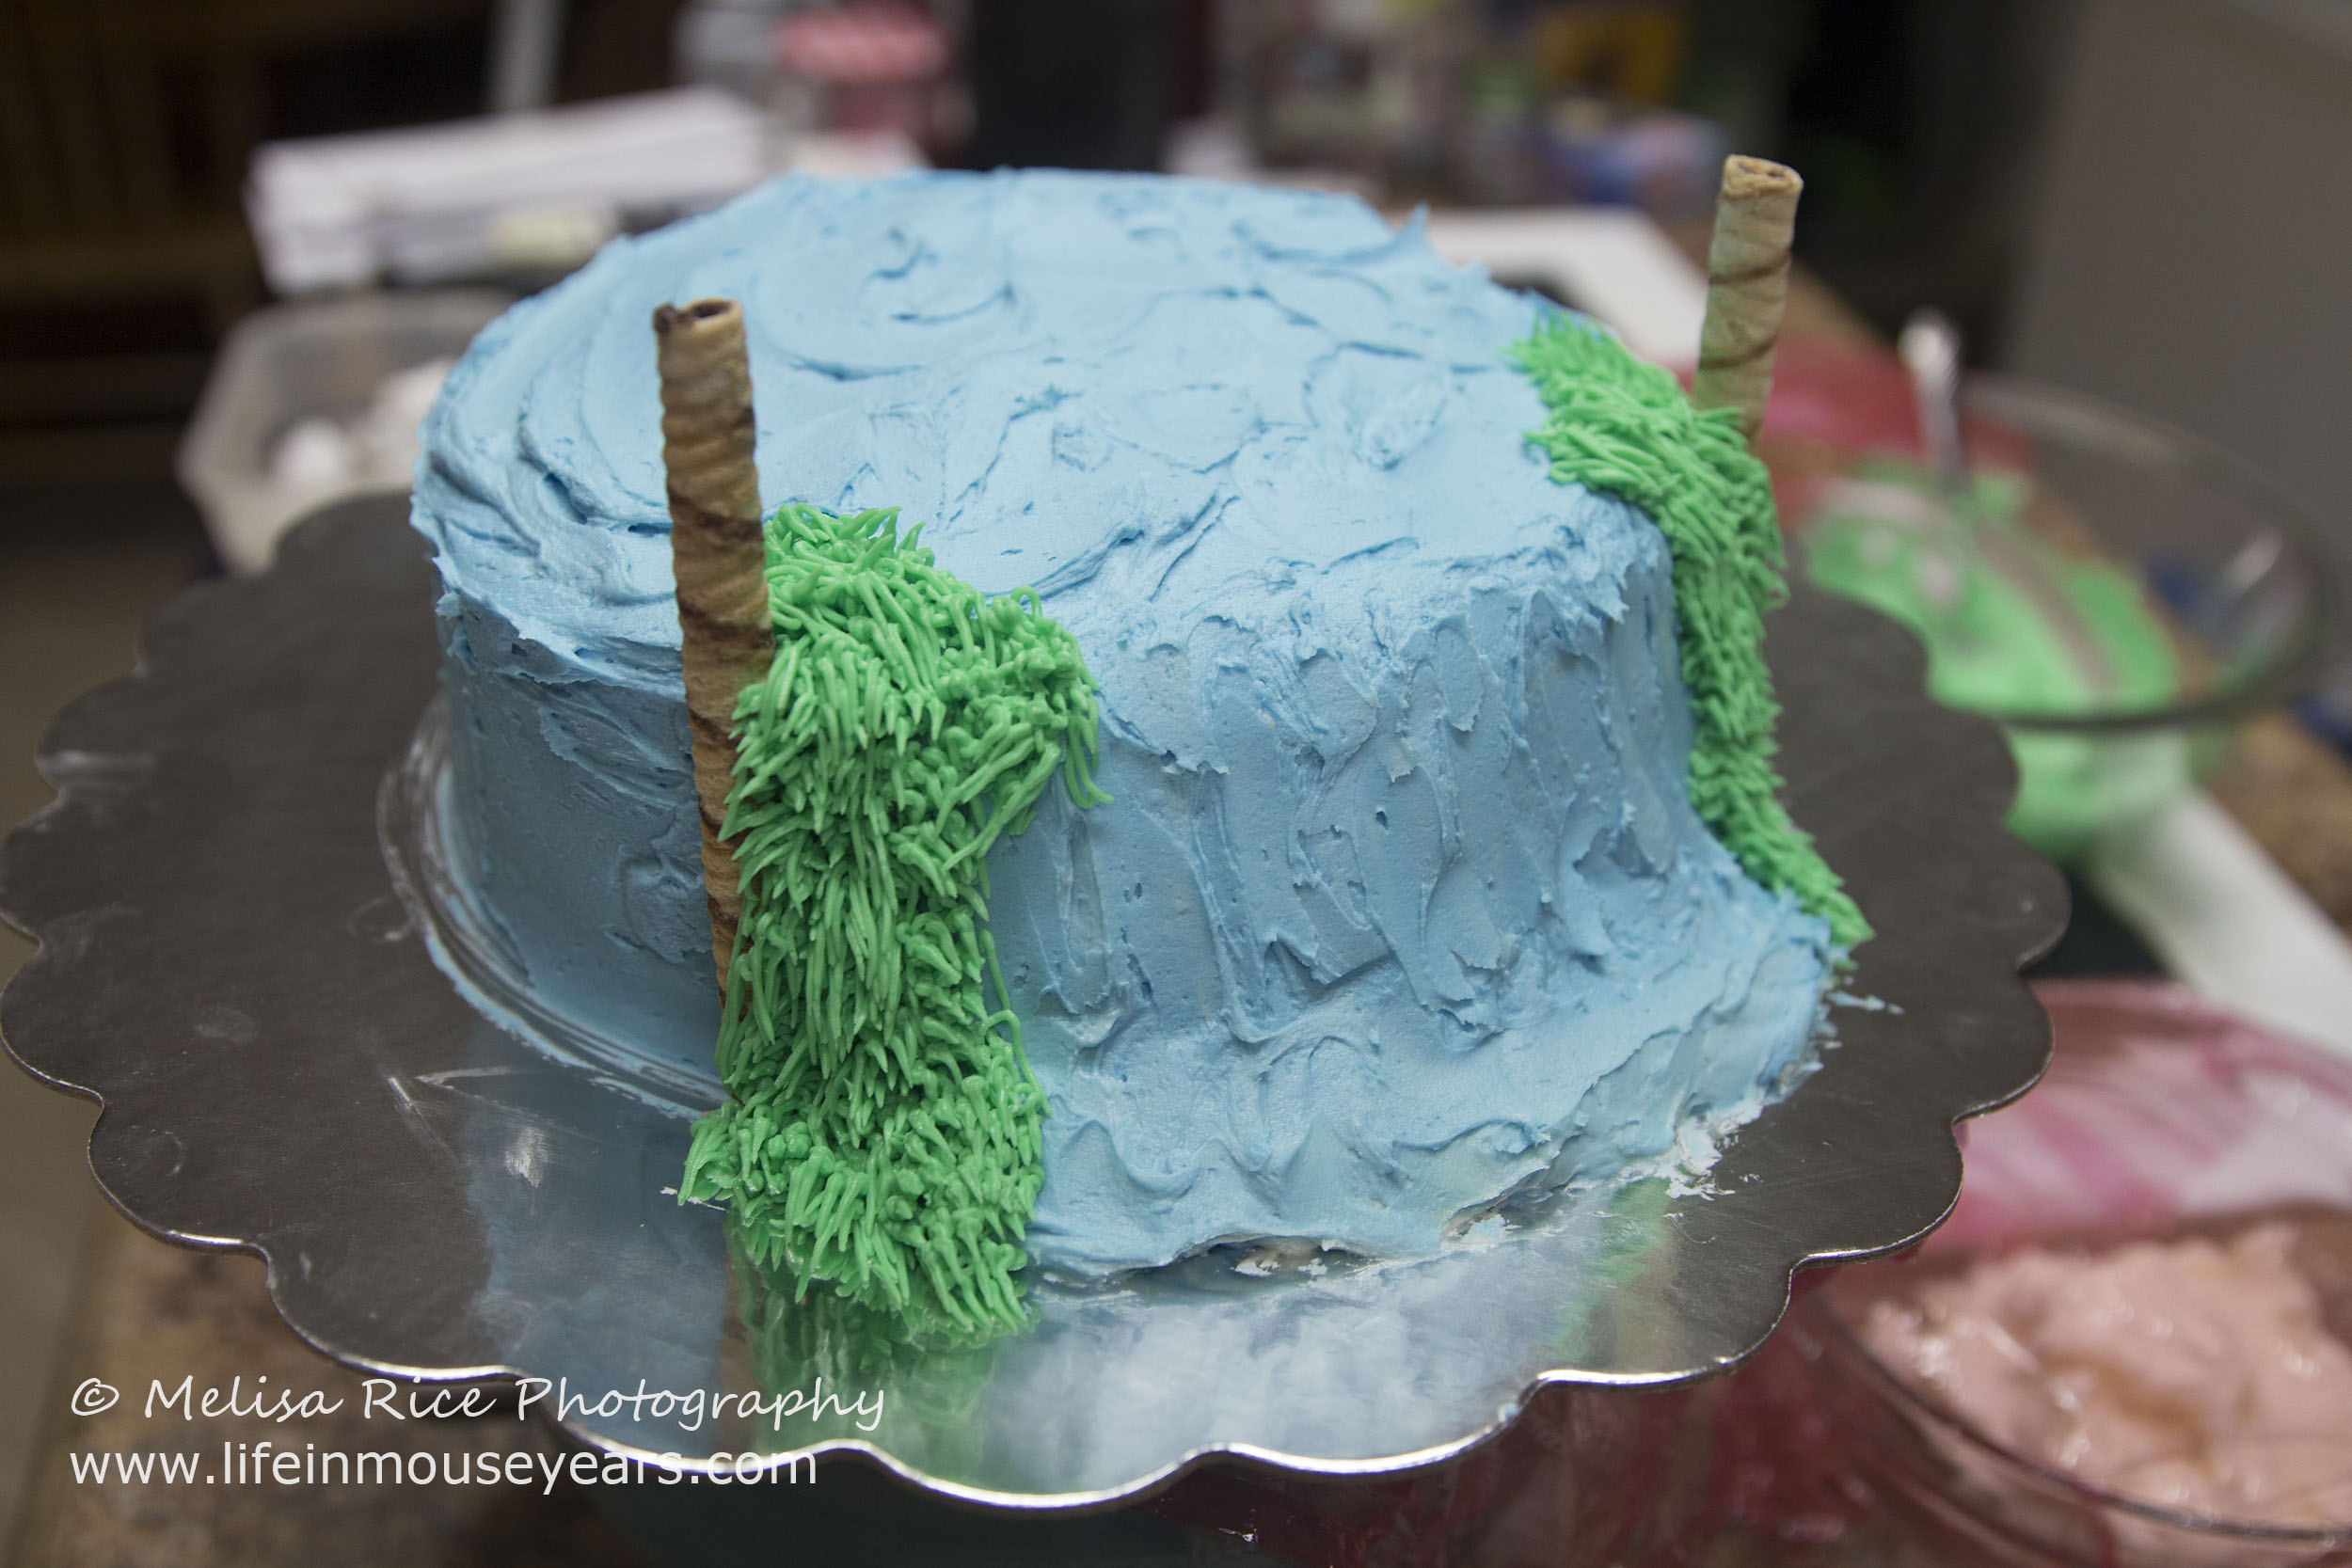
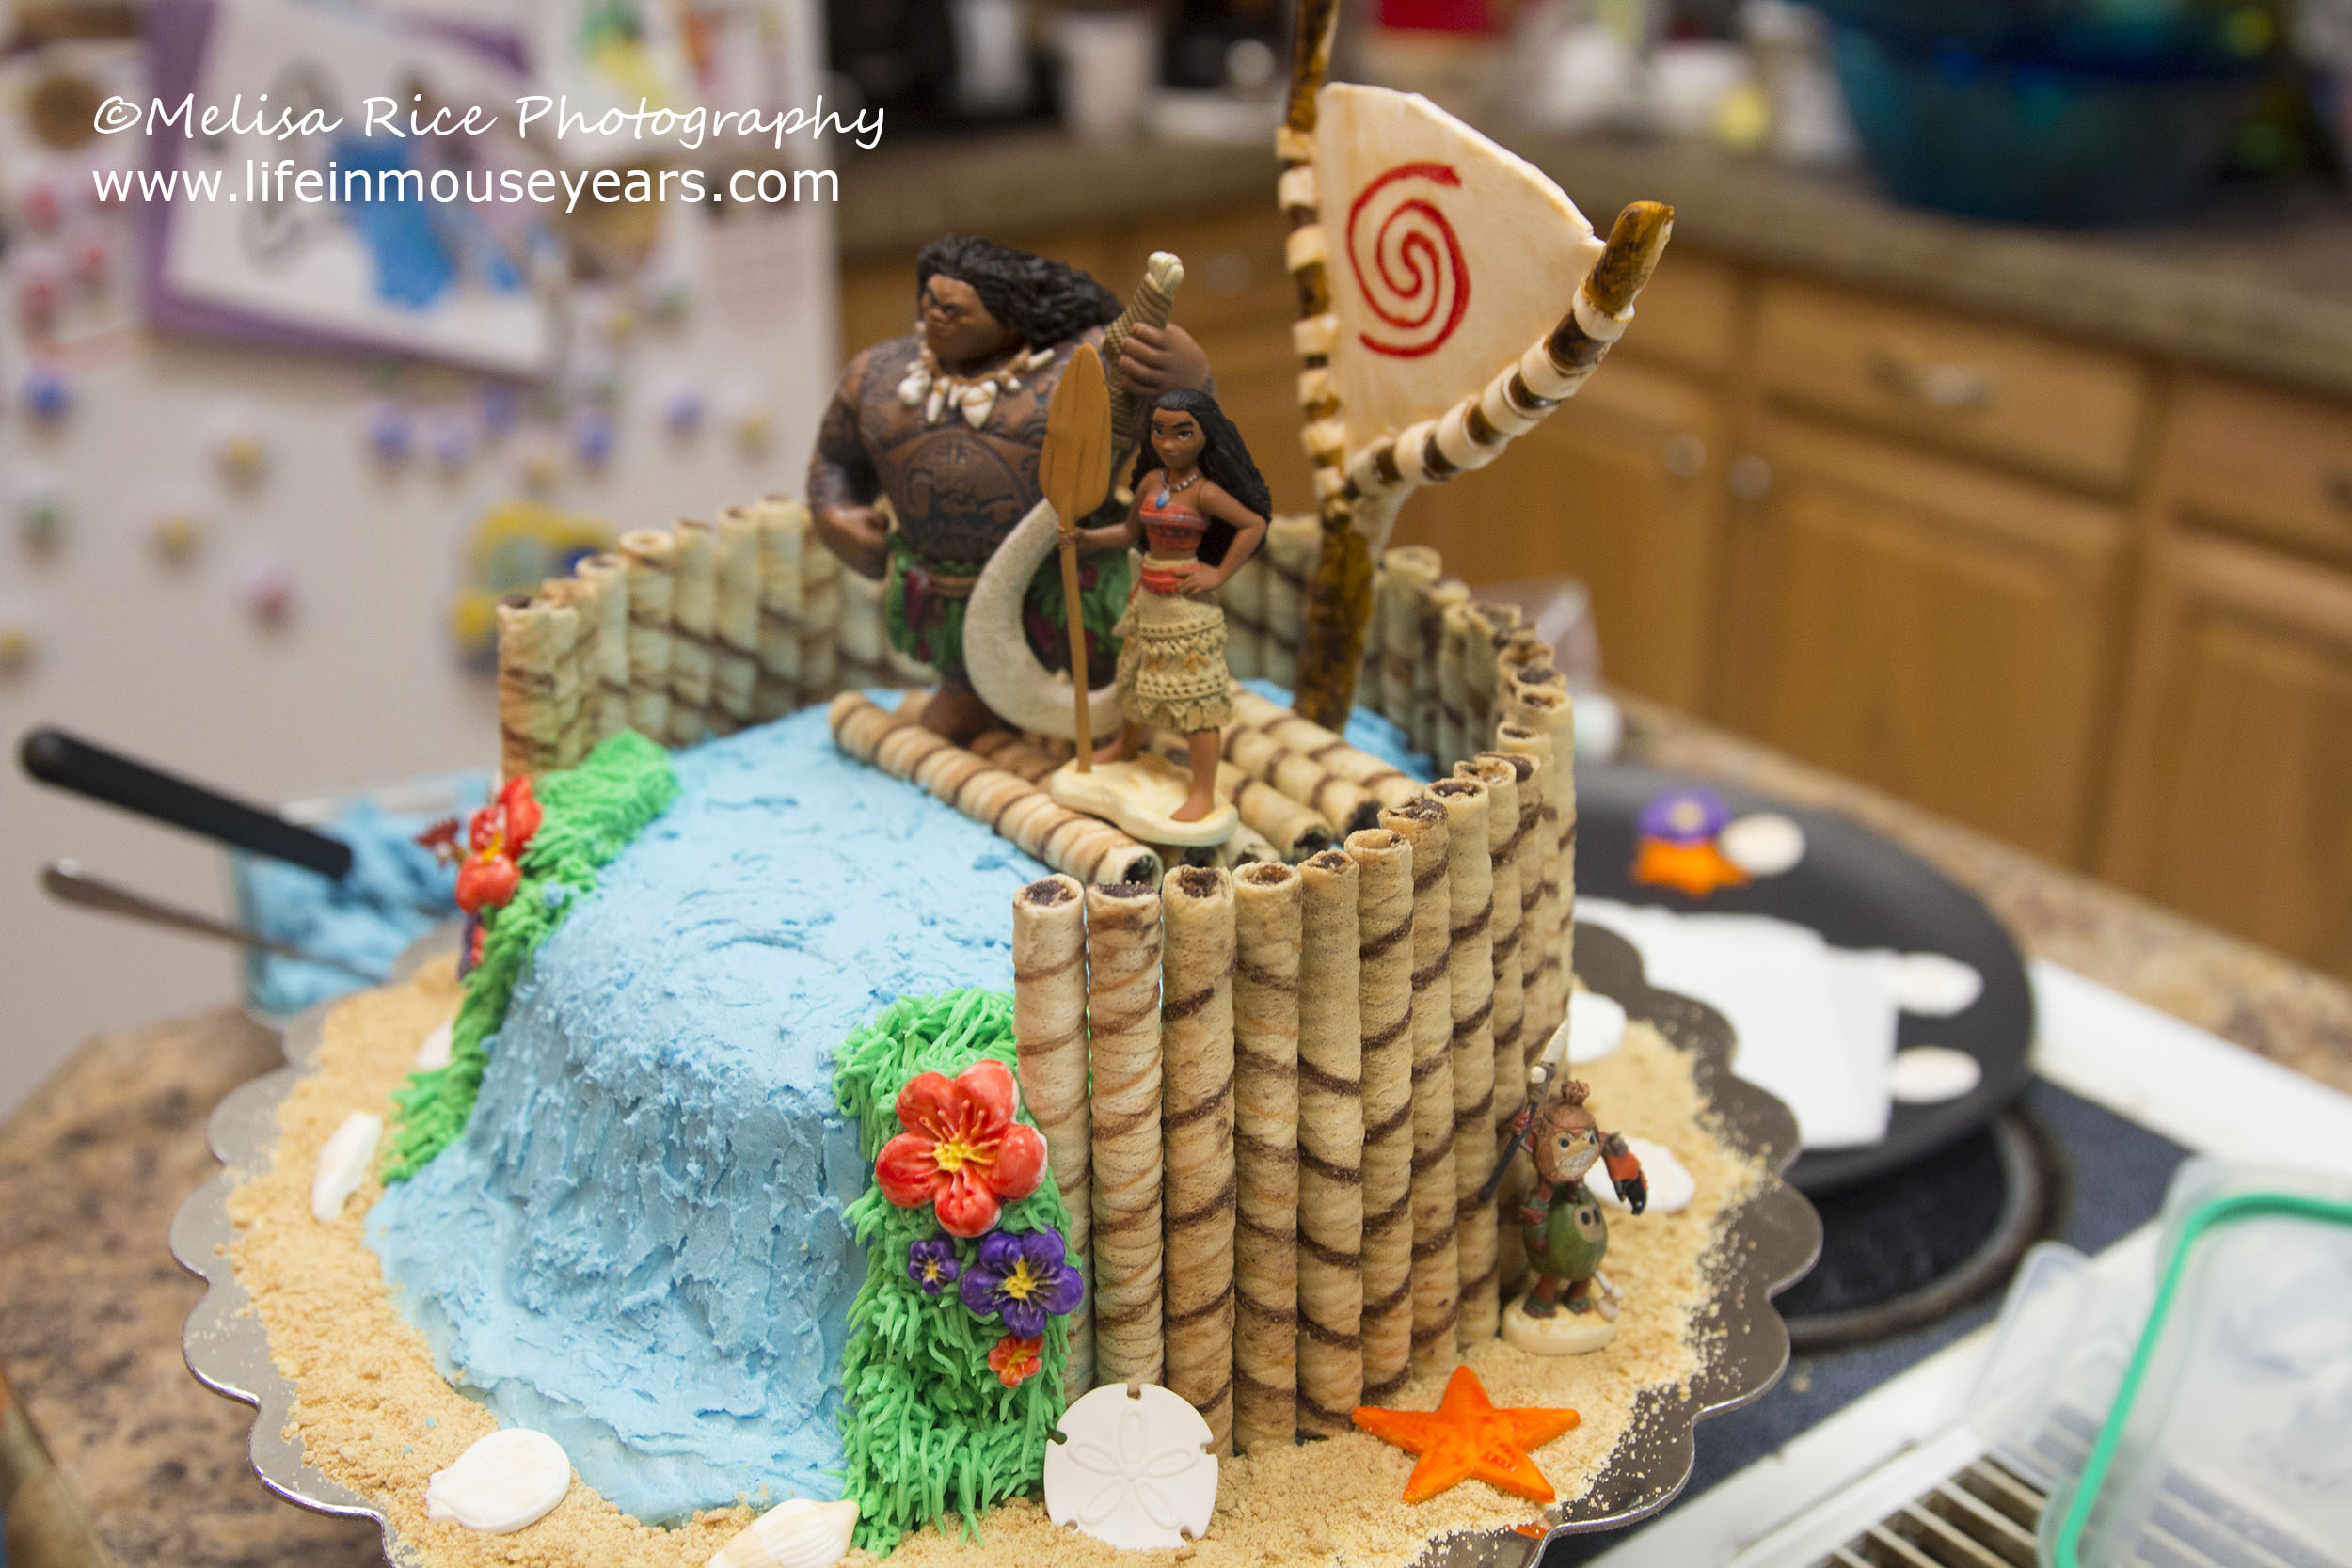
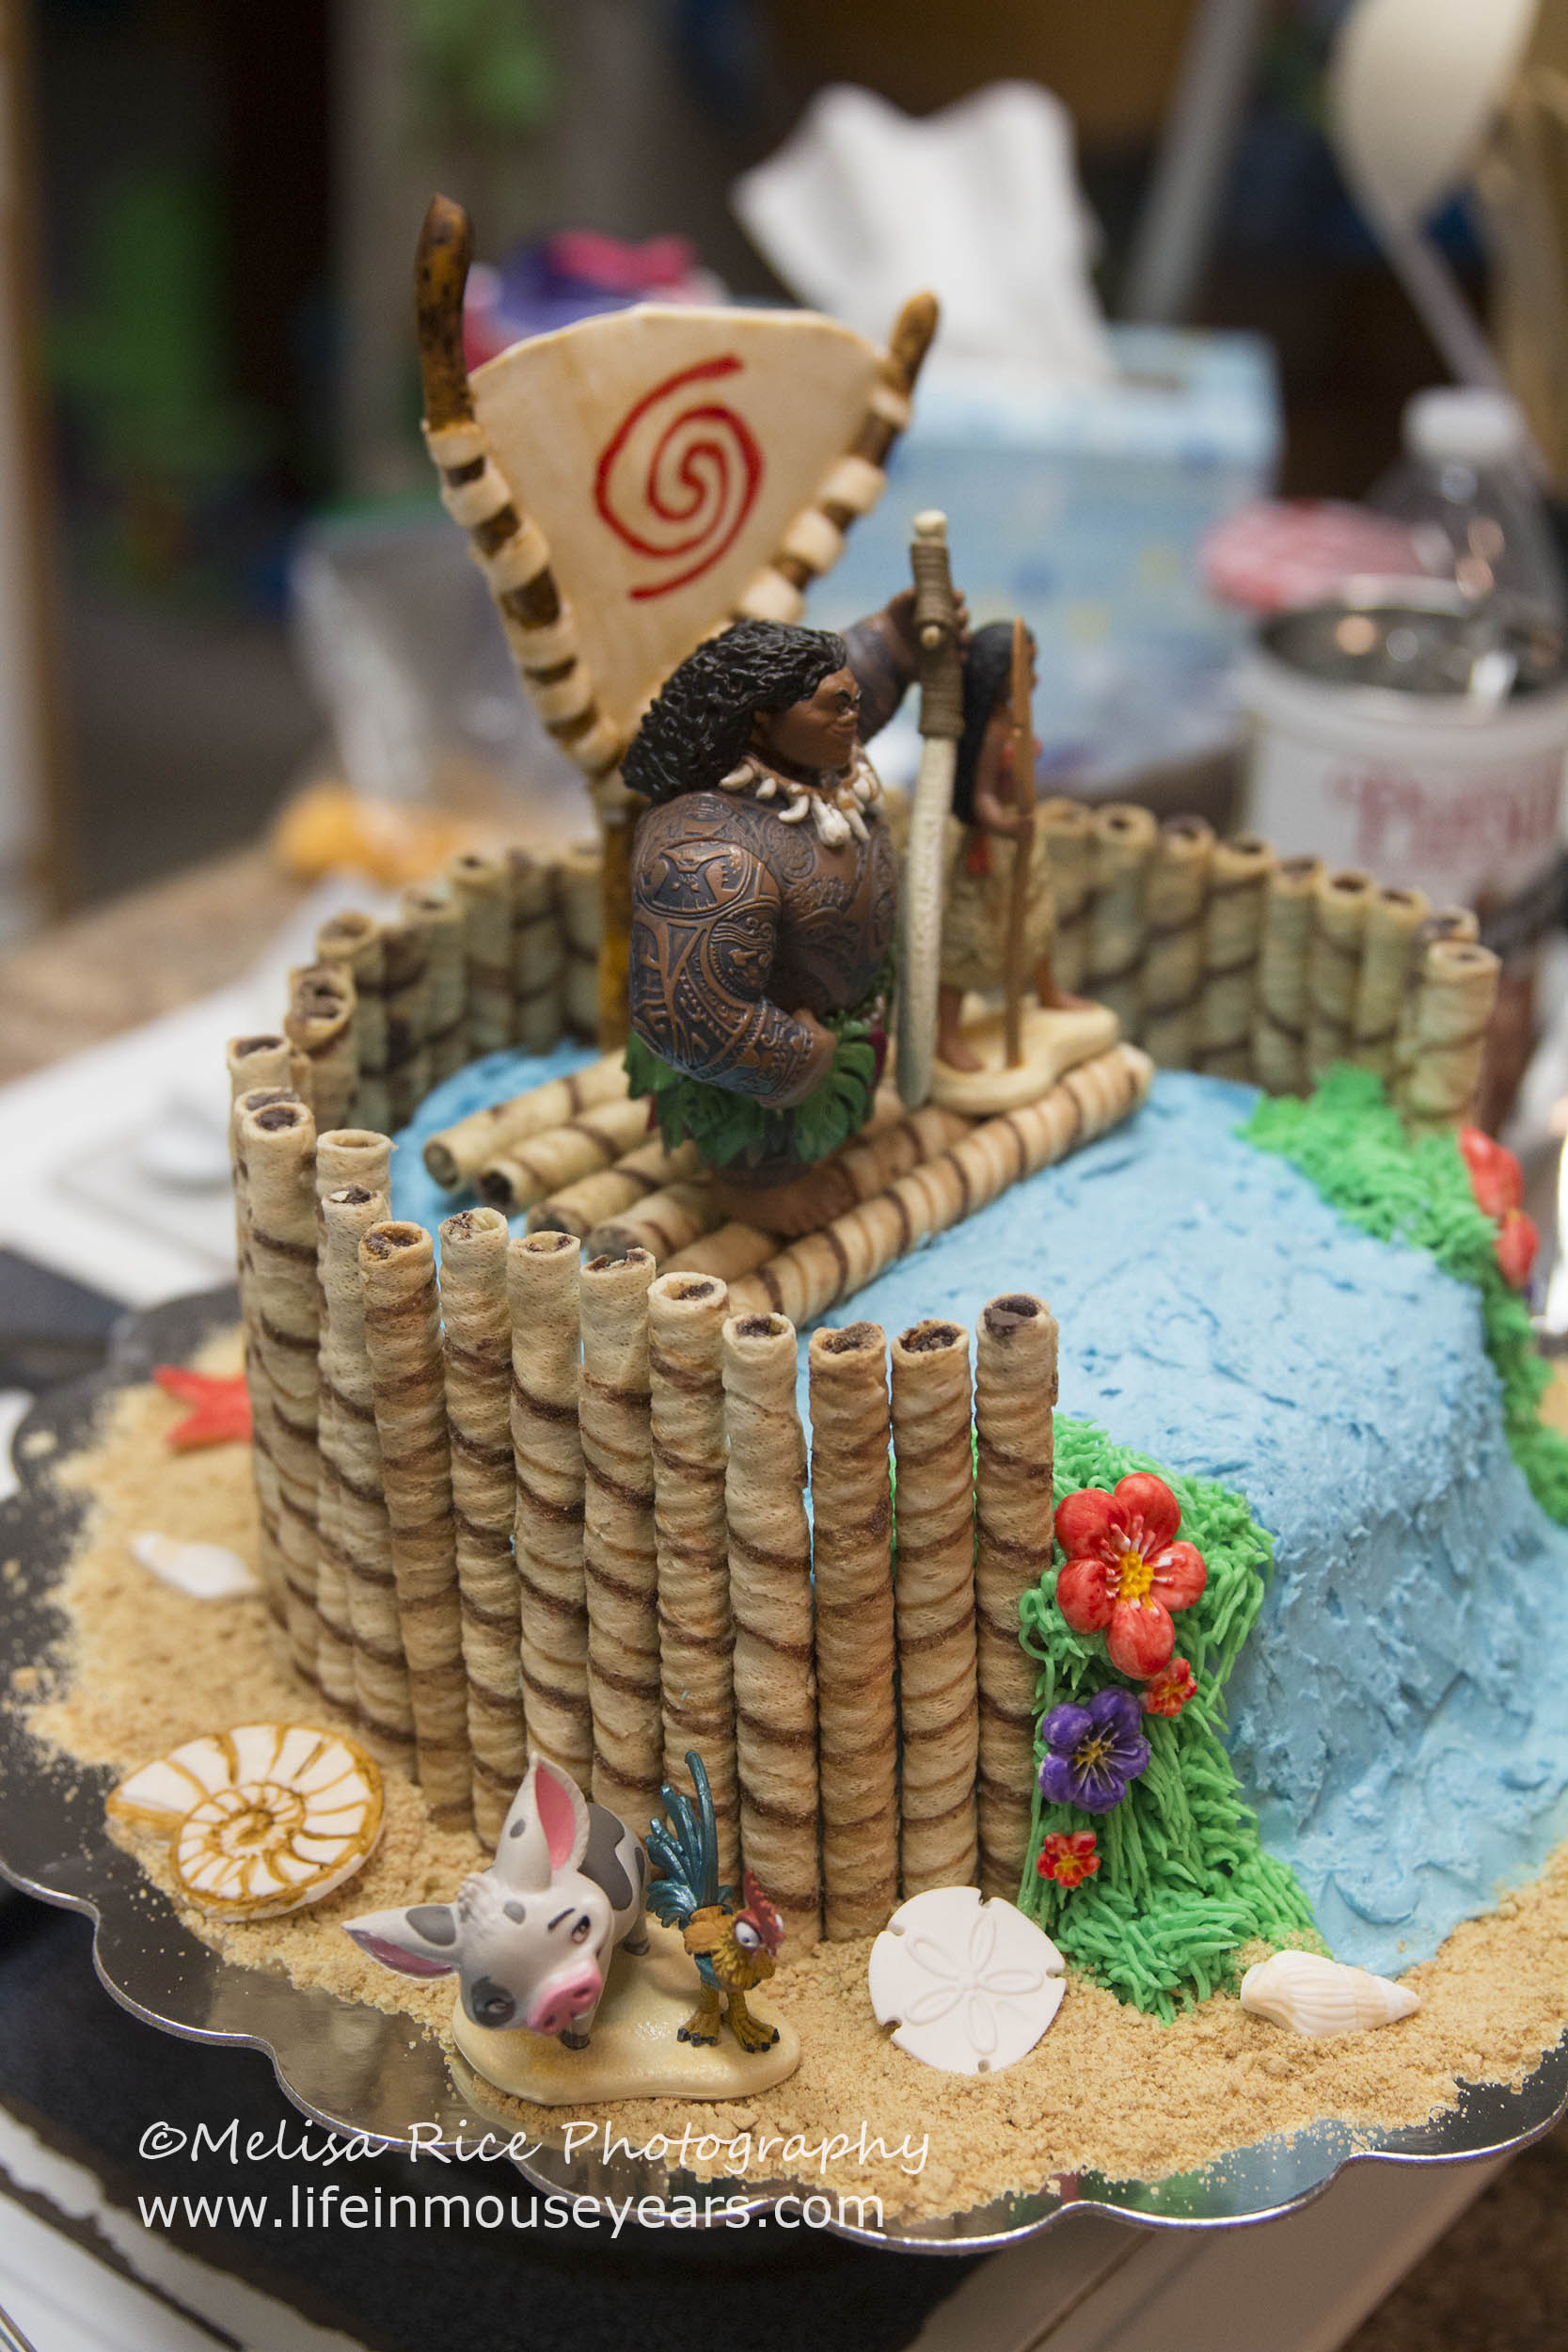
Next, for the light blue frosting, I covered the entire cake in the light blue frosting to signify the ocean water. For the waterfall on the front of the cake, I made it flow downwards (frosting in a downward motion) and used more frosting (to look thicker at the bottom of the waterfall) as it went onto the cake board.
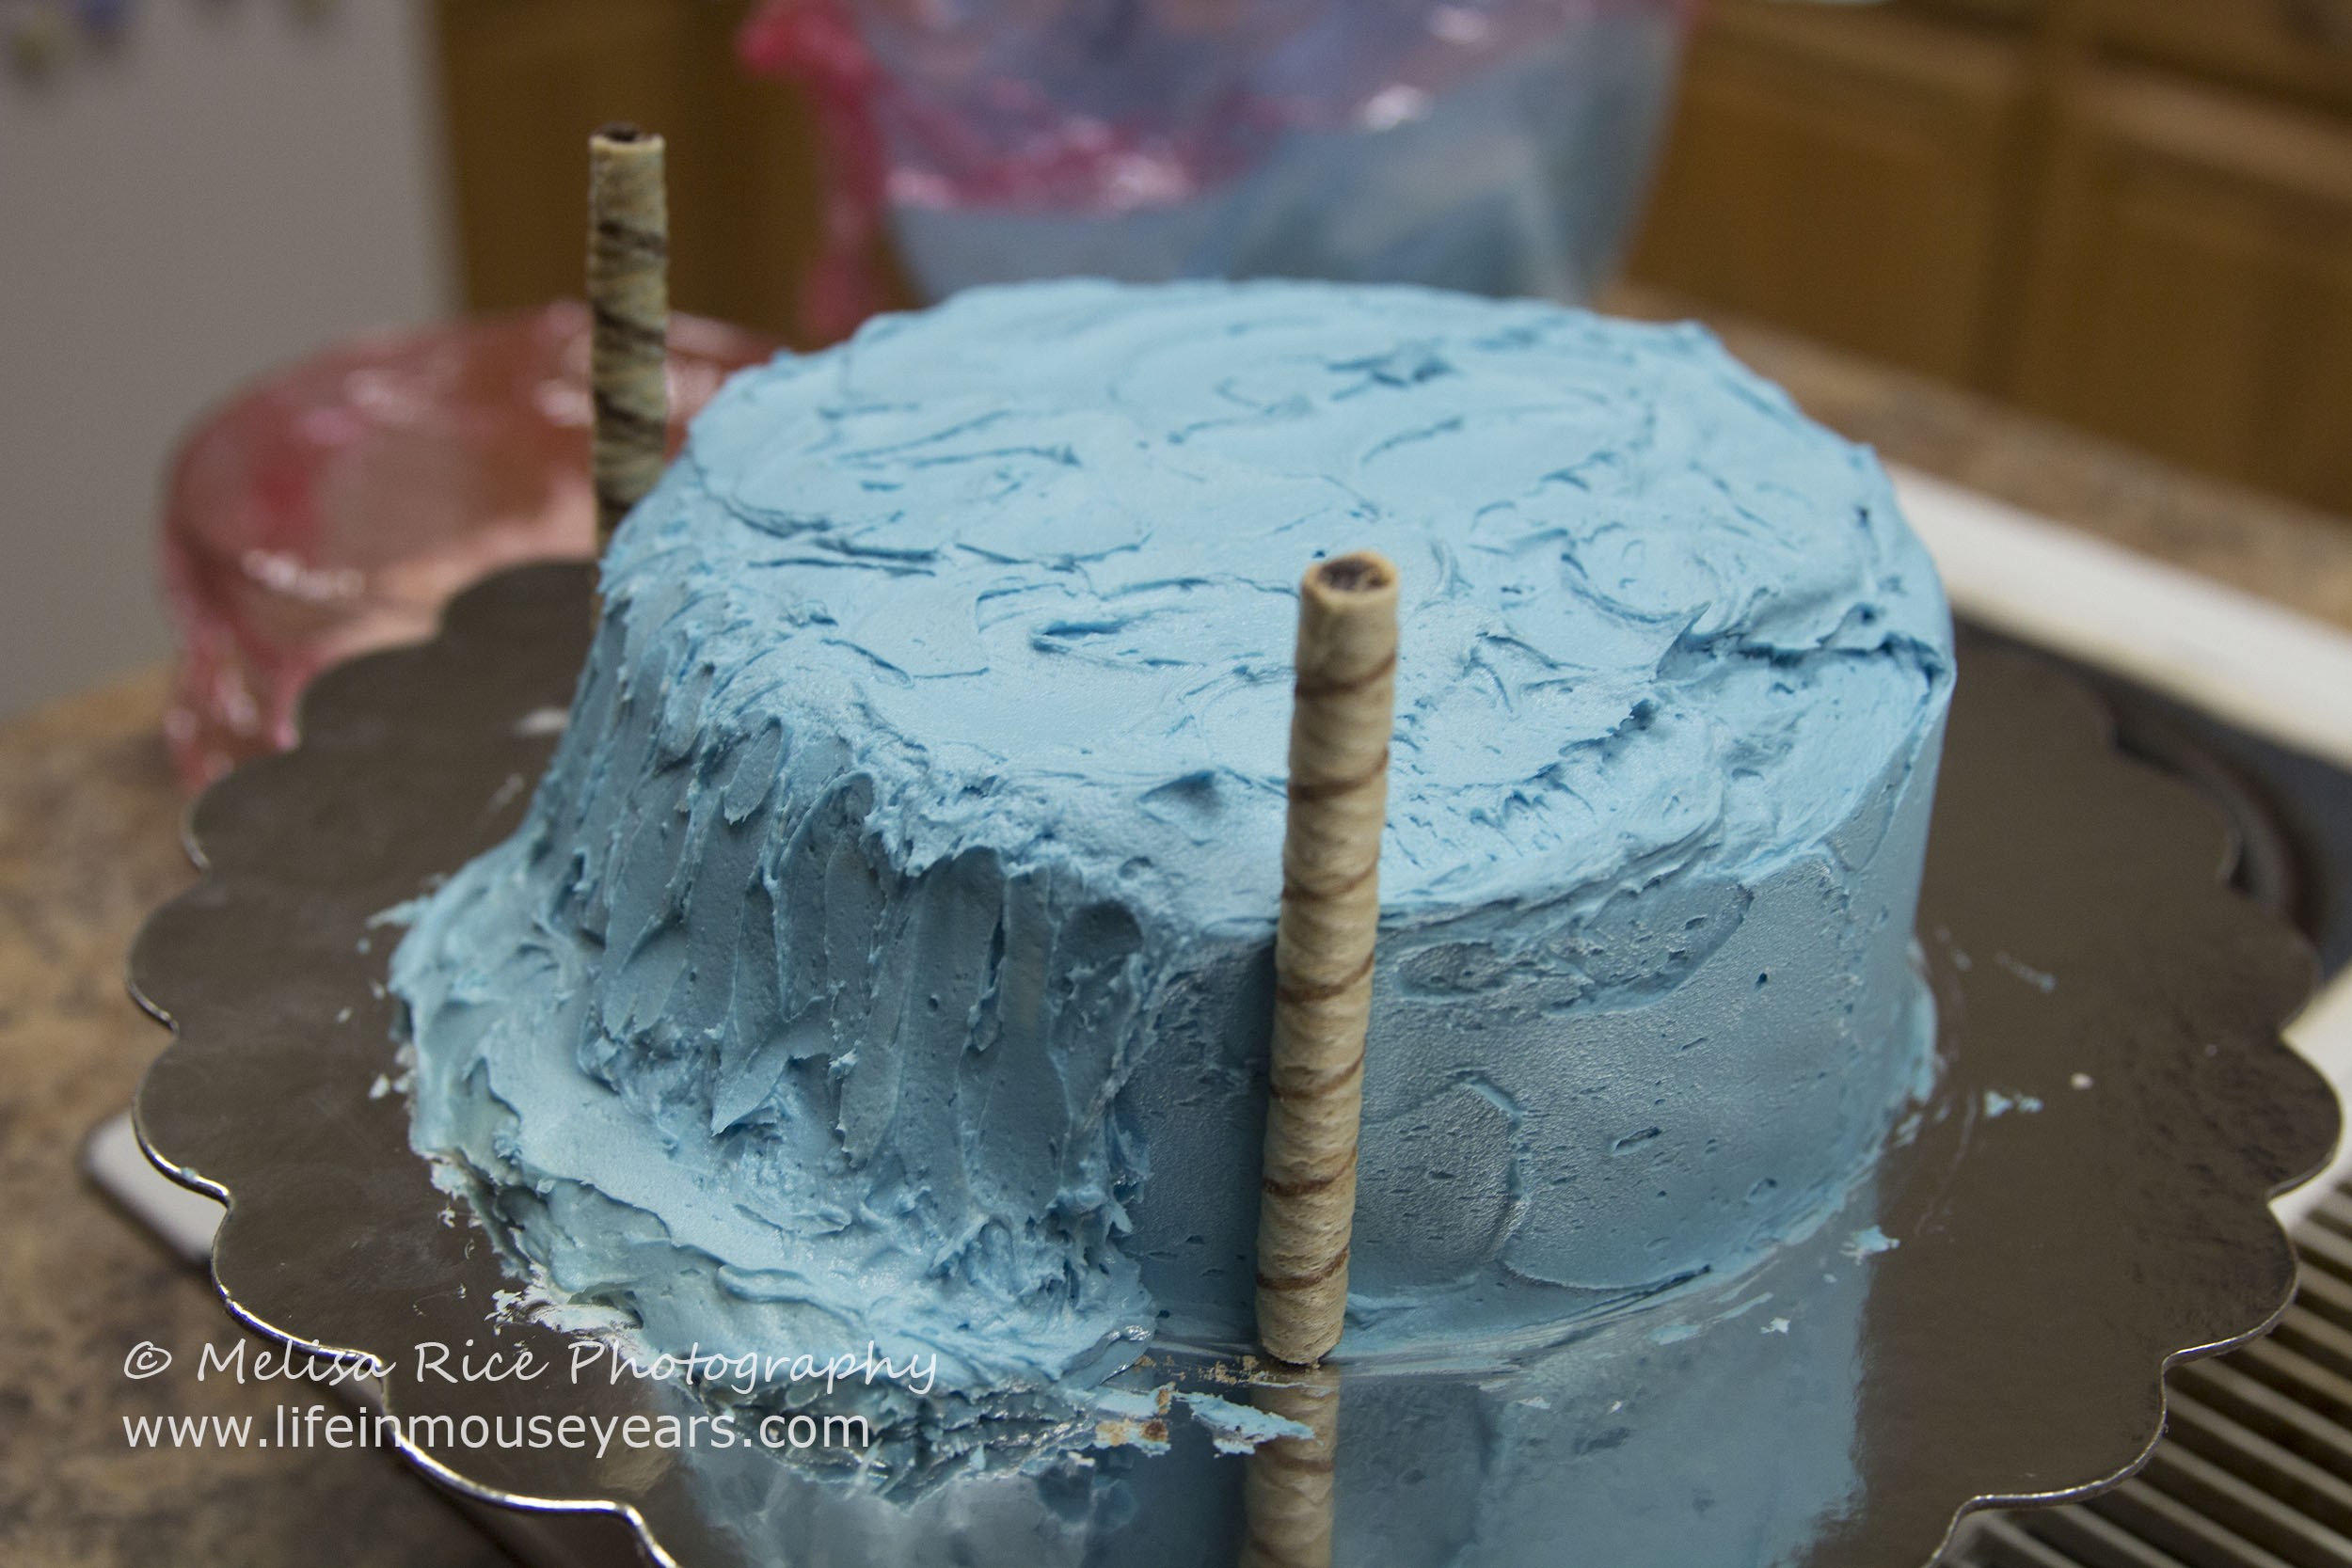
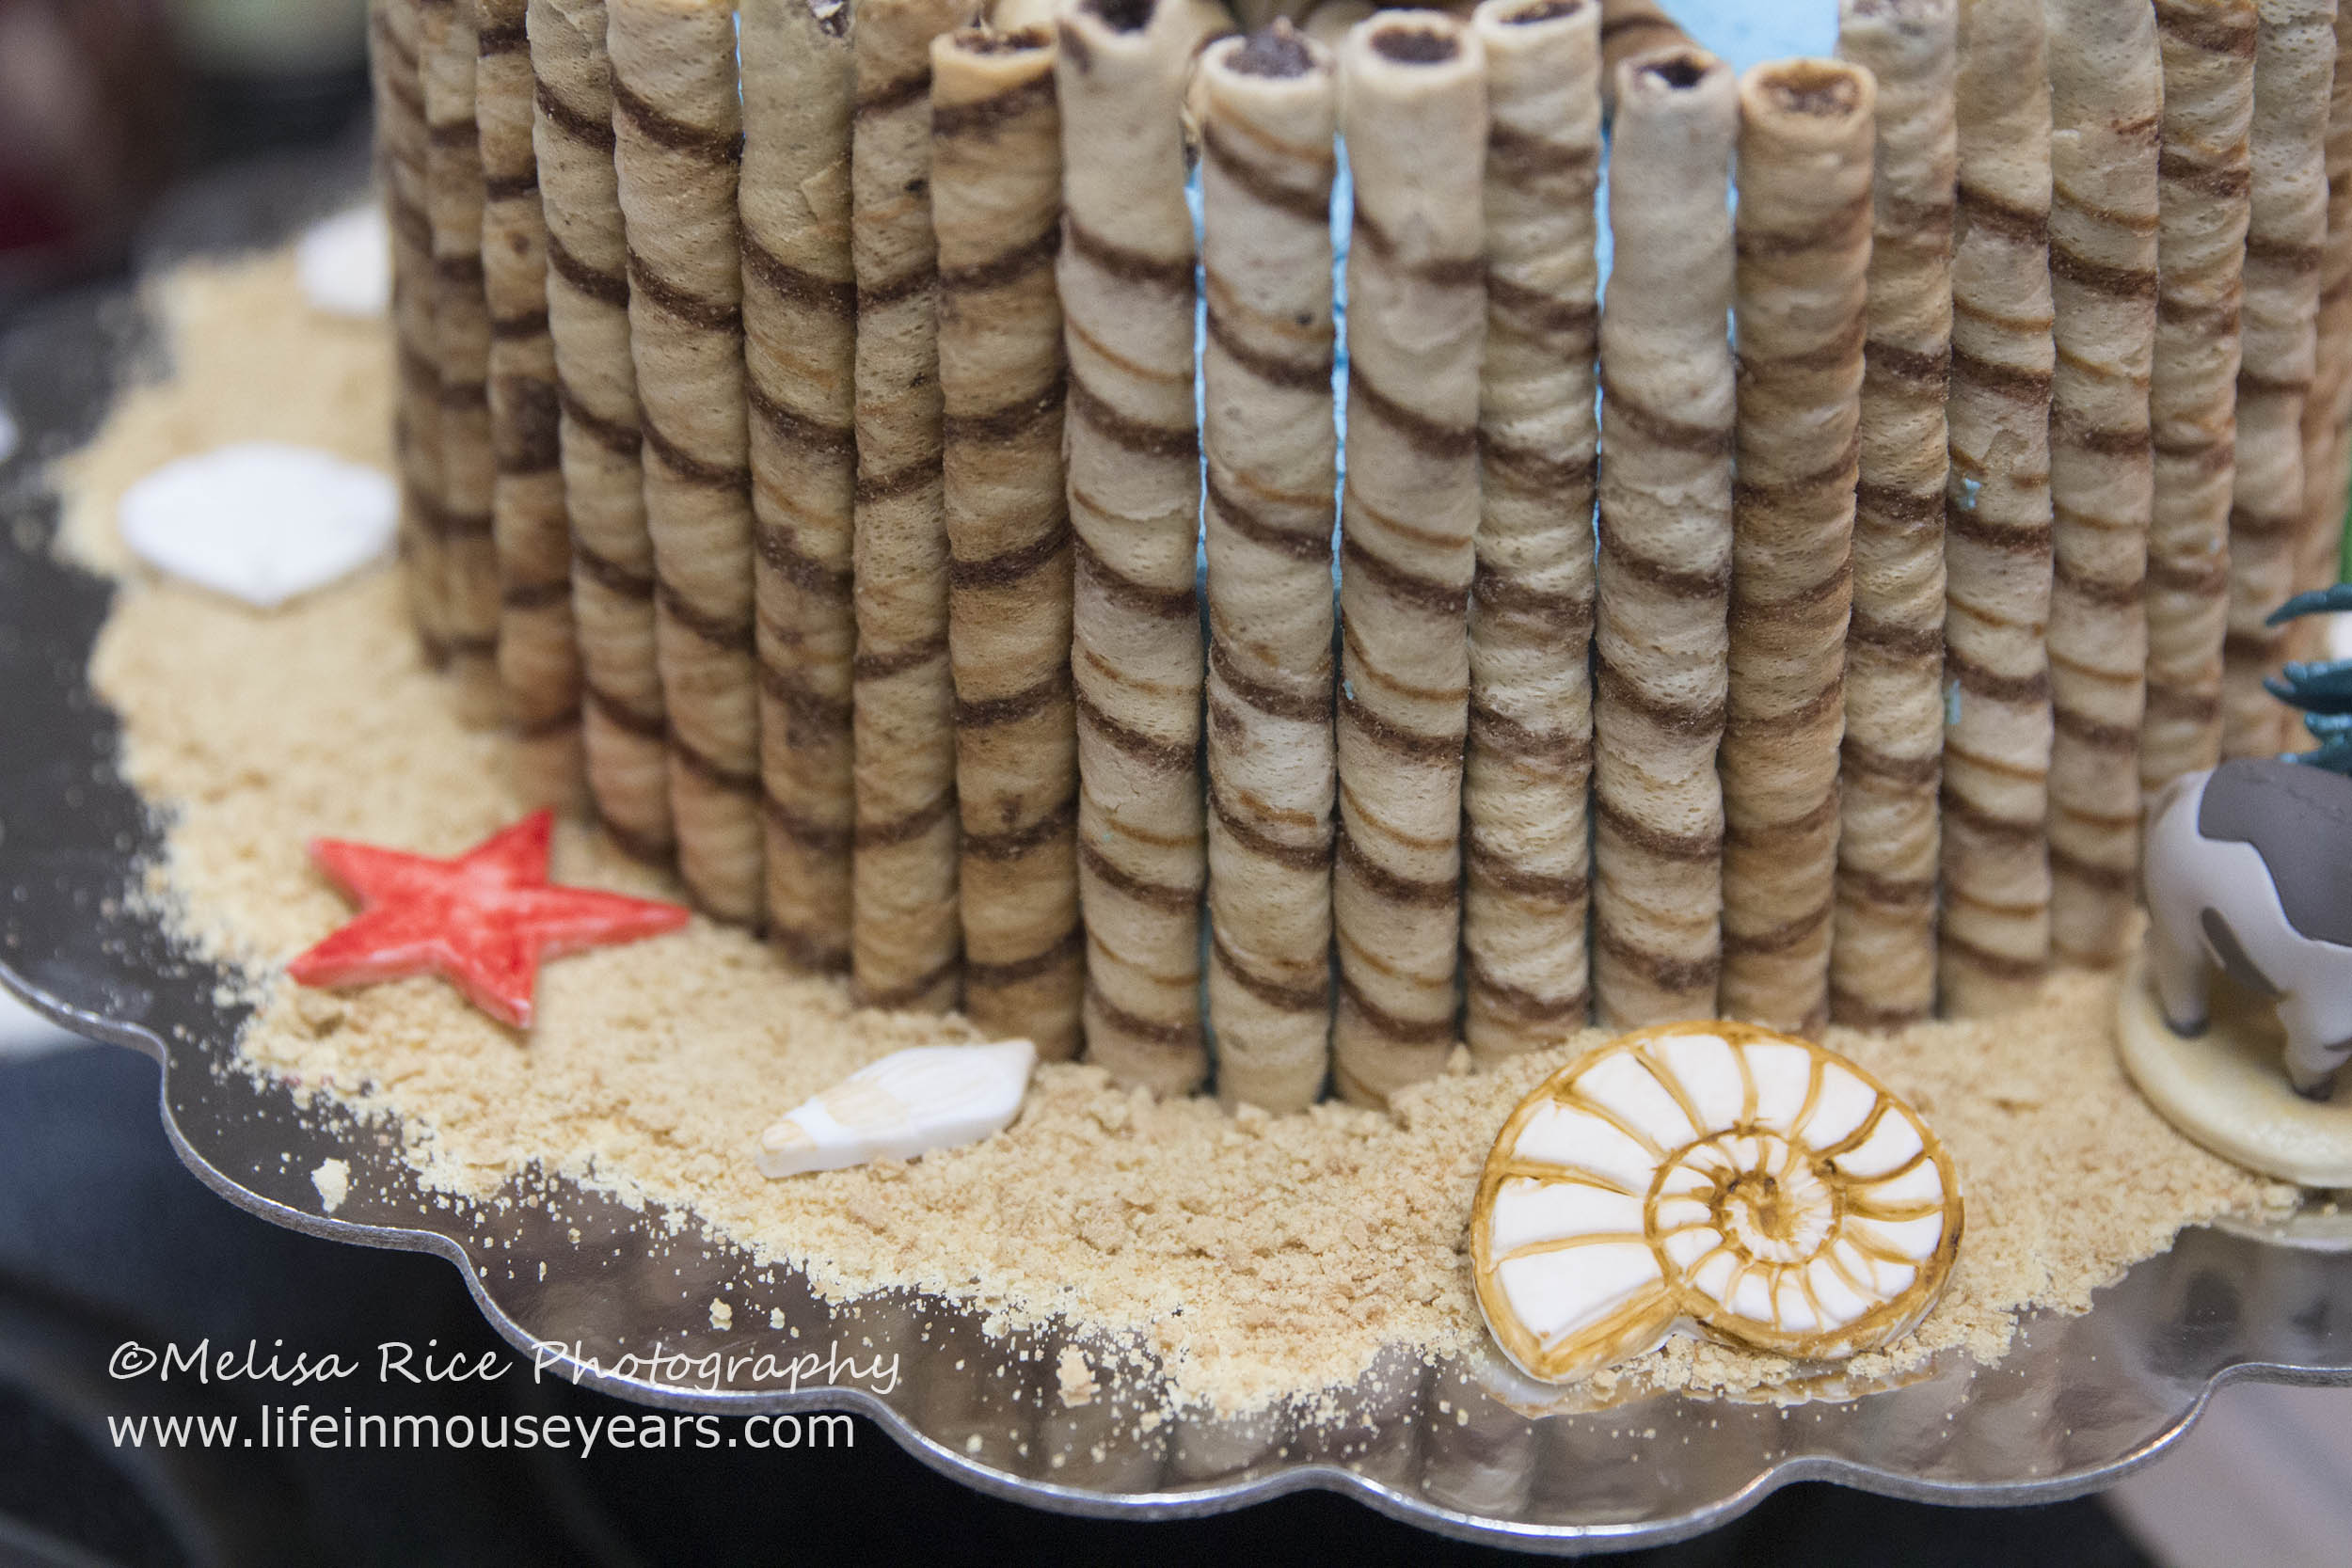
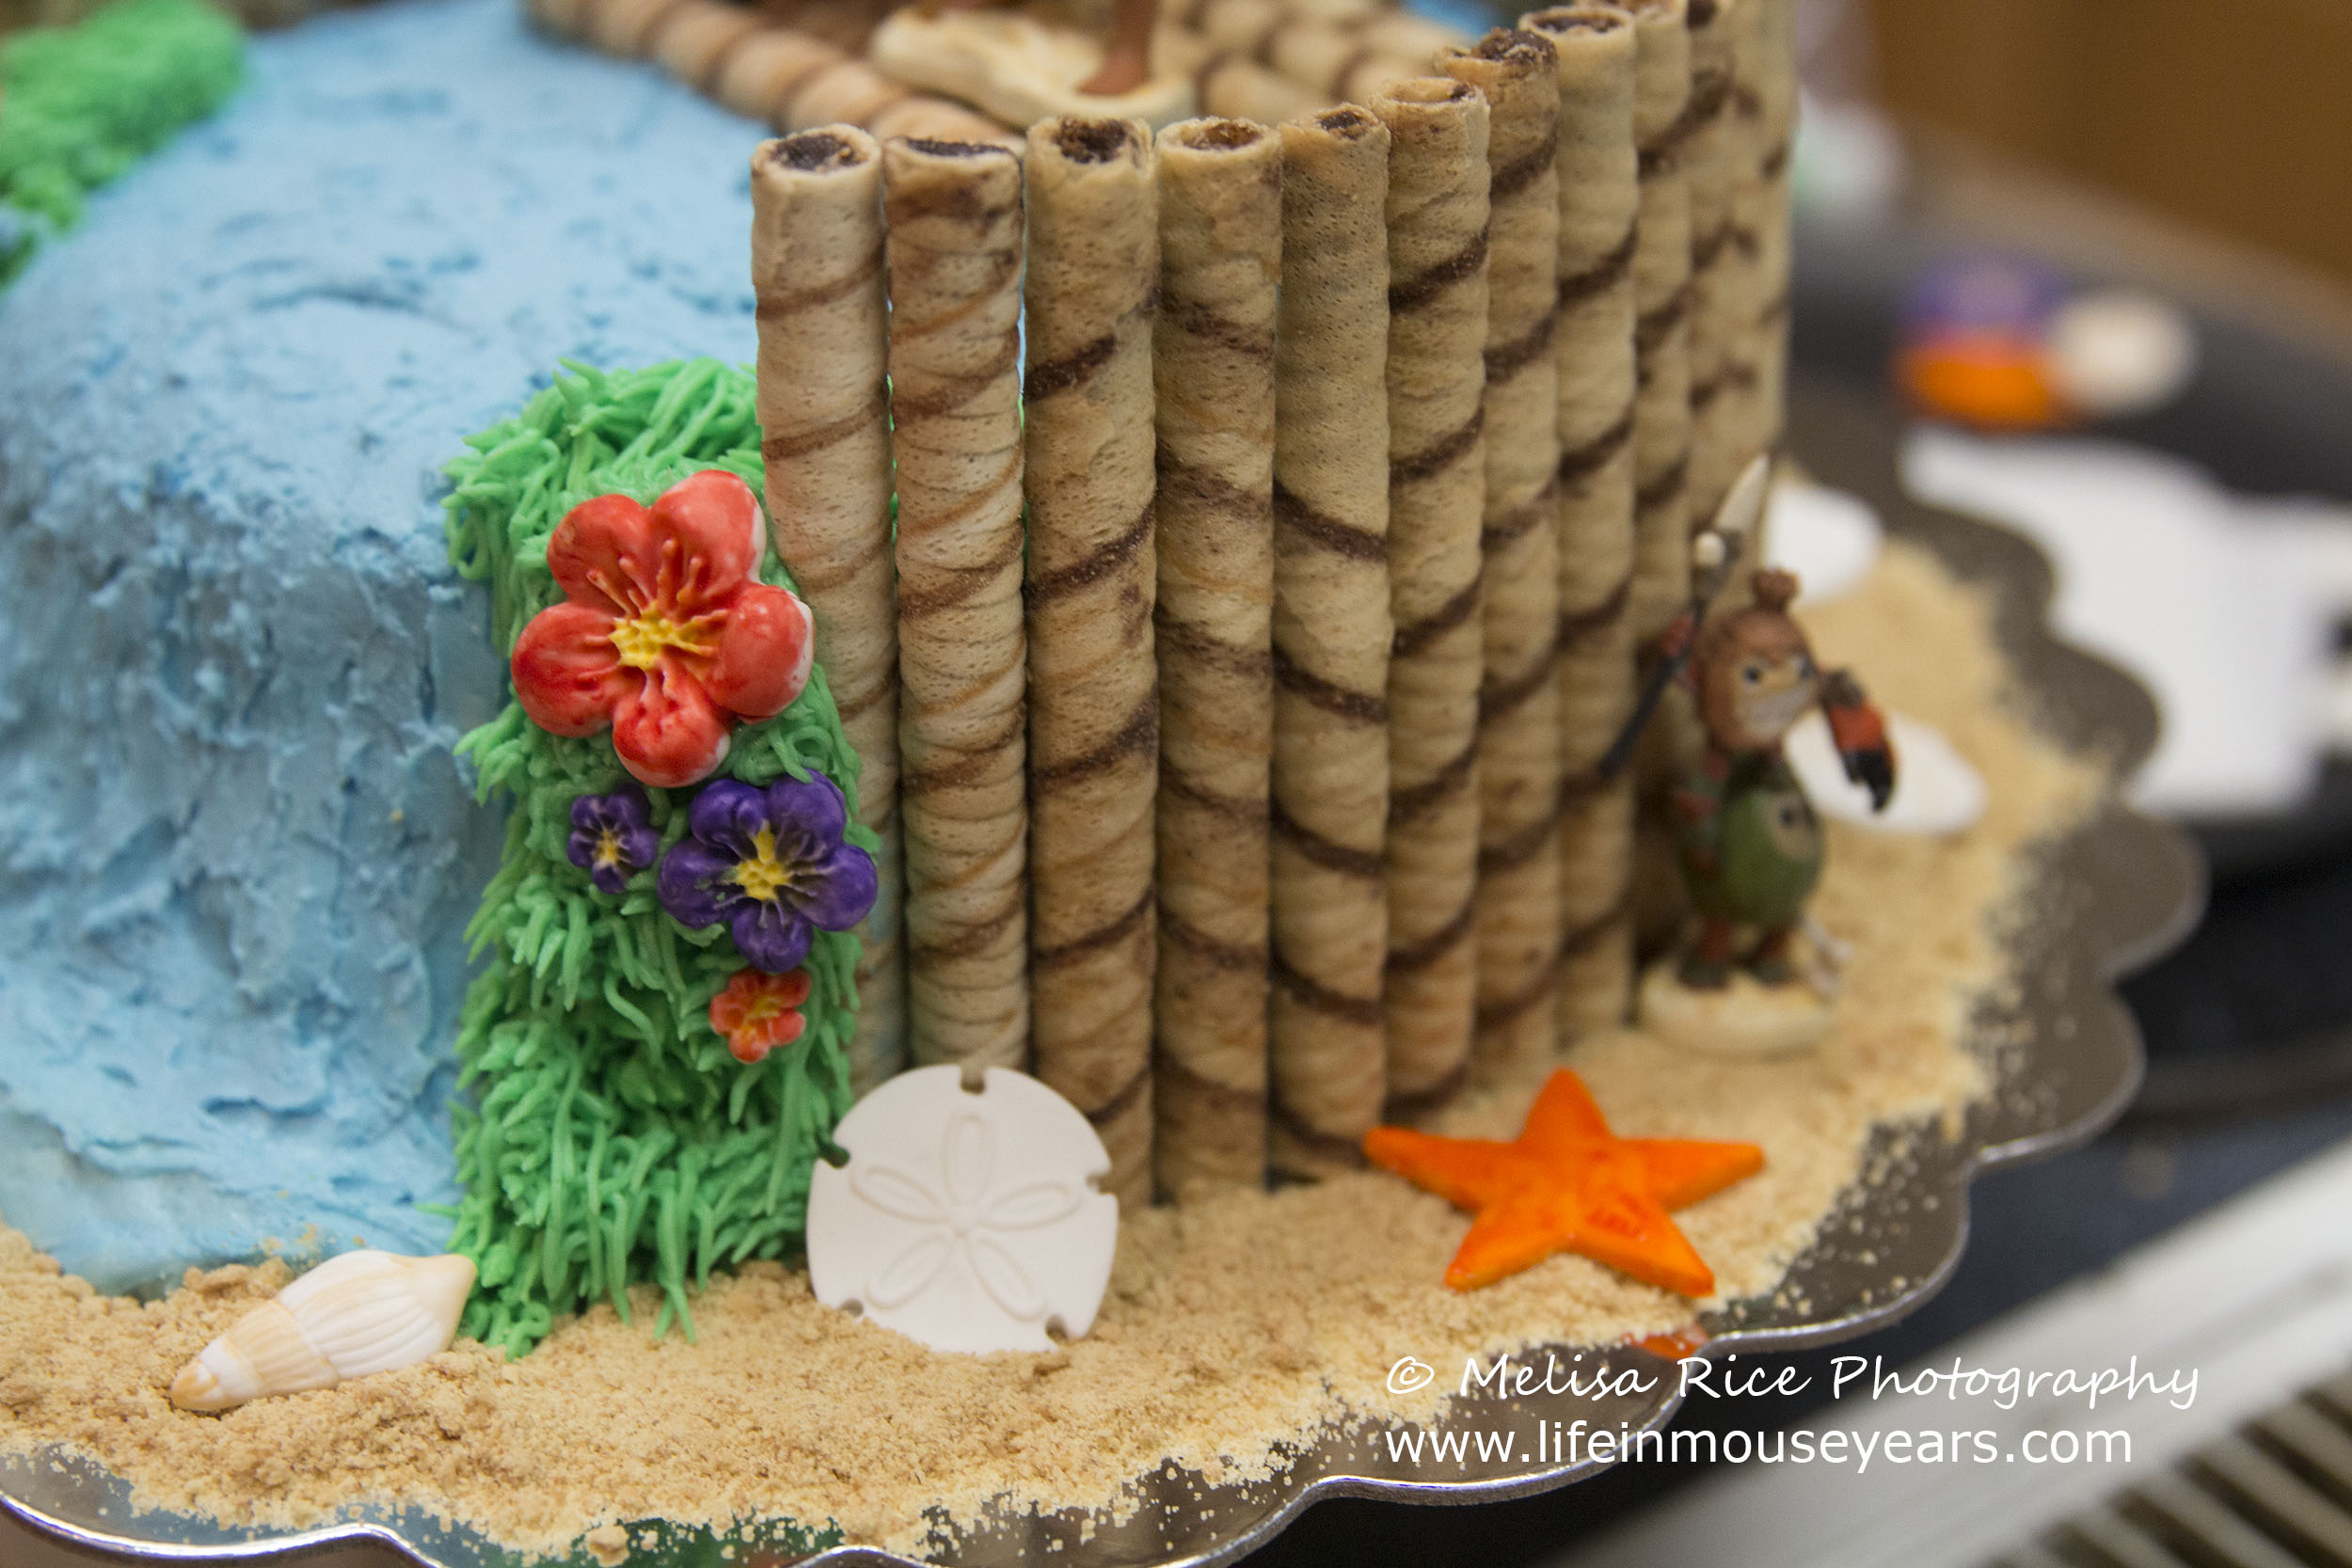
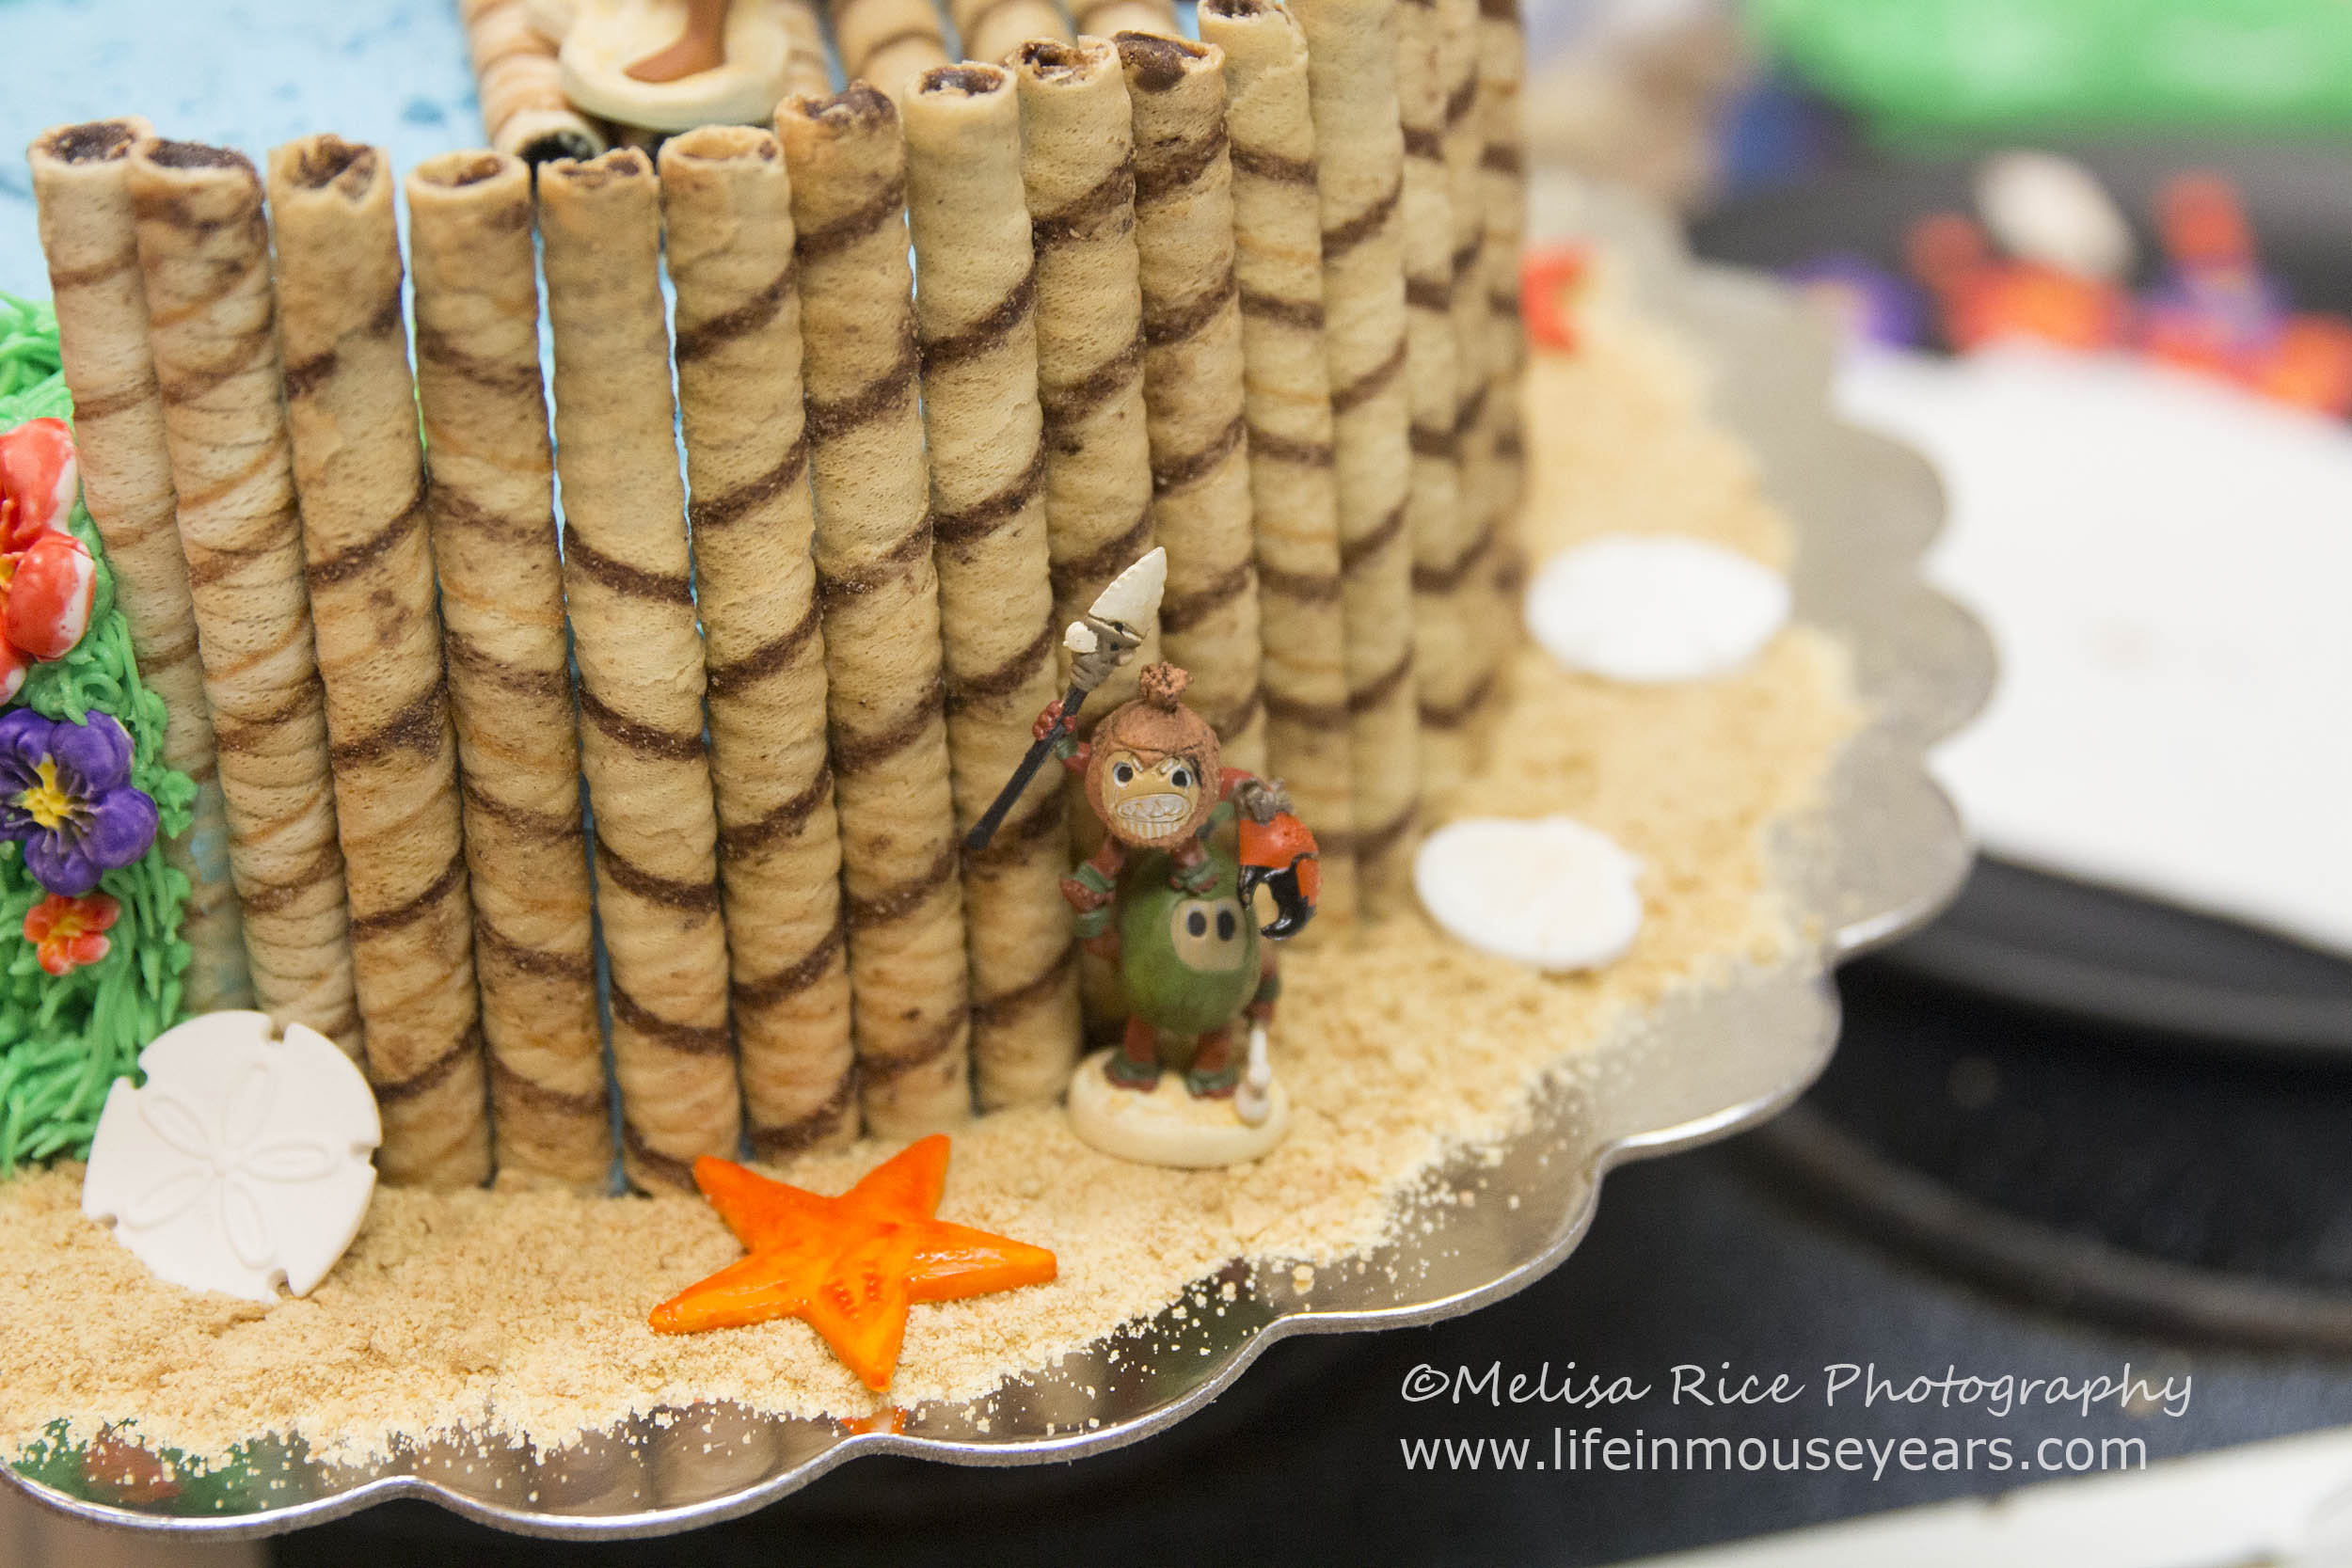
Add Piroulines
After the ocean and waterfall are added to the cake, I then took Piroulines and added them to the side of the cake. I left a little room next to the waterfall. Maybe a half an inch. Then I started adding the Piroulines all around the cake.
Grass
Next up is the grass. I used the Wilton grass tip to add some grass down both sides of the waterfall. In addition to adding grass at the top of the cake rounding behind the Piroulines a little. Don’t add the grass until you have added the Piroulines. This way when you add the grass it looks like it is growing out and in front of the Piroulines. It really helps with the effect.
Tip: If you have never used the grass tip before, practice it a little before doing it on the cake. It is not a hard effect, but it is all about releasing your squeeze on the bag as you pull the tip away from the cake.

Sand
Ocean and beach go hand in hand. Therefore, you need to have a sandy beach. I took the crushed graham crackers and put it all around the cake on the cake board. Putting it up against the Piroulines.
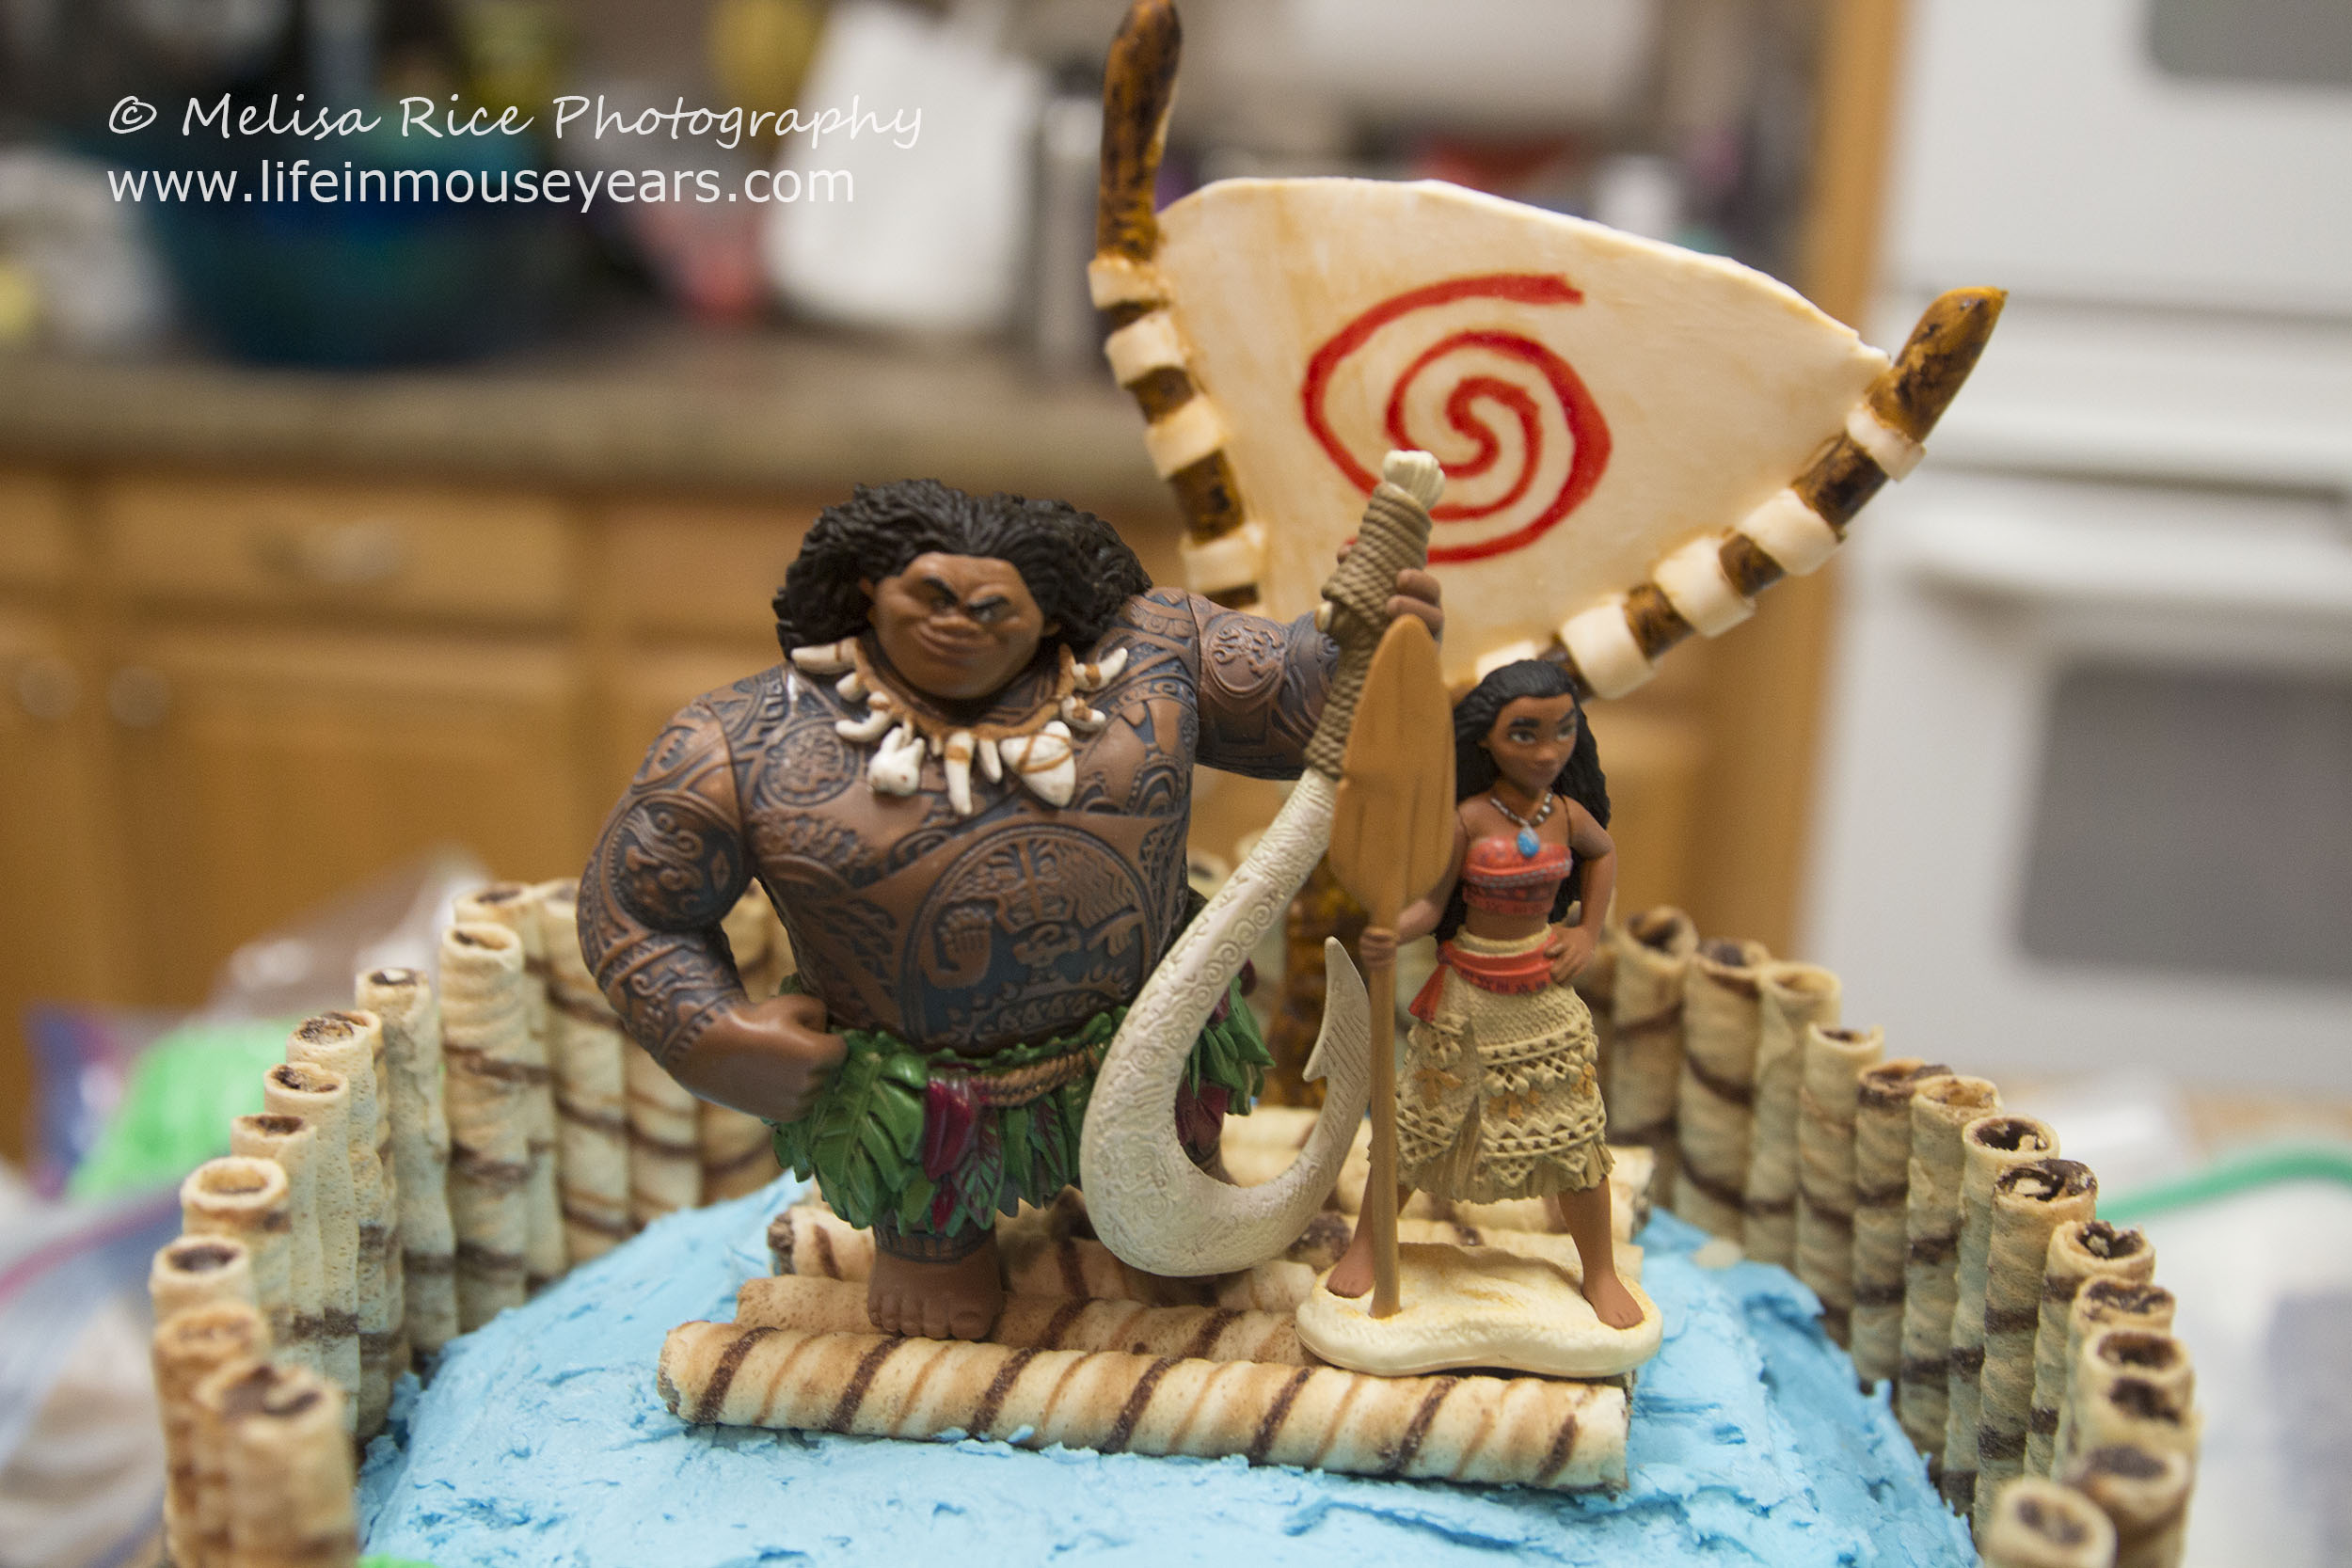
Boat
I was planning on making the boat out of the gum paste. However, with all the difficulties I had with the gum paste, I ran out of time. Therefore, since I had extra Pirouline’s, I used them to make a raft. Laying them on the cake next to each other, I think I used 5 or 6 in a row.
Add the Seashells
Next to add the Seashells and flowers to the Moana birthday cake. I placed the seashells in various places all around the cake in the “sand”.
To add the flowers, I added a little tuft of grass in the spot where I was placing the flowers to help the gum paste to stick in place. I varied the flower colors and sizes on each side of the waterfall.
Figurines
First I added the sail behind the boat. Next, I added the figurines, leaving Moana and Maui for very last once the cake was placed on the cake stand.

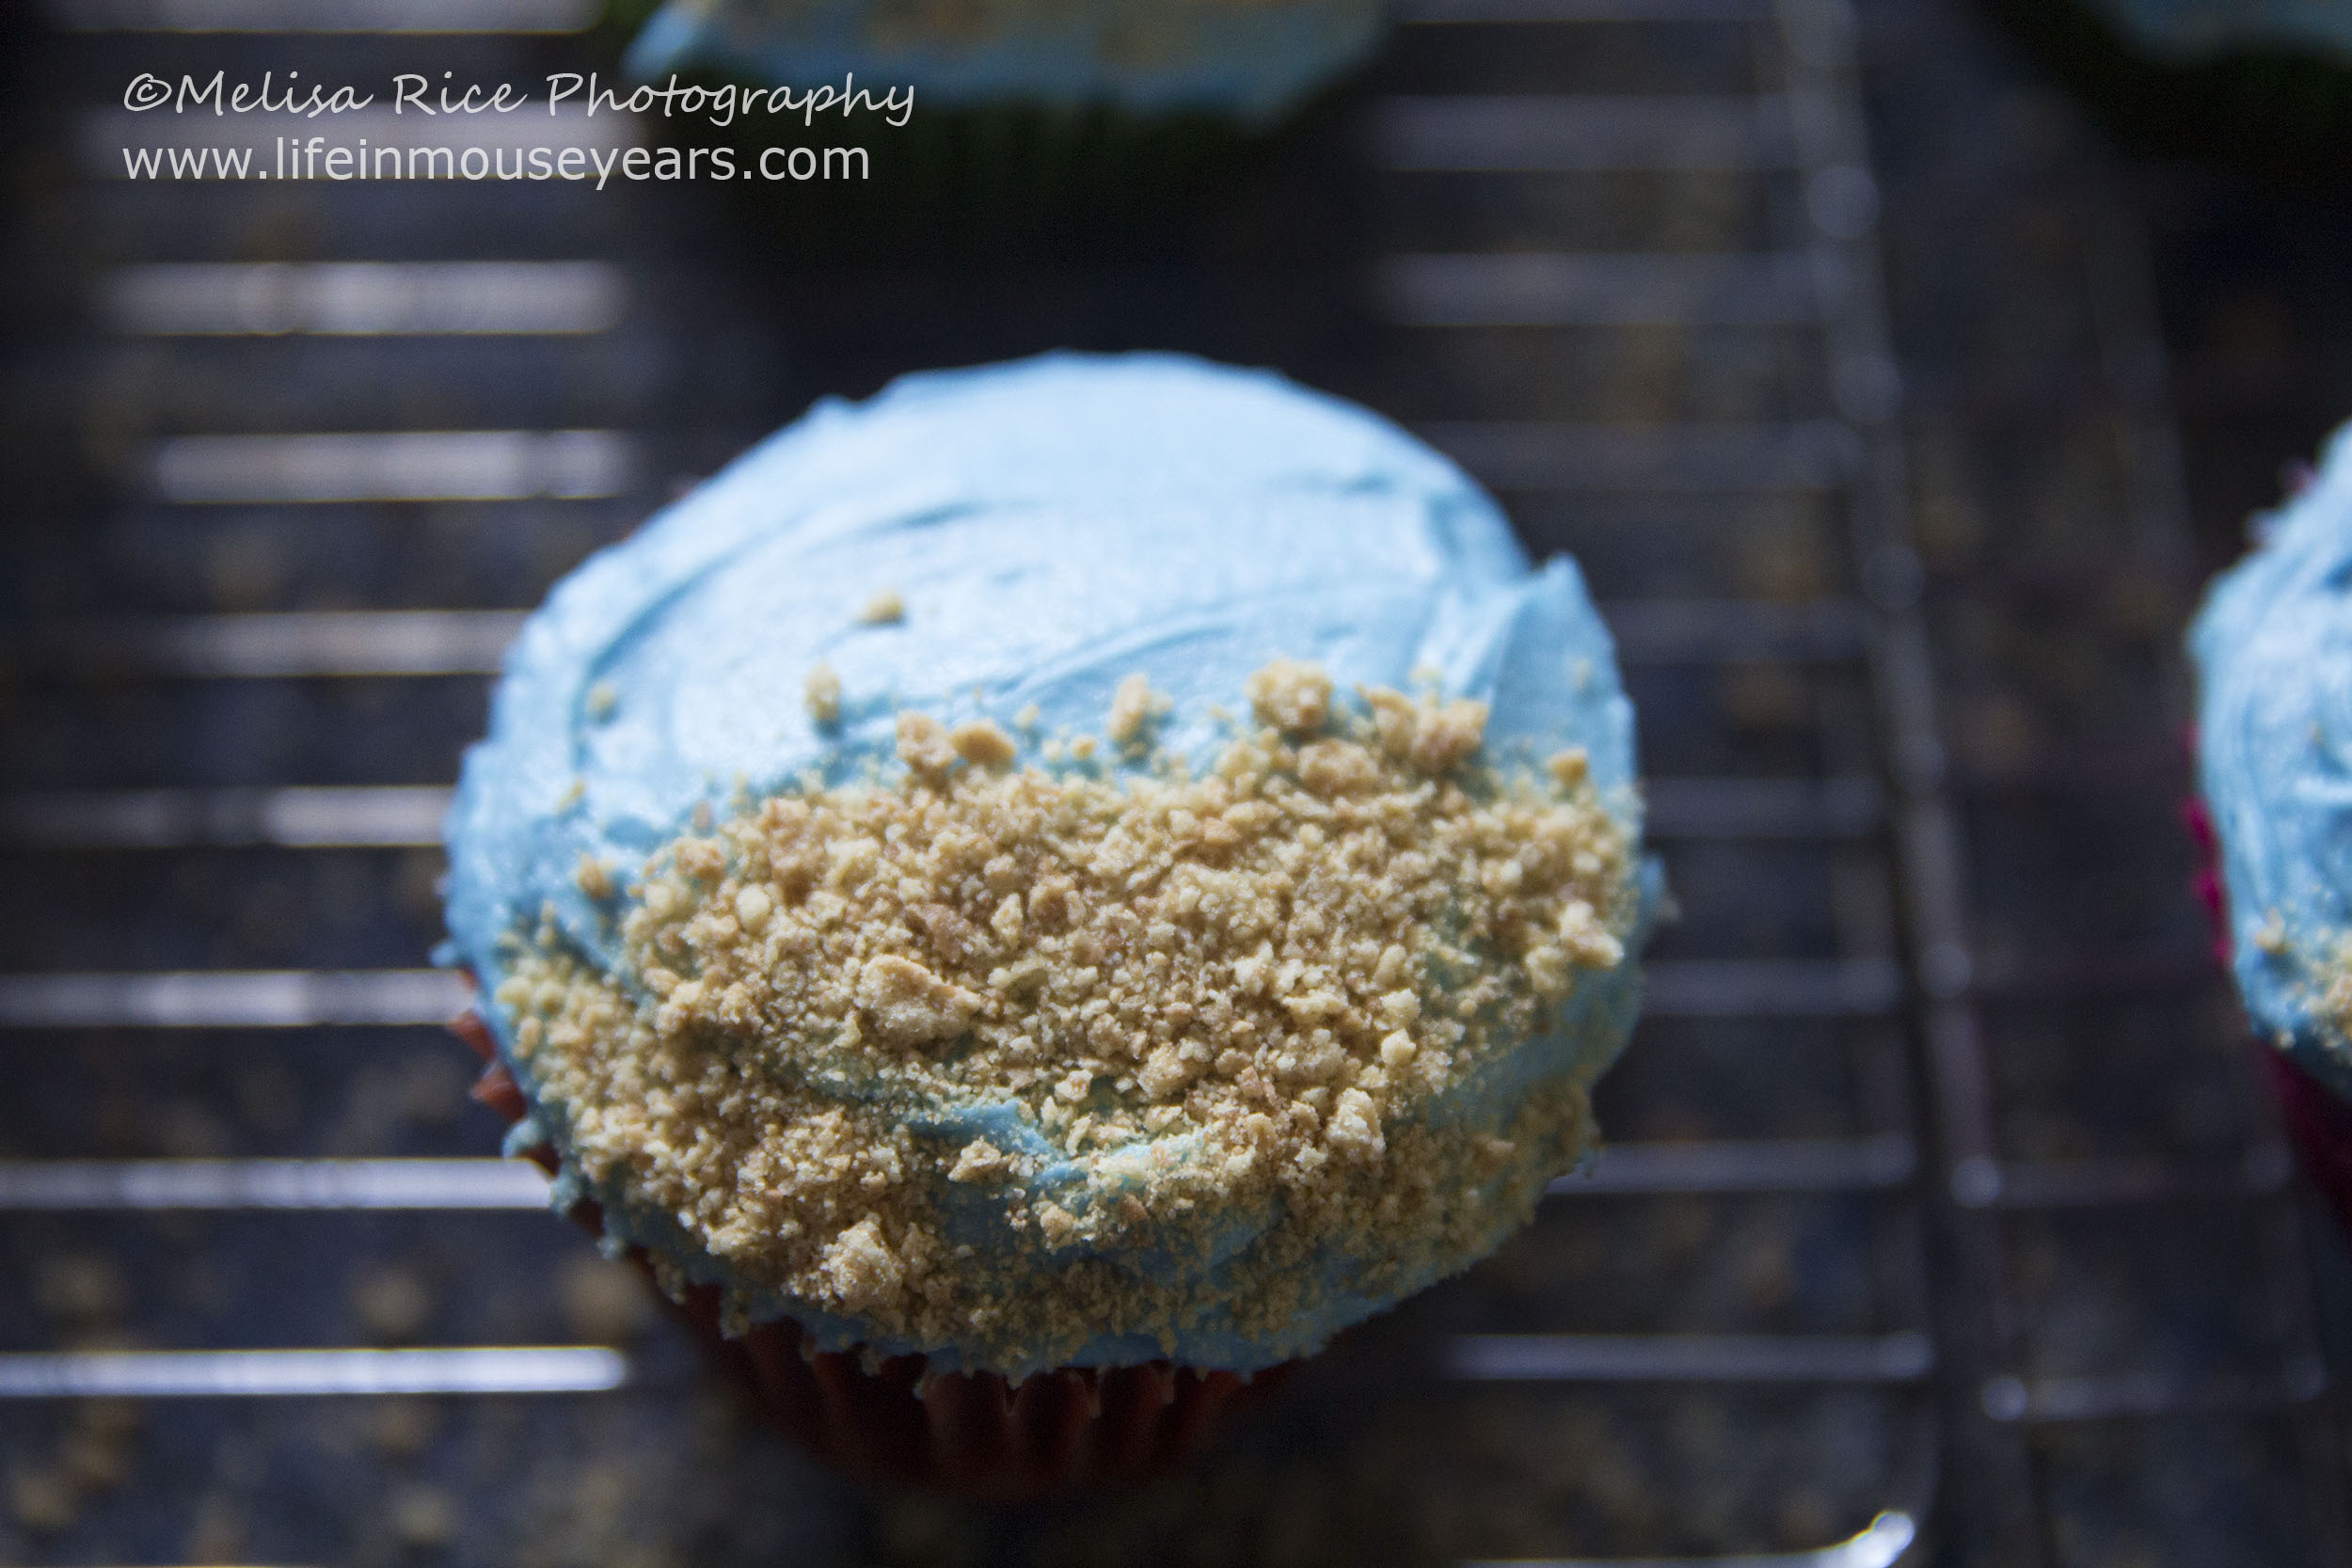
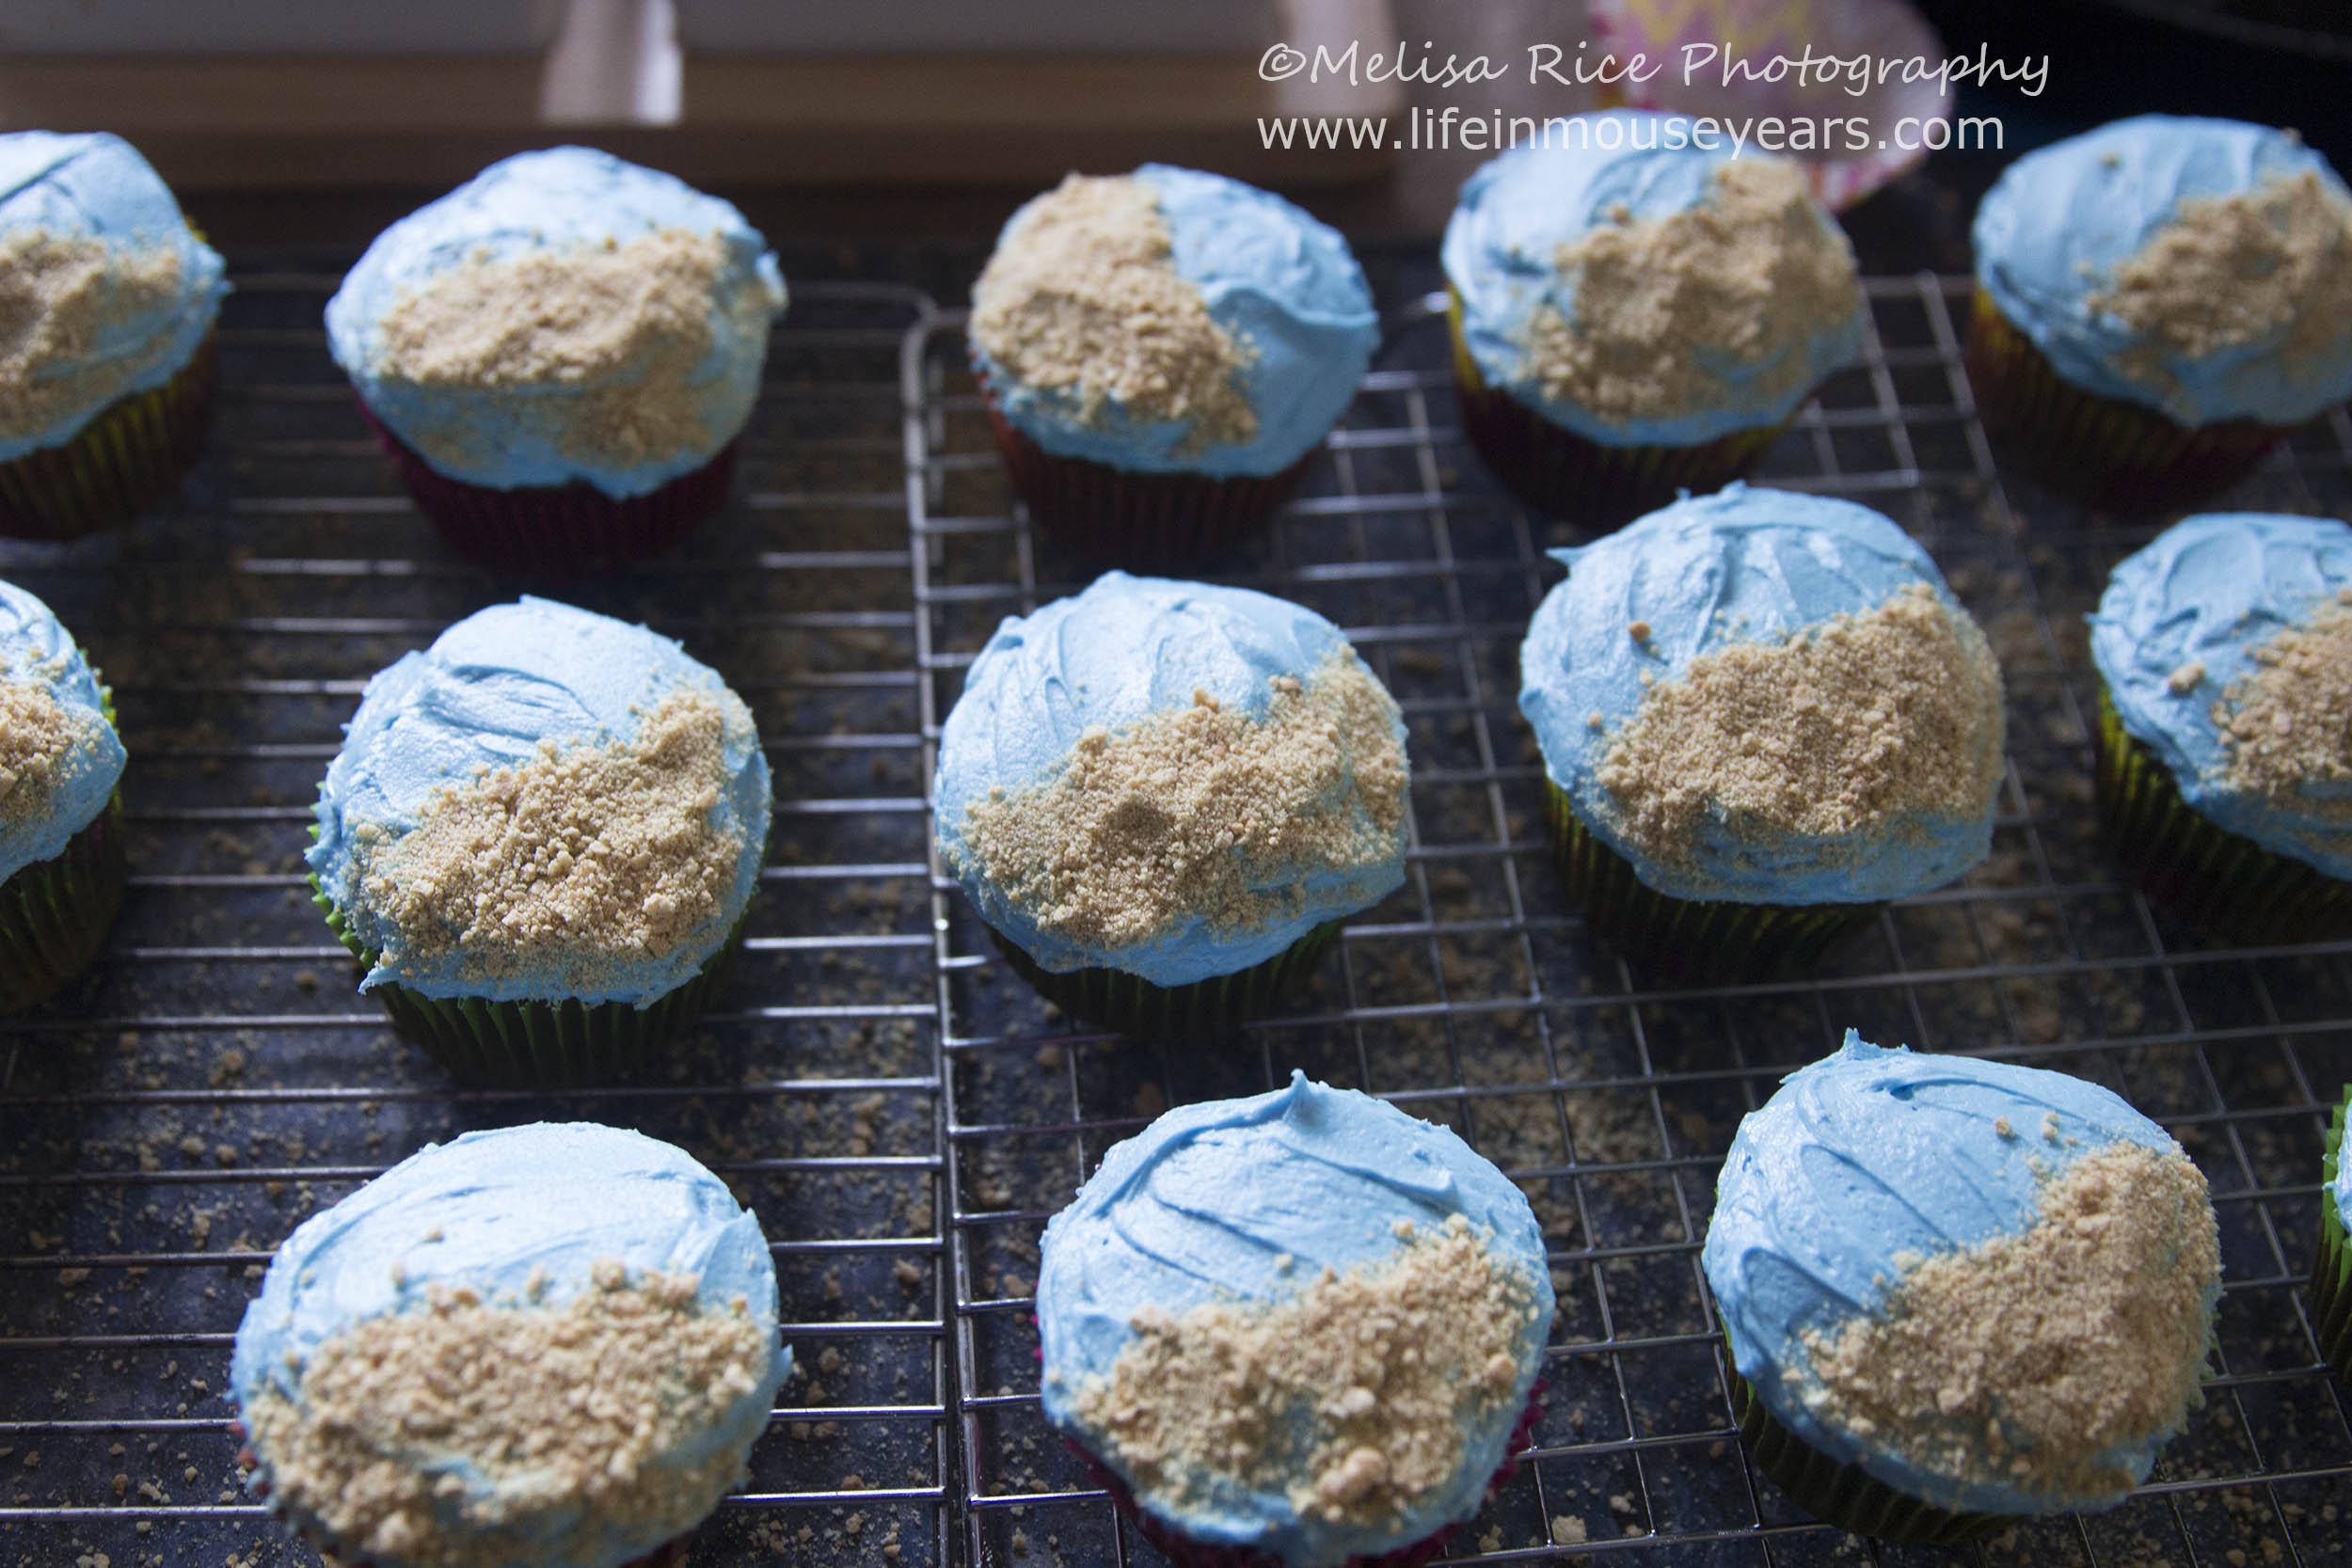
Cupcake Time
As I have mentioned in my other cake posts, I like to have the cake round as the display piece and then have cupcakes all around for quick and easy serving during the party. It is also nice for the birthday boy or girl to get to dig into their cake round later.
For these cupcakes, I used Duncan Hines Dutch Chocolate Cake mix. I use light olive oil in place of vegetable oil. They turn out moist when baked to the point of testing with a toothpick and it comes out clean.
Next, I frosted them with the light blue frosting. Again, making it look wavey like water. On half of the cupcake, I added crushed graham crackers. Finally, I added the chocolate seashells to the center of the cupcake. It was super easy and so cute!
Final Result
Here are some photos of the finished Moana birthday cake.


In Conclusion
Moana was a fun cake theme! While there are lots of different cake decorations you can do for a Moana theme, I hope that this helps you out should you decide to give this one try! If you don’t feel like you are cake crafty, try out the cupcakes! It is a quick and easy way to decorate cupcakes.
Questions or Comments?
If you have any questions or comments on today’s post-How to Moana Birthday Cake, please feel free to leave them below.
What would you like to see here?
Is there anything you would like to read about here at Life in Mouse Years? Let me know in the comments below! I would love to help!
Don’t forget to sign up!
If you would like to stay up to date on new posts that come available, please sign up to receive email updates!
Thanks for stopping by Life in Mouse Years!

Leave a Reply