
Is there a Frozen-themed party in your future? Frozen seems to be ever popular with the little ones. My friend’s daughter requested an Olaf Birthday party that morphed into a Frozen 2 themed party. Complete with an Olaf-shaped cake and frozen cupcakes. Find out How to Make an Olaf Shaped Cake and more in today’s post!
How To Make an Olaf Shaped Cake
First of all, I know it seems like I post about cakes a lot! But it seems to be what I do lately! Especially during 2020/2021. As a result of my “Niece” requesting an Olaf cake, I felt like it was a daunting task! I was stressing because I thought she wanted a cake that literally looked like an Olaf figure. Then after her Mom asked her, I realized, she wanted a cake similar to what I had made for my last birthday that was Mickey-shaped! Phew. Stress one relieved, however, stress two was on its way in trying to find an Olaf-shaped cake pan… It doesn’t exist! Keep reading to see what I did to make Olaf.
Olaf Cookie Pan
So I have to admit, if you have read some of my other cake posts, I like to get Disney figurines to add to the cakes. It helps me to not stress over trying to make the characters myself. (Which I should do…) But this way I can focus on other elements of the cake. In addition to helping me not do too much after surgery etc. However, my Niece did not want the figurines this time. She wanted an “OLAF CAKE”! Heehee.
Next, I searched and I searched for an Olaf-shaped cake pan. It… doesn’t… exist…
The next best thing I could find on How to Make an Olaf Shaped Cake was a cookie pan. There were a few sites I found it on. Including Amazon, however, I do not recommend Amazon for the cookie pan. It was way too pricey! I suggest getting it from eBay or one of the other sites that offer it for sale.
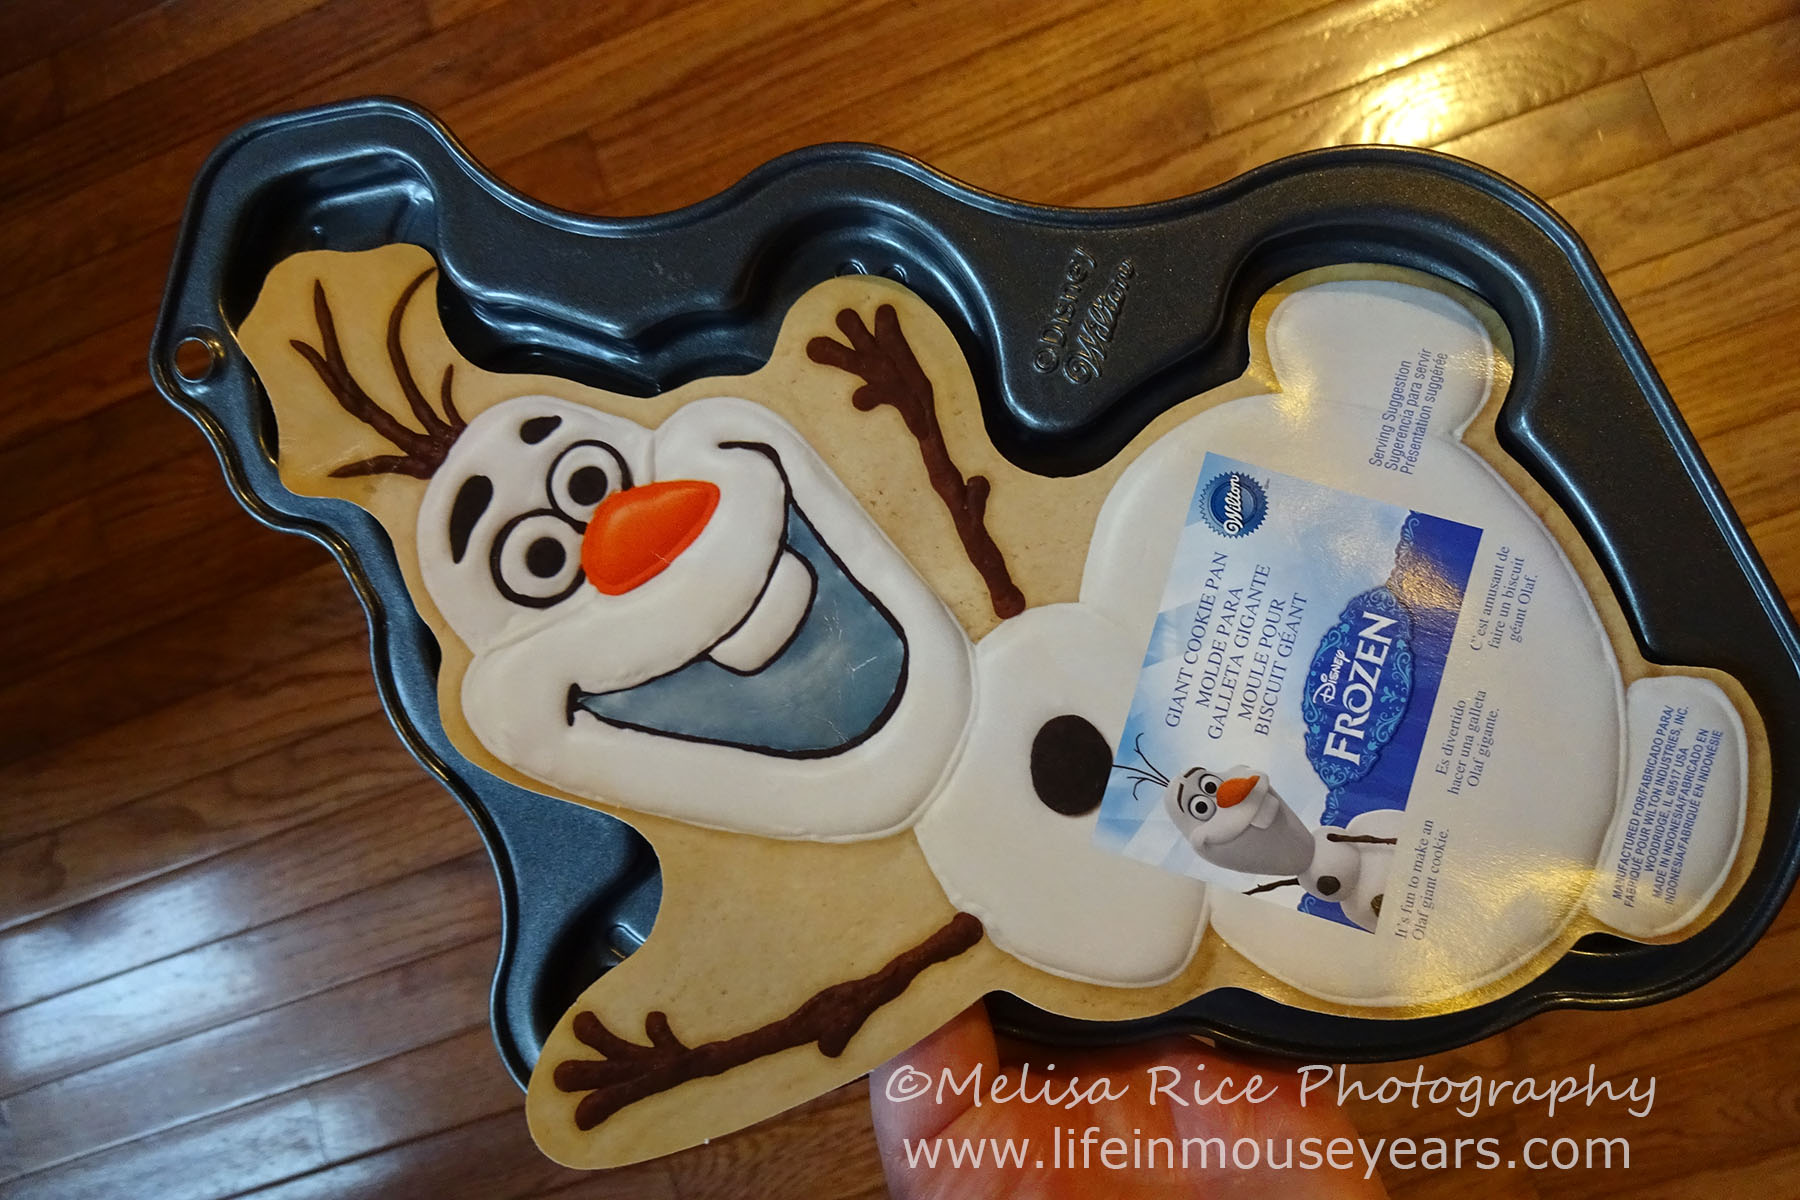
When the pan came in and I saw how small it is, I knew I was going to need to do more than just the pan alone. I knew it would be thin, I just didn’t realize how small the length and width were. As a result of the size of the pan, I decided to make a 9×13 sized cake to place the Olaf shape on as well as doing cupcakes for easy serving.

Another Option if No Cookie Pan
If you are unable to get the pan, if you a crafty, you can cut out an Olaf shape from a sheet cake and decorate it. ( Example: Print out an Olaf from your computer and use it as a cutting guide.) If you are wanting depth out of say his face, just add more white stars with the frosting in the places you want to stand out.
Supplies
Next on How to Make an Olaf Shaped Cake is the supplies. This is what you will need:
For the Cake:
- Cake Pan 9×13 + Olaf Cookie Pan (Optional)
- Cupcake Pan (If making cupcakes too.)
- Cupcake Liners
- Butter (just enough to line the pans)
- Flour
- Buttermilk
- Olive Oil (light tasting)
- Sugar
- Hershey’s Cocoa
- Baking Powder
- Baking Soda
- Salt
- Eggs
- Vanilla Extract
- Boiling Water
For the Frosting:
- Unsalted Butter
- Powdered Sugar
- Vanilla Extract
- Milk (half n half, whipping cream, or water)
Other:
- Piping Bags
- Tips: #3, #16 or #18, #10 (If you do not have the #16 or #18 tip, then either #21 or #22 tips can be used. They will just be larger star shapes.
- Small Angled Cake Knife (optional)
- Couplers
- Cake Board
- Kitchen Aid Mixer (Optional but so helpful!)
Best Chocolate Cake Recipe
Next on How to Make an Olaf Shaped Cake is to bake the cake. Sorry if I sound like a broken record on the recipe, but it really is a wonderful recipe! My all-time favorite, go-to recipe for chocolate cake is Hershey’s Perfectly Chocolate Cake. The recipe for this cake is on the package of Hershey’s cocoa or it can be found at Hershey’s official site in the link below.
Find the recipe for Hershey’s Perfectly Chocolate Cake here.
This cake is chocolatey, moist, and so delicious!
I make two changes to the recipe. I use light-tasting olive oil in place of the vegetable oil, and I use buttermilk in place of the milk.
White Cake Recipe
Another option for the cake if you are not wanting a chocolate cake is to make a white cake. The white cake recipe I use is moist and is delicious. (Here is the recipe I found.)
With this recipe, I did make a couple of changes to the recipe when I made it. The first change is one that I recommend with every cake blog post I have made. (Including this post!.) It is to use olive oil instead of vegetable oil, yet, it needs to be light olive oil. This way, it doesn’t have much for flavor which is what you are going for. Regular olive oil, (extra virgin olive oil), has a stronger flavor and can be tasted in the end result. (Not very tasty…)
The next thing I changed was I only used vanilla extract instead of adding the almond extract. (So 2 teaspoons vanilla.) I did this because someone ordered a white cake for me for a gathering and I didn’t know if anyone would have a reaction to the almond extract. Therefore, just to be safe, I only used vanilla. And while I can’t compare the taste difference, yet, by just using the vanilla the cake was delicious!
Baking Olaf and the Base Cakes
First, grease and flour the cake pan. I like to mix some flour with some cocoa to flour the pan. This way the edges won’t be all white compared to the cake-like when you use only flour. I did this to the Olaf-shaped cookie pan as well. Next, place all of the dry ingredients into a large bowl, then, add in milk, eggs, and vanilla extract and mix. Add in the boiling water and mix. The batter will be very runny, but do not worry! It is supposed to be that way. First, pour into the Olaf cake pan and then add the rest of the batter to the 9×13 pan. Next, put it in the oven to bake!

I like to use a wooden toothpick to check the cake for doneness. If the toothpick comes out clean, it is ready to take out and cool.
Keep an eye on the Olaf pan. Because it is smaller, it doesn’t take as long to bake it. I think I started to check it after 10 minutes. Also, I would bake Olaf separately from the other pan. Disturbing the heat and baking process too soon will affect the rising of the cake.
Frozen 2 Cupcakes
Next, if you are wanting to make cupcakes as well or on their own without Olaf, take the cupcake liners you are using and line the cupcake pan. The same recipe above can be used to make cupcakes as well! Once the batter is ready, fill the liners ⅔ the way full and put them in the oven to bake. I also check the cupcakes for doneness with a wooden toothpick. Once they are done, bring them out of the oven and cool them on a baking rack.
Buttercream Recipe
Another thing on the list for How to Make an Olaf Cake is the frosting!! Yummy!
My go-to recipe for the icing is Wilton’s Buttercream Recipe. Another thing I probably sound like a broken record on. Lol
I have tried all different types of milk in this recipe. Including Almond Milk and Soy Milk! They all turn out, just the consistency might be a little different. Lately, I have been using half and half because that is what I had on hand. I actually really like it for this frosting recipe.
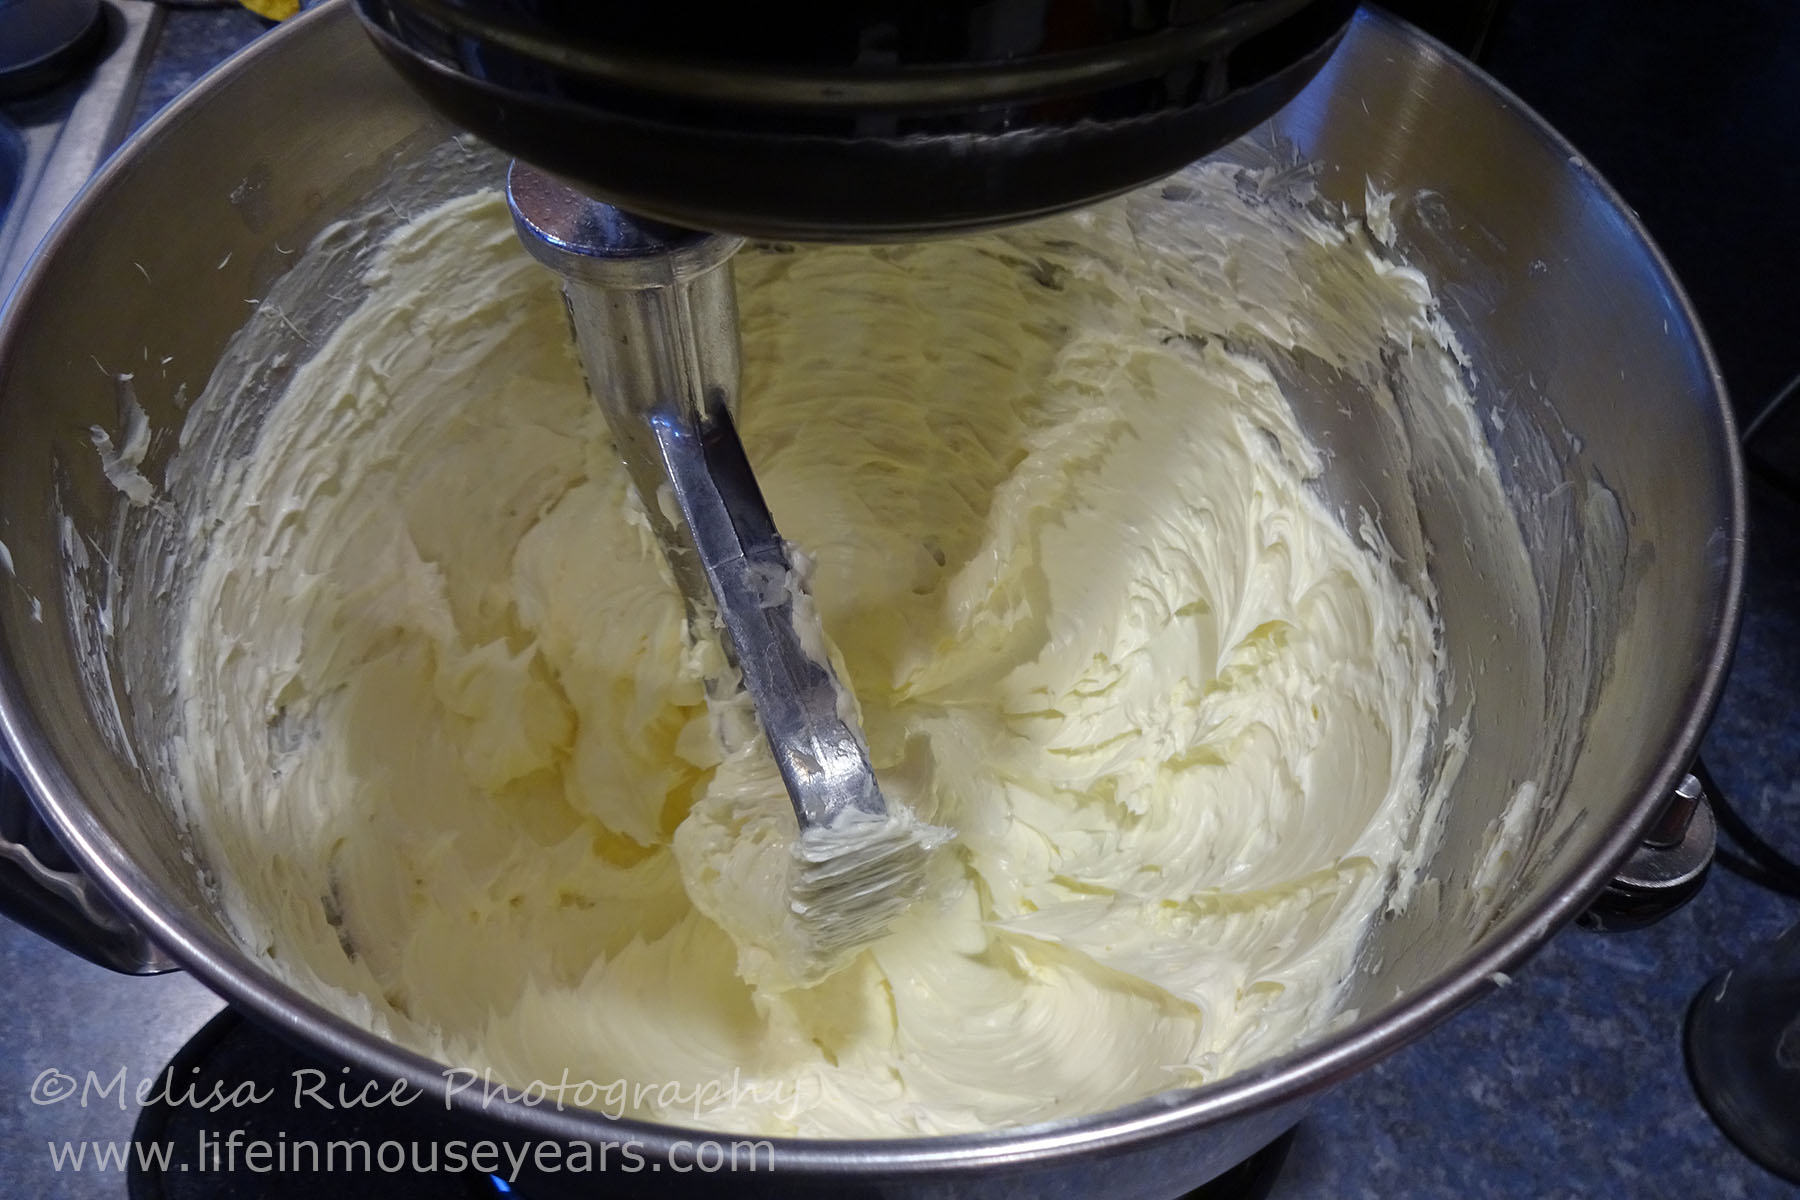
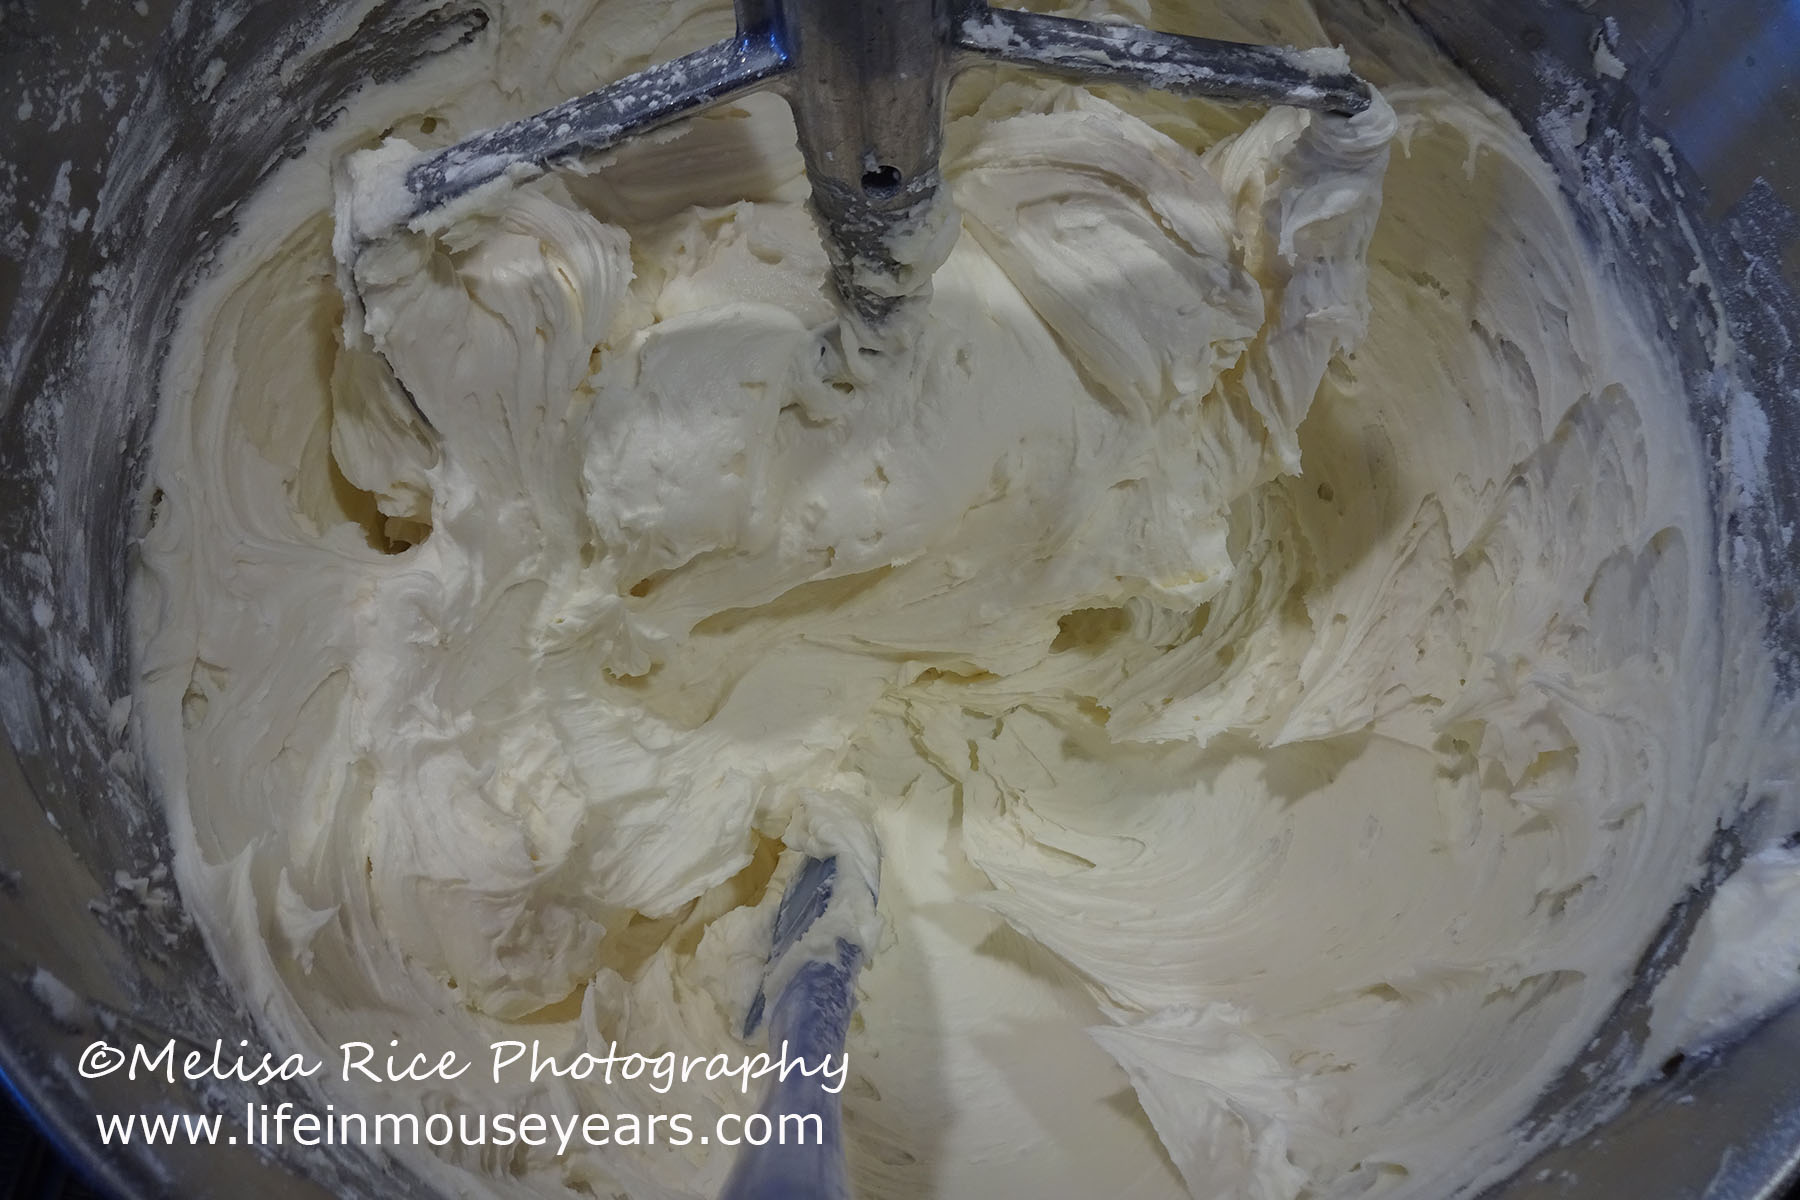
The other thing I like to do with this recipe is to whip the butter before I add other ingredients. It turns out so soft!
To whip the icing, put the butter in the mixer bowl and turn on the mixer to med to med-high speed. Let it go for about 5 mins, scrape the bowl, and start again.
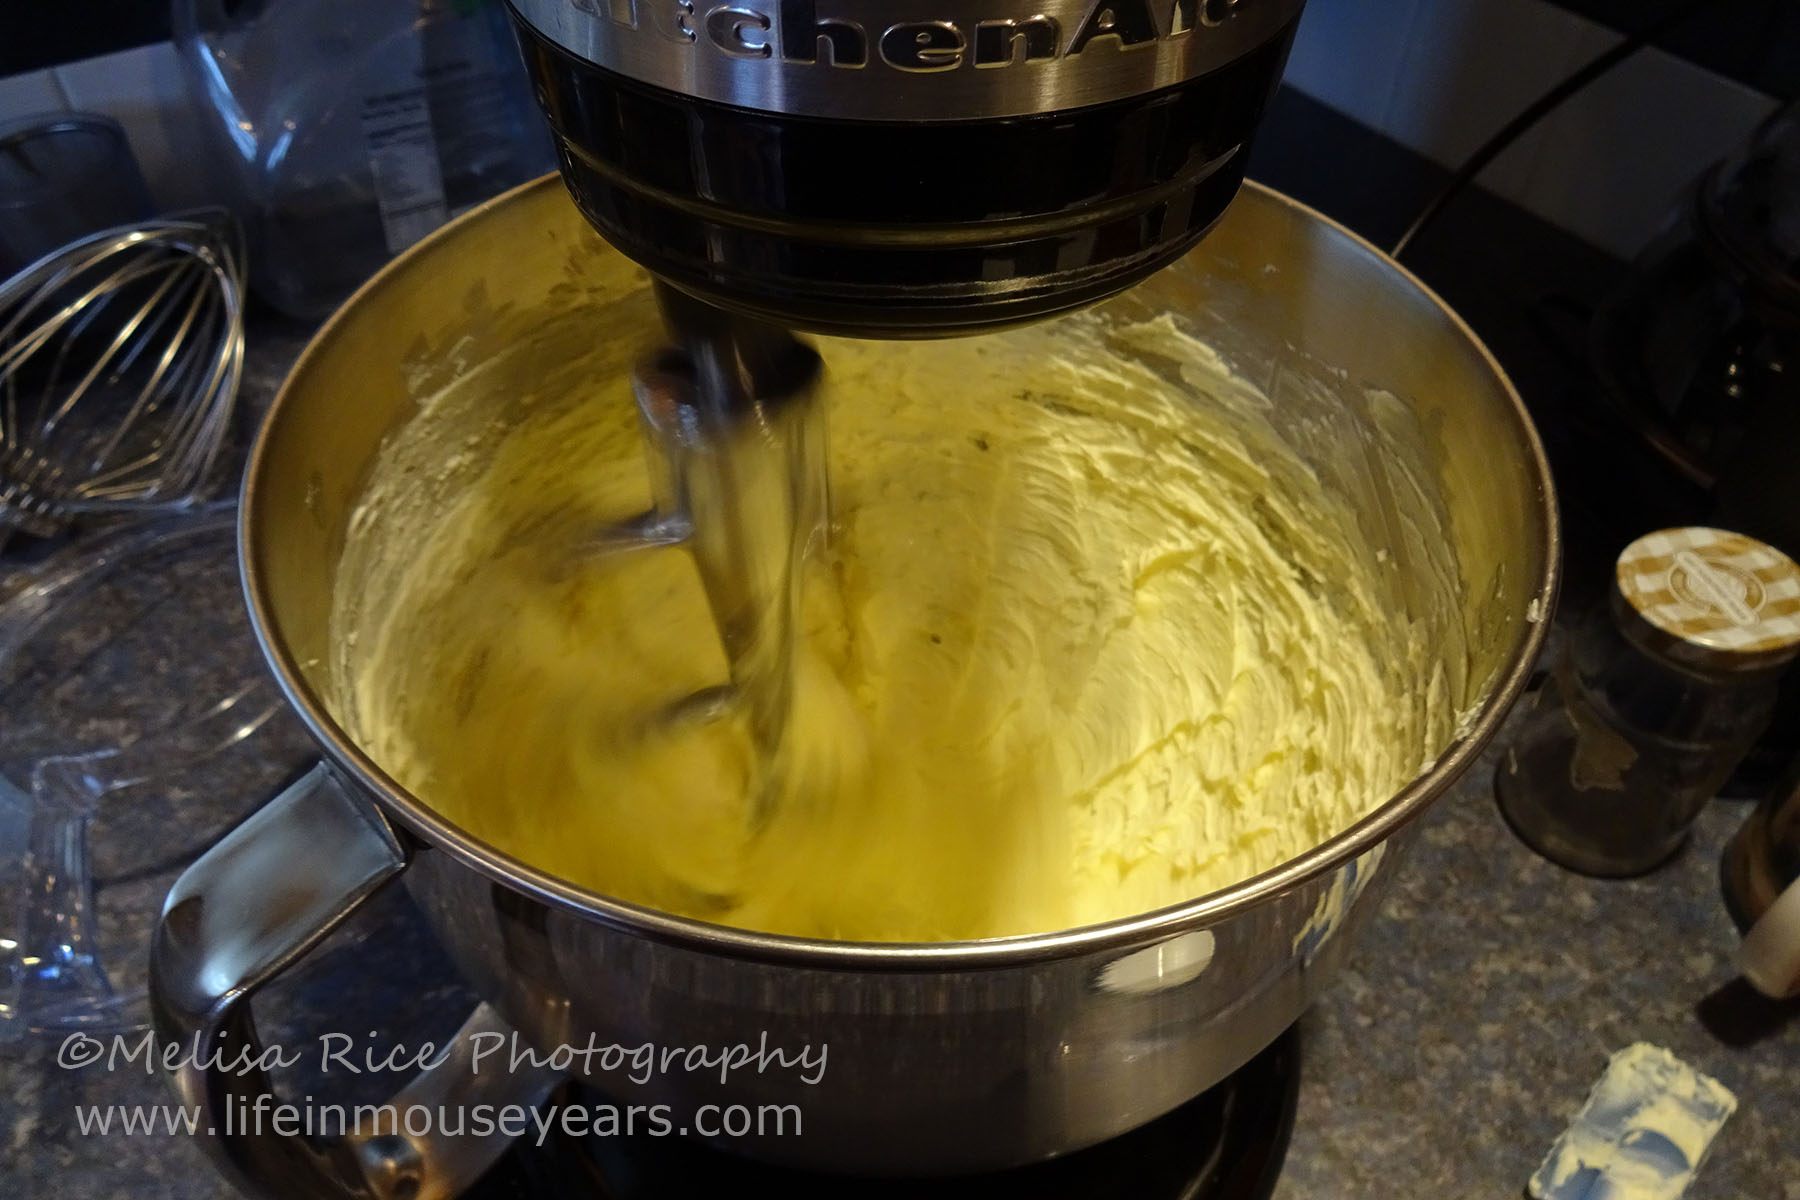
Once the butter is a very light yellow and looks fluffy then you can start to add the powdered sugar and vanilla extract a little at a time. The temperature of the butter and your environment will alter the time it takes, but it will get there!
Color Time!
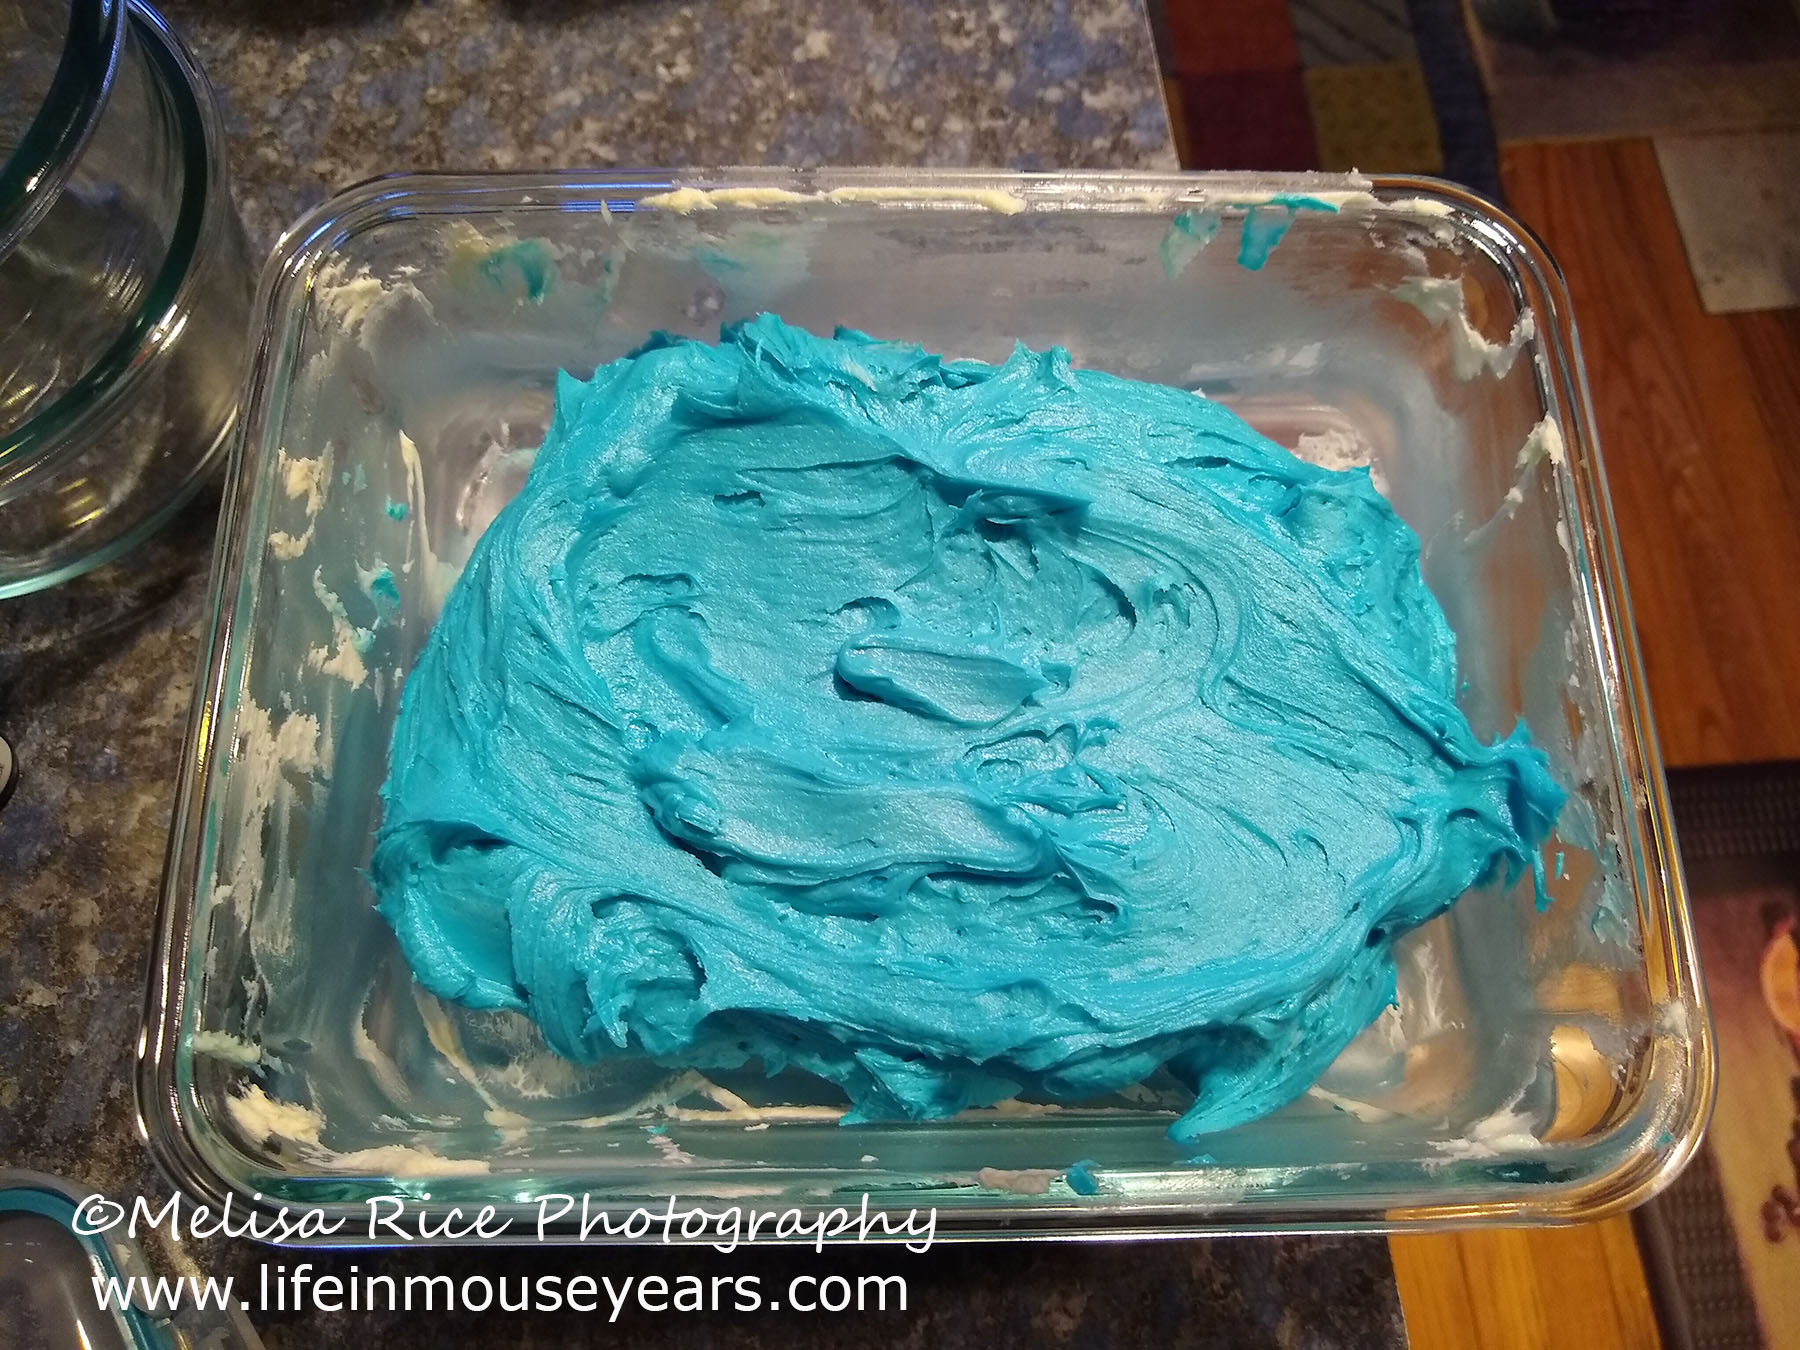
Next, divide the frosting up into bowls and add some gel colors to it. Once you have divided some into smaller bowls. Add some gel color to the bowl.
For this Olaf cake I used white, and Wilton Color Right black, orange, blue, and Wilton gel color brown.
If you are needing darker colors, I recommend making the frosting a day ahead to let the colors develop. I did this with the blue because I was trying to get a specific shade. In the past, I used to have a hard time getting my frosting dark enough. Now… I have the opposite issue and it gets darker than I want. However, it still turned out great! (I am my own worst critic and I didn’t accept how well it turned out until later on during and after the party. Then I realized, hey! It turned out pretty good!)
Let the Frosting Begin!
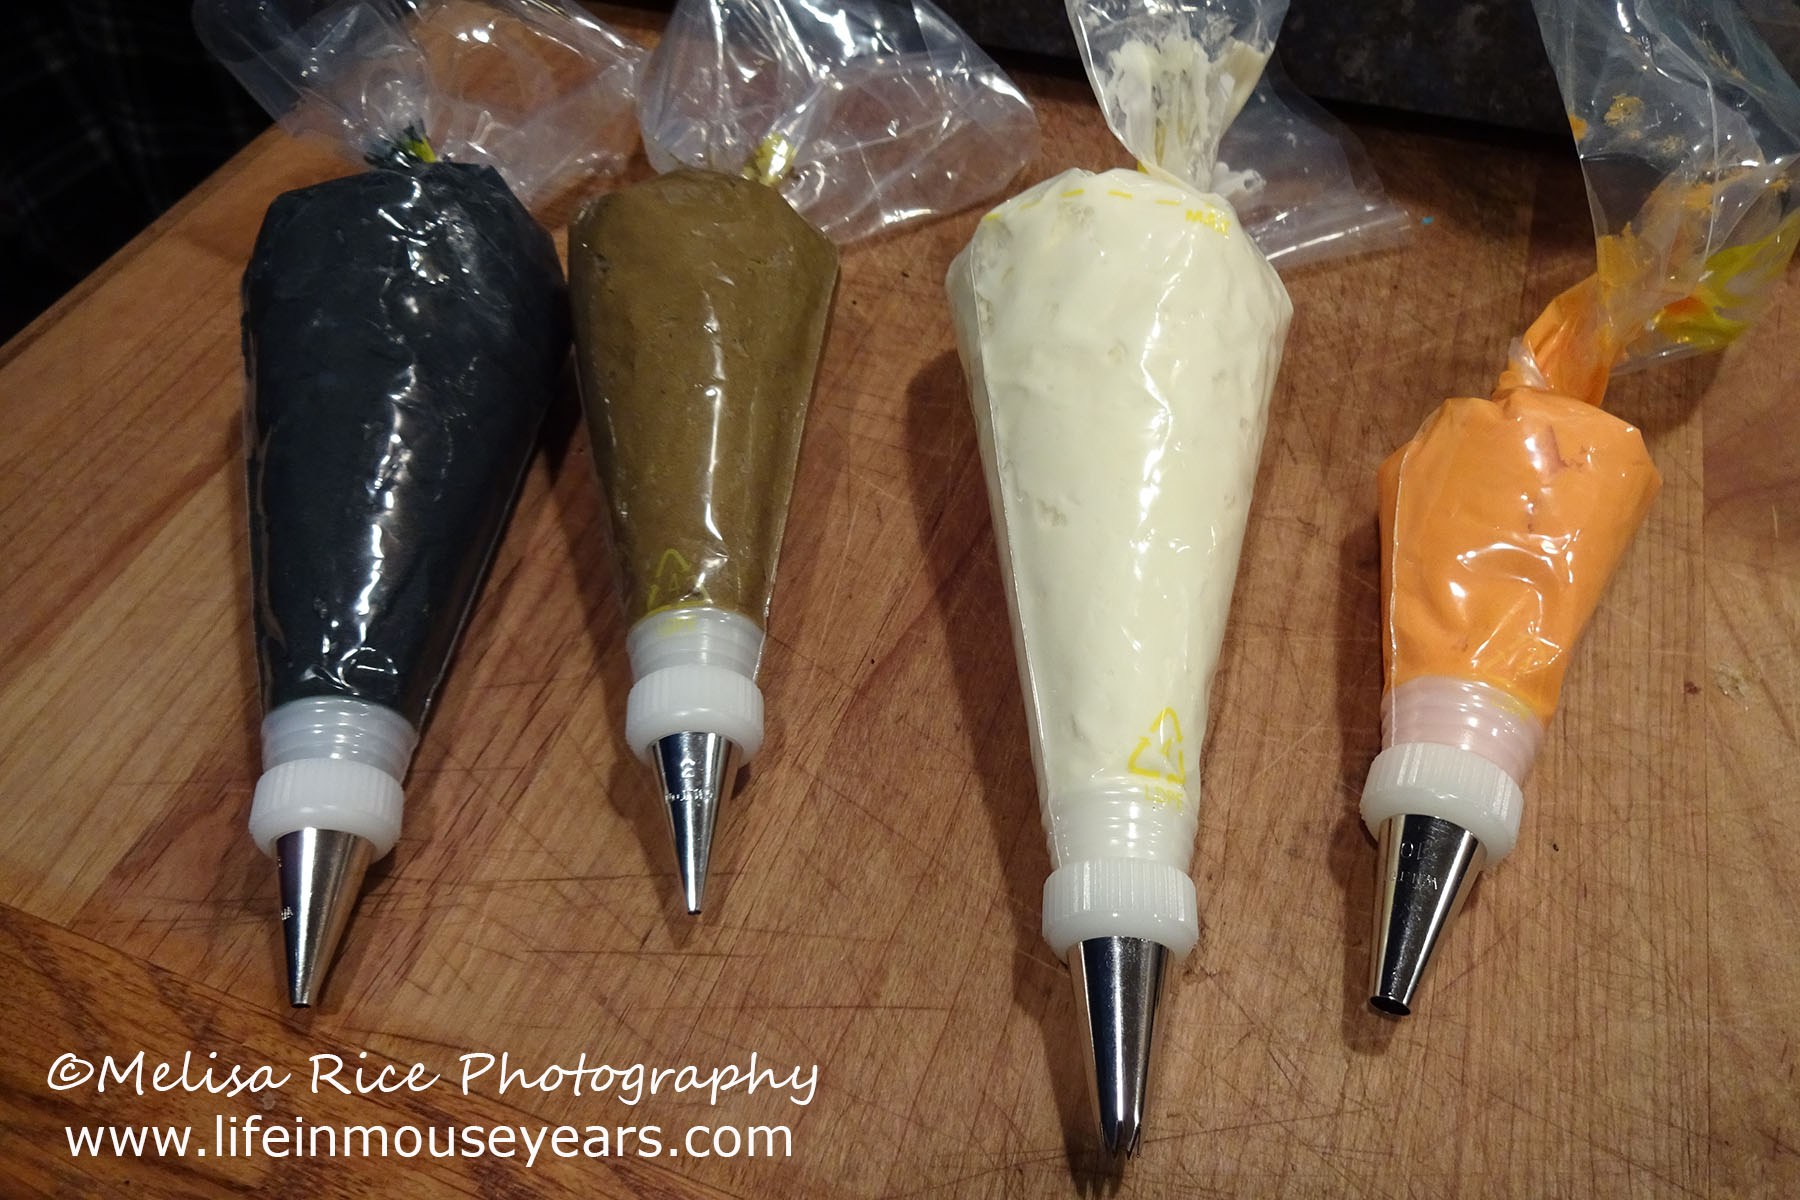
Another thing on the list for How to Make an Olaf Shaped Cake is to prepare the frosting piping bags. I like to use couplers in the piping bags so that I can change out the tips if I need the same tip for multiple colors. It definitely comes in handy to change out the tips back and forth. I have gotten multiples of the same tip so that I do not have to mess with changing and cleaning the tips, however, I do not have multiples of all of them. Yet…
For this cake, it will take four piping bags. (More if you are making the cupcakes.) Place the couplers in the bags and attach the tips. Next, fill the bags with frosting, matching the tips with the colors you will be using. For example, black and brown are #3, orange is #10, white is #16, or #18. If you do not have enough tips and need to change out tips, the bags can still be filled with frosting ahead of time. Just make sure to not squeeze it all the way to the coupler until the tip is on there. Then you will be ready to go!
Assembling the Olaf Cake
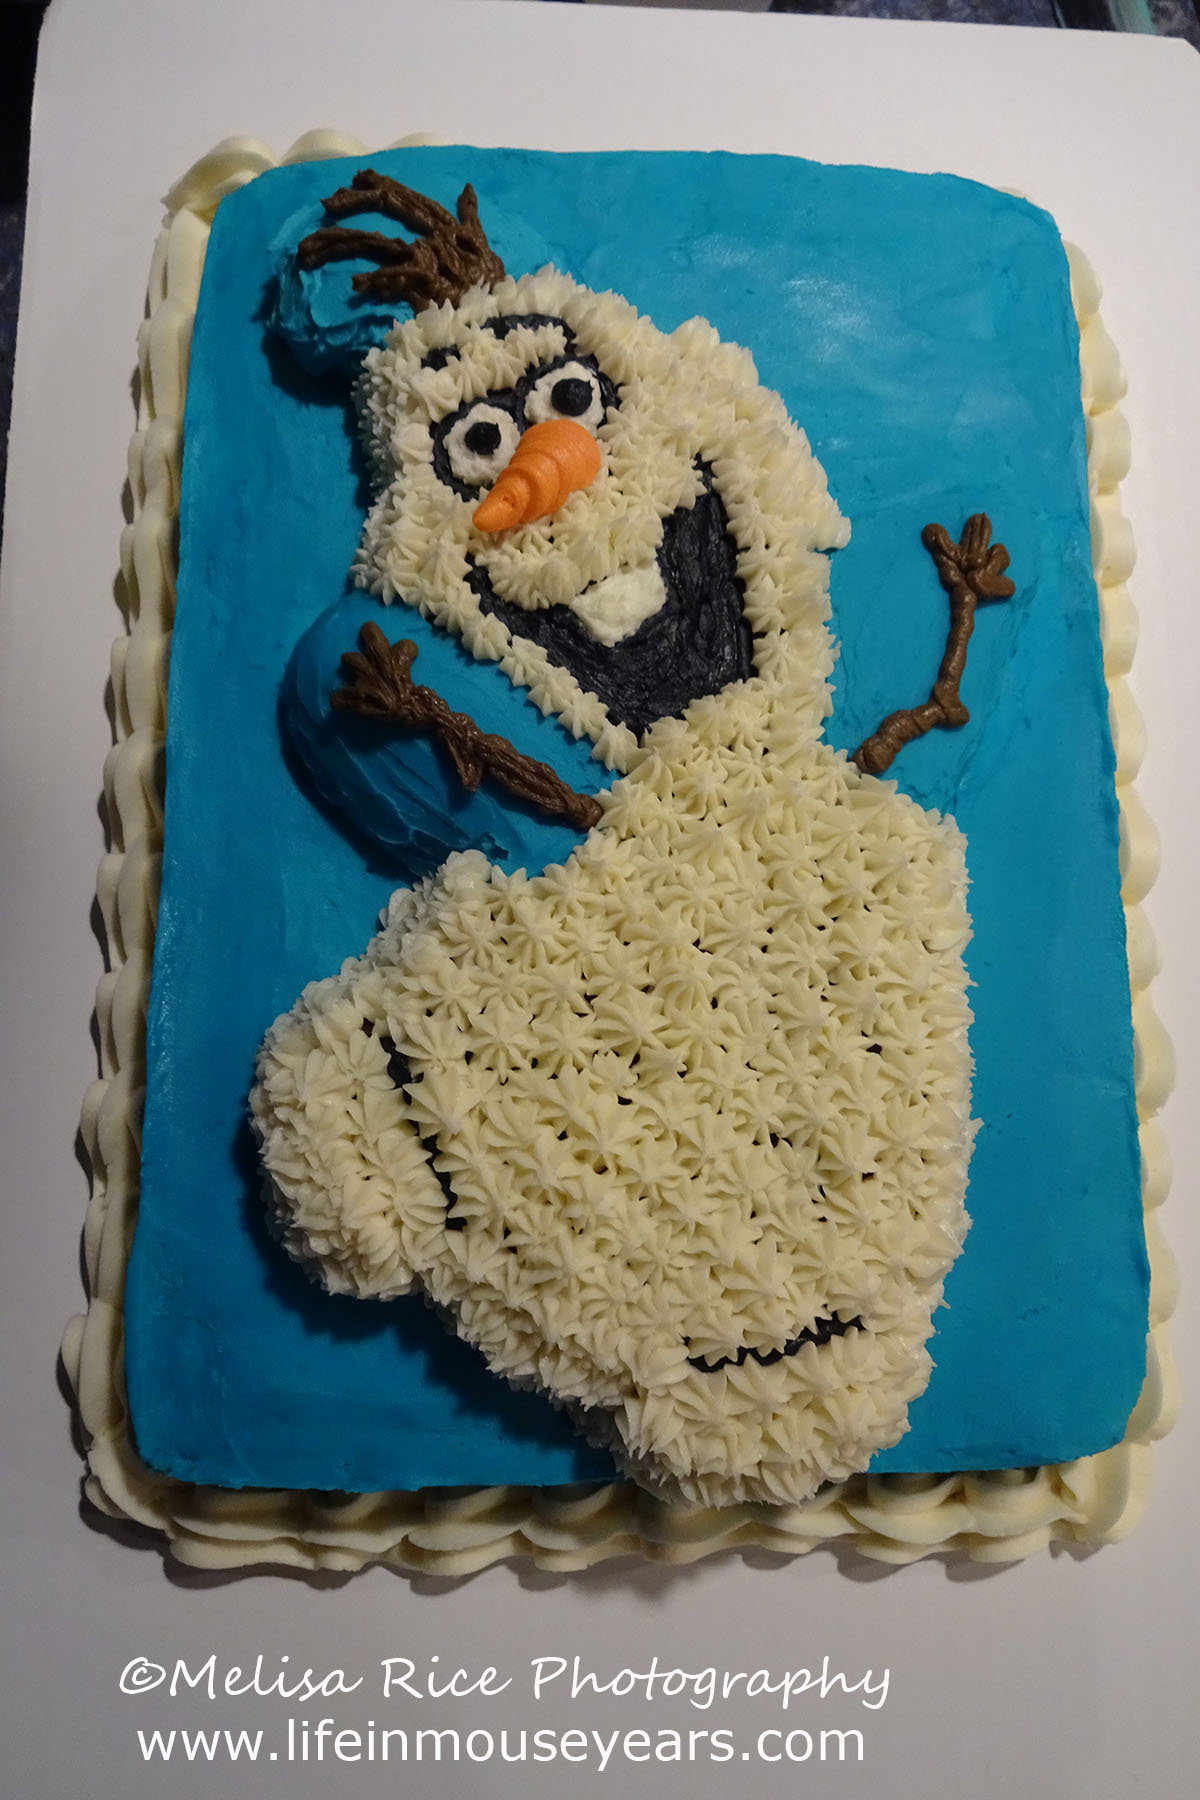
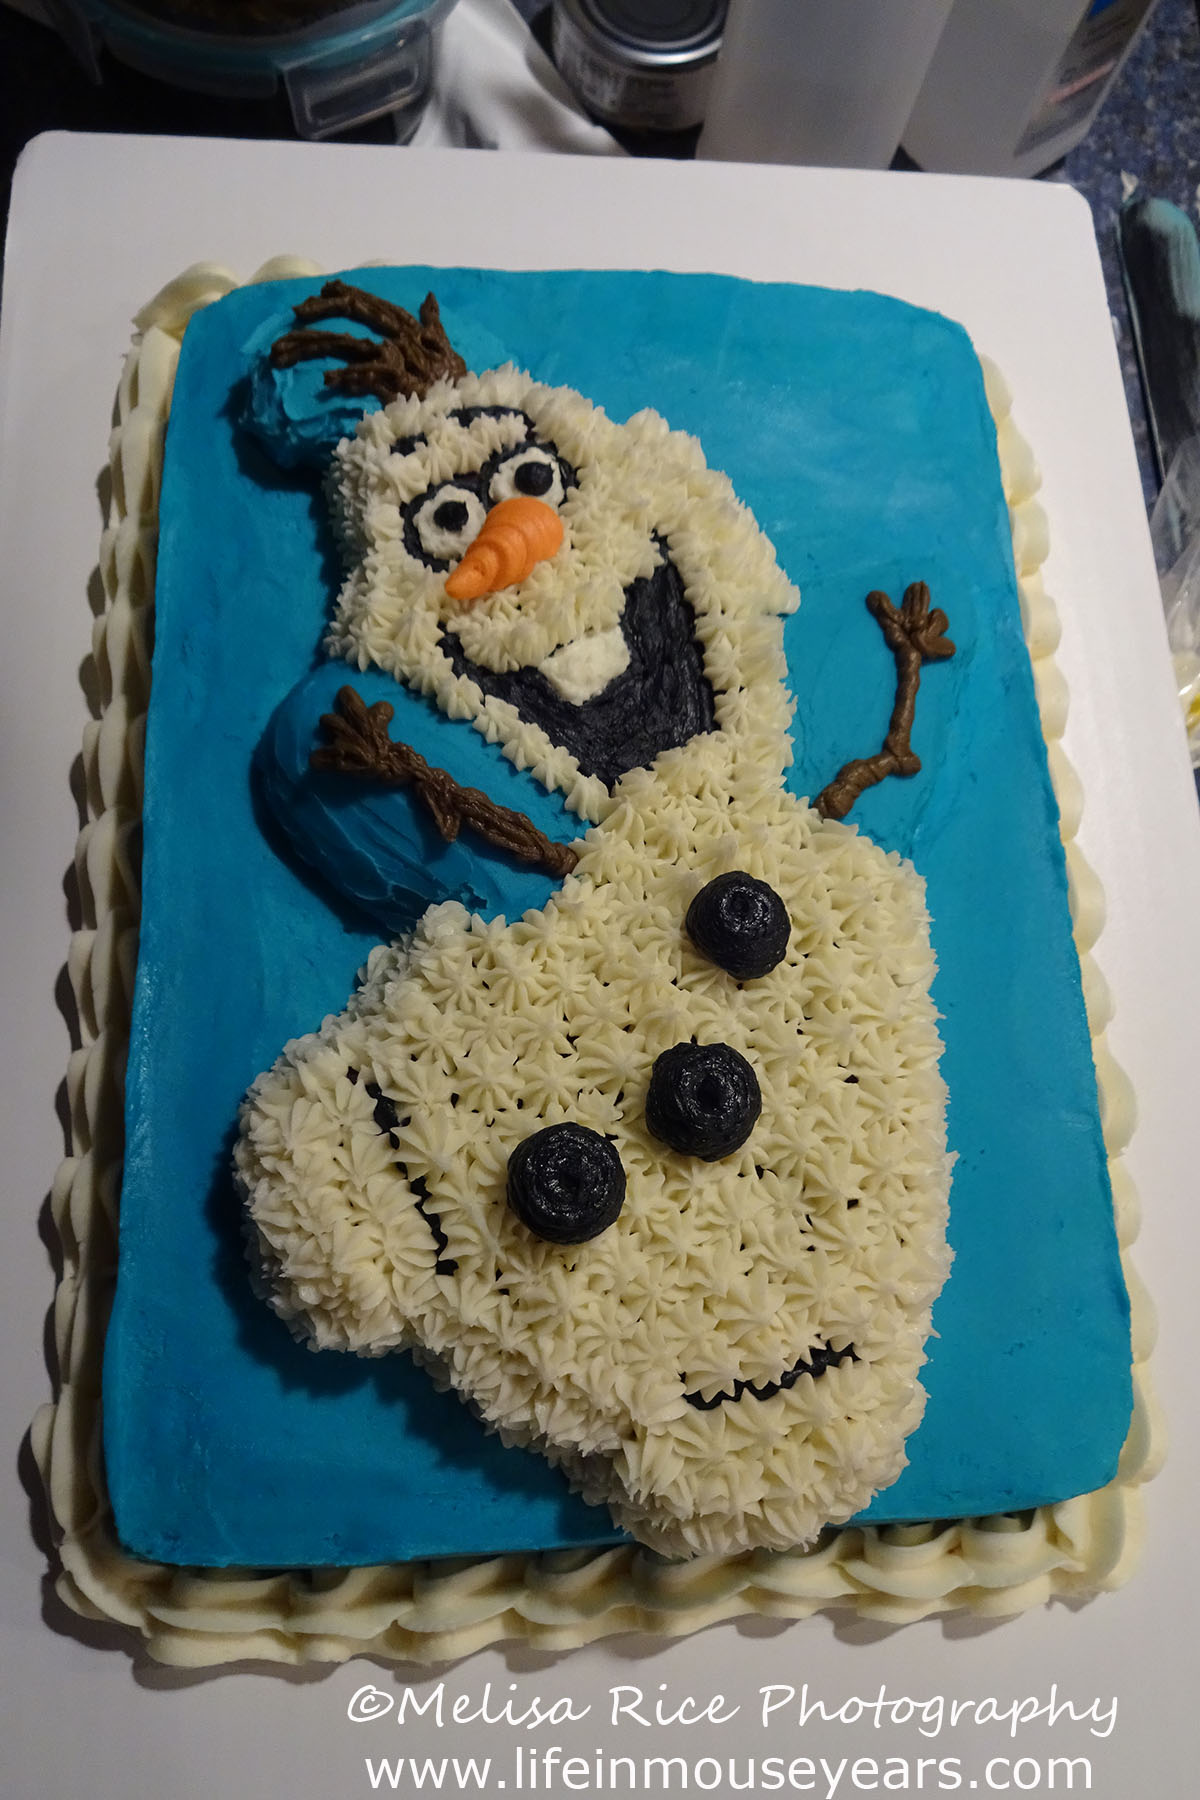
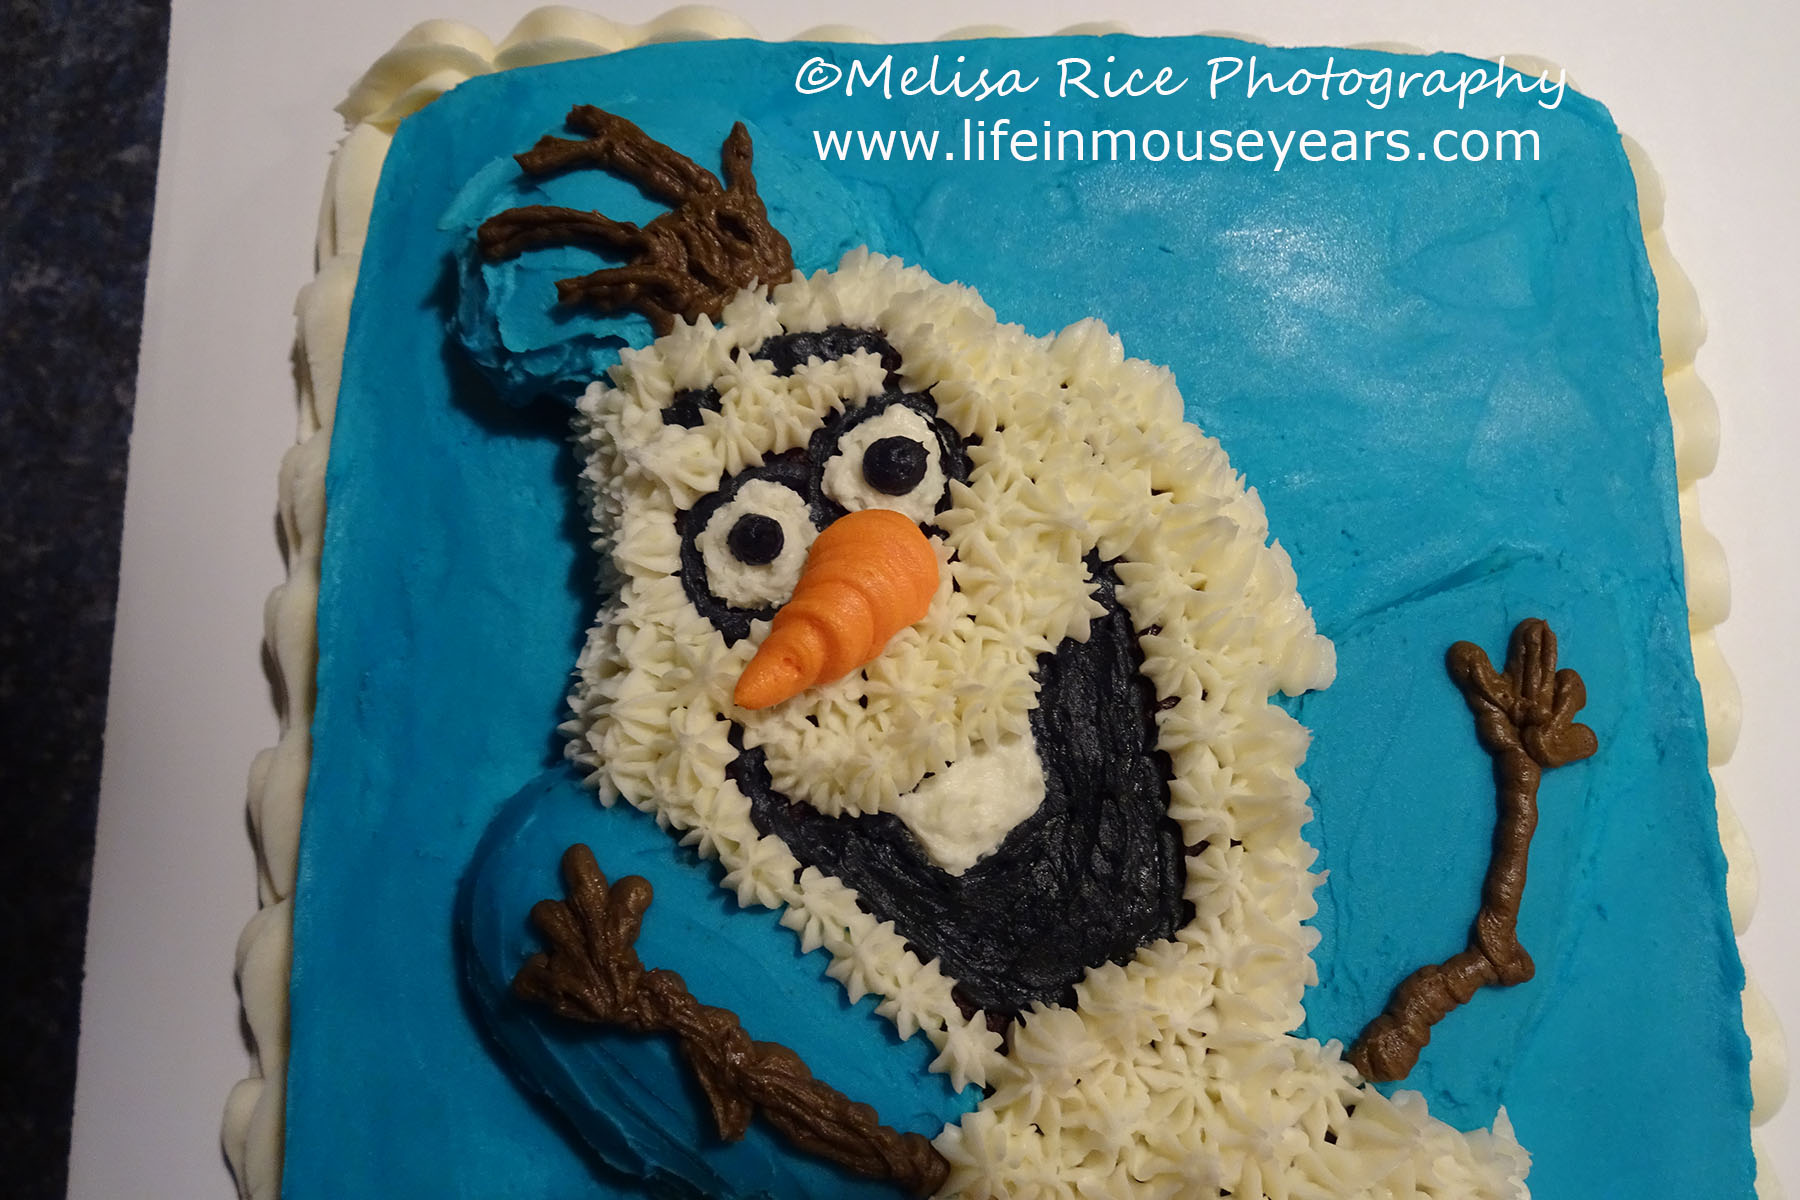
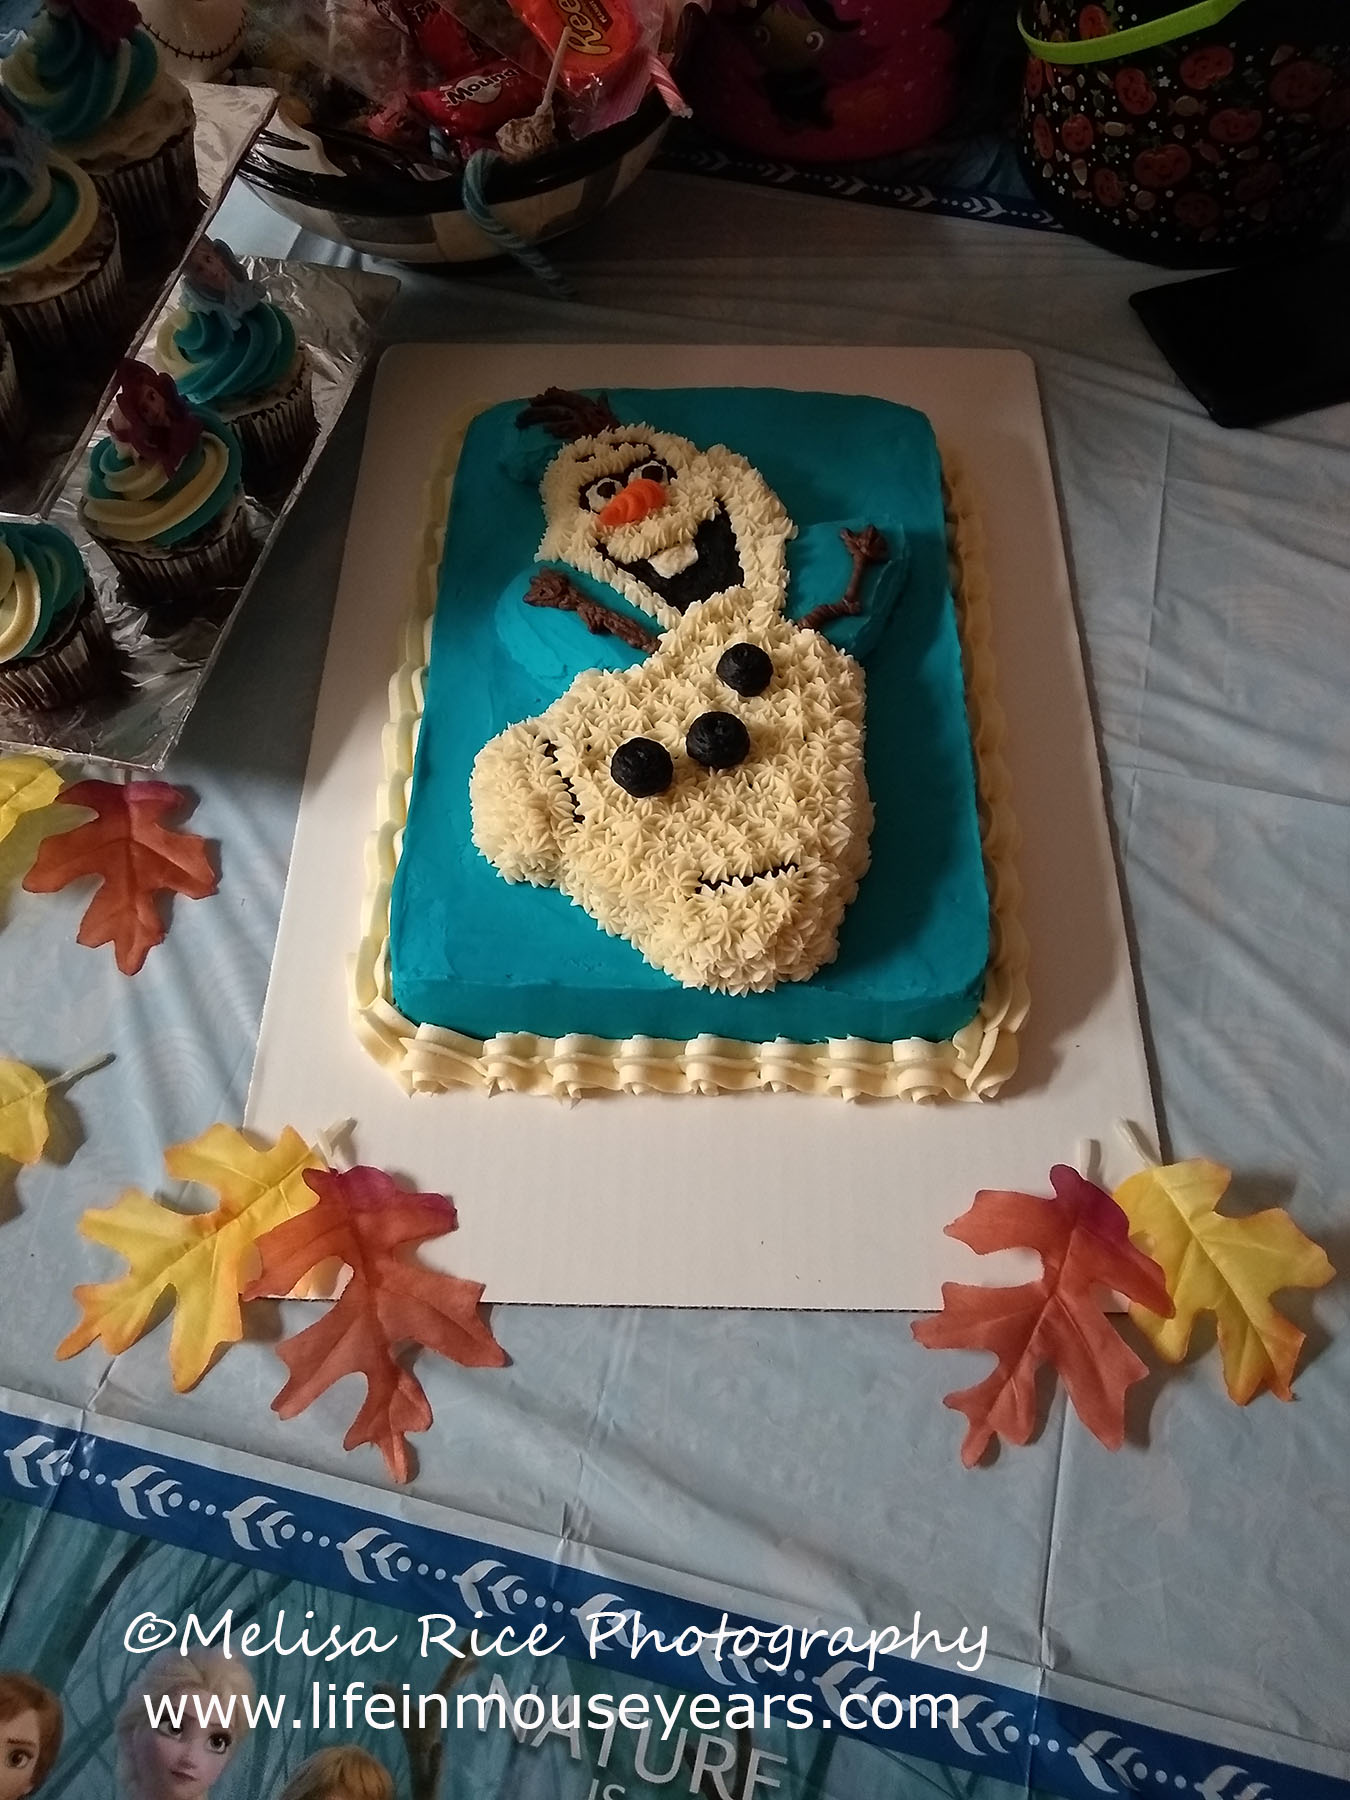
Next on How to Make an Olaf Shaped Cake is to start assembling the cake. I am not a professional. I am self-taught so I don’t know the official way of doing this. That being said, I frosted the 9×13 cake with the blue frosting. Next, I carefully added Olaf to the center of the cake. Then I even more carefully attempted to frost the areas on Olaf where his hair would be and his stick arms and hands. I used blue to match the background area. It needed to be frosted because the chocolate cake made his arms and hair invisible.
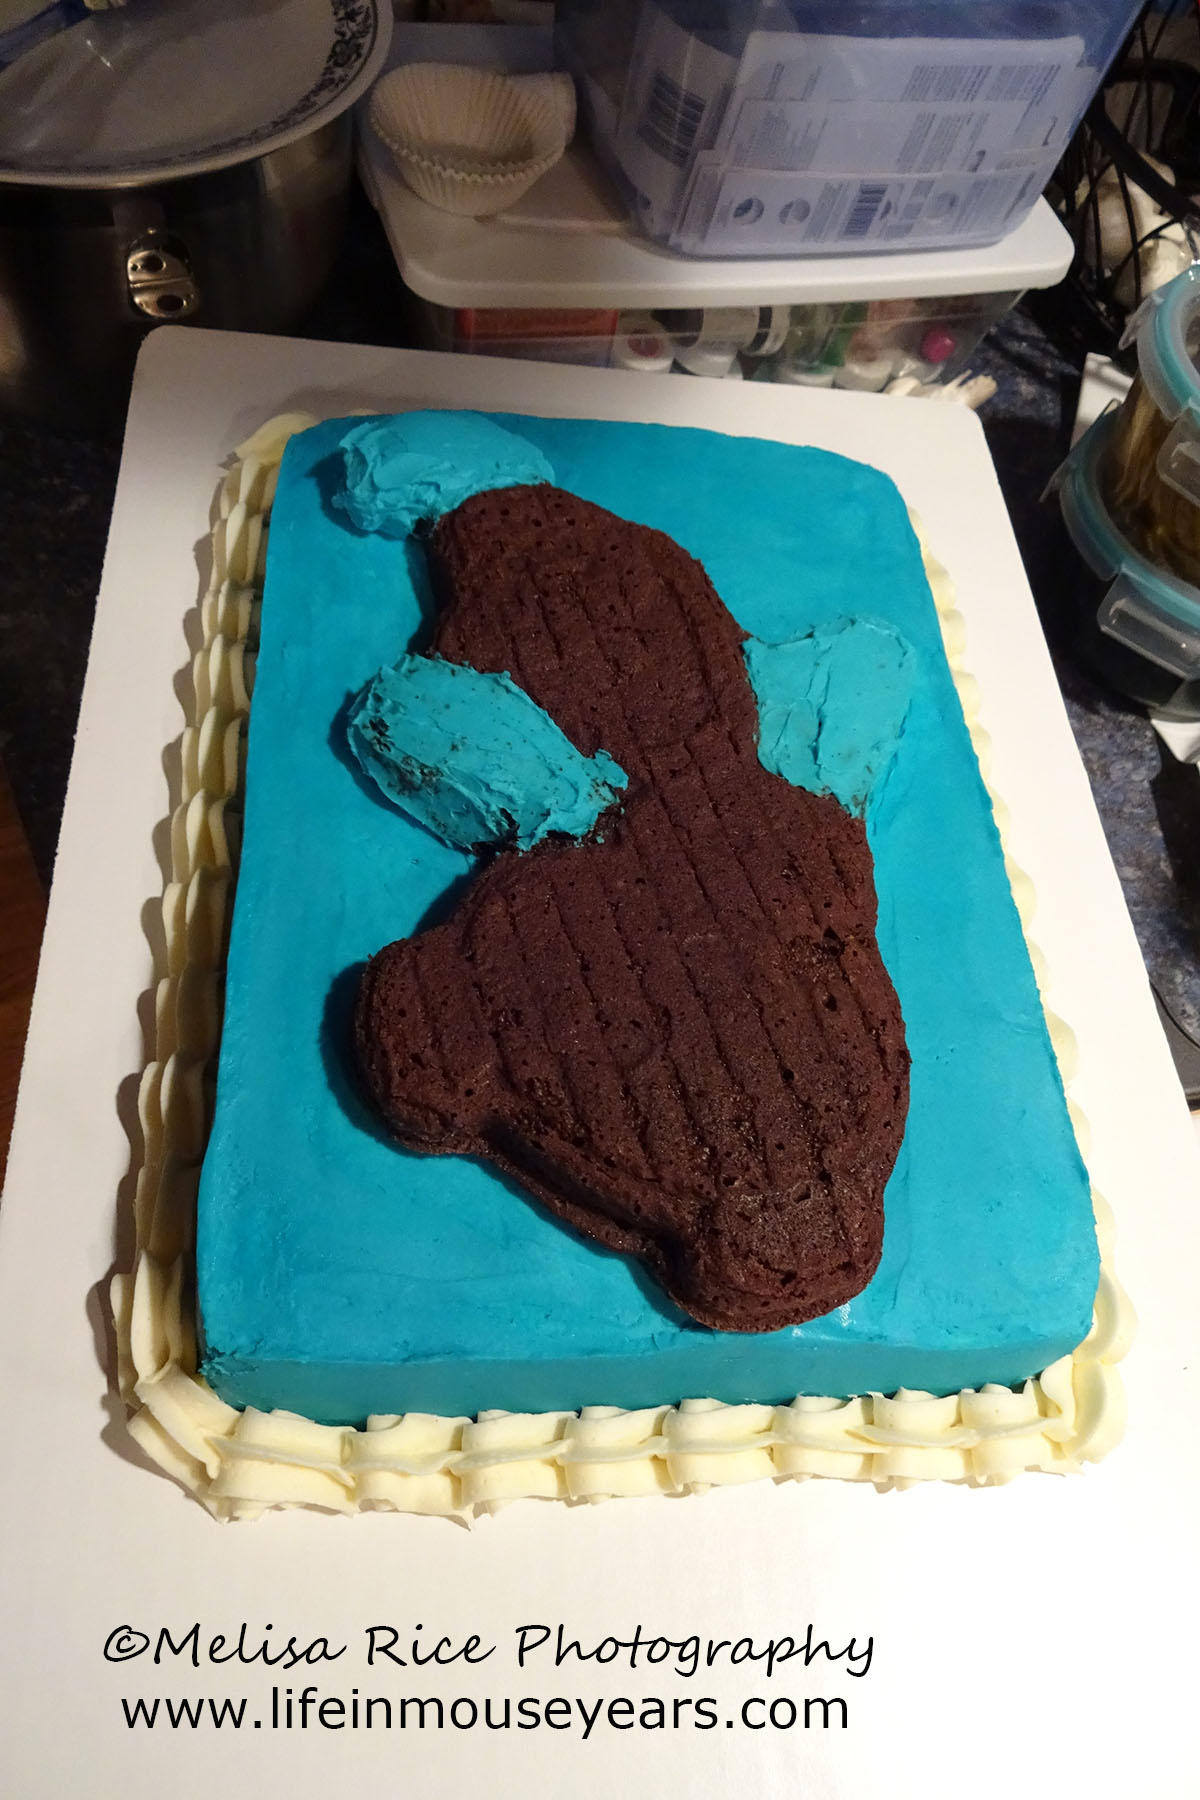
If you used the cookie pan, make sure to ice those sections very carefully. They tried to break apart on me because the cake was so thin. I usually try to ice a thin layer of icing to hide any holes when I pipe stars onto the cake shapes. However, being that Olaf was trying to break, I skipped that step with the rest of Olaf.
Time to Decorate
Next, I placed the cake in the fridge for 20 minutes to set the frosting. After it was set, I pulled the cake out of the fridge and then started to pipe Olaf.
First, I start with the black to add details before piping the stars. I did outlines for his mouth, tooth, eyes, eyebrows, and lines to indicate his feet from his body. Then, I filled in Olaf’s mouth area with the black and smoothed it. Next is to pipe white for his eyes and to fill in the tooth.
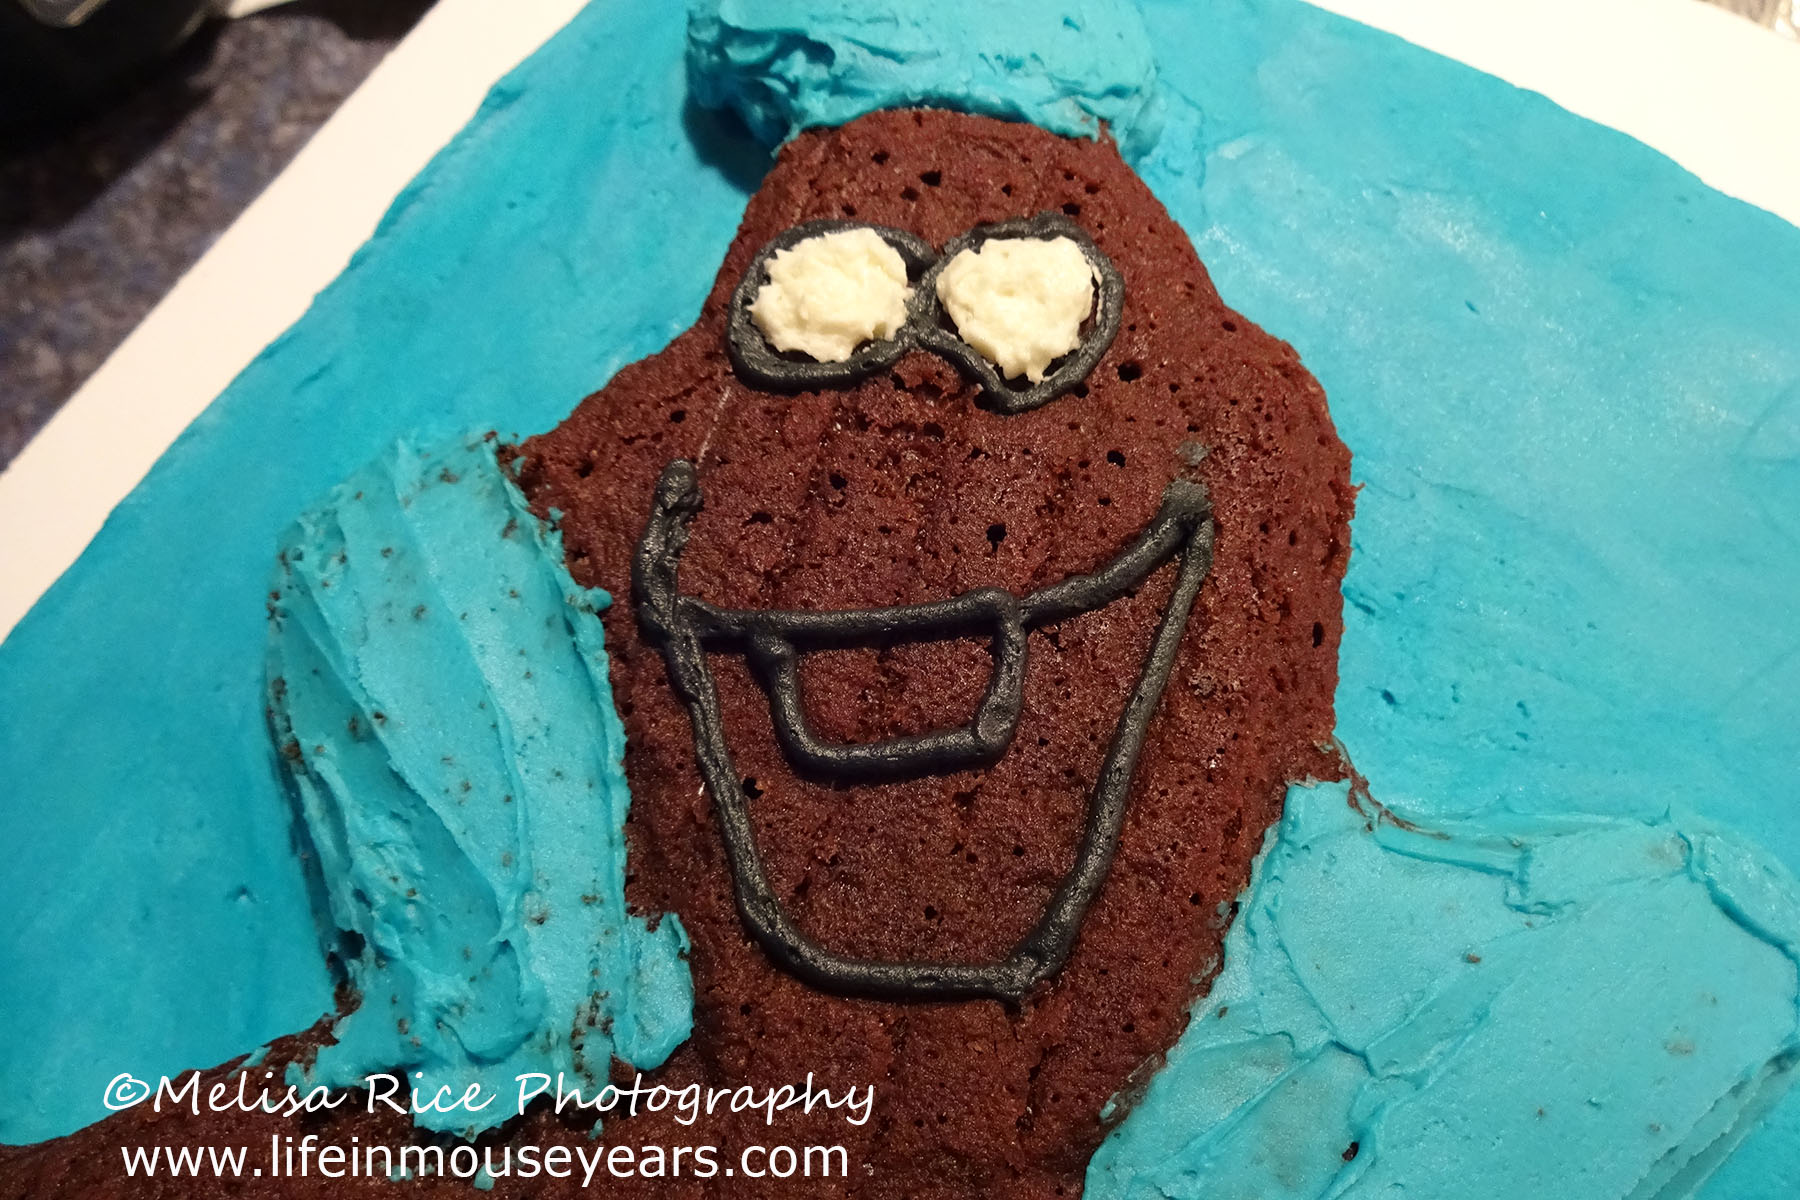
After those areas were done, I began to pipe the white stars all over Olaf, including the sides. Next, I piped Olaf’s hair up top and his arms and hands on the sides. Then I piped Olaf’s nose in place. Starting from one spot I started to pipe the orange without moving the bag at first to get a circle of frosting going. Then I gradually started to move the bag to the left making sure the frosting is smaller and smaller as I go until I have a point at the end to resemble a carrot.
Forgetful While Making an Olaf Cake
After I did his nose, I took a photo of Olaf. Thinking man this doesn’t look right.
Then I had my mom come look and it hit me! His buttons are missing!!
Oh my, it makes a huge difference to have his buttons on. To make them I place the black frosting tip close to the white frosting and start to squeeze the bag until I had a nice round-ish shape that resembled coal. Then stop squeezing and lift the tip. Repeat two more times.
Decorating the Cupcakes
Another item on the list of How to Make an Olaf Shaped Cake is to decorate the cupcakes. (If you decided to make them.)
Disclaimer: I am still working on piping two colors at the same time. I need more practice…
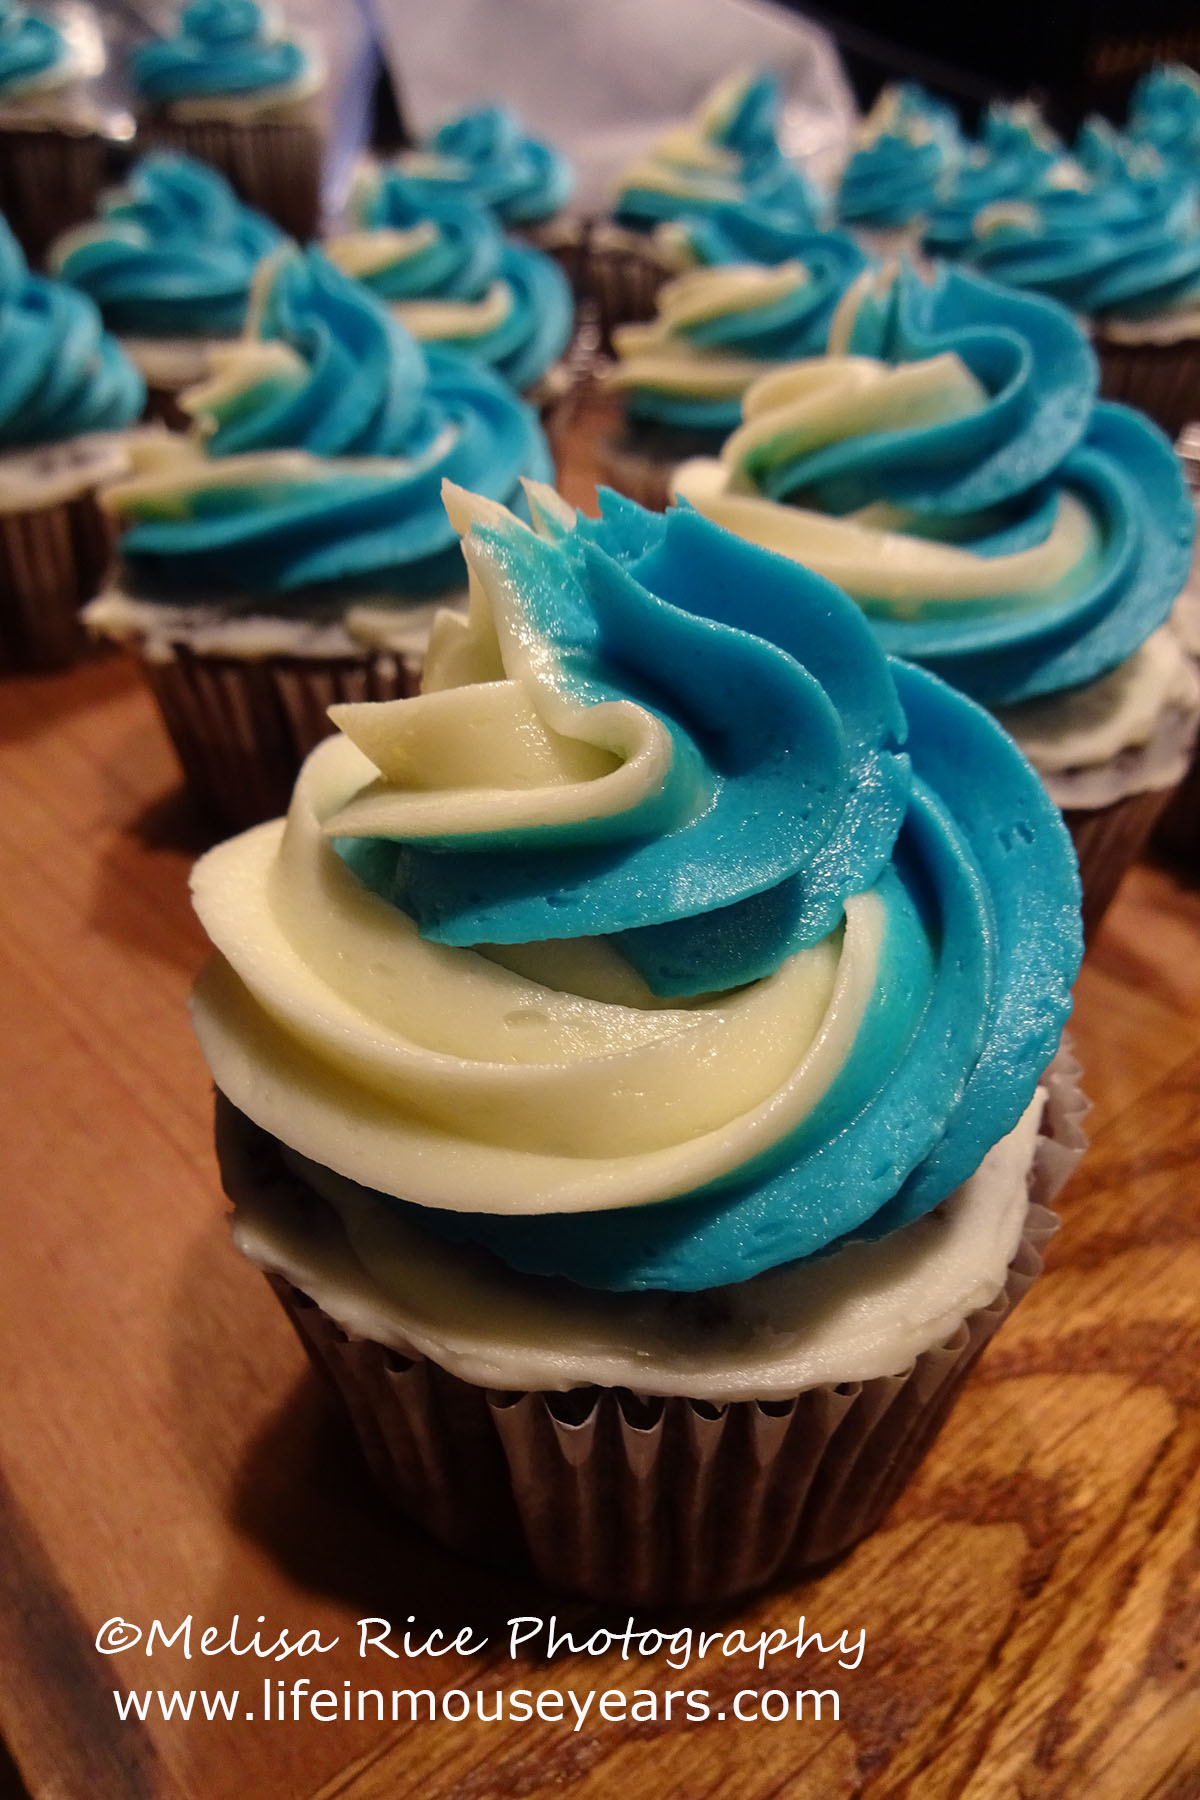
So first I take a larger piping bag with a 1M tip (16 inches or larger) and add the two filled piping bags (with the ends cut off). Second, I start to pipe the frosting to the top of the cups by going around in a circle along the edge into the center of the cupcake making what soft serve ice cream looks like. Later the toppers will be added to the center of the swirl.
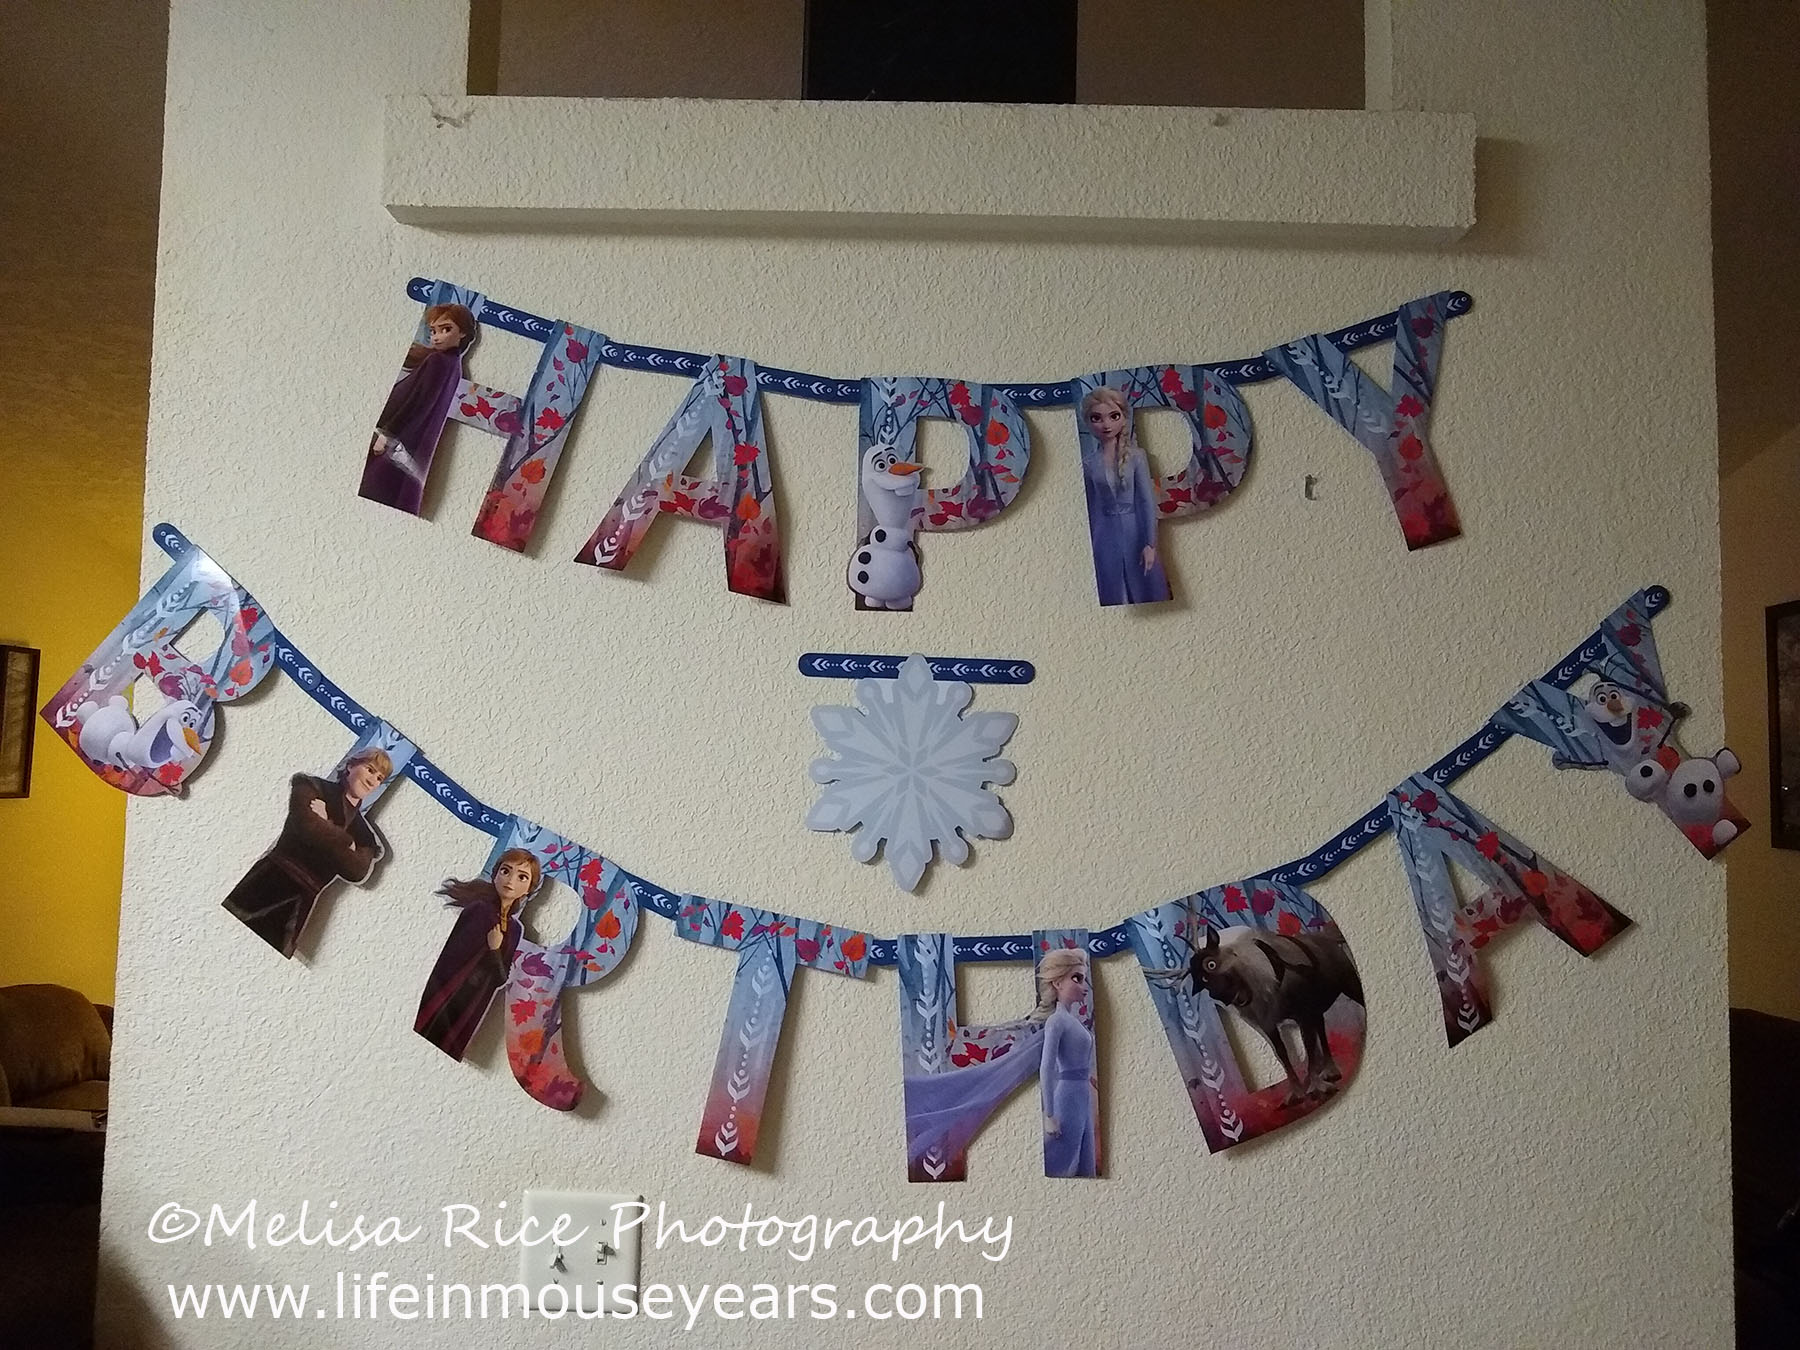
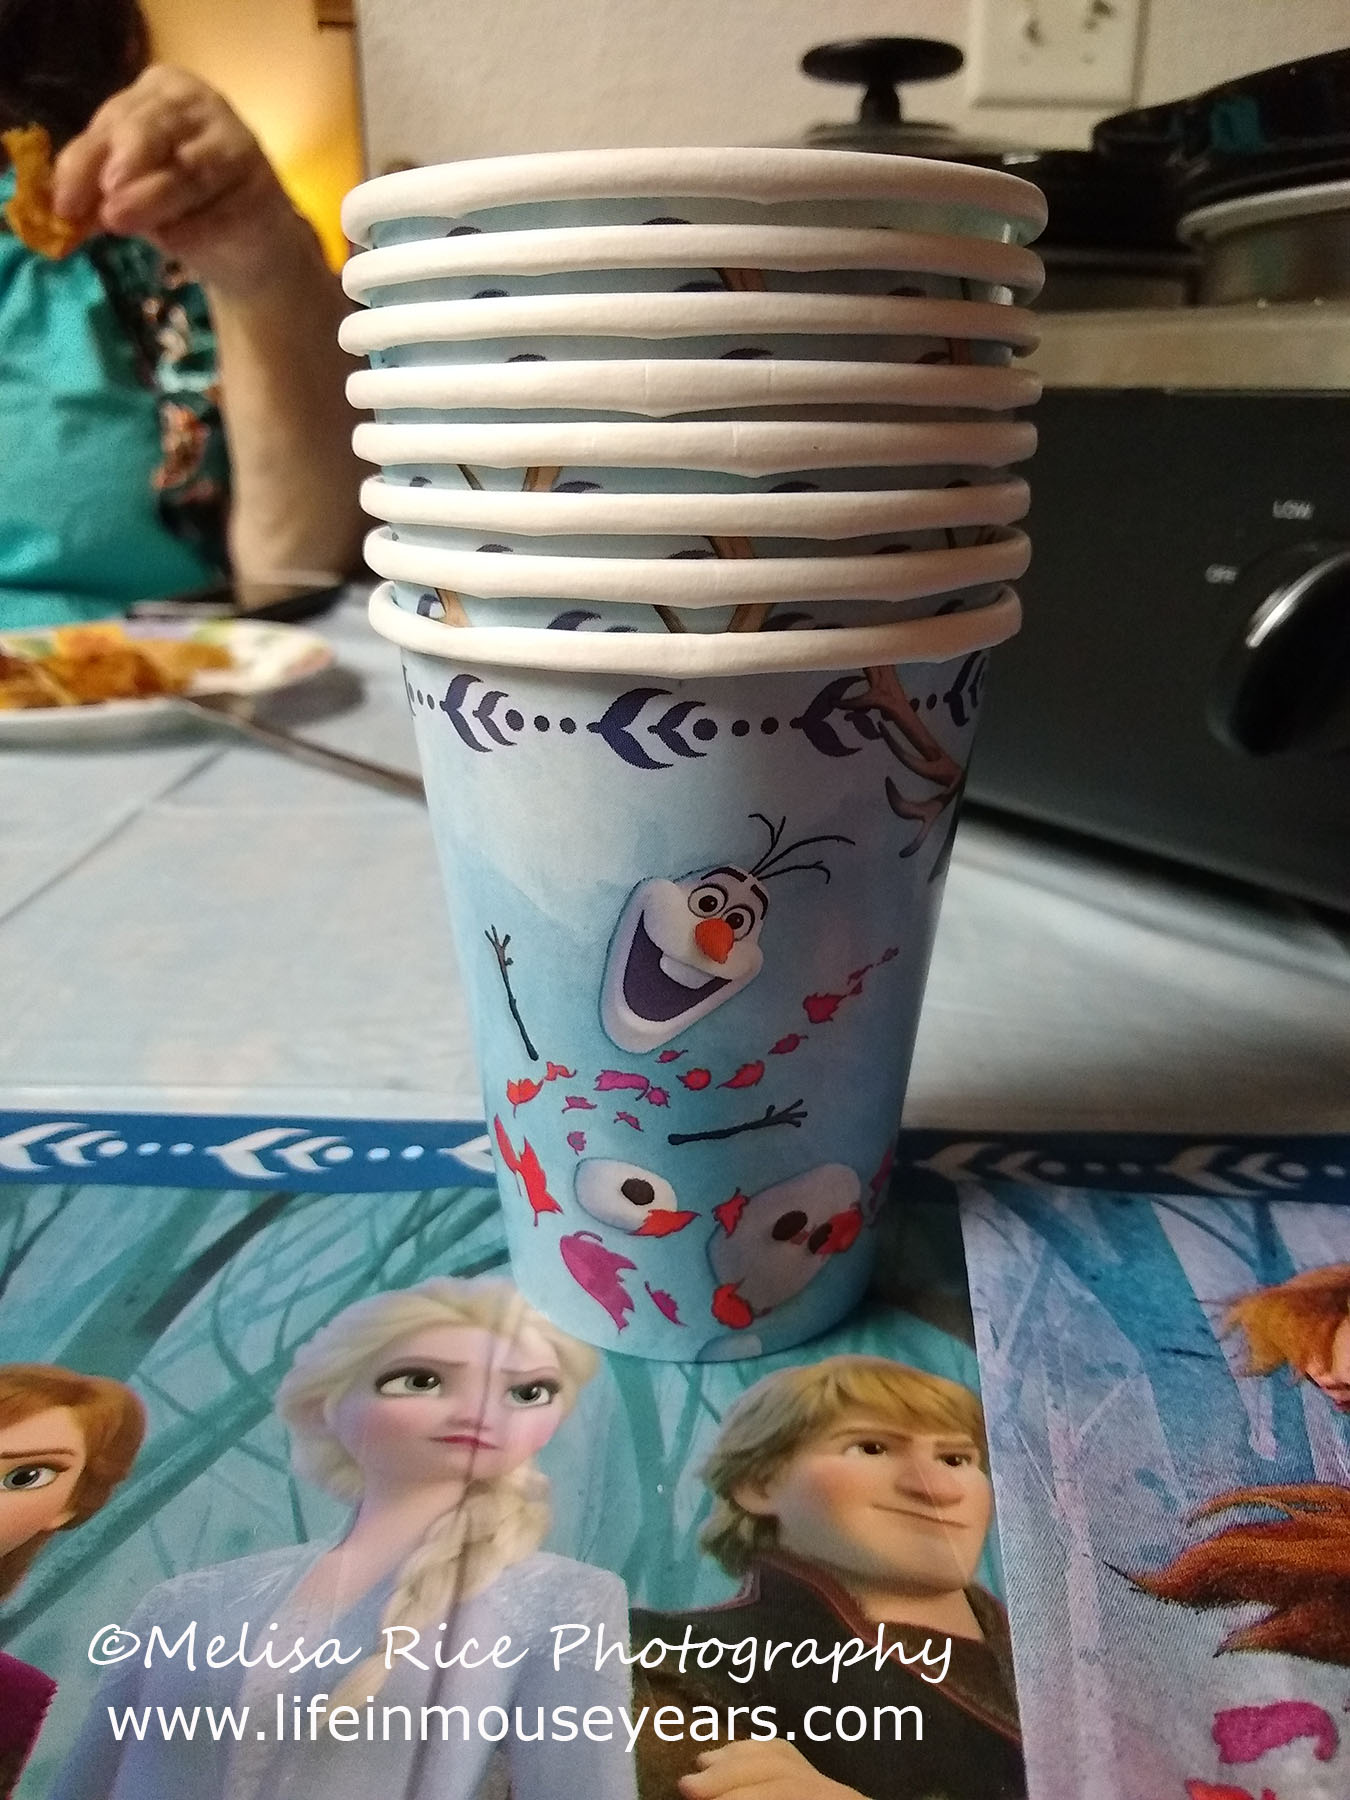
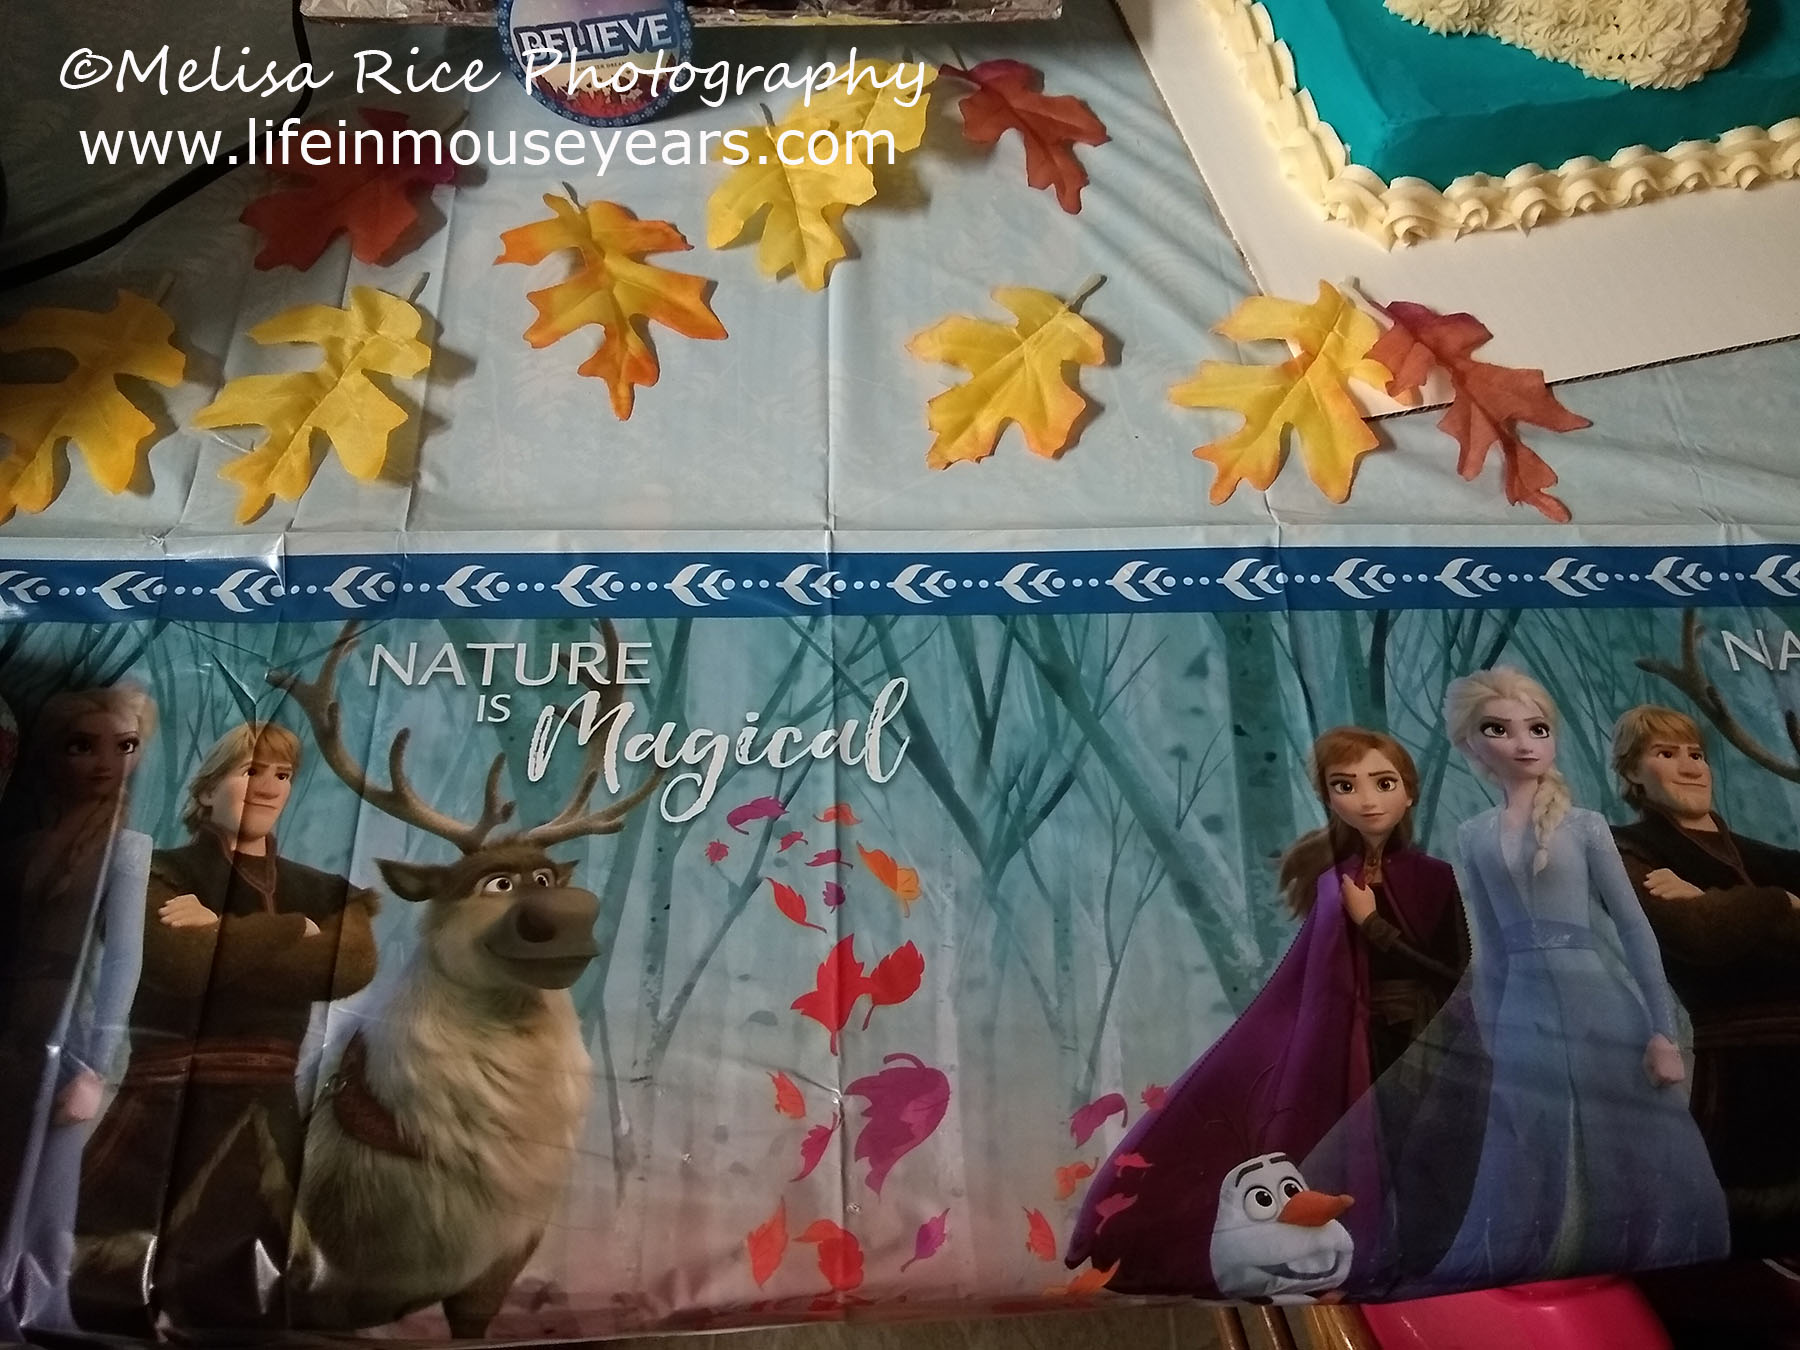
Frozen 2 Party Supplies
Next on How to Make an Olaf Shaped Cake is the Frozen 2 party supplies. My friend found a party pack that had plates, cups, napkins, a hanging birthday sign, tablecloth, balloons, and leaves (for table decoration). She also found some Frozen cupcake toppers. Check out the decorations below.

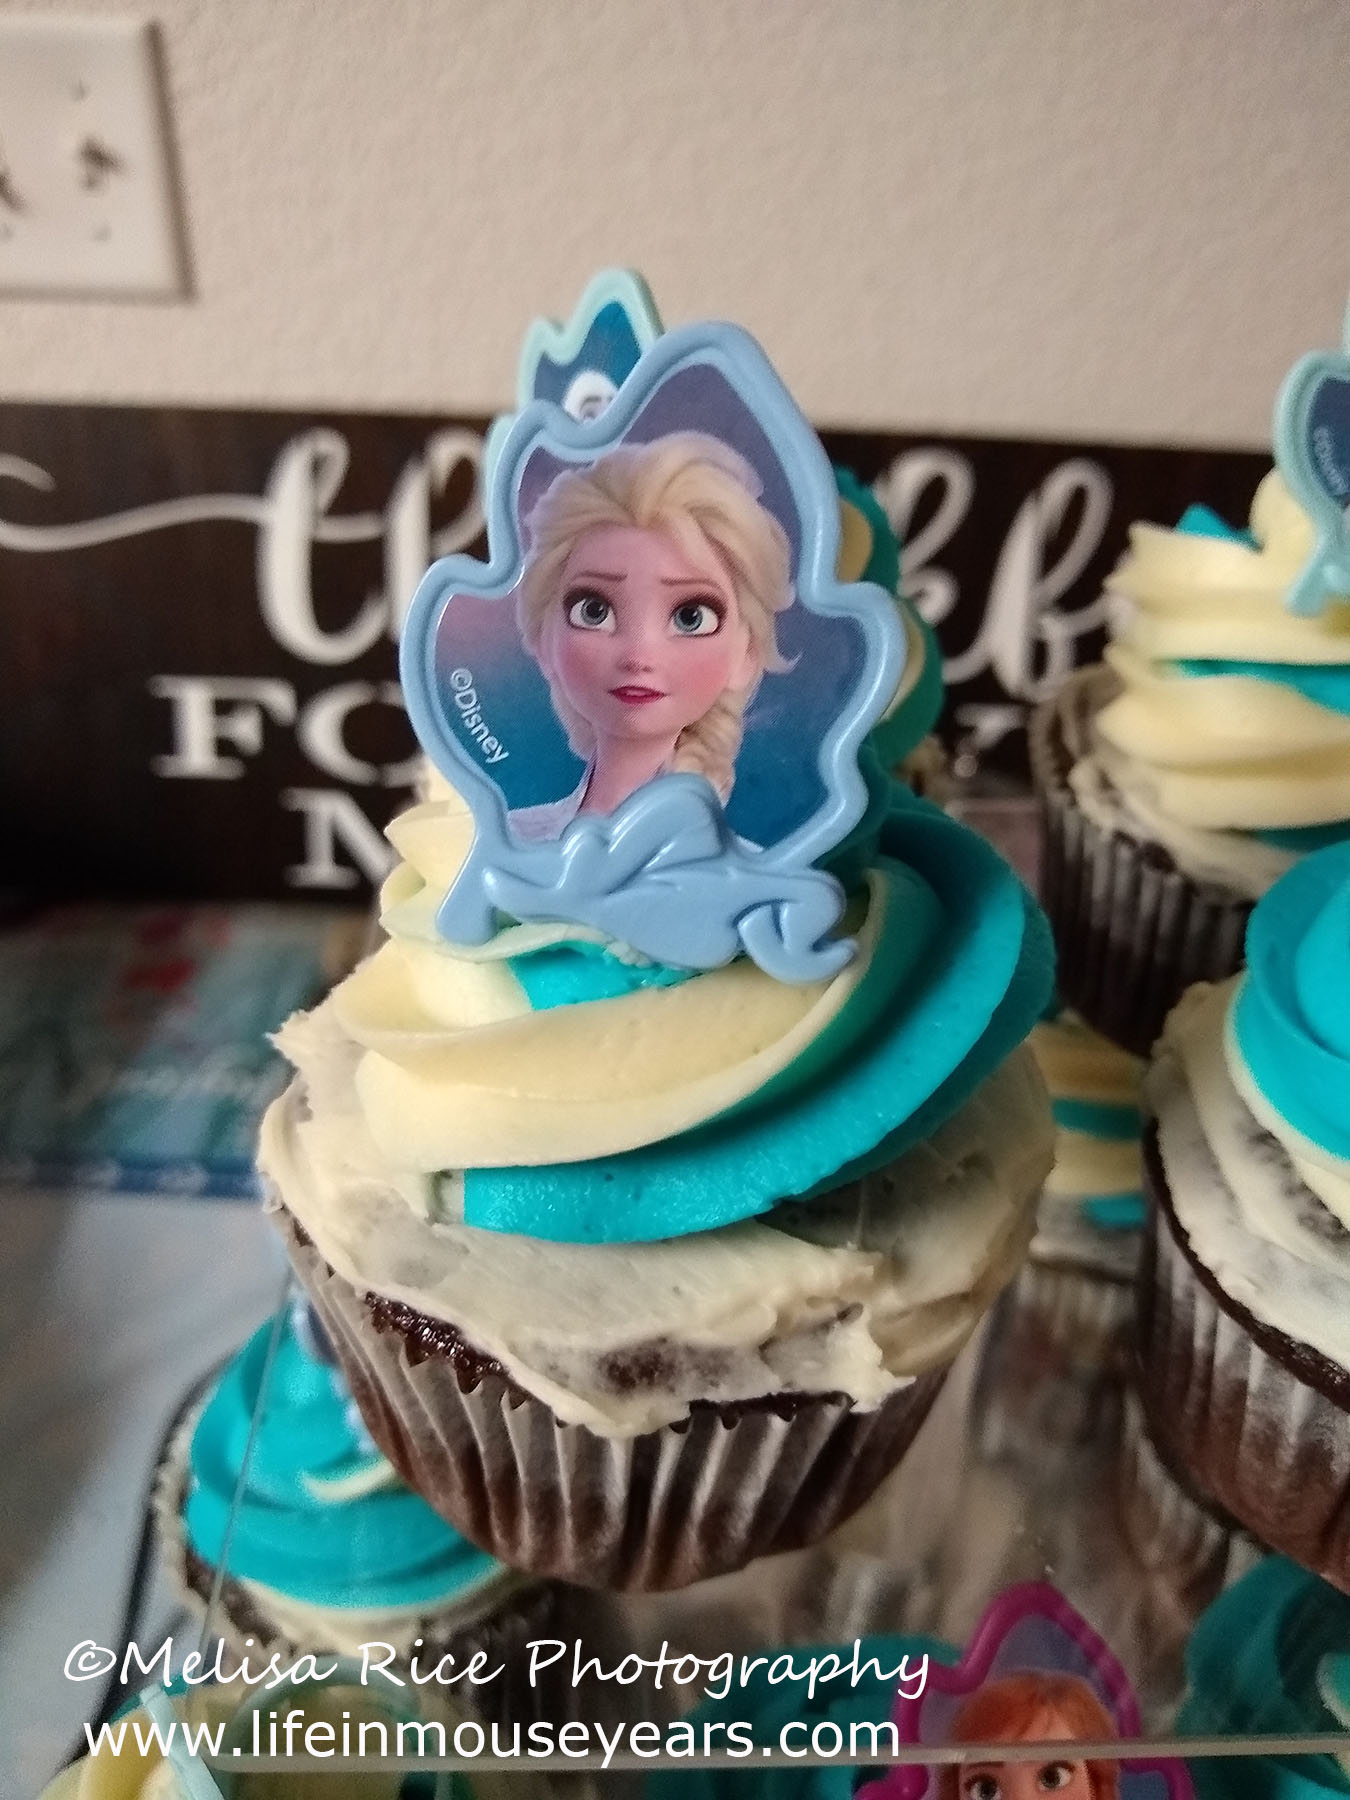
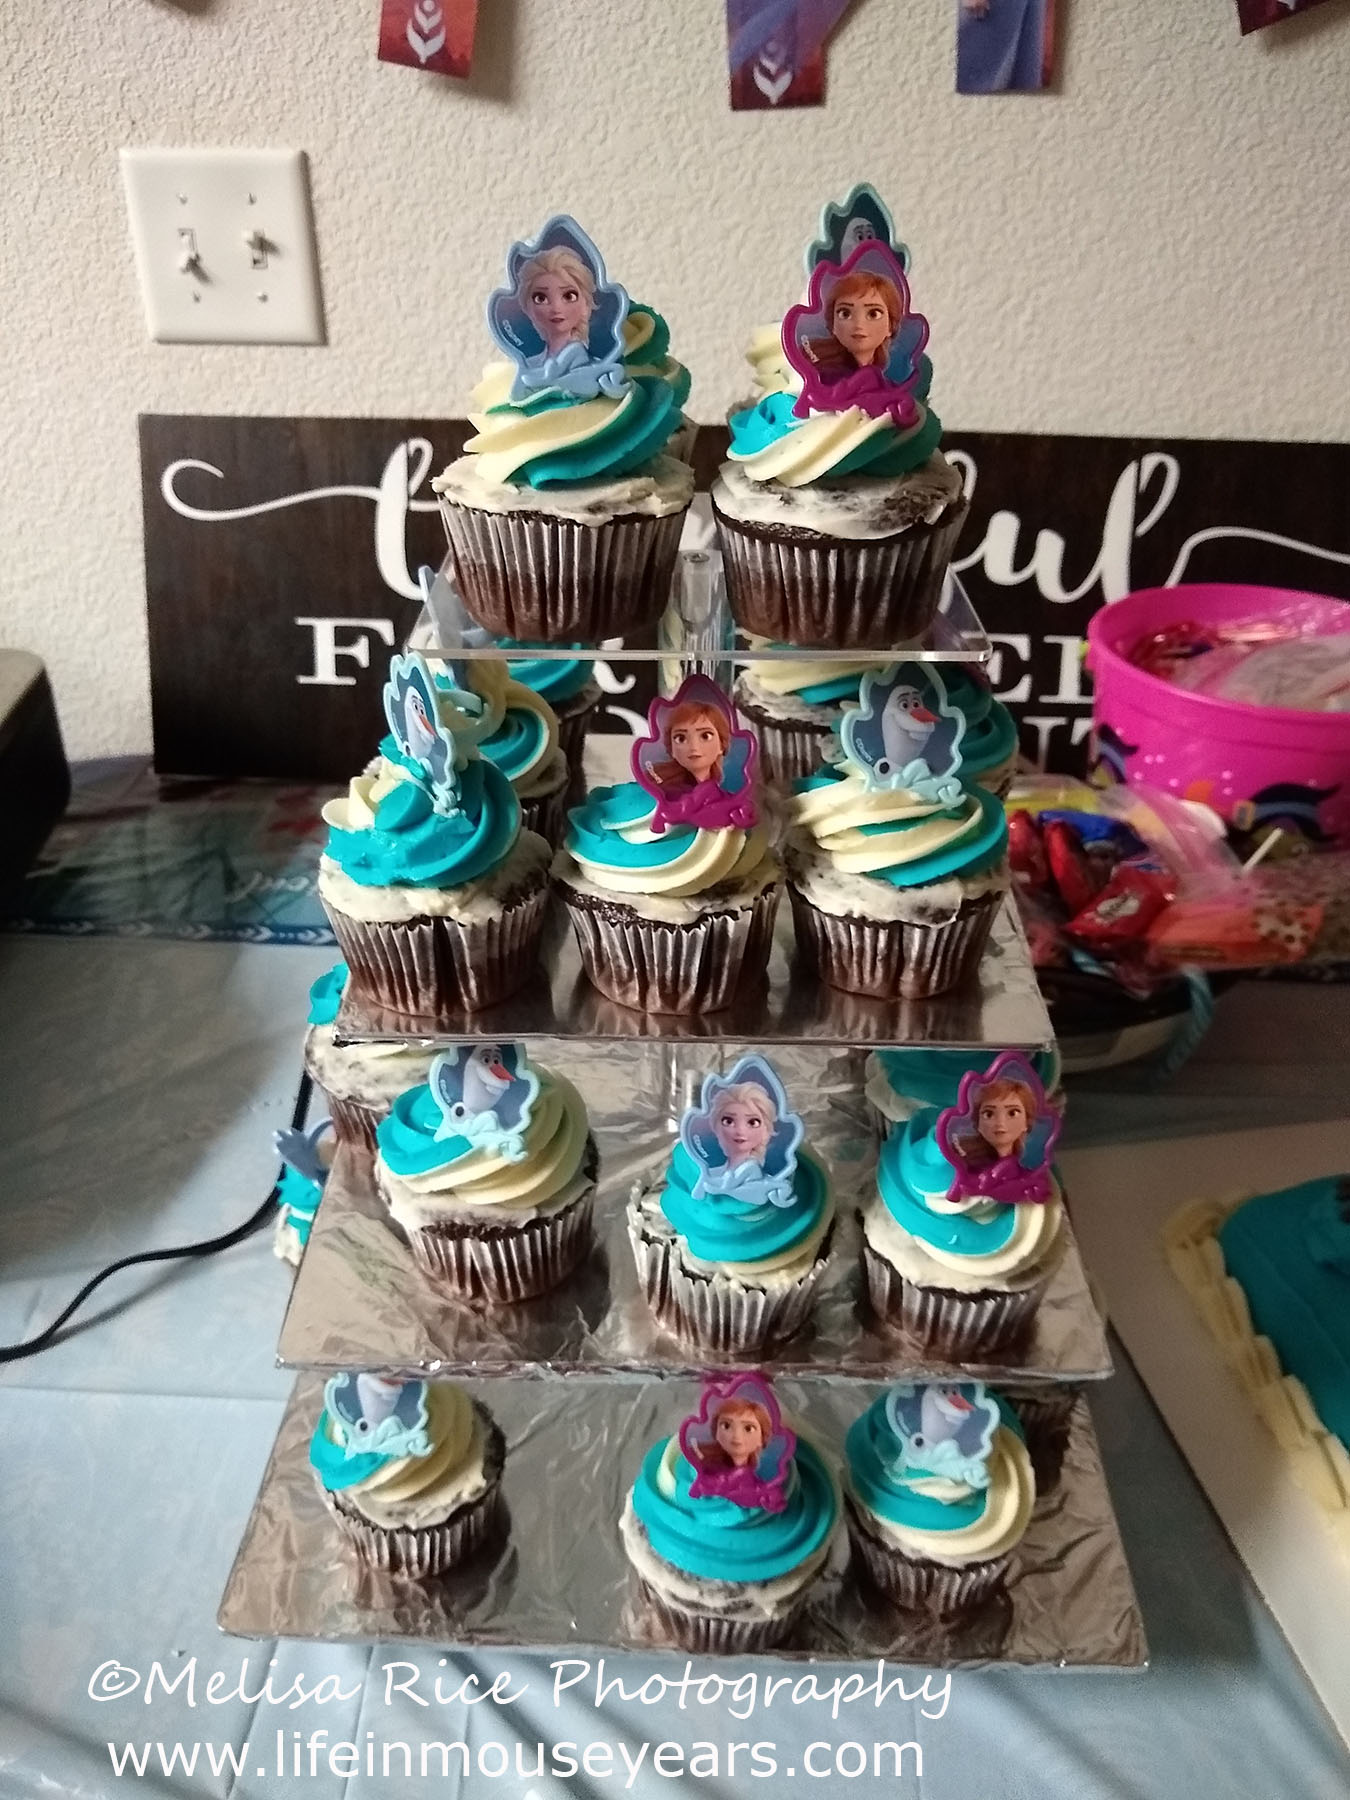
Cupcake Toppers
Finally on How to Make an Olaf Shaped Cake is to add the cake toppers! Because my friend ordered them and had gotten them in (and I wasn’t able to get ahead) I added them when I arrived. Well, I had help from the birthday girl and her brother. I piped a little bit of fresh frosting to the top and let them add the toppers. There were pictures of Olaf, Elsa, and Anna on each of the ring toppers.

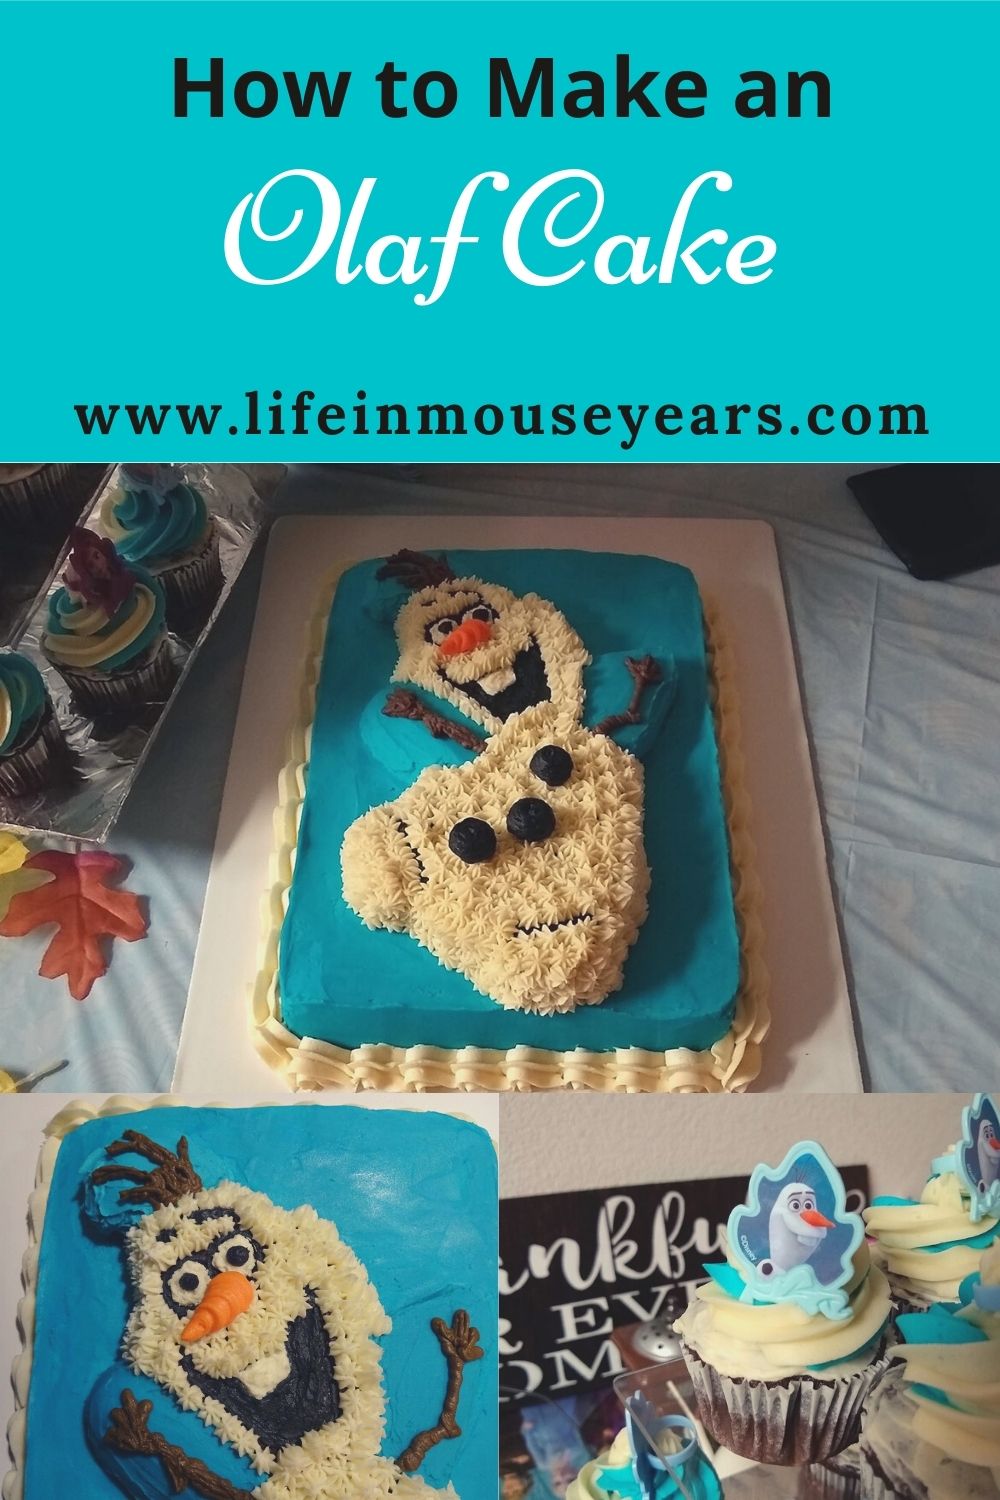
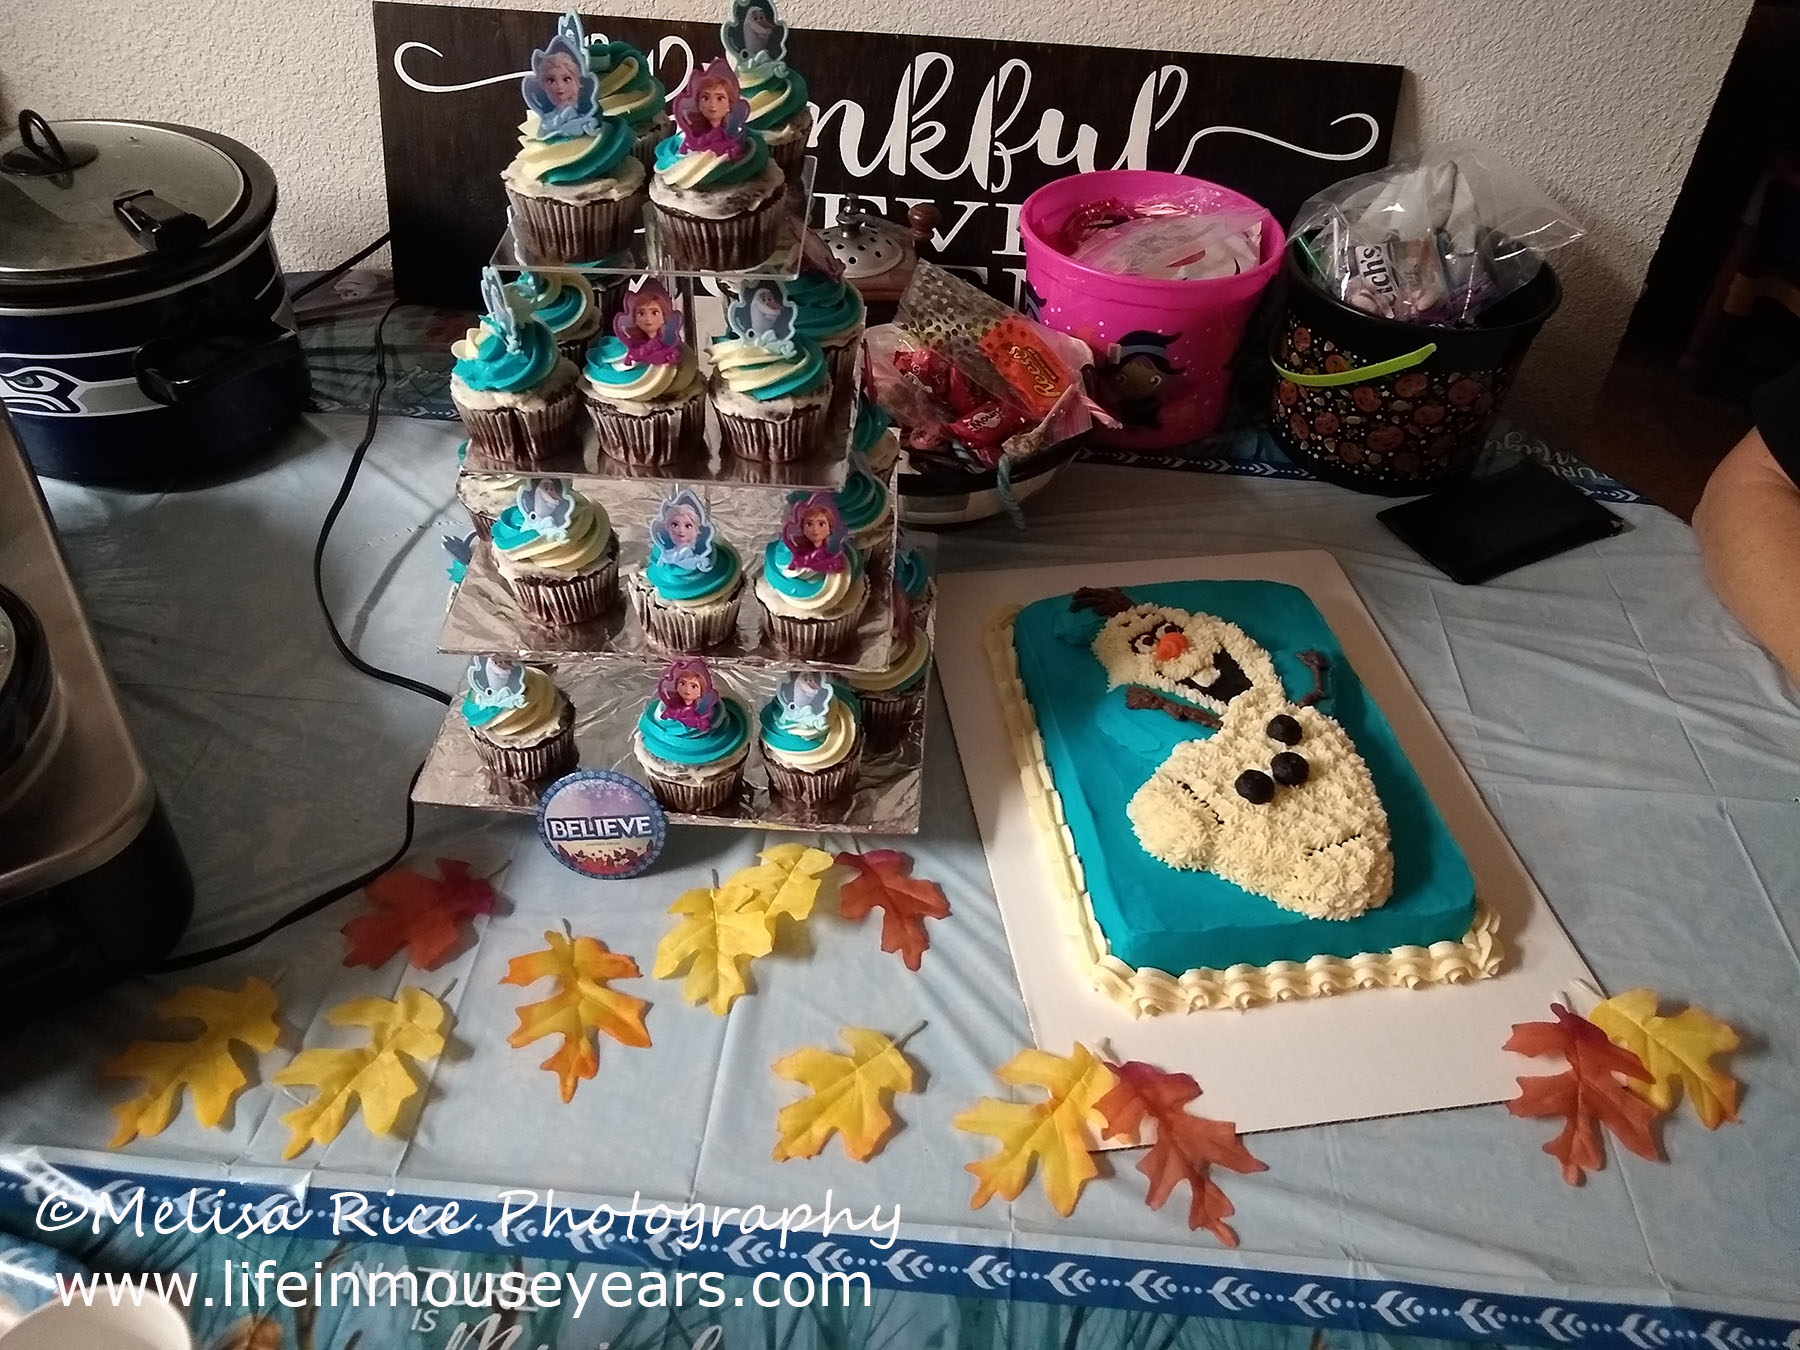
The Olaf Cake and Cupcakes at the Party
Finally, here are the photos of the final display of the Olaf cake and cupcakes!
In Conclusion
How to Make an Olaf Shaped Cake was an adventurous time. Trying to figure out what to do and how to do it. I hope that today’s post helps you out to make your own Olaf-shaped cake or Frozen cupcakes. As well as give you ideas on what to do and try out for your next Frozen-themed party.
Questions or Comments?
If you have any questions or comments on today’s post, please feel free to leave them in the comments below. I would love to help!
Thanks for stopping by Life in Mouse Years!
Find the perfect gift for someone you love today!

Leave a Reply