
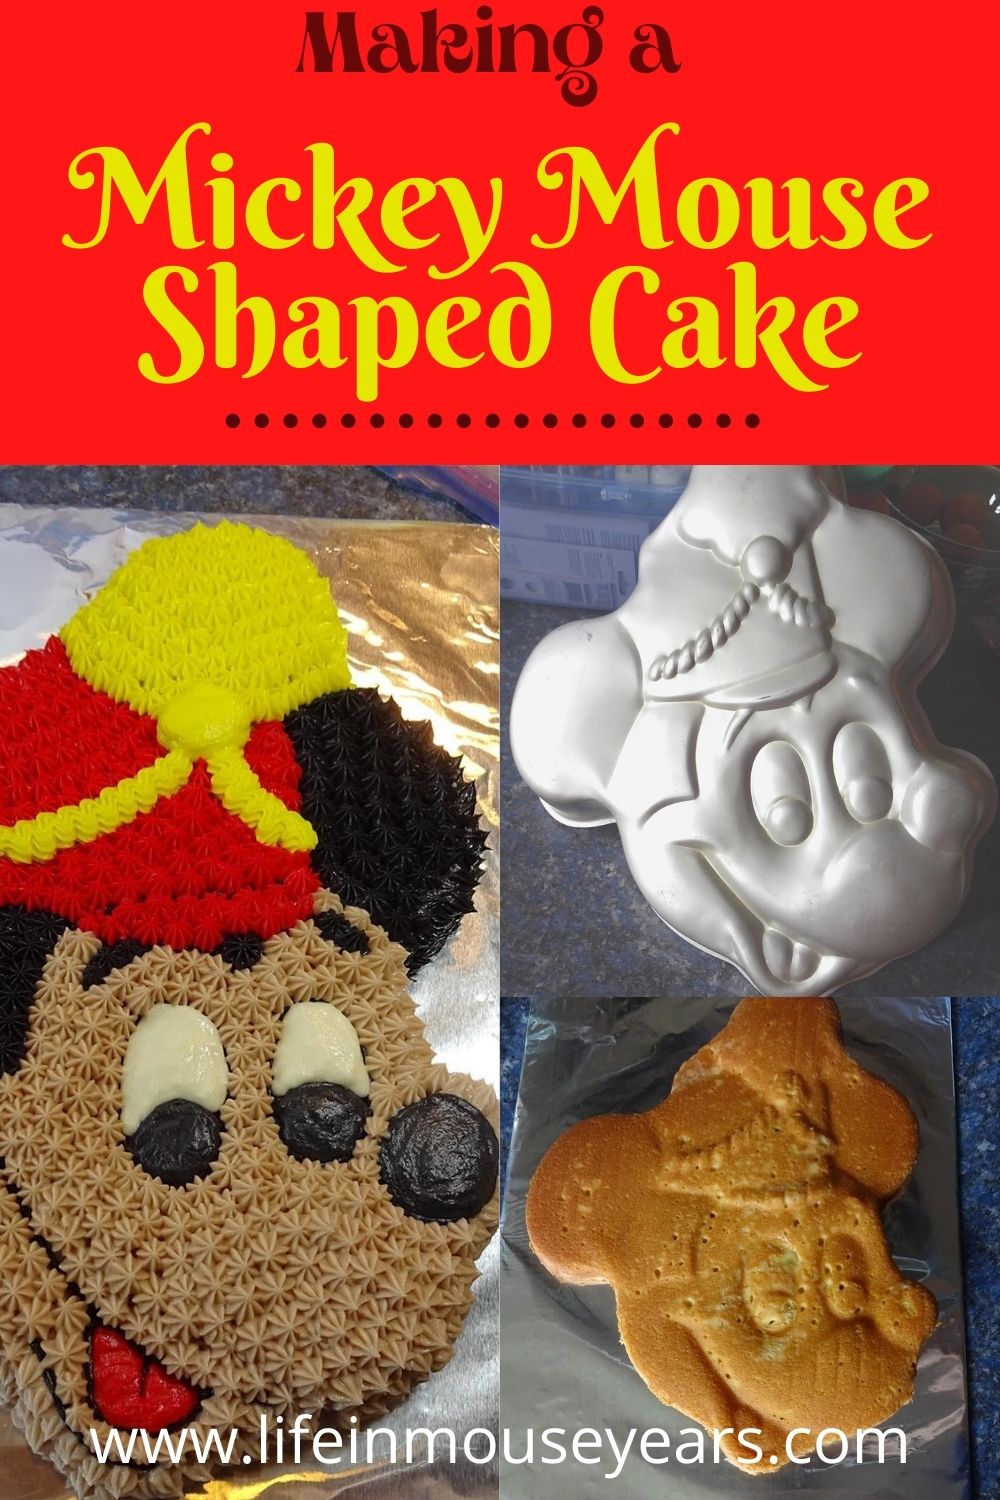
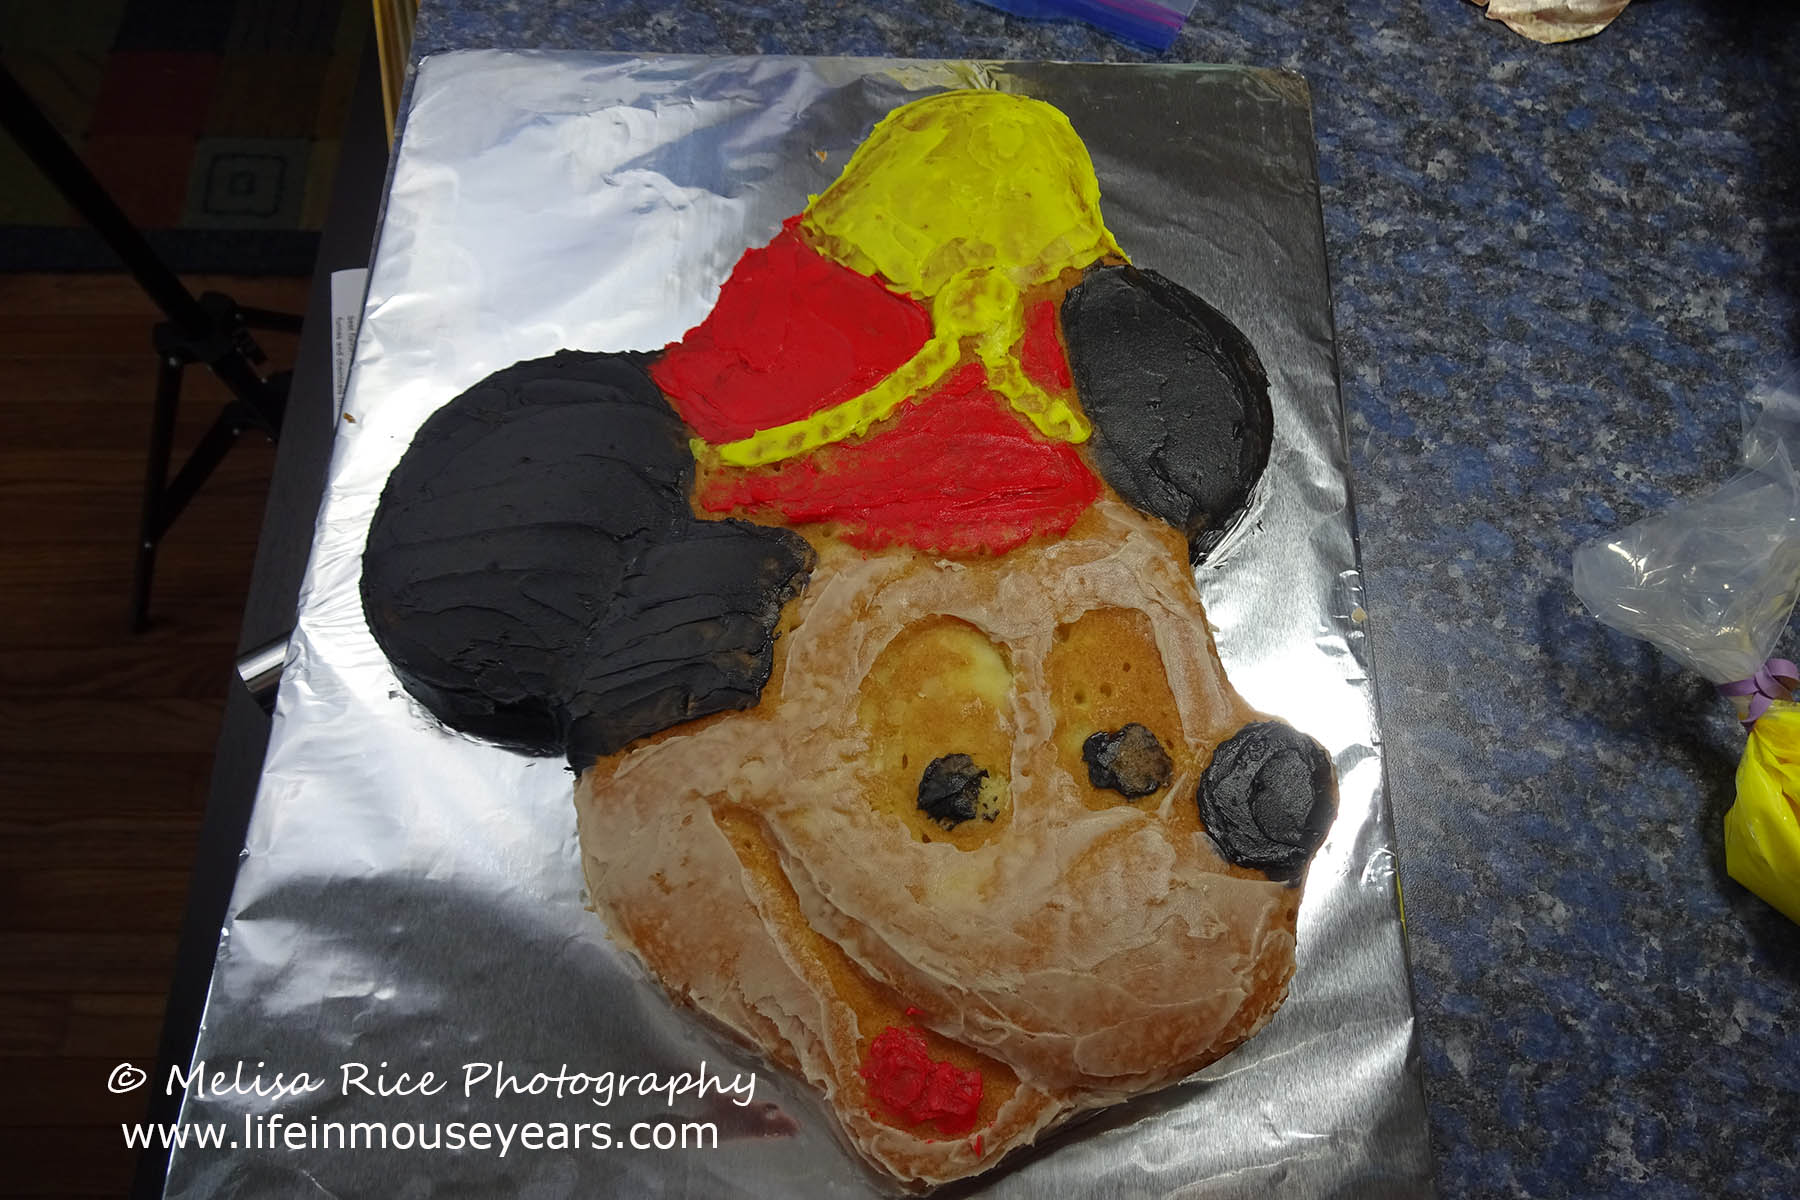
Making a Mickey Mouse Shaped Cake is what I did for my birthday this year! I had never had the opportunity to make my own cake before. I had so many ideas that were rolling around in my head. Which one should I make? I wished I could do more than one, but, I finally made the choice to use a Mickey Mouse shaped pan that my mom has had since I was very little. Nostalgia.
Making a Mickey Mouse Shaped Cake
Making a Mickey Mouse Shaped Cake was a fun treat for me to do. Besides making a cake for myself and getting exactly what I wanted, I was able to make a Disney cake to share with all of you! A Mickey Mouse-shaped cake! Continue reading to find out what supplies I used and what I did to make this cake. While you may not find this exact cake pan, being that it is so old, however, there are other Mickey-shaped cake pans that can be used. In fact, any character-shaped pans can be used, and then the icing methods and supplies can be used in the same way!
Another Cake
First of all, I would like to say thank you for reading this post! I try to keep a mix of Disneyland tips, history, cakes, and crafts. (Although I need to bump up the DIY Disney crafting.) Unfortunately, or fortunately, there have been a lot of cakes being made lately. Being that they are in abundance, I have been trying to space them out a bit. This way hopefully, you guys won’t get caked out like I am right now after all the cake making. Hee hee
Supplies
Next on the list for Making a Mickey Mouse Shaped Cake is the supplies. The following list is what I used for this cake. Starting with the supplies, then the cake ingredients, and then the frosting ingredients. The recipes I used will be in other sections down below.
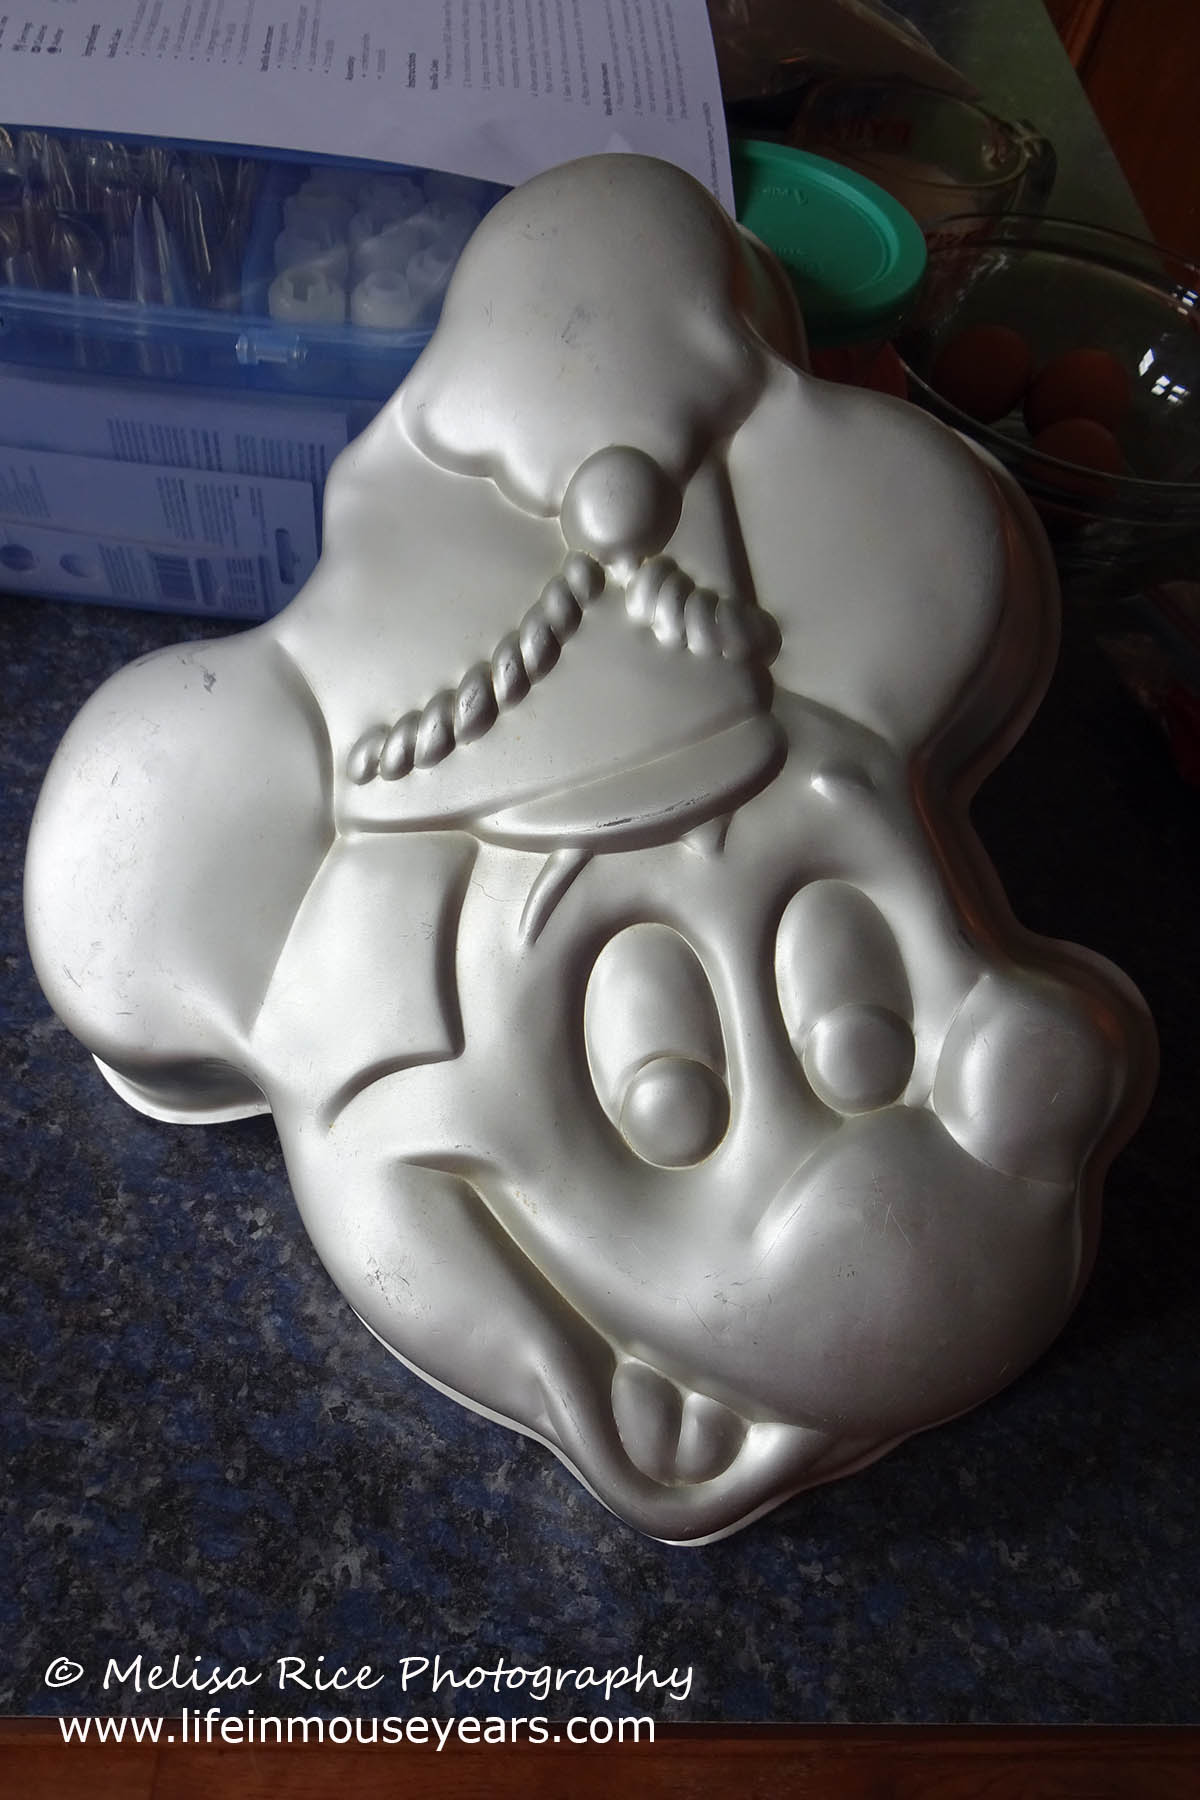
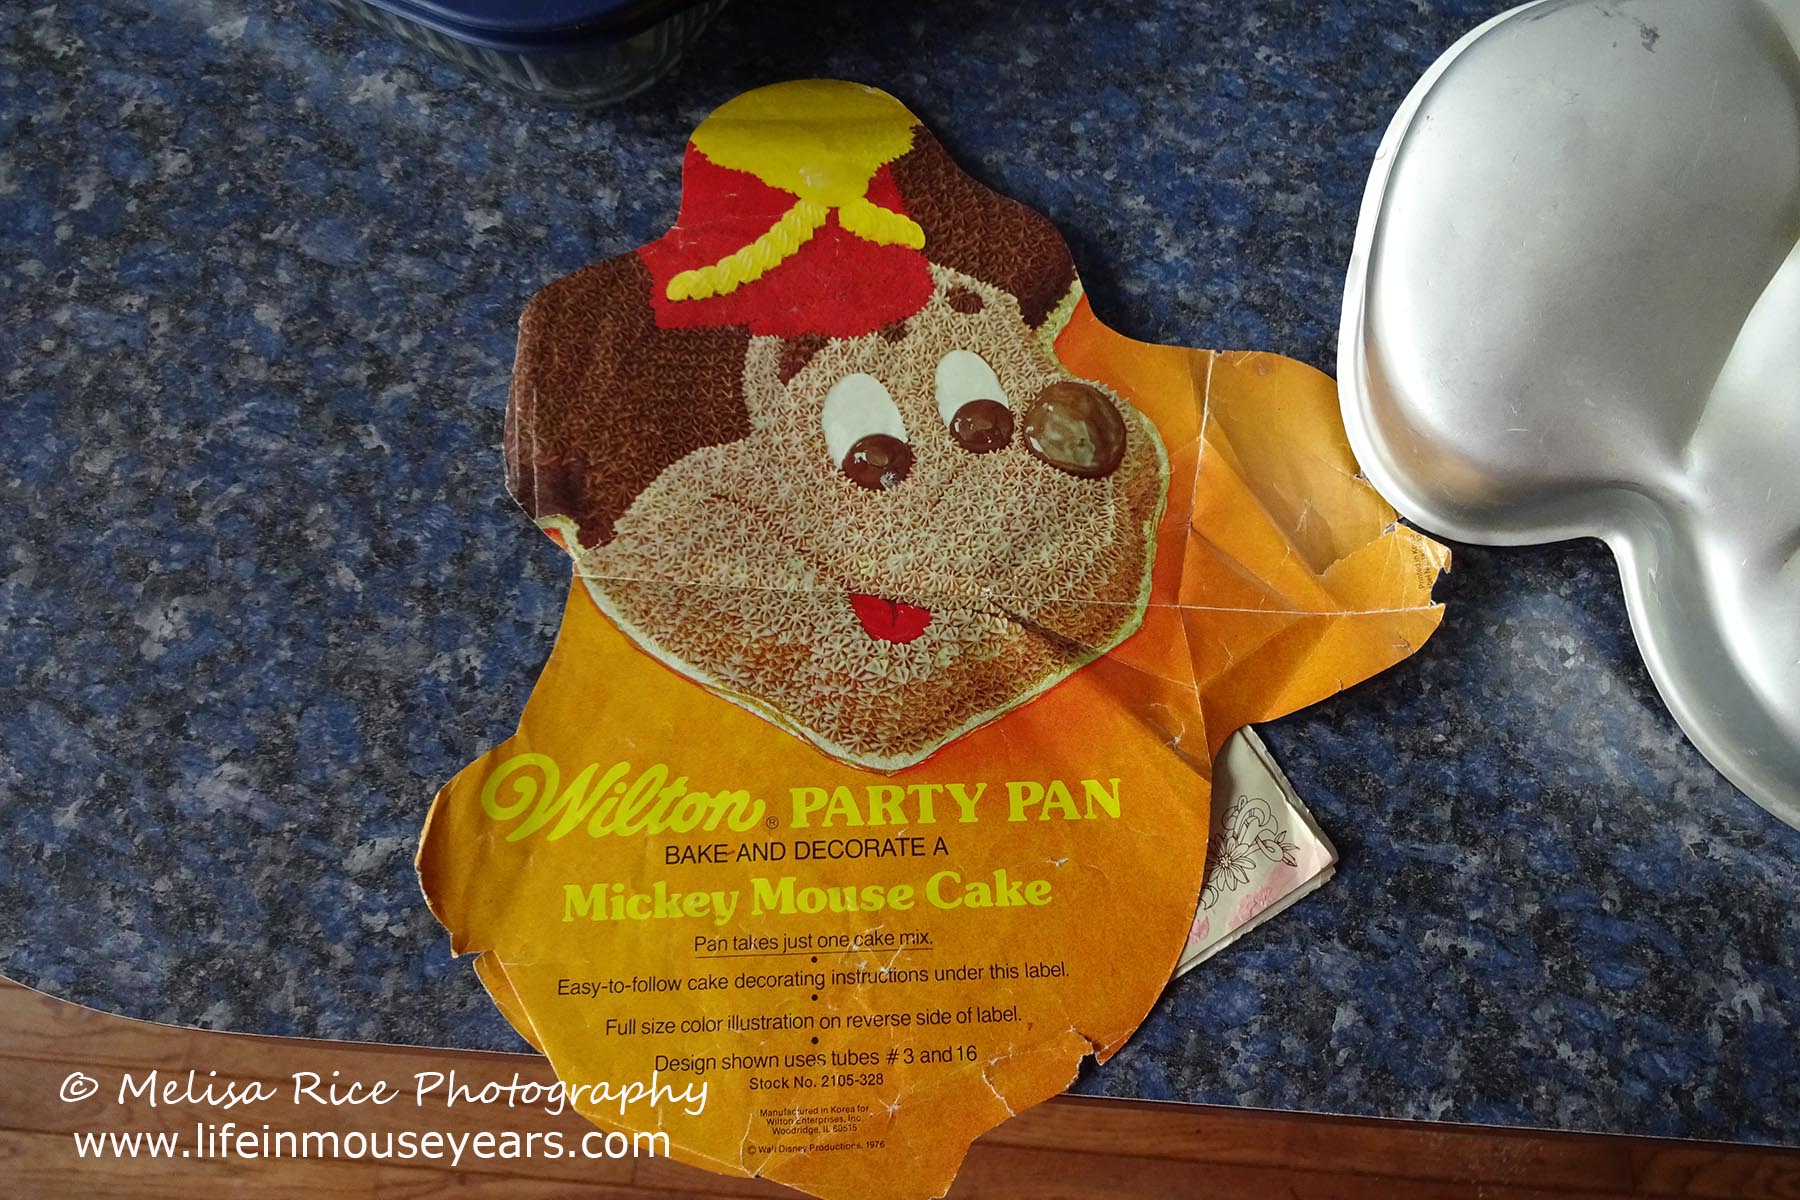
- Wilton Mickey Mouse Cake Pan (or ANY character-shaped pan.)
- Piping Bags
- # 21 Tip
- #22 Tip
- #18 Tip
- #3 Tip
- Couplers
- Small Angled Cake Knife
- Cake Board
White Cake Ingredients
- Unsalted Butter
- All-Purpose Flour
- Sugar
- Egg Whites
- Baking Powder
- Salt
- Milk
- Extra Light Olive Oil
Buttercream Ingredients
- Unsalted Butter
- Powdered Sugar
- Pure Vanilla Extract
- Half n Half
White Cake Recipe
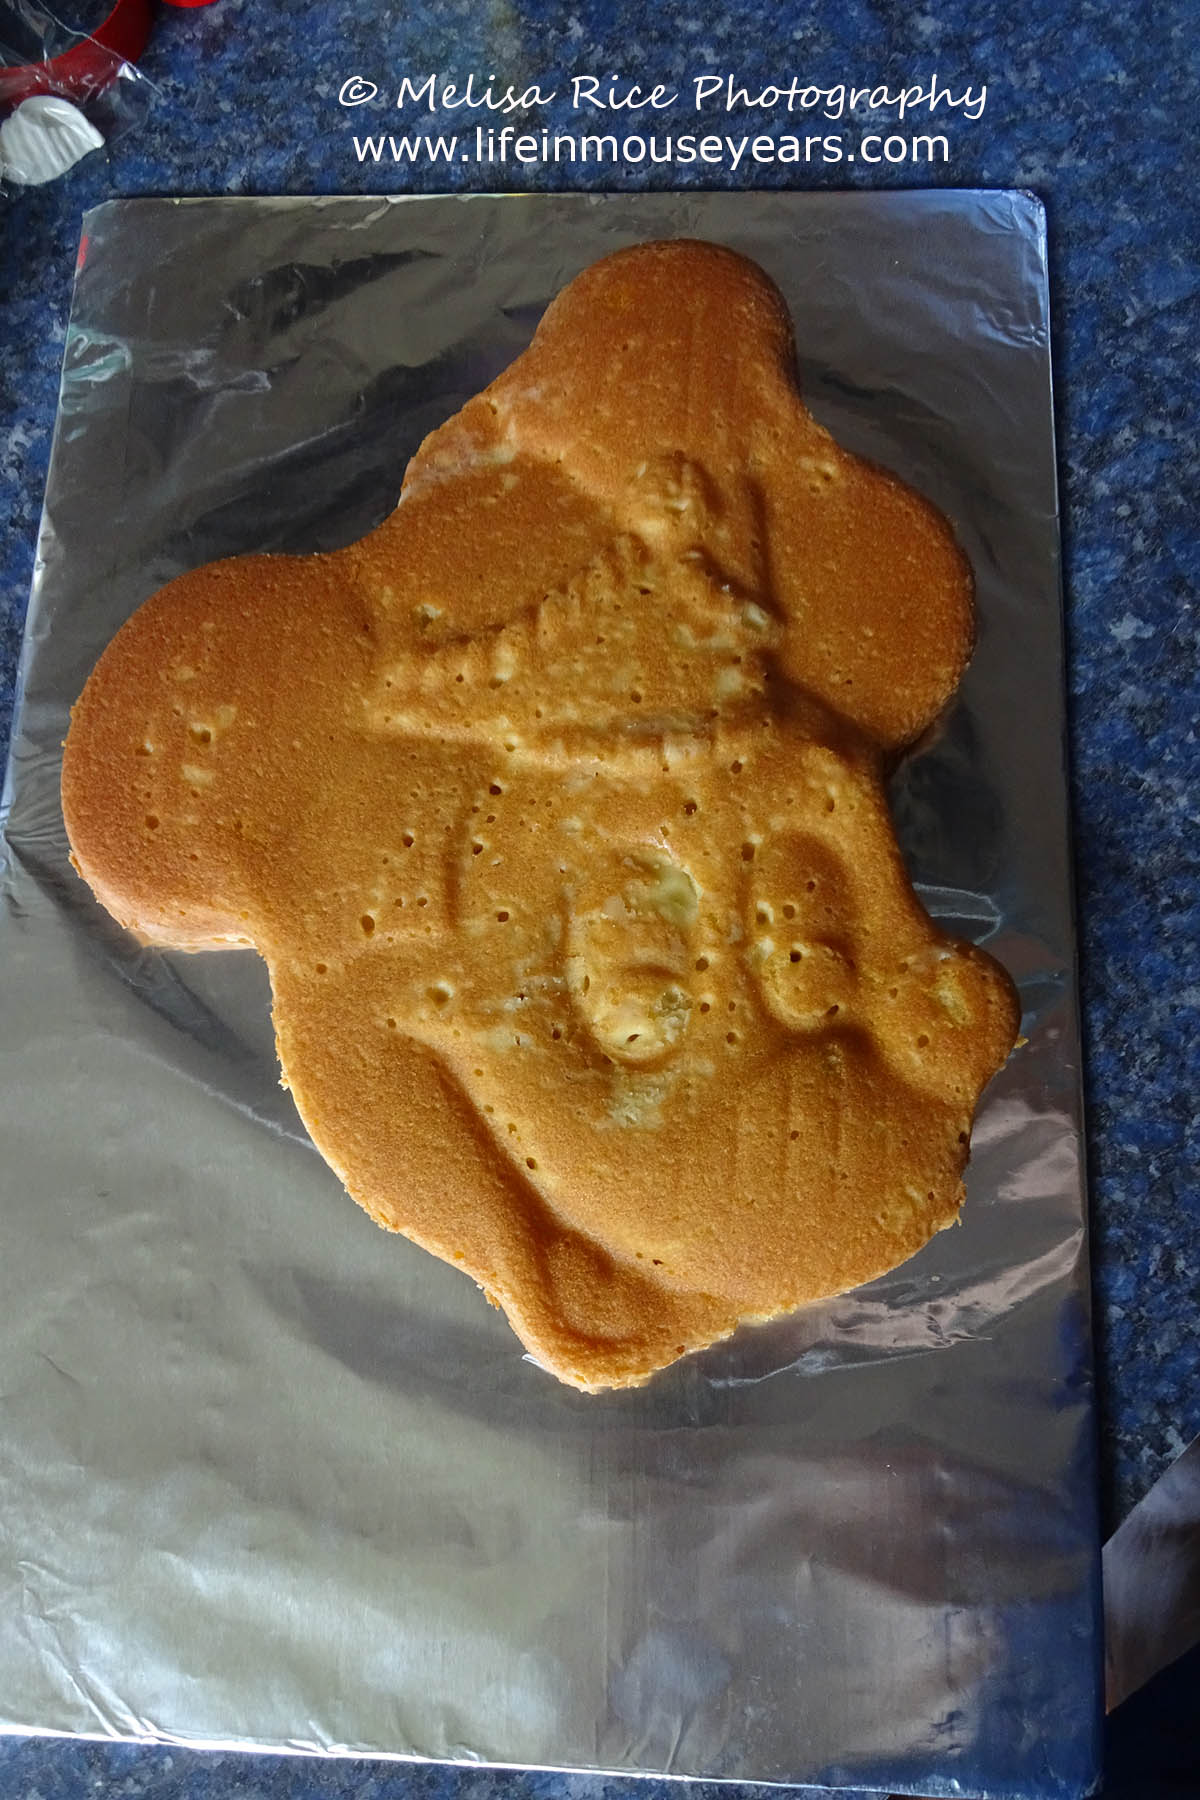
Third on the list for Making a Mickey Mouse Shaped Cake is making the cake. I had tried out a recipe for a vanilla cake that was more of a yellow cake for this. The end result was ok, but, it was not what I was looking for with taste and texture. After my birthday, I had done quite a few test cakes to find just the right white cake recipe that was moist and tasted great. ( Here is the recipe I found.)

With this recipe, I did make a couple of changes to it when I made it. The first change is one that I recommend with every cake blog post I have made. (Check out my Mickey Mouse Buttercream cake post here for a chocolate cake. The chocolate recipe works for a shaped cake pan too as I will share more details with you soon! FYI, it was a Tinker Bell cake.) It is to use olive oil instead of vegetable oil, yet, it needs to be light olive oil. This way, it doesn’t have much flavor which is what you are going for. Regular olive oil, (extra virgin olive oil), has a stronger flavor and can be tasted in the end result. (Not very tasty…)
The next thing I changed was that I only used vanilla extract instead of adding the almond extract. (So 2 teaspoons vanilla.) I did this because someone ordered a white cake for me for a gathering and I didn’t know if anyone would have a reaction to the almond extract. Therefore, just to be safe, I only used vanilla. And while I can’t compare the taste difference, yet, by just using the vanilla the cake was delicious!

Making Buttercream
Next on the list for Making a Mickey Mouse Shaped Cake is to make the buttercream! This is the recipe I use. It is my go-to recipe and has always worked out well. It can also be made into a whipped buttercream.
One change that I do to the recipe is to use butter in place of the shortening. I prefer it to the half butter and half shortening that the recipe calls for.
This step is one to do the day before you are needing to use the frosting. The reason for this is that it takes time for the colors to develop. Especially if you are trying to get darker colors like red and black.
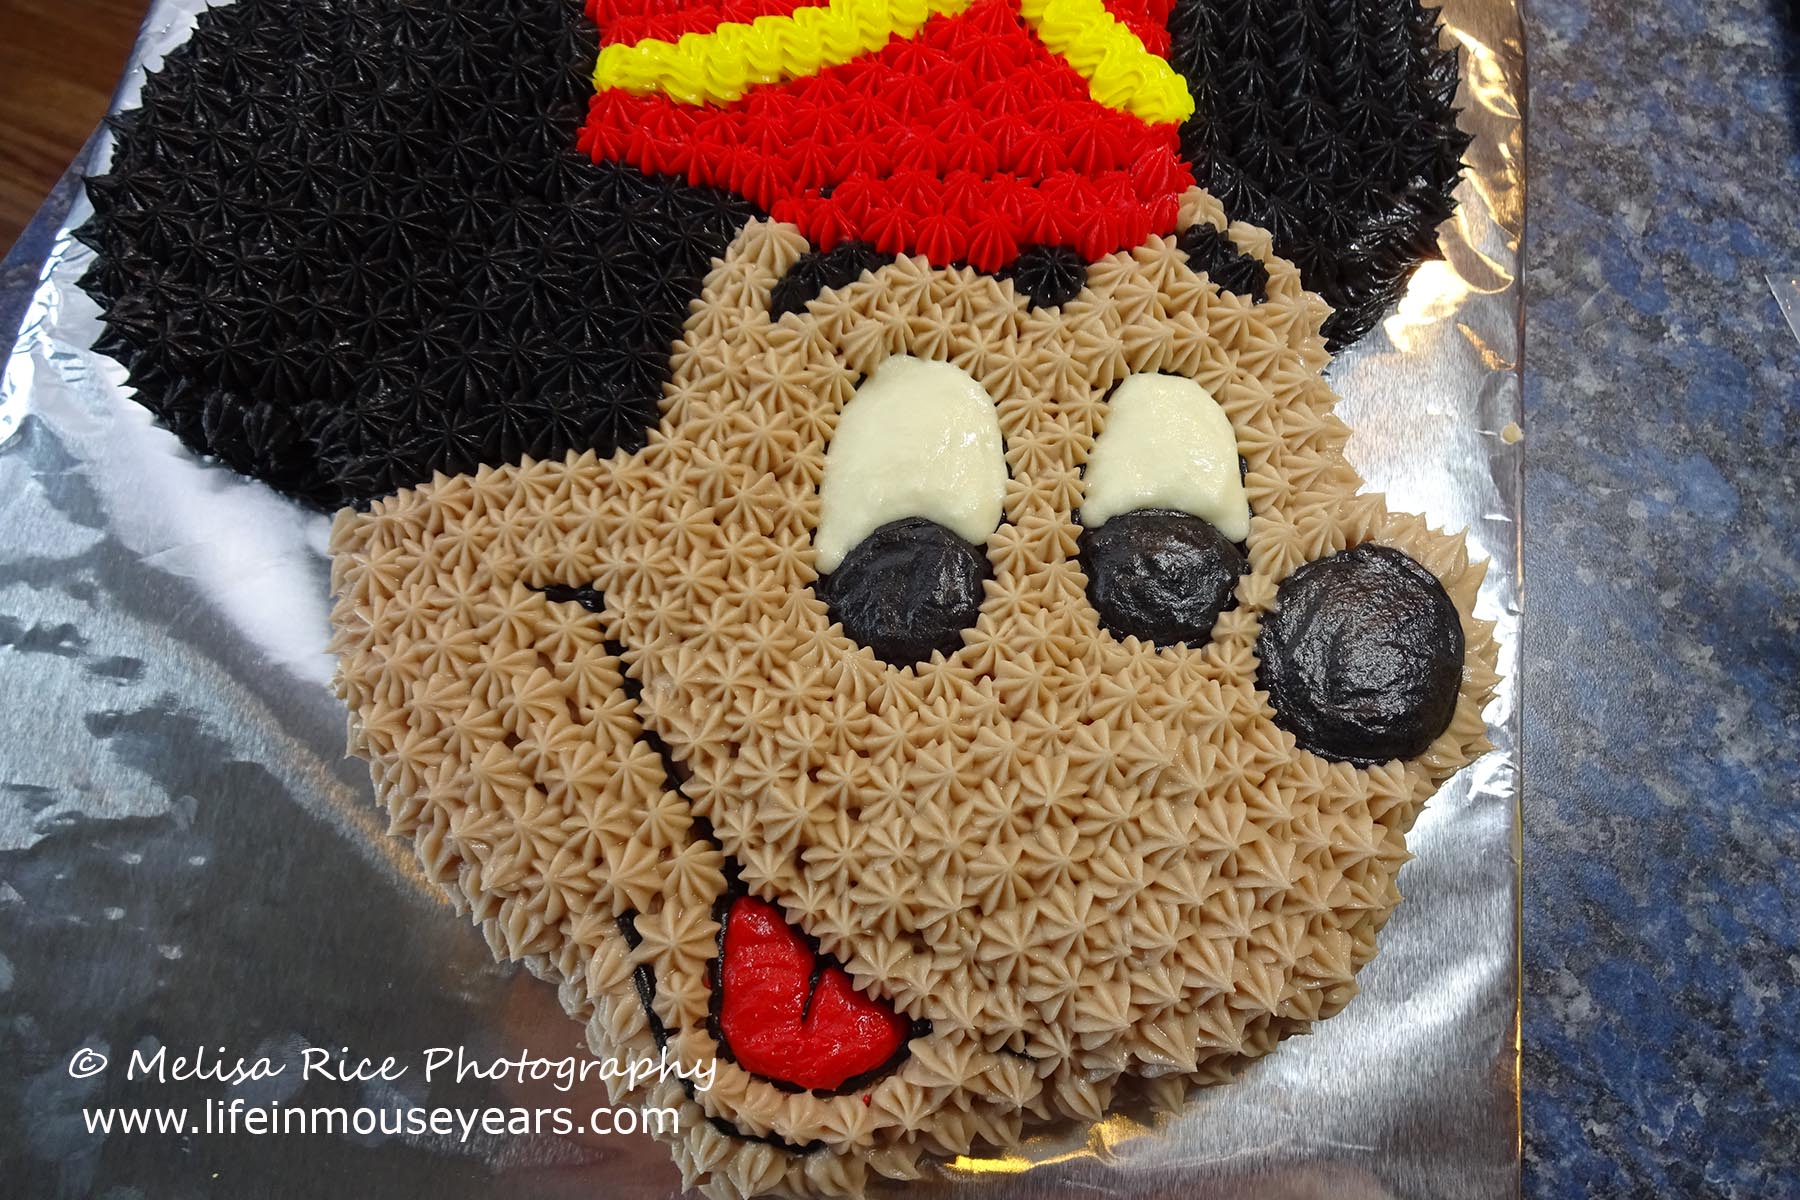
For Mickey’s face, I added a little bit of cocoa powder to get a tan color. Likewise, for his ears, I also added cocoa powder in addition to adding the color black in. It turned a nice shade of black and tasted like chocolate. Which is always a plus.
Whipped Buttercream Tip: (Including a Less Sweet Option.)
To make whipped buttercream, put the butter in the mixer, and just let it go on a med/high speed until it looks white and a bit fluffy. Next, add the powdered sugar a cup at a time. Let it mix well after each addition. And the more you mix it, the more it gets whipped up and soft. Then add in the vanilla and the milk you are using. ( I have tried pretty much every type out there. Milk, half n half, heavy whipping cream, soy milk, and almond milk. Half n half is my favorite right now.)
If you are not wanting or needing a stiffer consistency, this recipe works to use 3 cups of powdered sugar instead of 4. The whipped buttercream with less sugar is so super soft, and not overpoweringly sweet. It is wonderful! Just know, that if you are piping shapes like stars or flowers, you will need that extra cup of sugar so that your shapes will hold their form.
Dirty Icing
Another thing on the list for Making a Mickey Mouse Shaped Cake is to dirty ice the cake. Yes, I know that the shaped cakes generally have you pipe stars all over the cake, however, I don’t like to see the cake in between the stars. I like to make sure the cake is fully covered. Just like when I make cupcakes or a rosette cake. Dirty icing helps hold the crumbs onto the cake and makes sure the whole cake is covered which helps the cake to stay moist and hide any gaps.
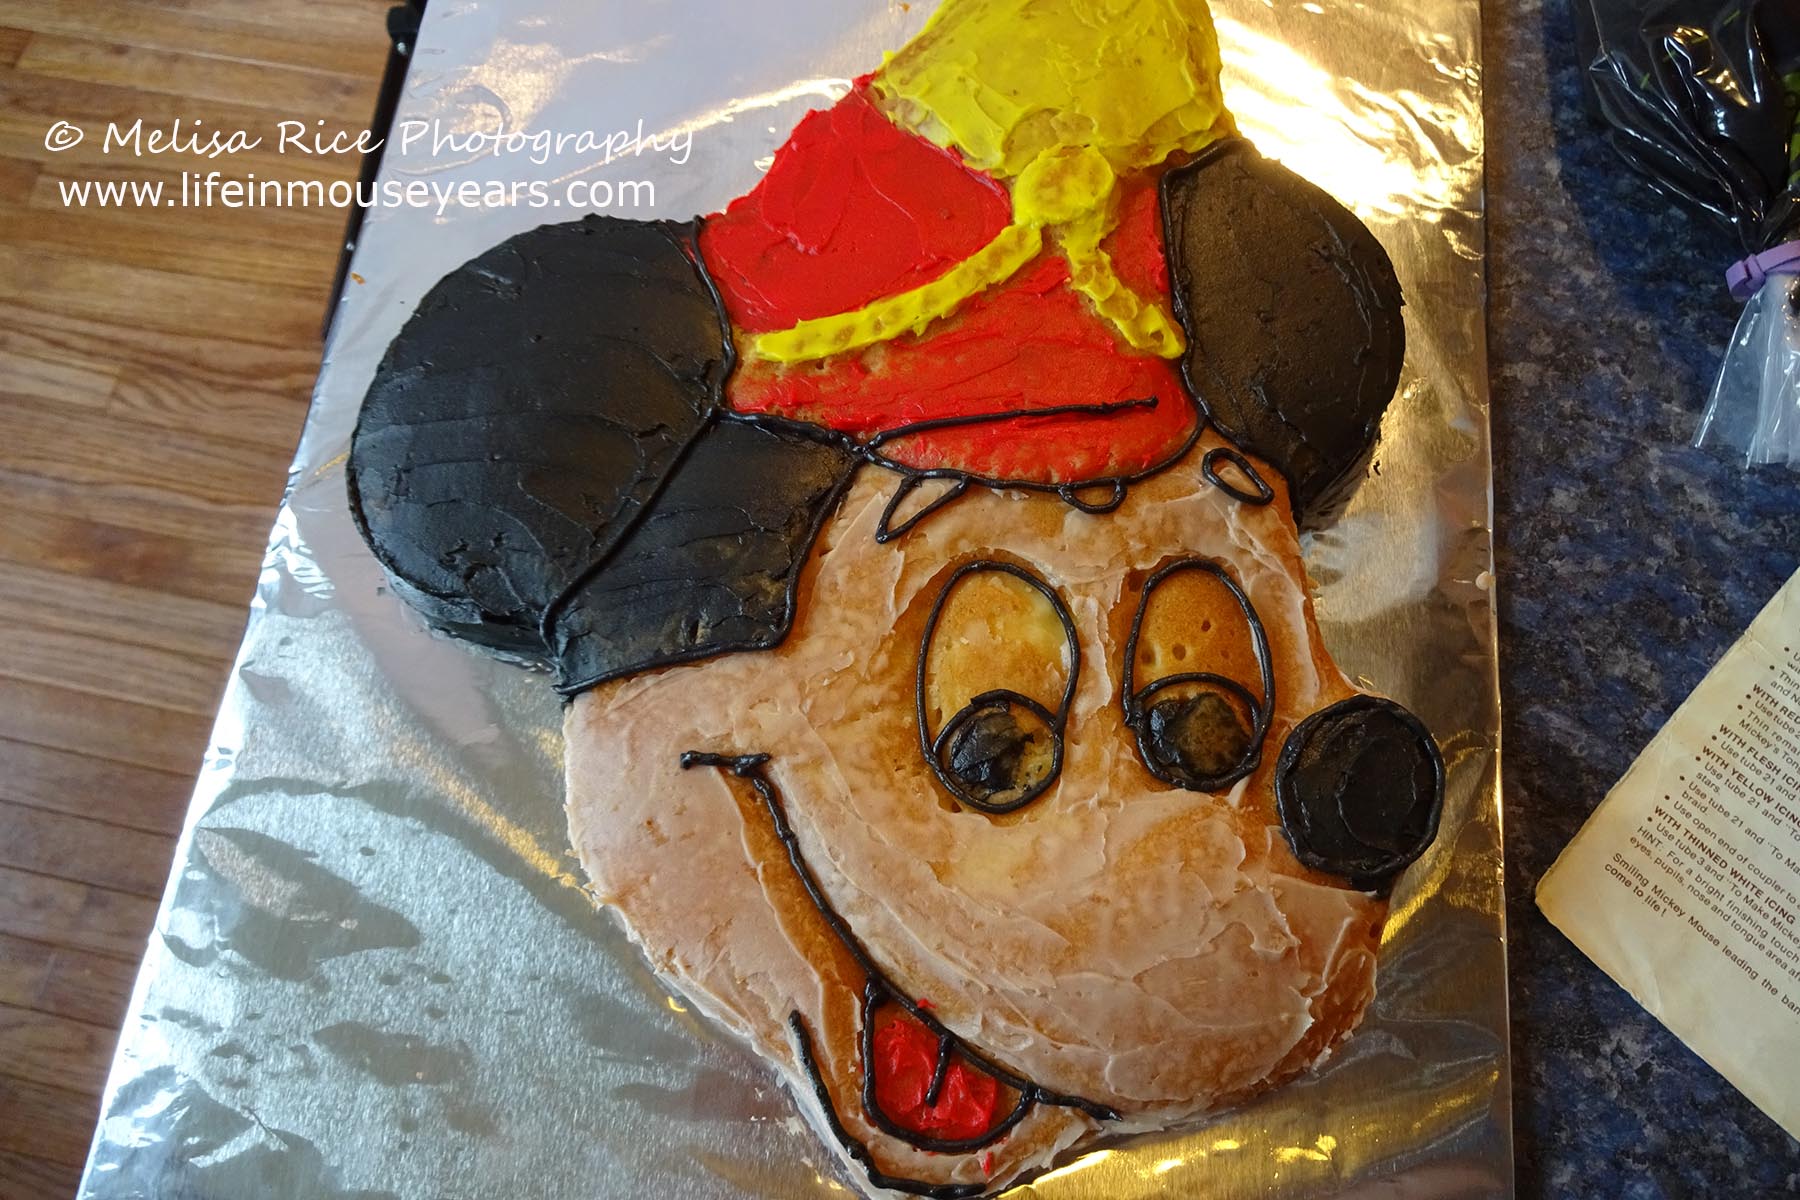
For this part, I took a small angled icing knife and placed the matching color of icing on the cake. For example, for Mickey’s hat, I placed a thin layer of red on the brim and hat part. Next, I put yellow on the top of the hat for the pom and black for the ears, etc.
Once you are done with the dirty icing, place it in the fridge for 30 min to set.
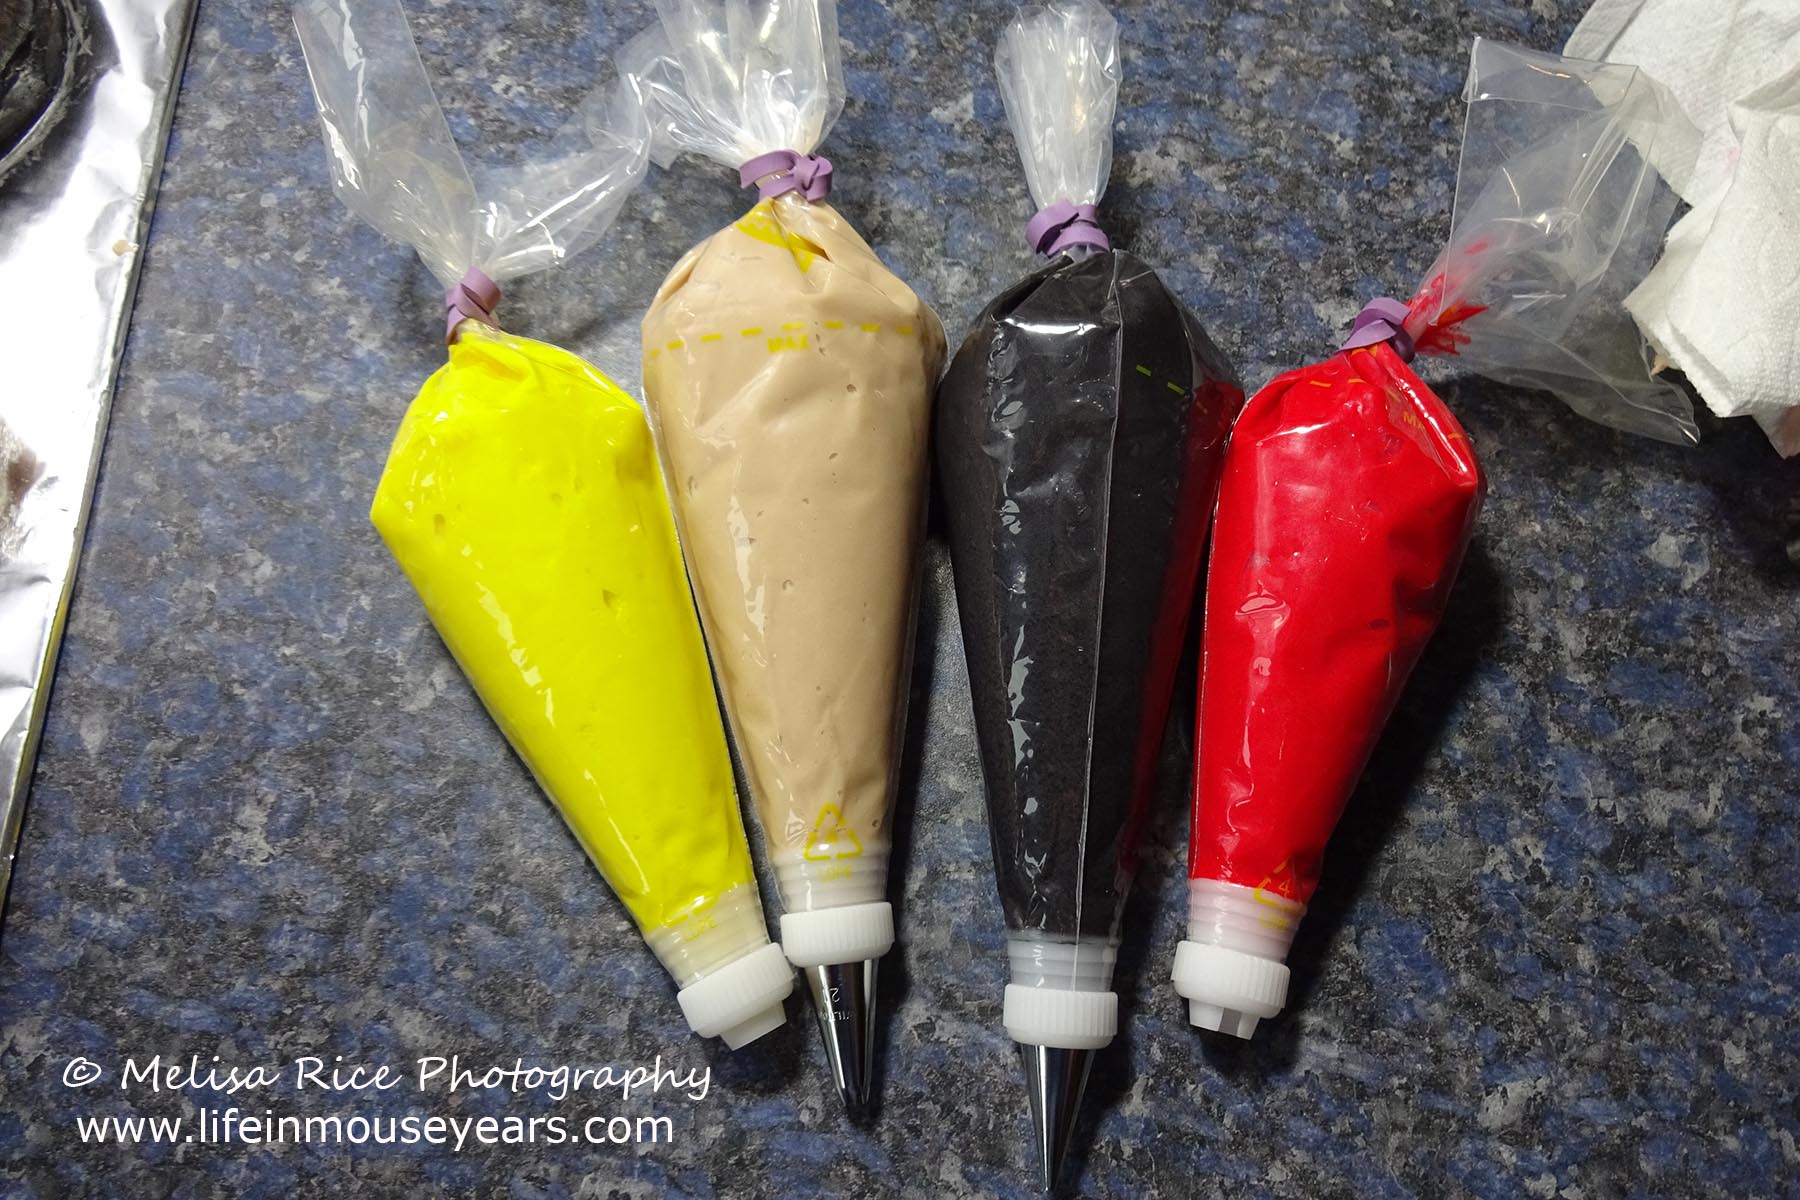
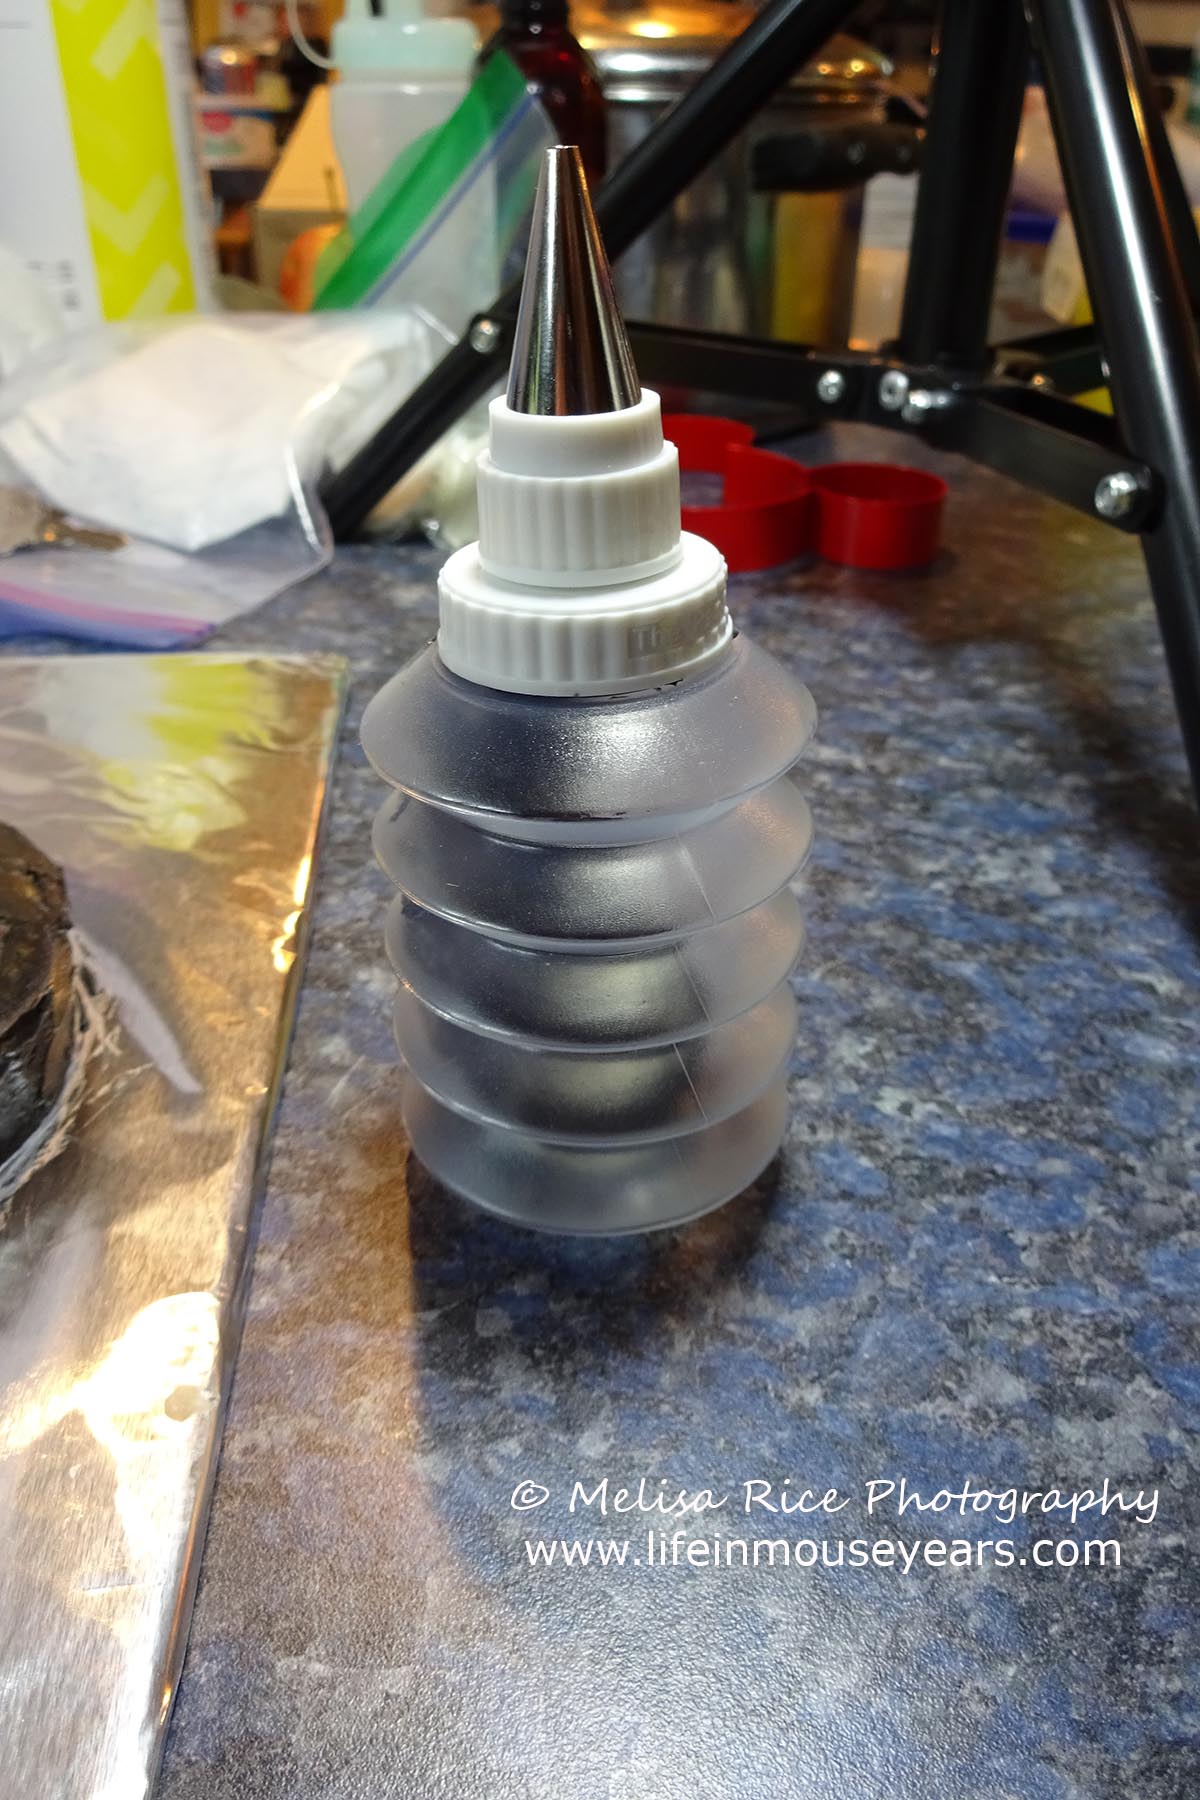
Prep Frosting Bags and Tips
While you are letting the cake set in the fridge, now is a great time to prep the piping bags and tips. For the cake I did, I needed 4 bags. One for yellow, red, black, and tan. If you do not have couplers to put in the bags, you will need another piping bag for the black for piping lines. If you do have couplers, all you would have to do is unscrew the coupler and change out the tip. They are so handy to have and fairly inexpensive.
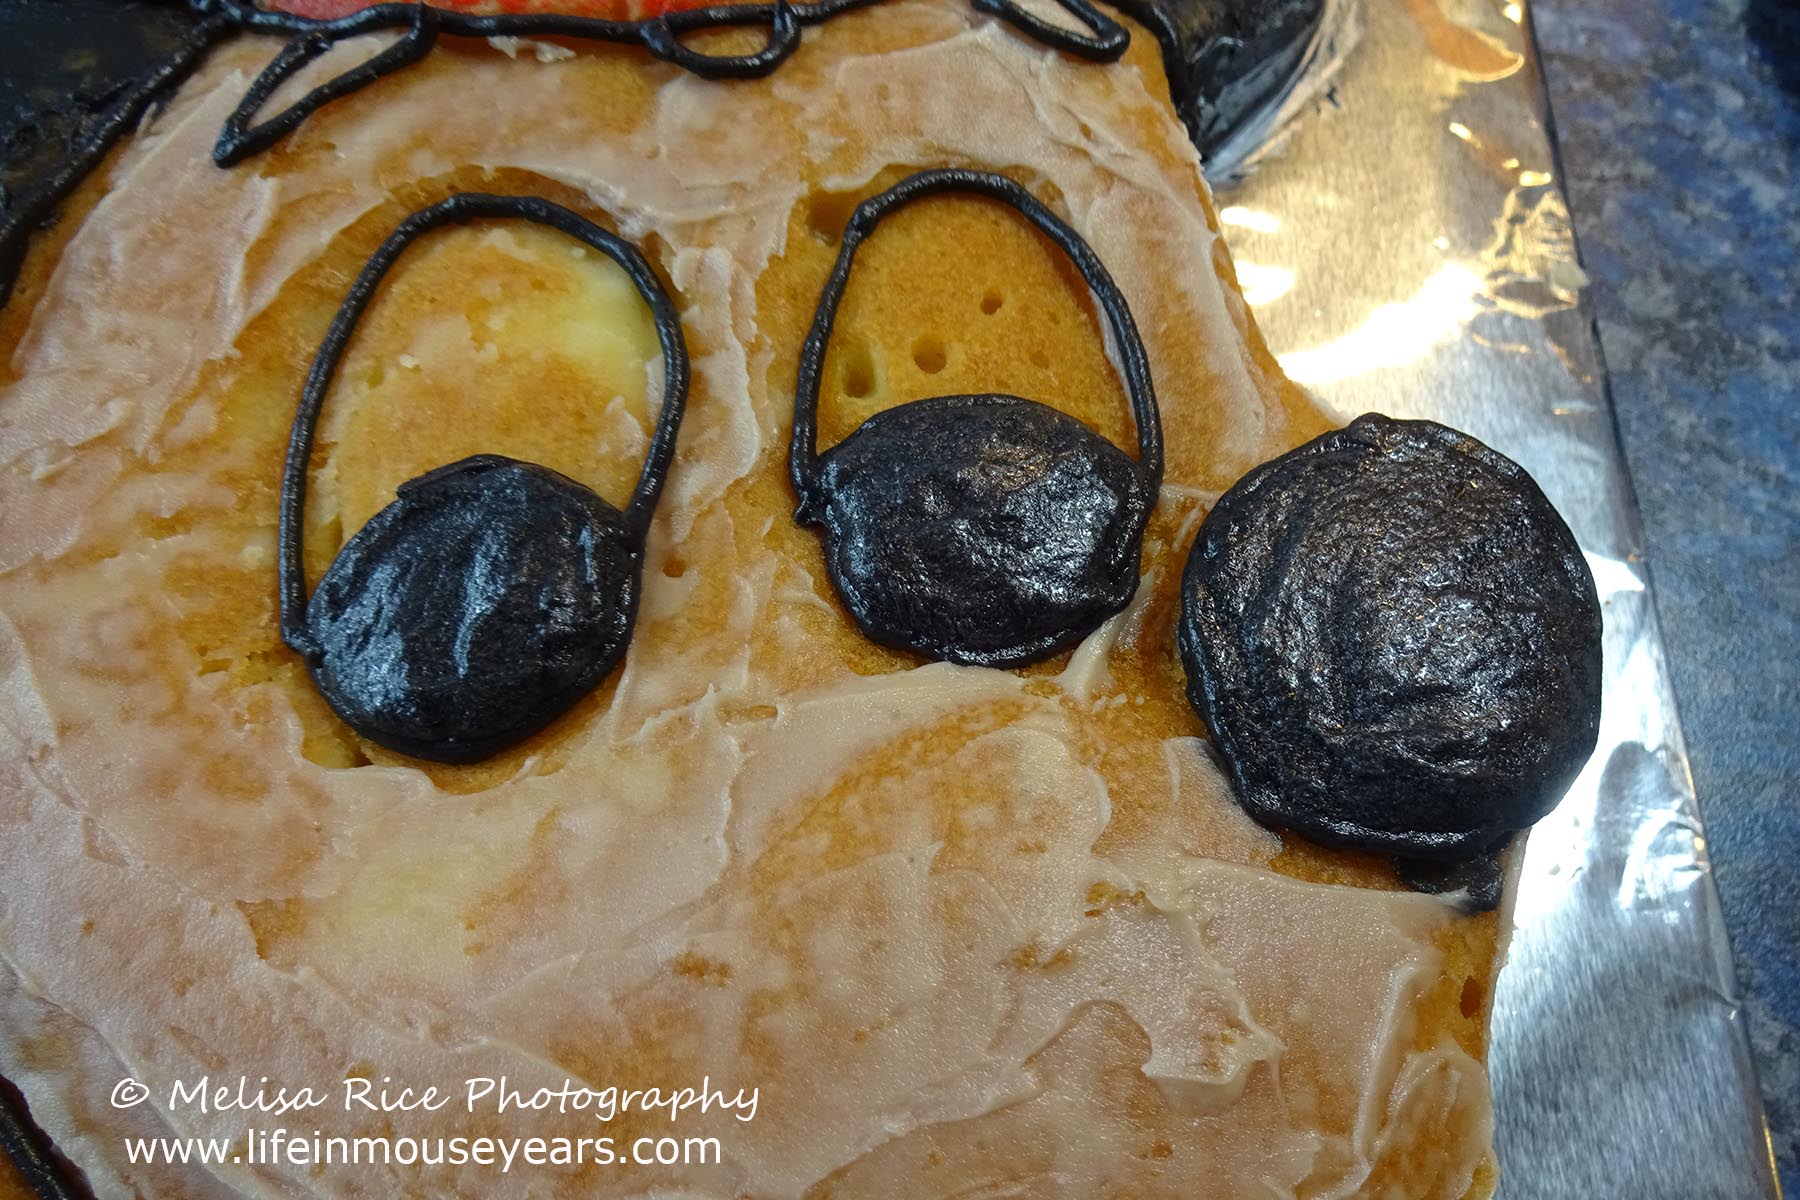
Eyes, Nose, and Tongue
Next on the list for Making a Mickey Mouse Shaped Cake is to frost the eyes, nose, and tongue. The directions said to thin the icing using corn syrup. Which will also make it very shiny when the cake is done. However, I personally, do not like to use corn syrup. As a result, I thinned my icing by adding more half n half. Just be careful to add a little at a time. I accidentally got a little heavy-handed on my first color and had to start over on the thinning.
Once you thin some white, black, and red, you are ready to add the eyes, nose, and tongue. I would recommend taking black with the #3 tip and pipe Mickey’s mouth and chin as well as outline his tongue before adding the red for his tongue. Once the outline is finished, then take some of the thinned red with the angled knife and add it to the cake. If you would like, it is easier, to pipe the color in and then level it with the angled knife. This way the piping gets exactly where you need it.
Repeat the process for the white and black of his eyes and then black for his nose.
Let the Piping Begin!
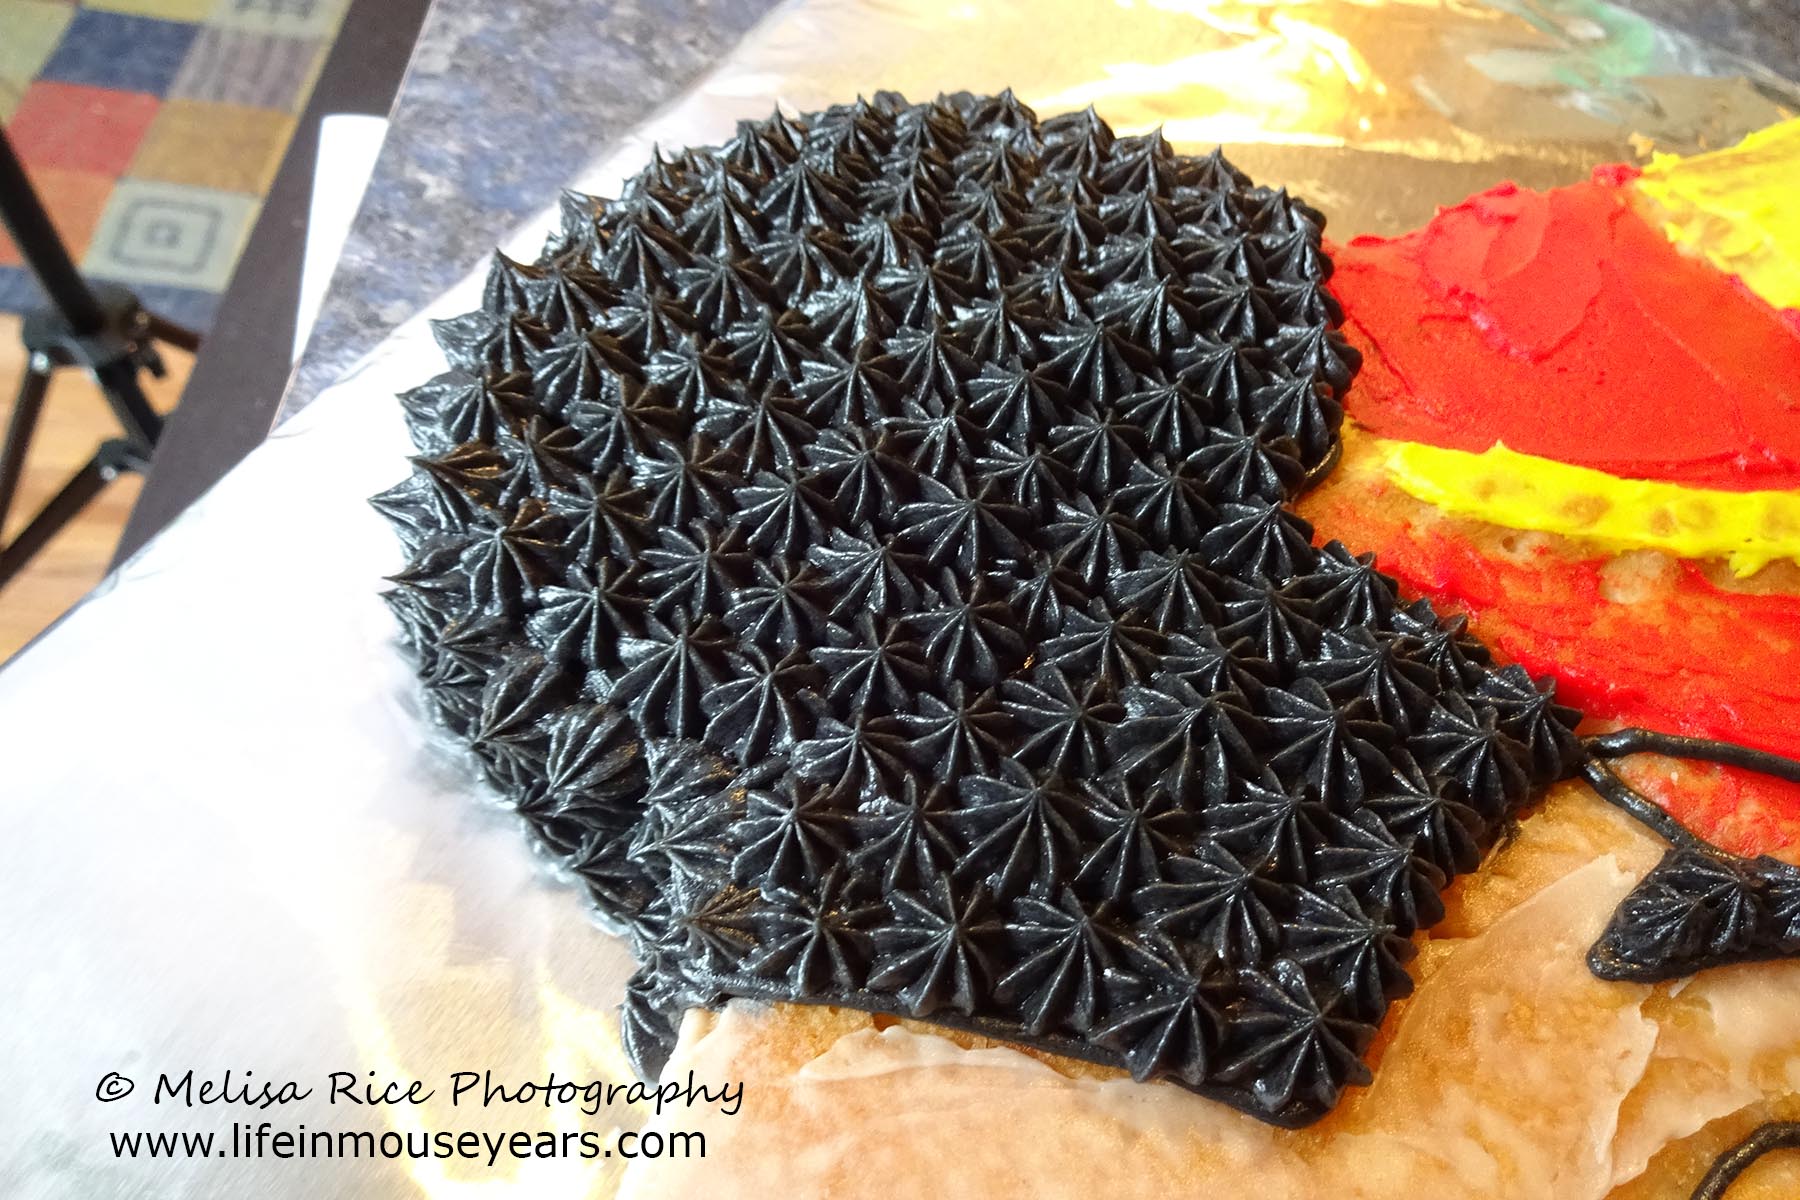
Another thing on the list for Making a Mickey Mouse Shaped Cake is to pipe on all the colors! Once you have finished with Mickey’s eyes, nose, and mouth, you are ready to start the star-shaped madness!
I would recommend using a smaller size on the star tip for Mickey’s face (tan #18) and then use a size bigger for his ears (#22), and hat (#21). I feel that it gives it dimension for a more realistic look. It is the same trick I used for my mom’s Tinker Bell-shaped cake. (Tinker Bell post coming soon!)
It doesn’t really matter which area you start with. I started with the black so I could get his eyebrows in and then did his face later so that it helps fill in the area nicely. Holding the bag straight up, place the tip above the cake. Close to the cake yet not touching it. Next, start to squeeze the bag and the frosting will flow out in a circle Stop squeezing and lift up. Now you have your star! Just continue until you have covered the whole cake.
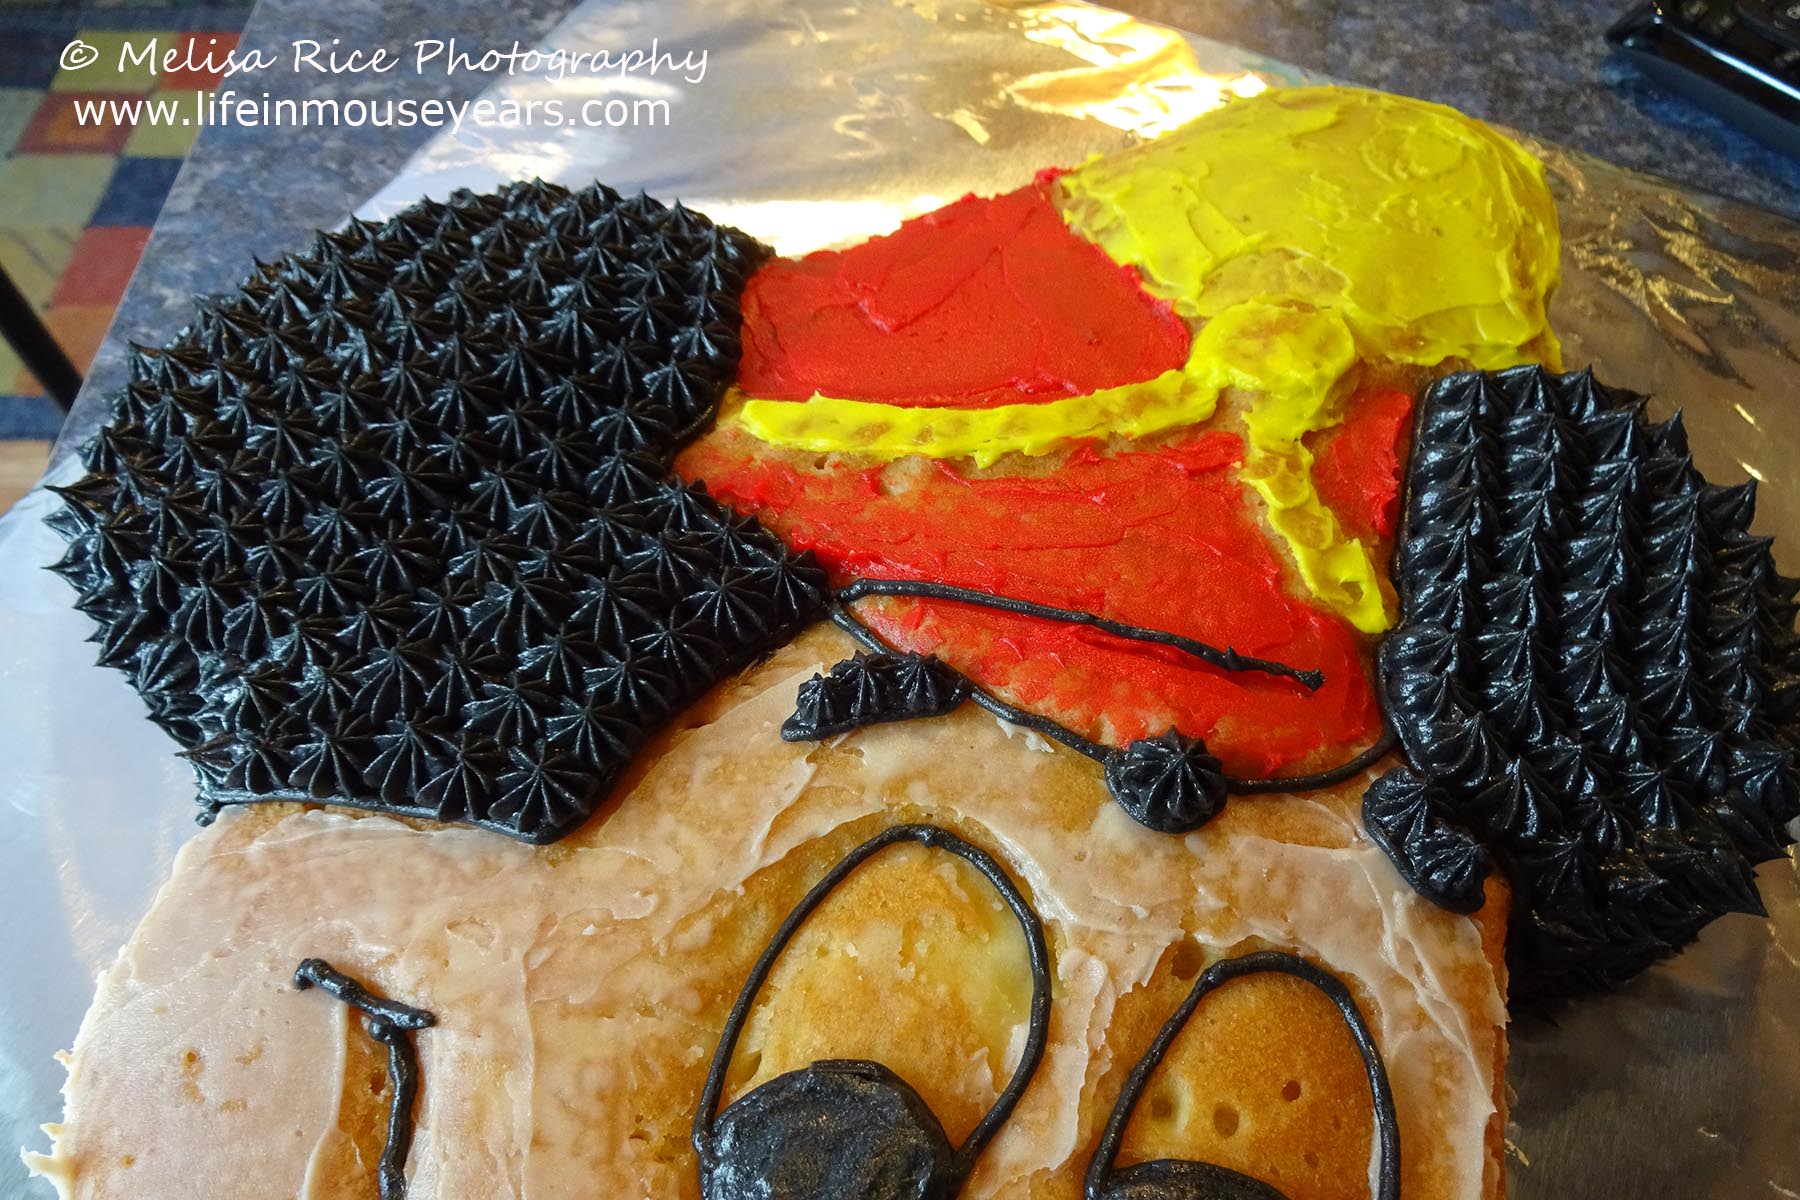
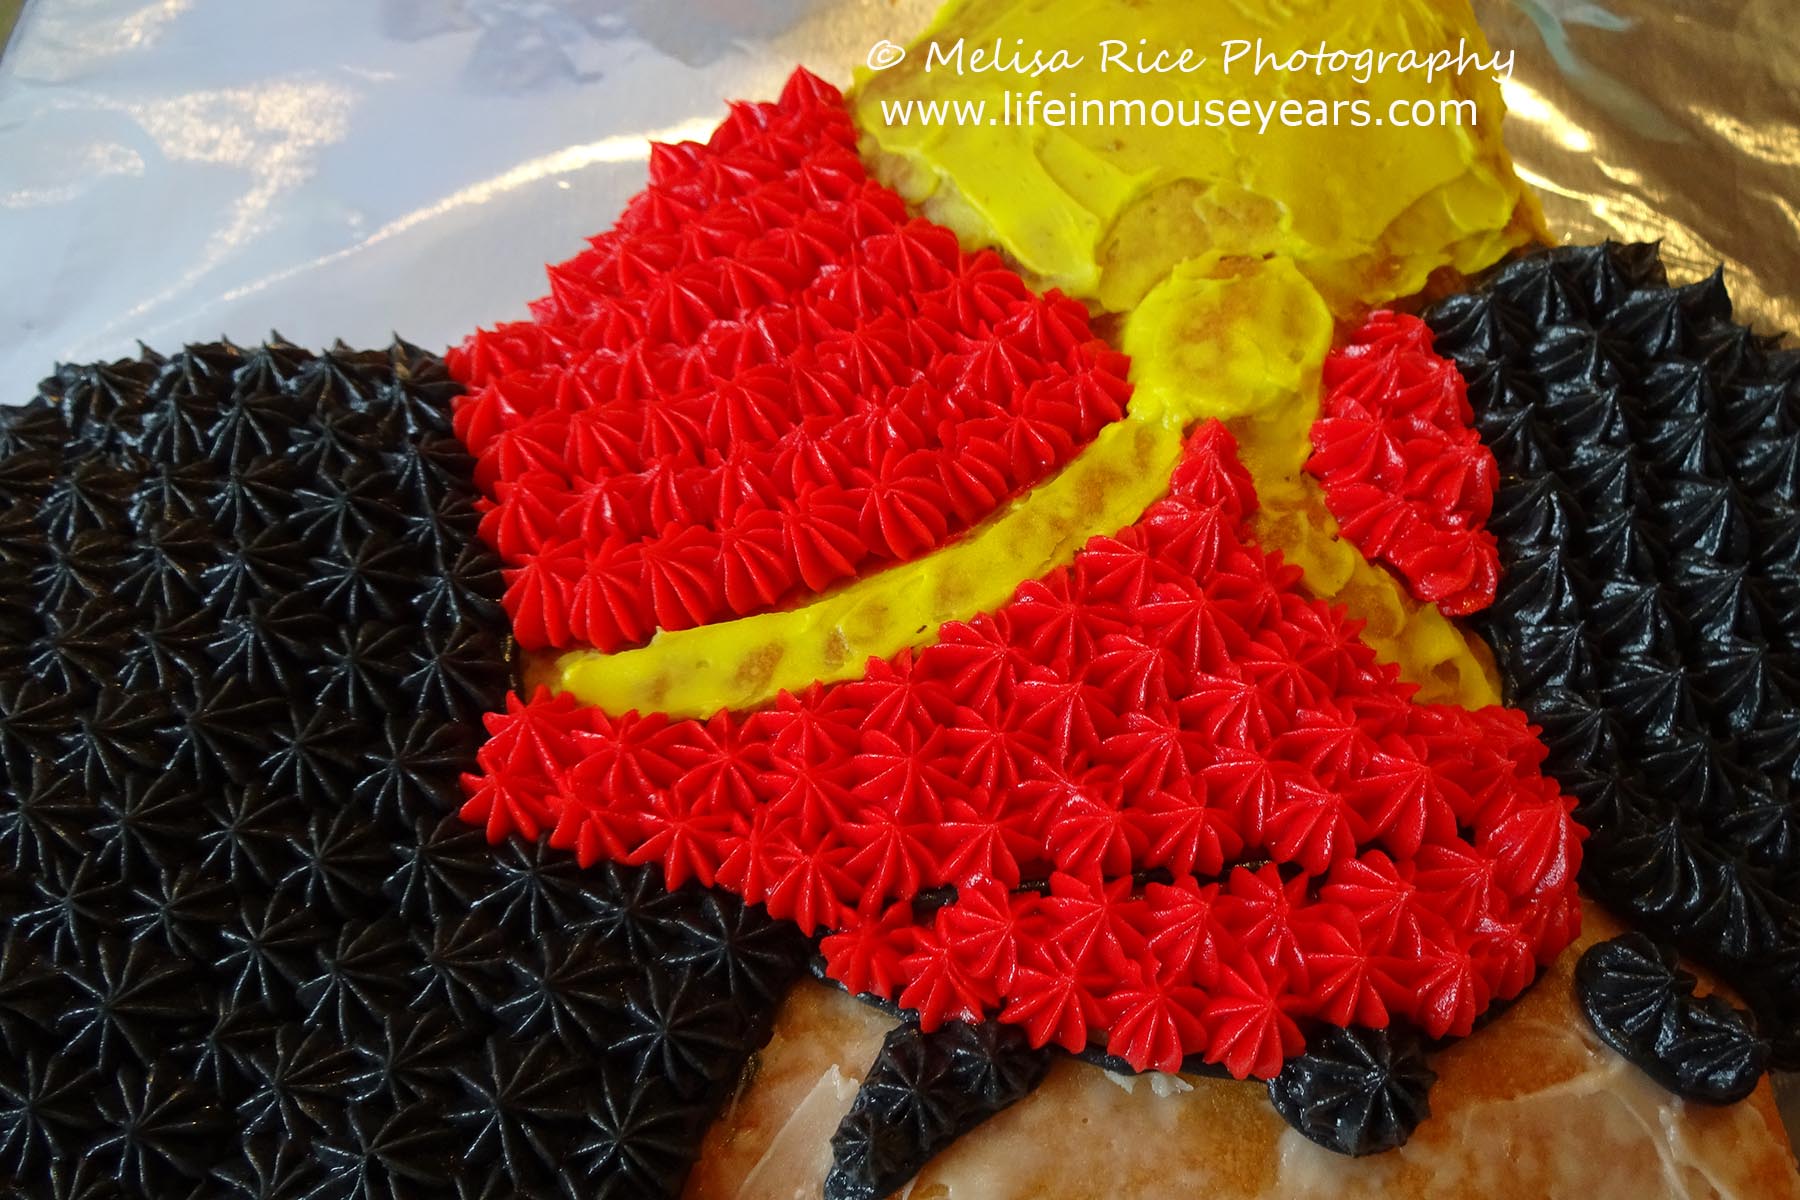
Mickey’s hat has a medallion and ribbon on it. I just piped yellow to the medallion area and then smoothed it with the angled knife. (That angle knife comes in handy for so many things.) Next, I piped the ribbon using the same star tip and just moved the tip left and right to create a ripple effect.
Tip:
I recommend piping buttercream stars on the side of the cake as well as the top. Using the coordinating colors for the area that is on top. For example, tan around Mickey’s face, black where his ears are, and red and yellow in the hat areas

In Conclusion
Making a Mickey Mouse Shaped Cake is so much fun and a shaped cake pan makes it easy to do! The techniques in this post can be used with any character-shaped cake pan that you have or that you can get. I hope this post helps you to make a character-shaped cake for yourself or someone you love.
Questions or Comments
If you have any questions or comments on today’s post, please feel free to leave them in the comments below. I would love to help!
Thanks for stopping by Life in Mouse Years!
Check out some other fun Disney-themed cake posts below!
Check out this necklace below! Not something I could spend that much money on, but if I could… 😀

Leave a Reply