
I am not a professional cake decorator, however, I do like to make cakes for my friends and family when I can. It stresses me because I want it to be perfect! But I still attempt to do cakes each year regardless. One year for my friends birthday I made a Sleeping Beauty cake for her. Today I would like to share what I did and how I did it and share some photos of the cake. It is one of my favorite cakes I have done so far.
Sleeping Beauty Birthday Cake
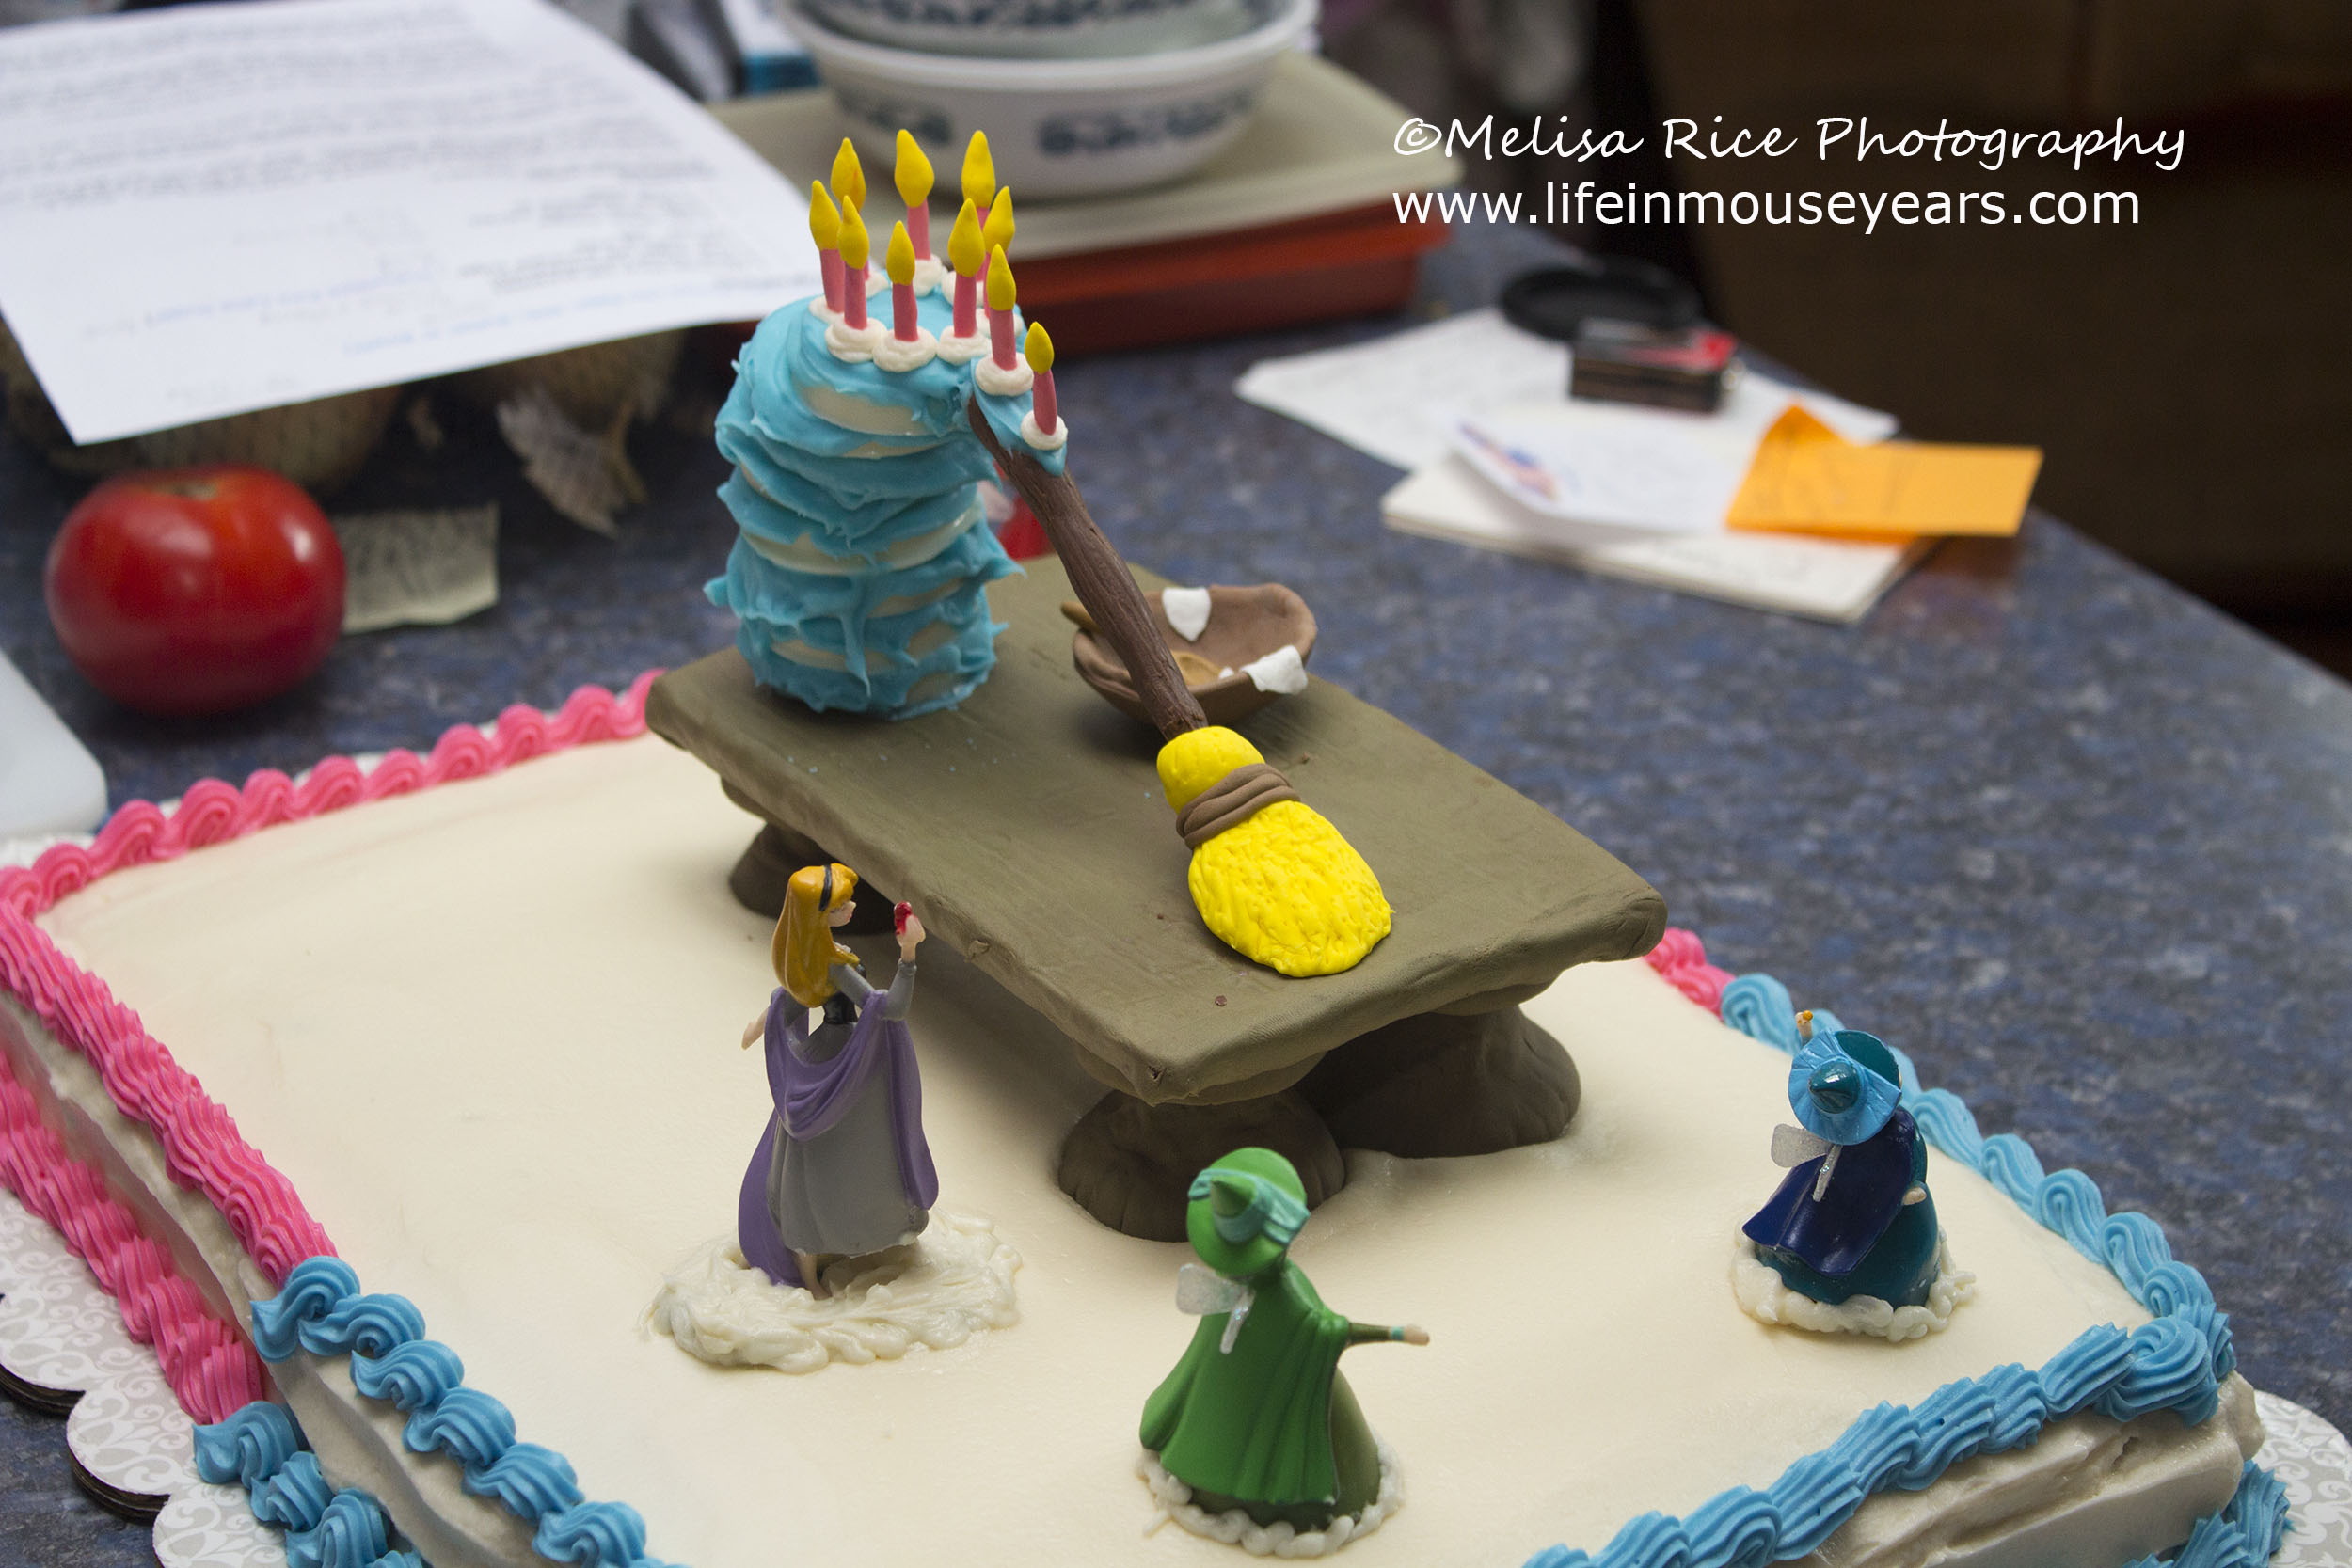
The scene I wanted to replicate for the Sleeping Beauty cake was from the animated movie where Flora, Fauna, and Merryweather are in the cottage making the cake and the dress for Aurora’s 16th Birthday.

Buy Figurines
One of my tips on doing themed cakes is to purchase figurines for the cake. While I am artistic in many ways (something I got from my Grandmother), I am not very skilled in making figures out of sugar. I have attempted it in the past, however, I would prefer to purchase the figures and spend my time on other elements of the cake. By buying the corresponding figures helps me to do just that!
For this Sleeping Beauty cake, I bought one of the figurine playsets that Disney sells of various Disney movies. It had Aurora, Flora, Fauna, and Merryweather in the set.
Cake
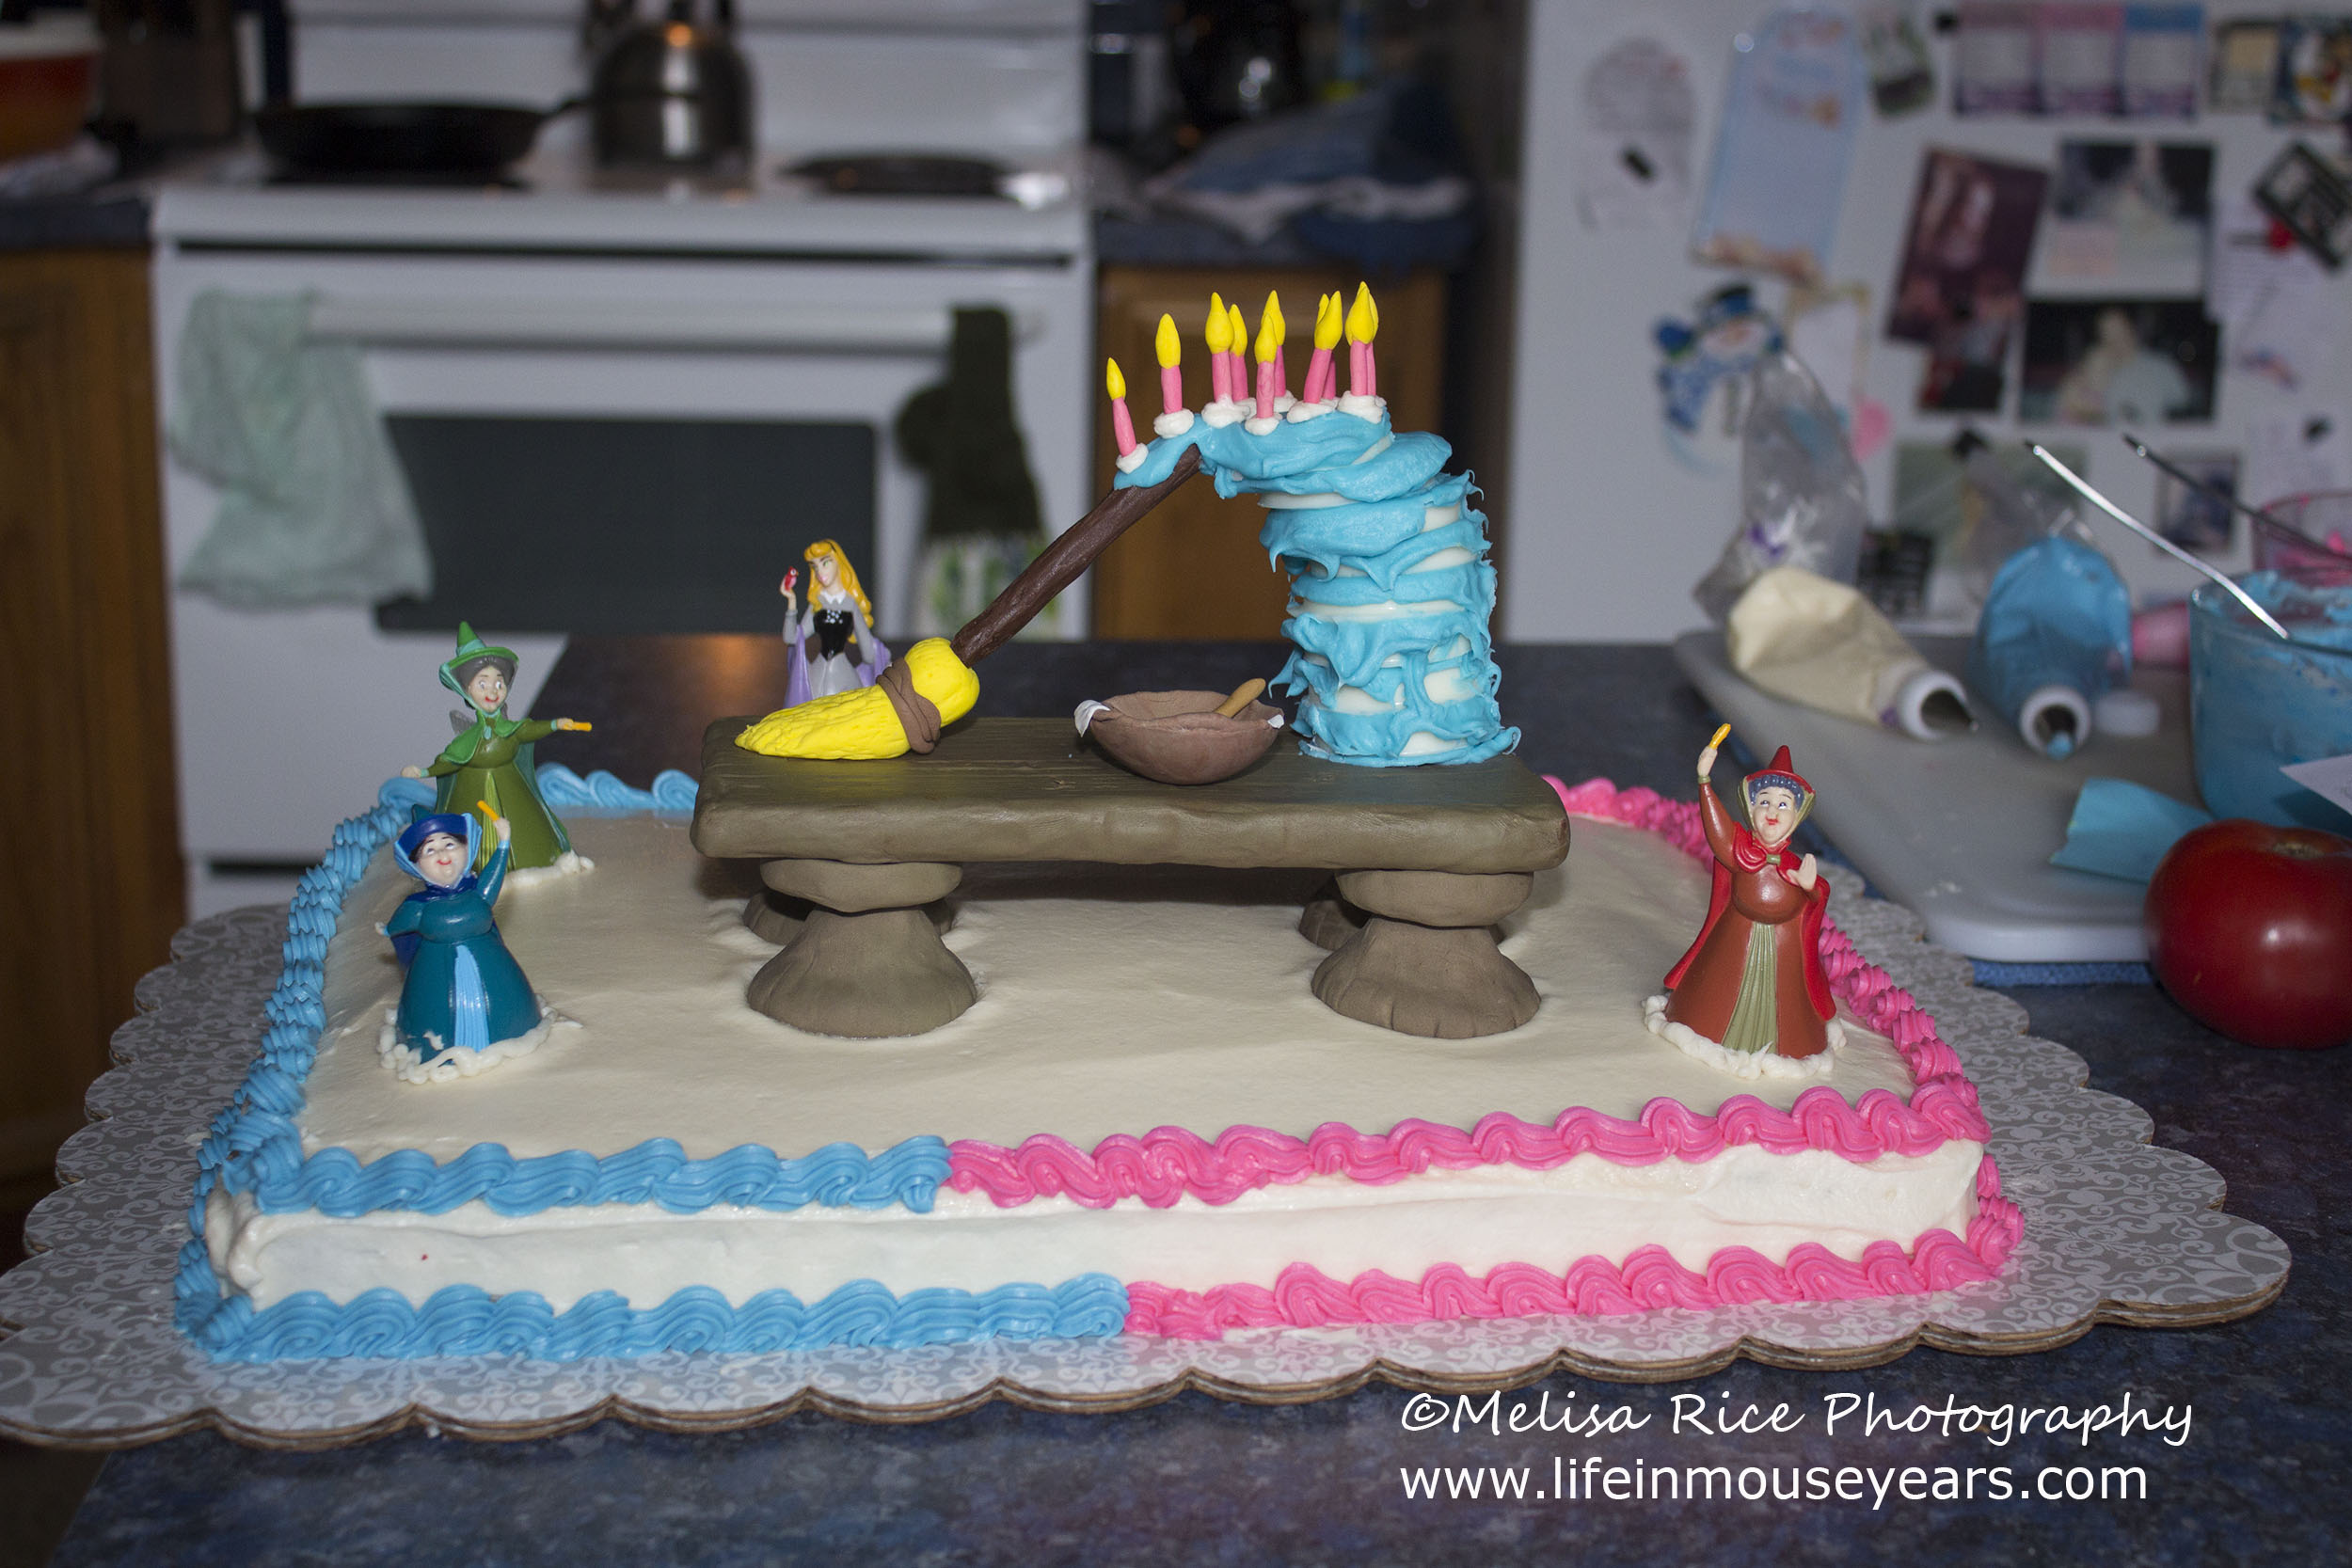
Next was to bake the cake, cool it, then frost it. I went with a rectangle sheet cake for the Sleeping Beauty cake. Because the scene had a long rectangle wooden table, I felt that having the long rectangle cake would work better.
The buttercream frosting was made from scratch and I left it white on top and on the sides of the cake. For the edging, one side of the cake is blue and one side is pink. If you haven’t seen the movie, it is to signify the two fairies that fight over the color of the dress during the movie. One wants the dress blue and the other wants it pink.
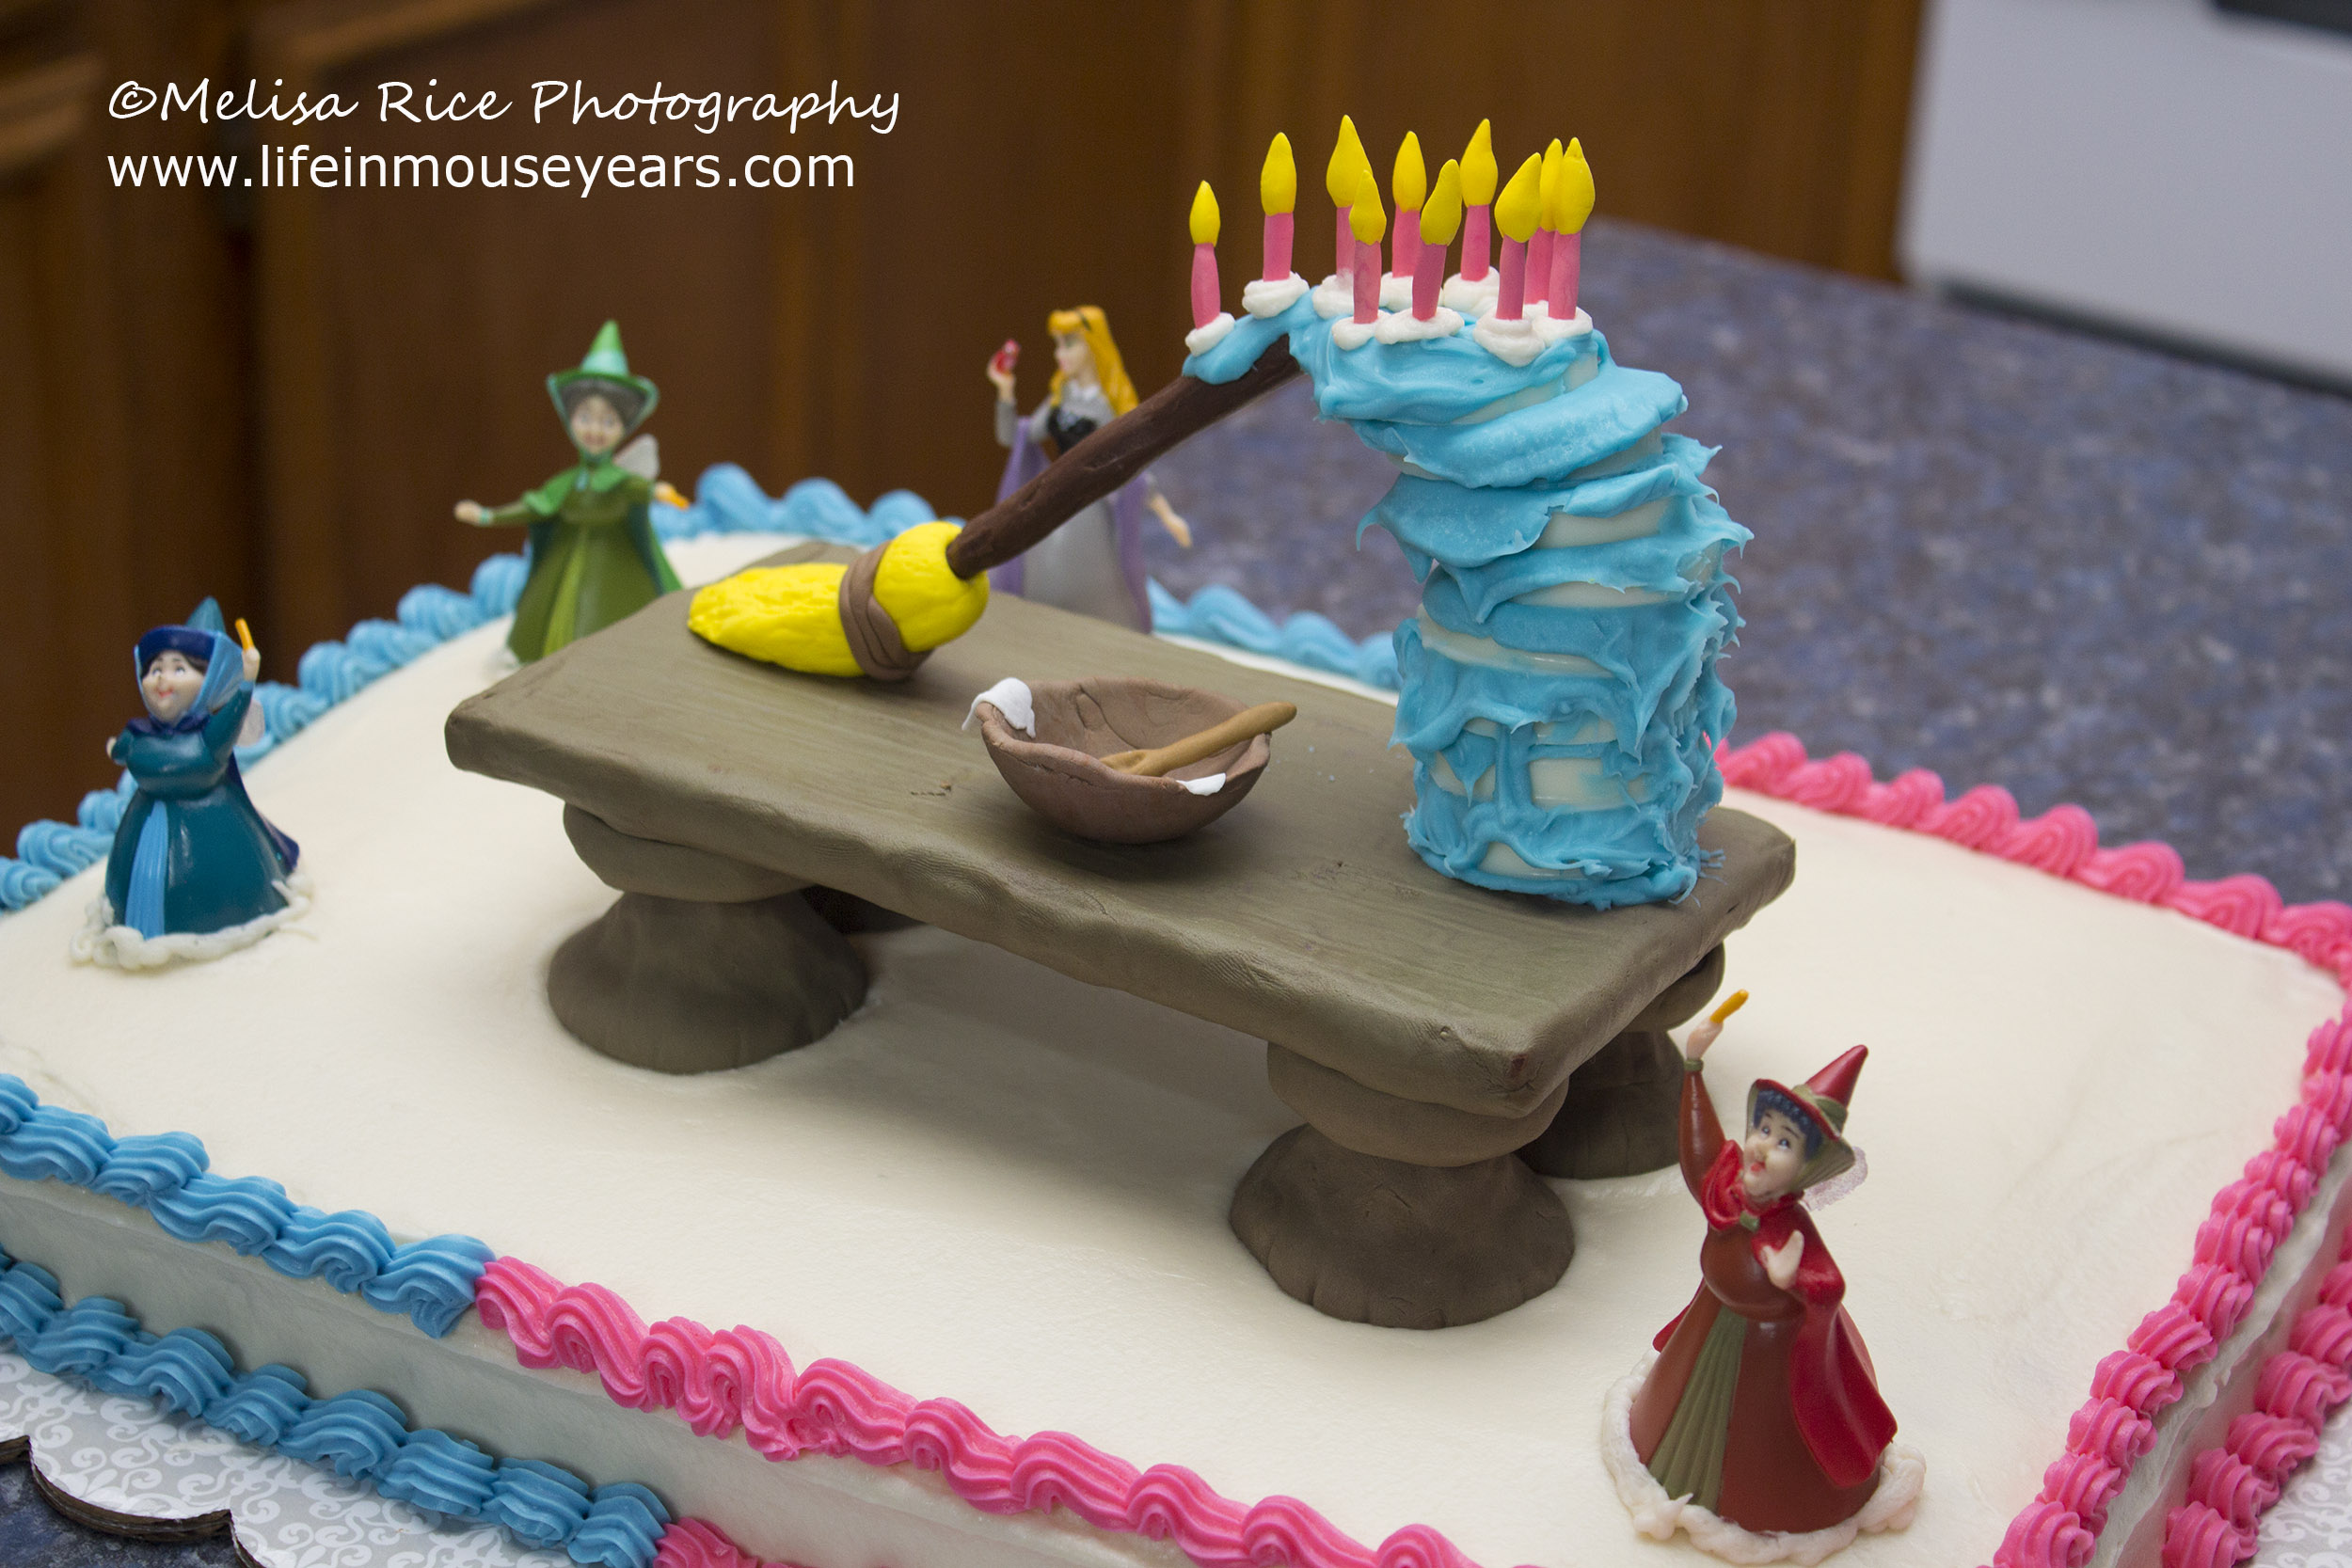
Table
To make the table for the top of the Sleeping Beauty cake, I used a BIG Hersheys chocolate bar, Wilton candy melts, and fondant.
First, to make the table legs, I used a candy mold that had a pedestal shape. The mold wasn’t made for this. It is a wedding cake lollipop mold. When the two sides were put together for the cake mold there was a space on one end that was hollow so it can stand on its end. I filled that part and stacked two on top of each other to make each leg.
Next, I colored the fondant to a brown color to look like a wooden table. I used a fondant mold that looked like wood planks to give it the “wood” look. I then wrapped the Hershey with it to make the table top. (Flat side up.) Then I also used that fondant to cover the table legs so they would match the table top.
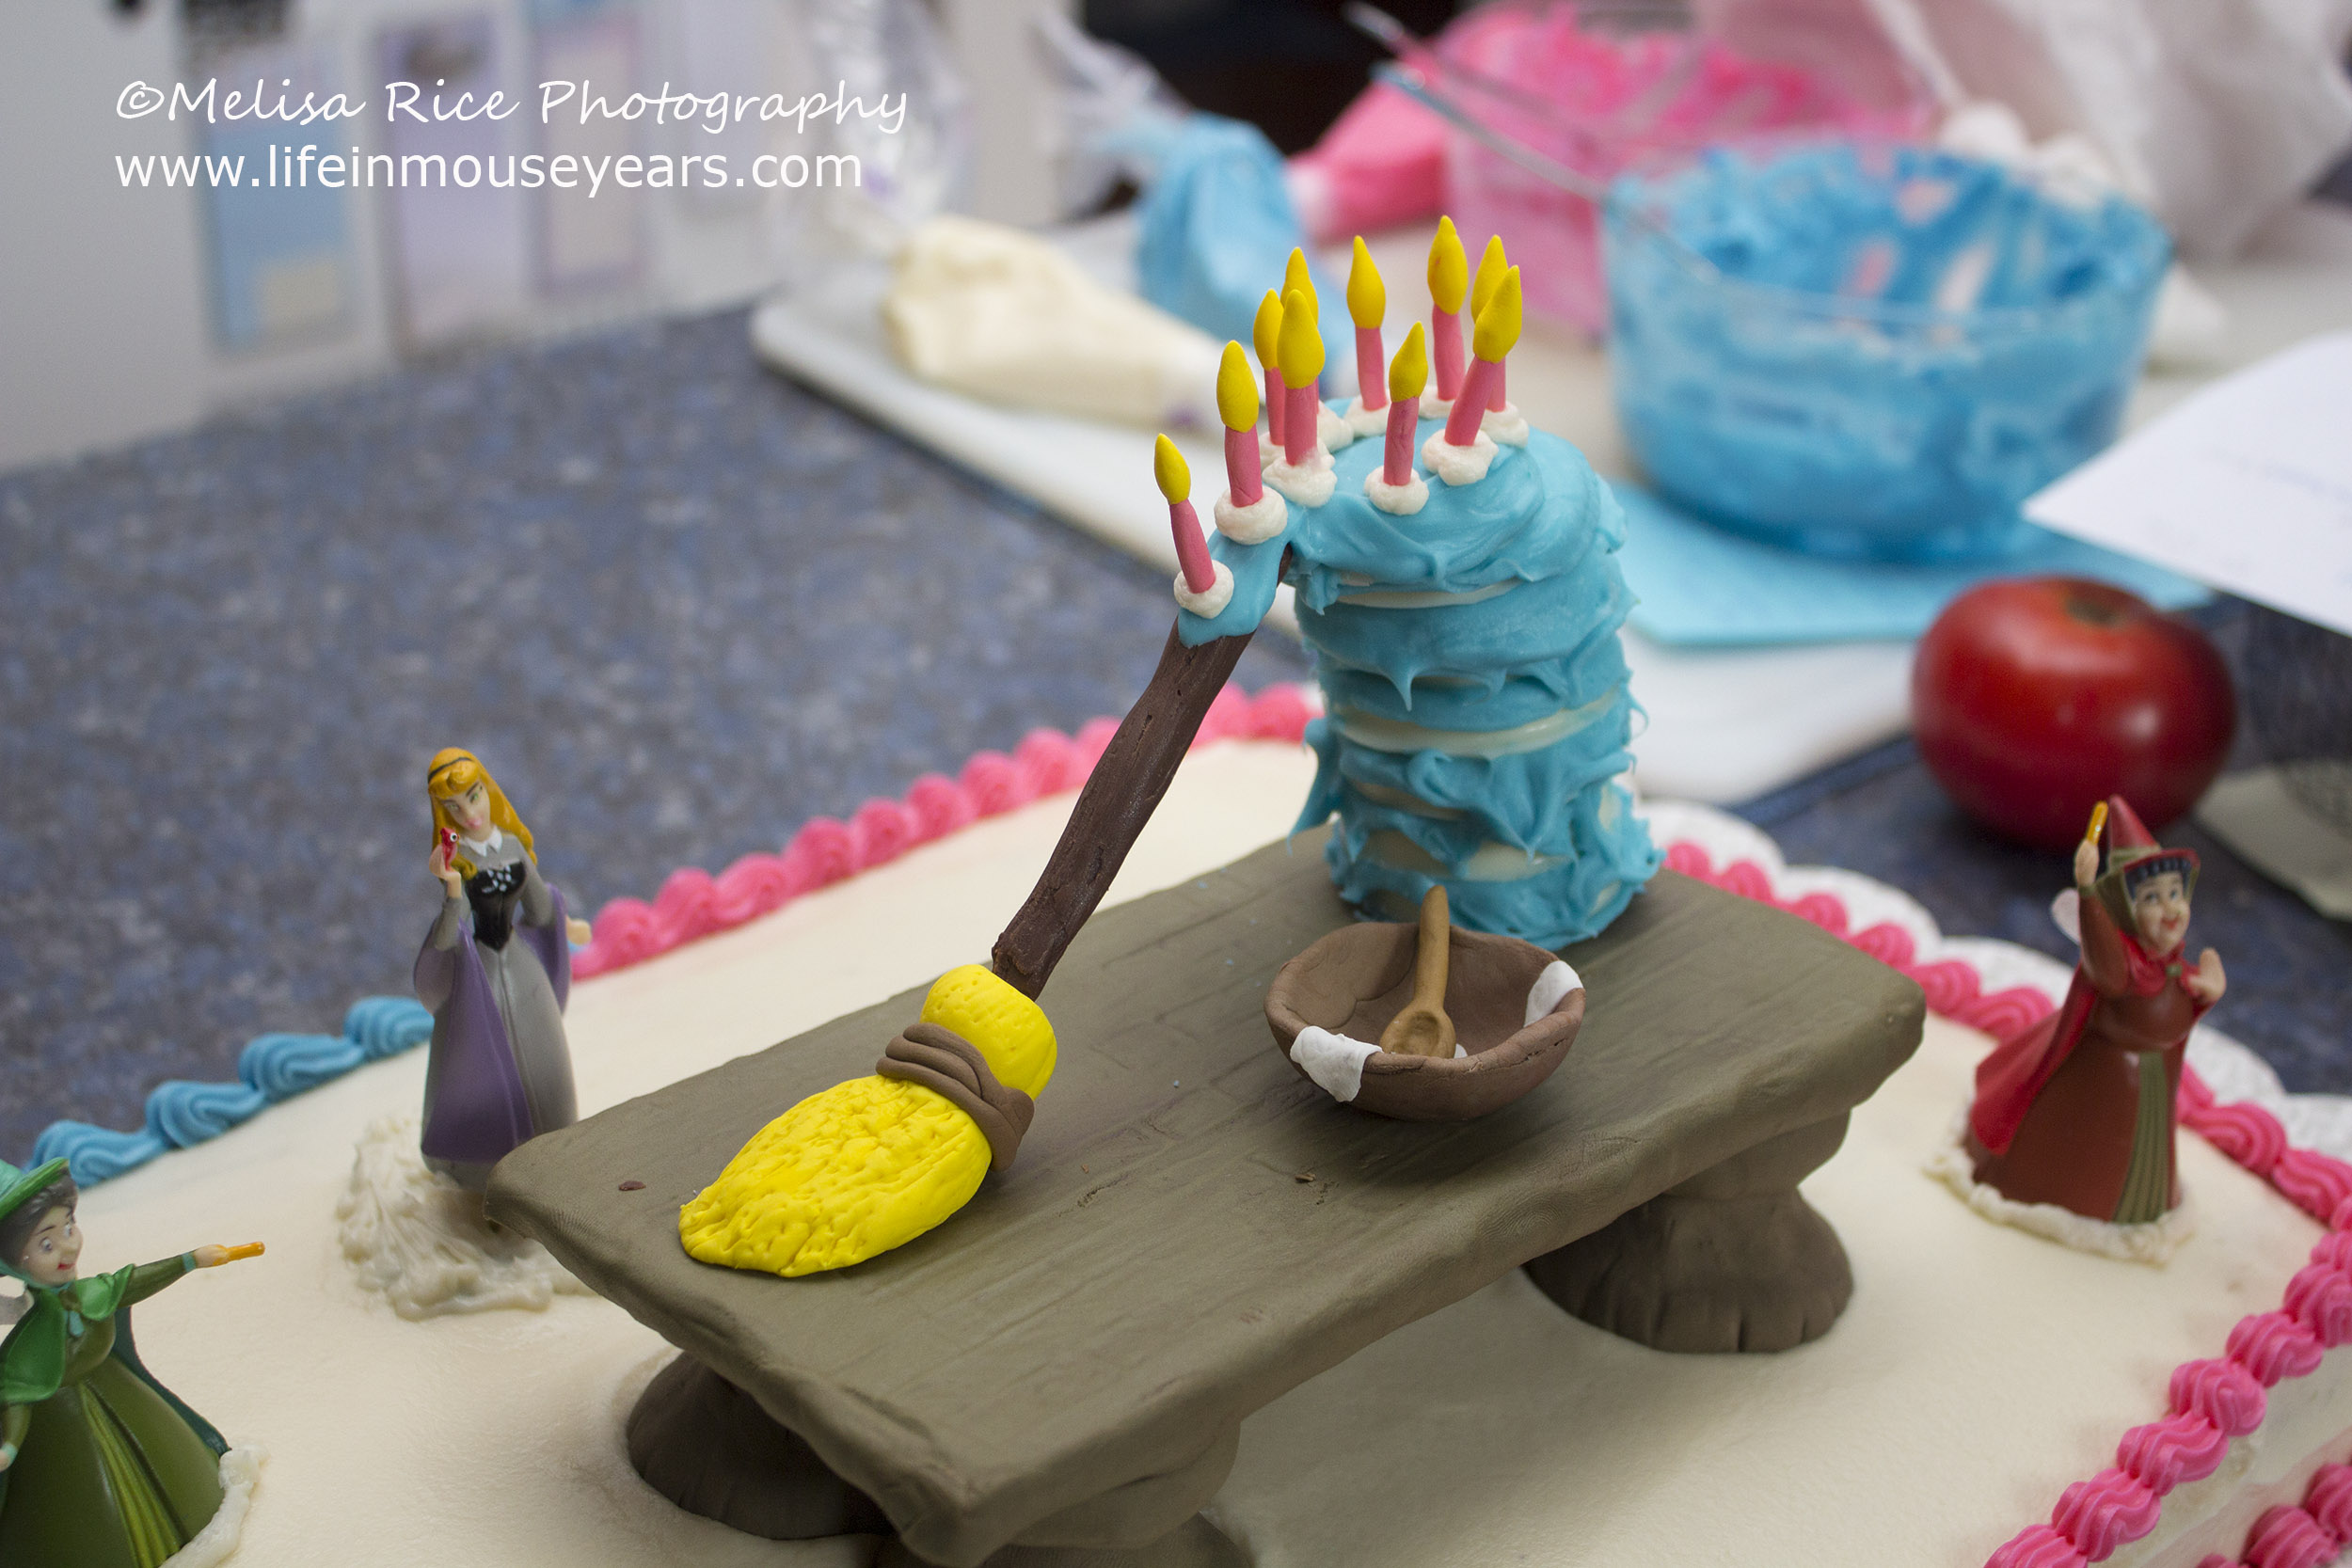
Broom
While the table top was hardening, I took gum paste and began to color and make a broom. First I made brown and rolled it to look like a broom handle.
Next, I made yellow gum paste to make the bristles. I shaped the bristles and put the broom handle in the top. I then made lines to show the individual bristles of the broom.
Finally, I did a lighter shade of brown and rolled it into a small rope. I wrapped the bristles with it towards the top of the yellow bristles.
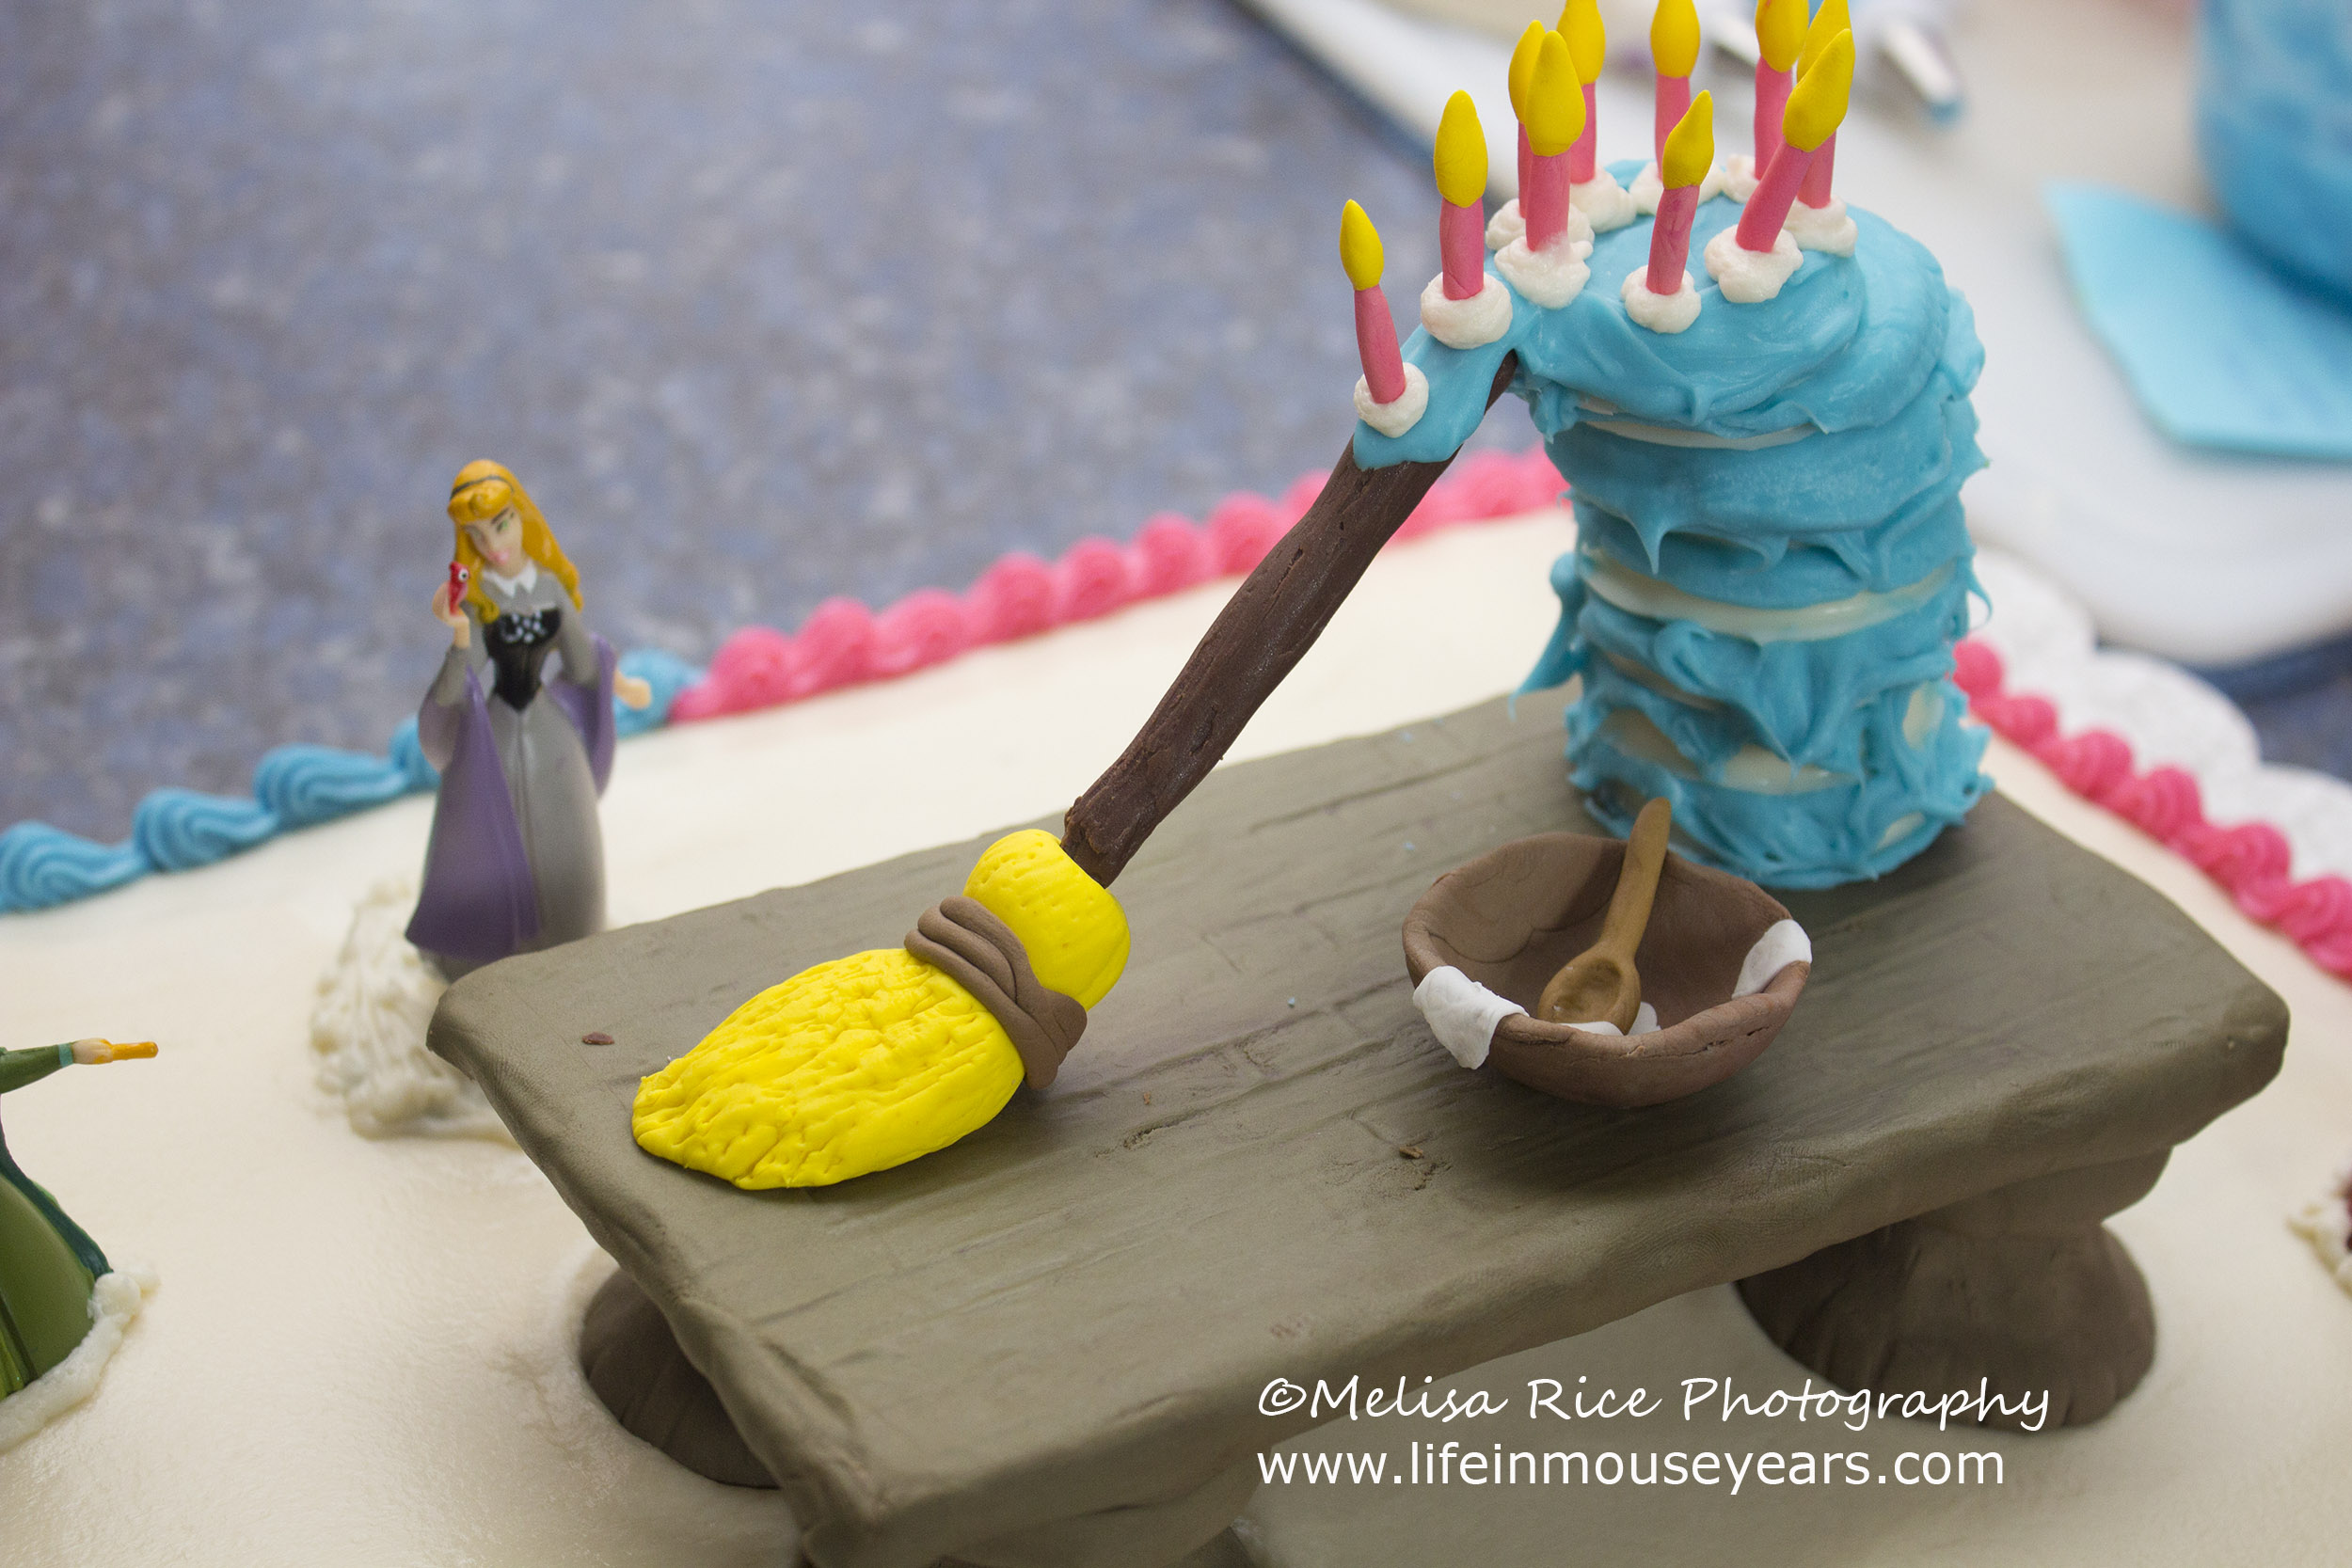
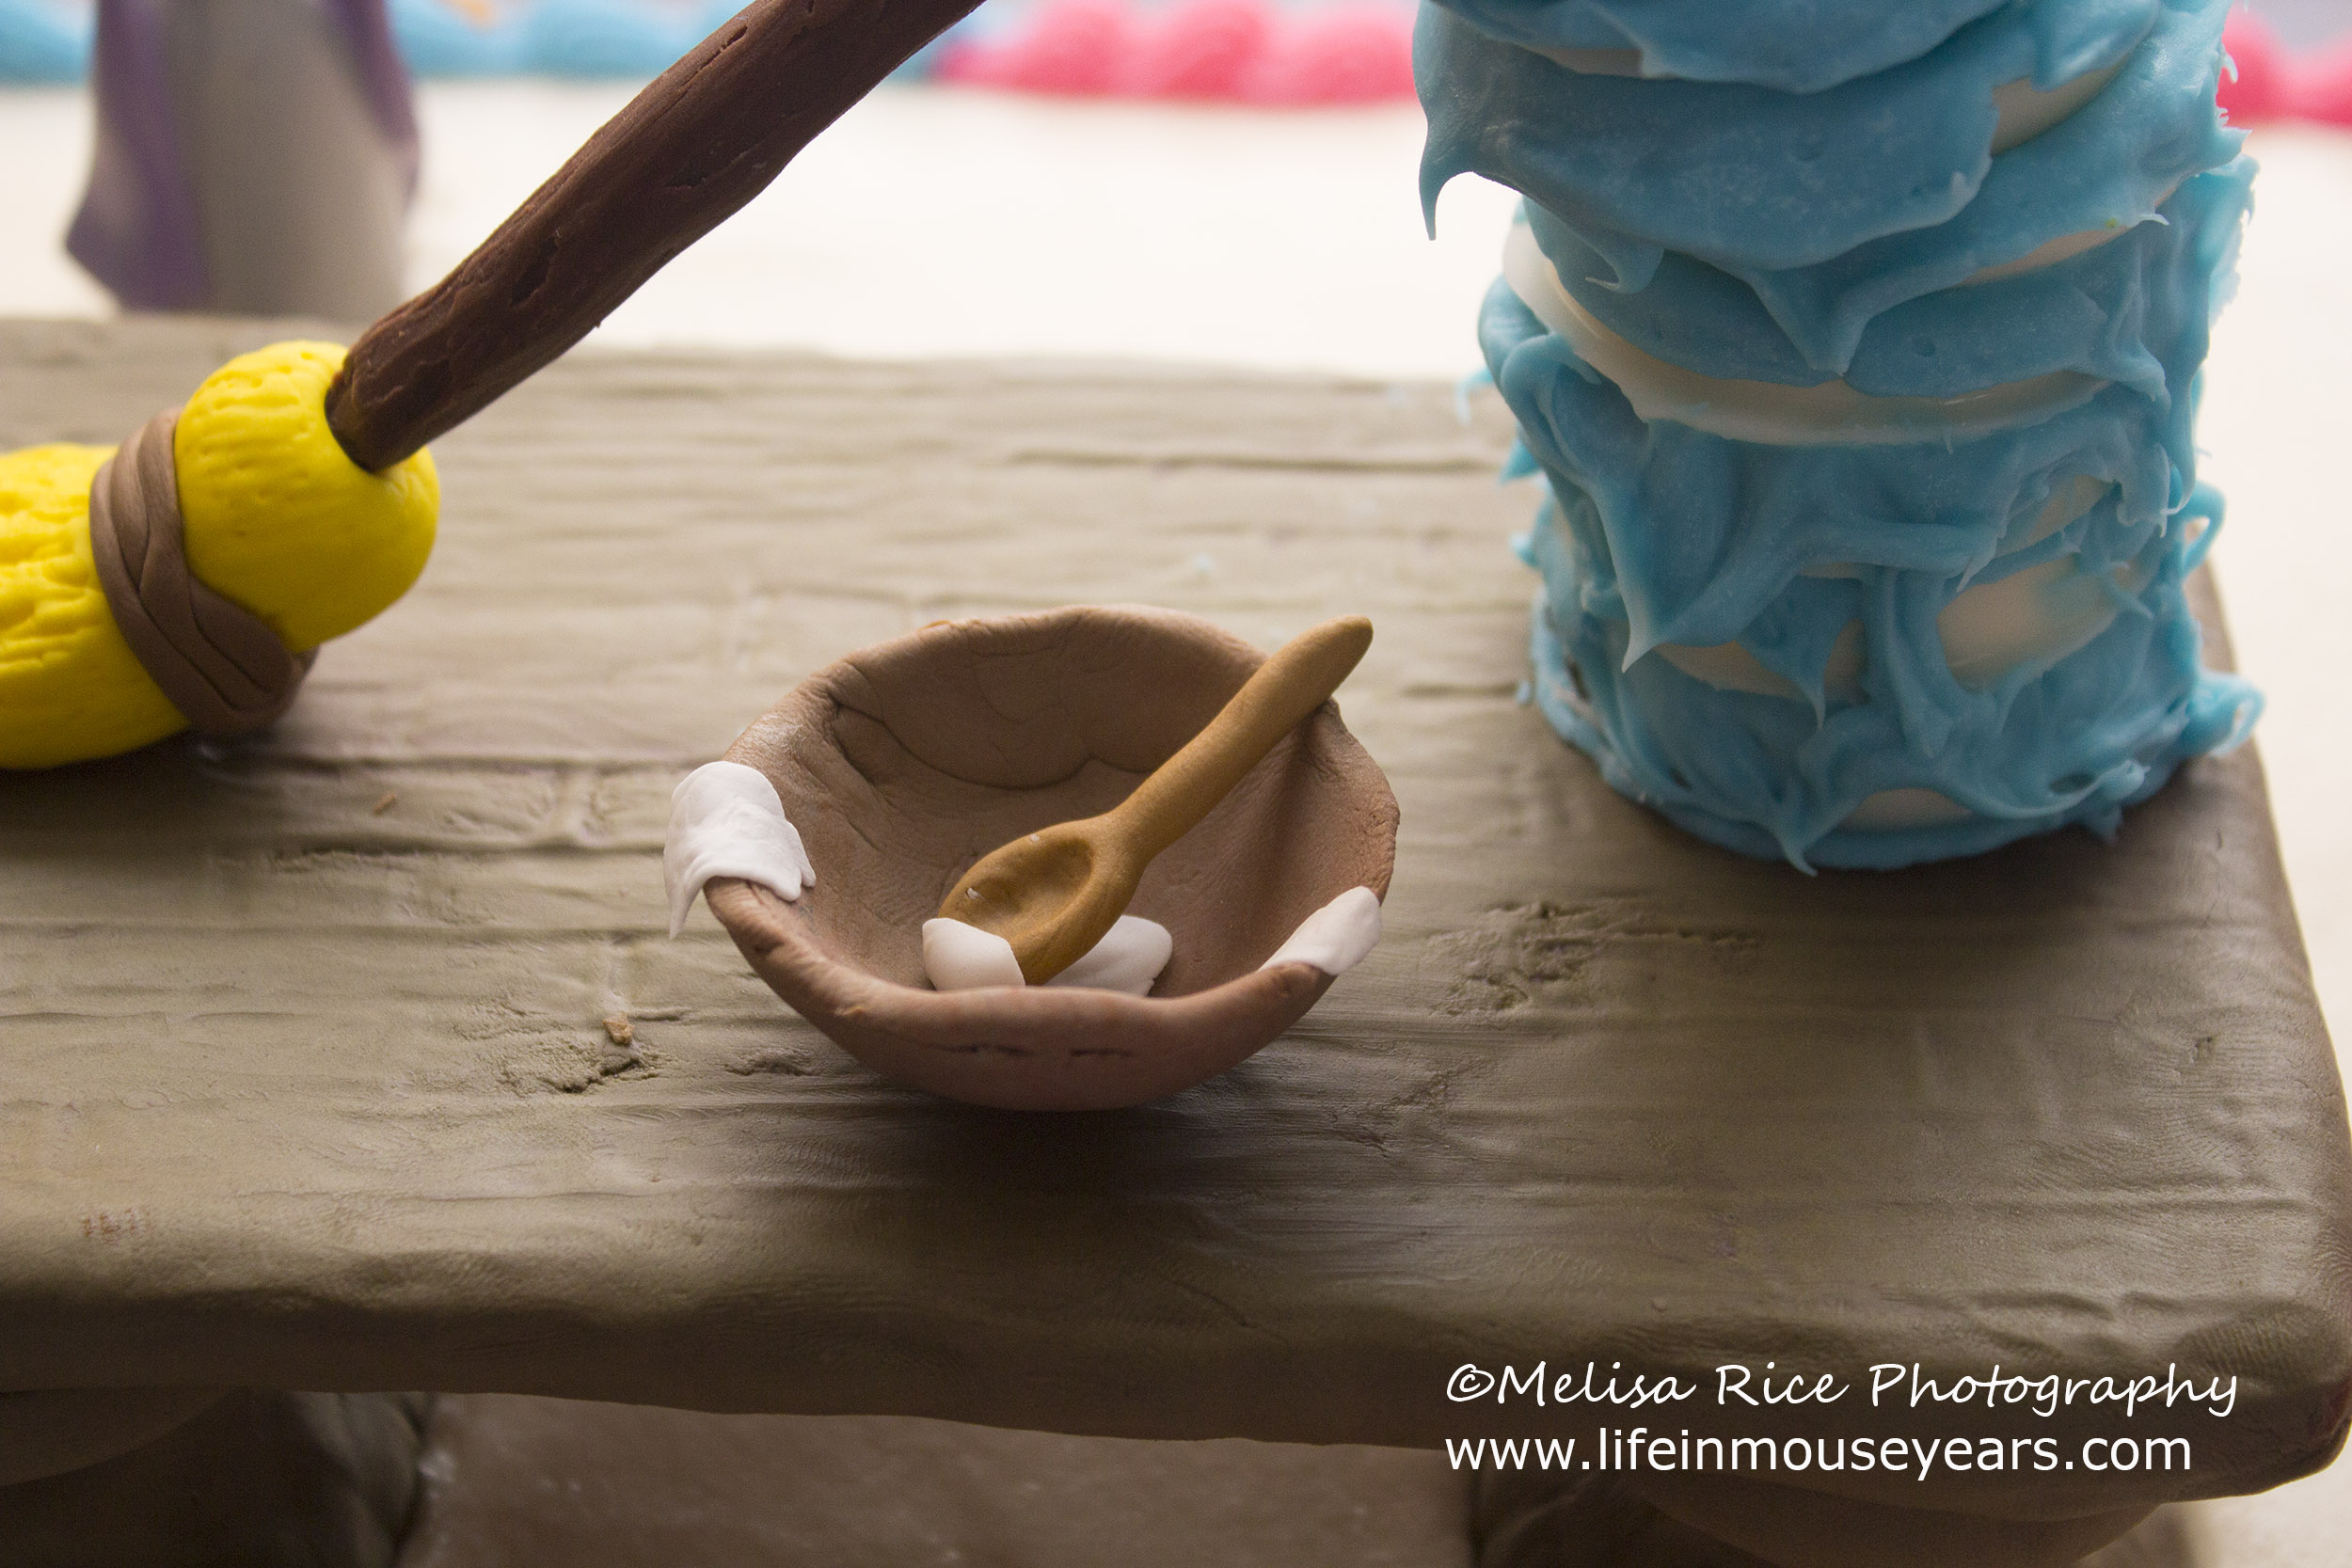
Mixing Bowl with Spoon
Another thing I used the gum paste for was to make a mixing bowl and spoon. I took some brown and shaped it into a bowl shape. Next, I took a lighter shade of brown and made a wooden spoon. Finally, I took some tiny pieces of white gum paste and rolled them out and placed it inside the bowl under the spoon, on the spoon, and on the rim of the bowl to look like some batter was left in the bottom.

Mini Cake
I needed a mini cake to go on the table of this Sleeping Beauty Cake. In the movie, the cake was leaning and the cake layers were sliding with the candles sliding down the broom the fairy used to hold the cake up.
First, I needed to make the cake layers. I deciding to use white Wilton candy melts and a candy mold that were little round disc shapes. I made 8 or 9 of them. Once they were set I began to place them on the table one at a time. In between the layers, I added blue Wilton candy melts and had enough on there so when I added the next white cake layer it would ooze out the sides and look like it was dripping. I continued until I reached a good height.
When I got to the top layer, I added the broom to the table and to the top layer. I added blue candy melts to the top of the broom handle. Due to the cake sliding, the “frosting” needed to start sliding down the handle.
Next, I made pink gum paste and rolled it into a tiny roll. Then I cut about ¾ of an inch sticks for the candles. Then I took yellow gum paste and shaped the fire part of the candles.
Take the candlestick and put it into the bottom of the fire.
To get them on the cake, I used some of the white frosting and piped a tiny ball around the top of the mini cake and then on the broom handle. Then take the candles and press them into the center of the frosting balls.
Alternate Idea
Another option instead of using frosting, melt white candy melts in a candy piping bag and use that. It would be more sturdy than the frosting. However, if the candles were to start leaning with the buttercream frosting, it would help to create the sliding/leaning look you are going for.
Place Figurines
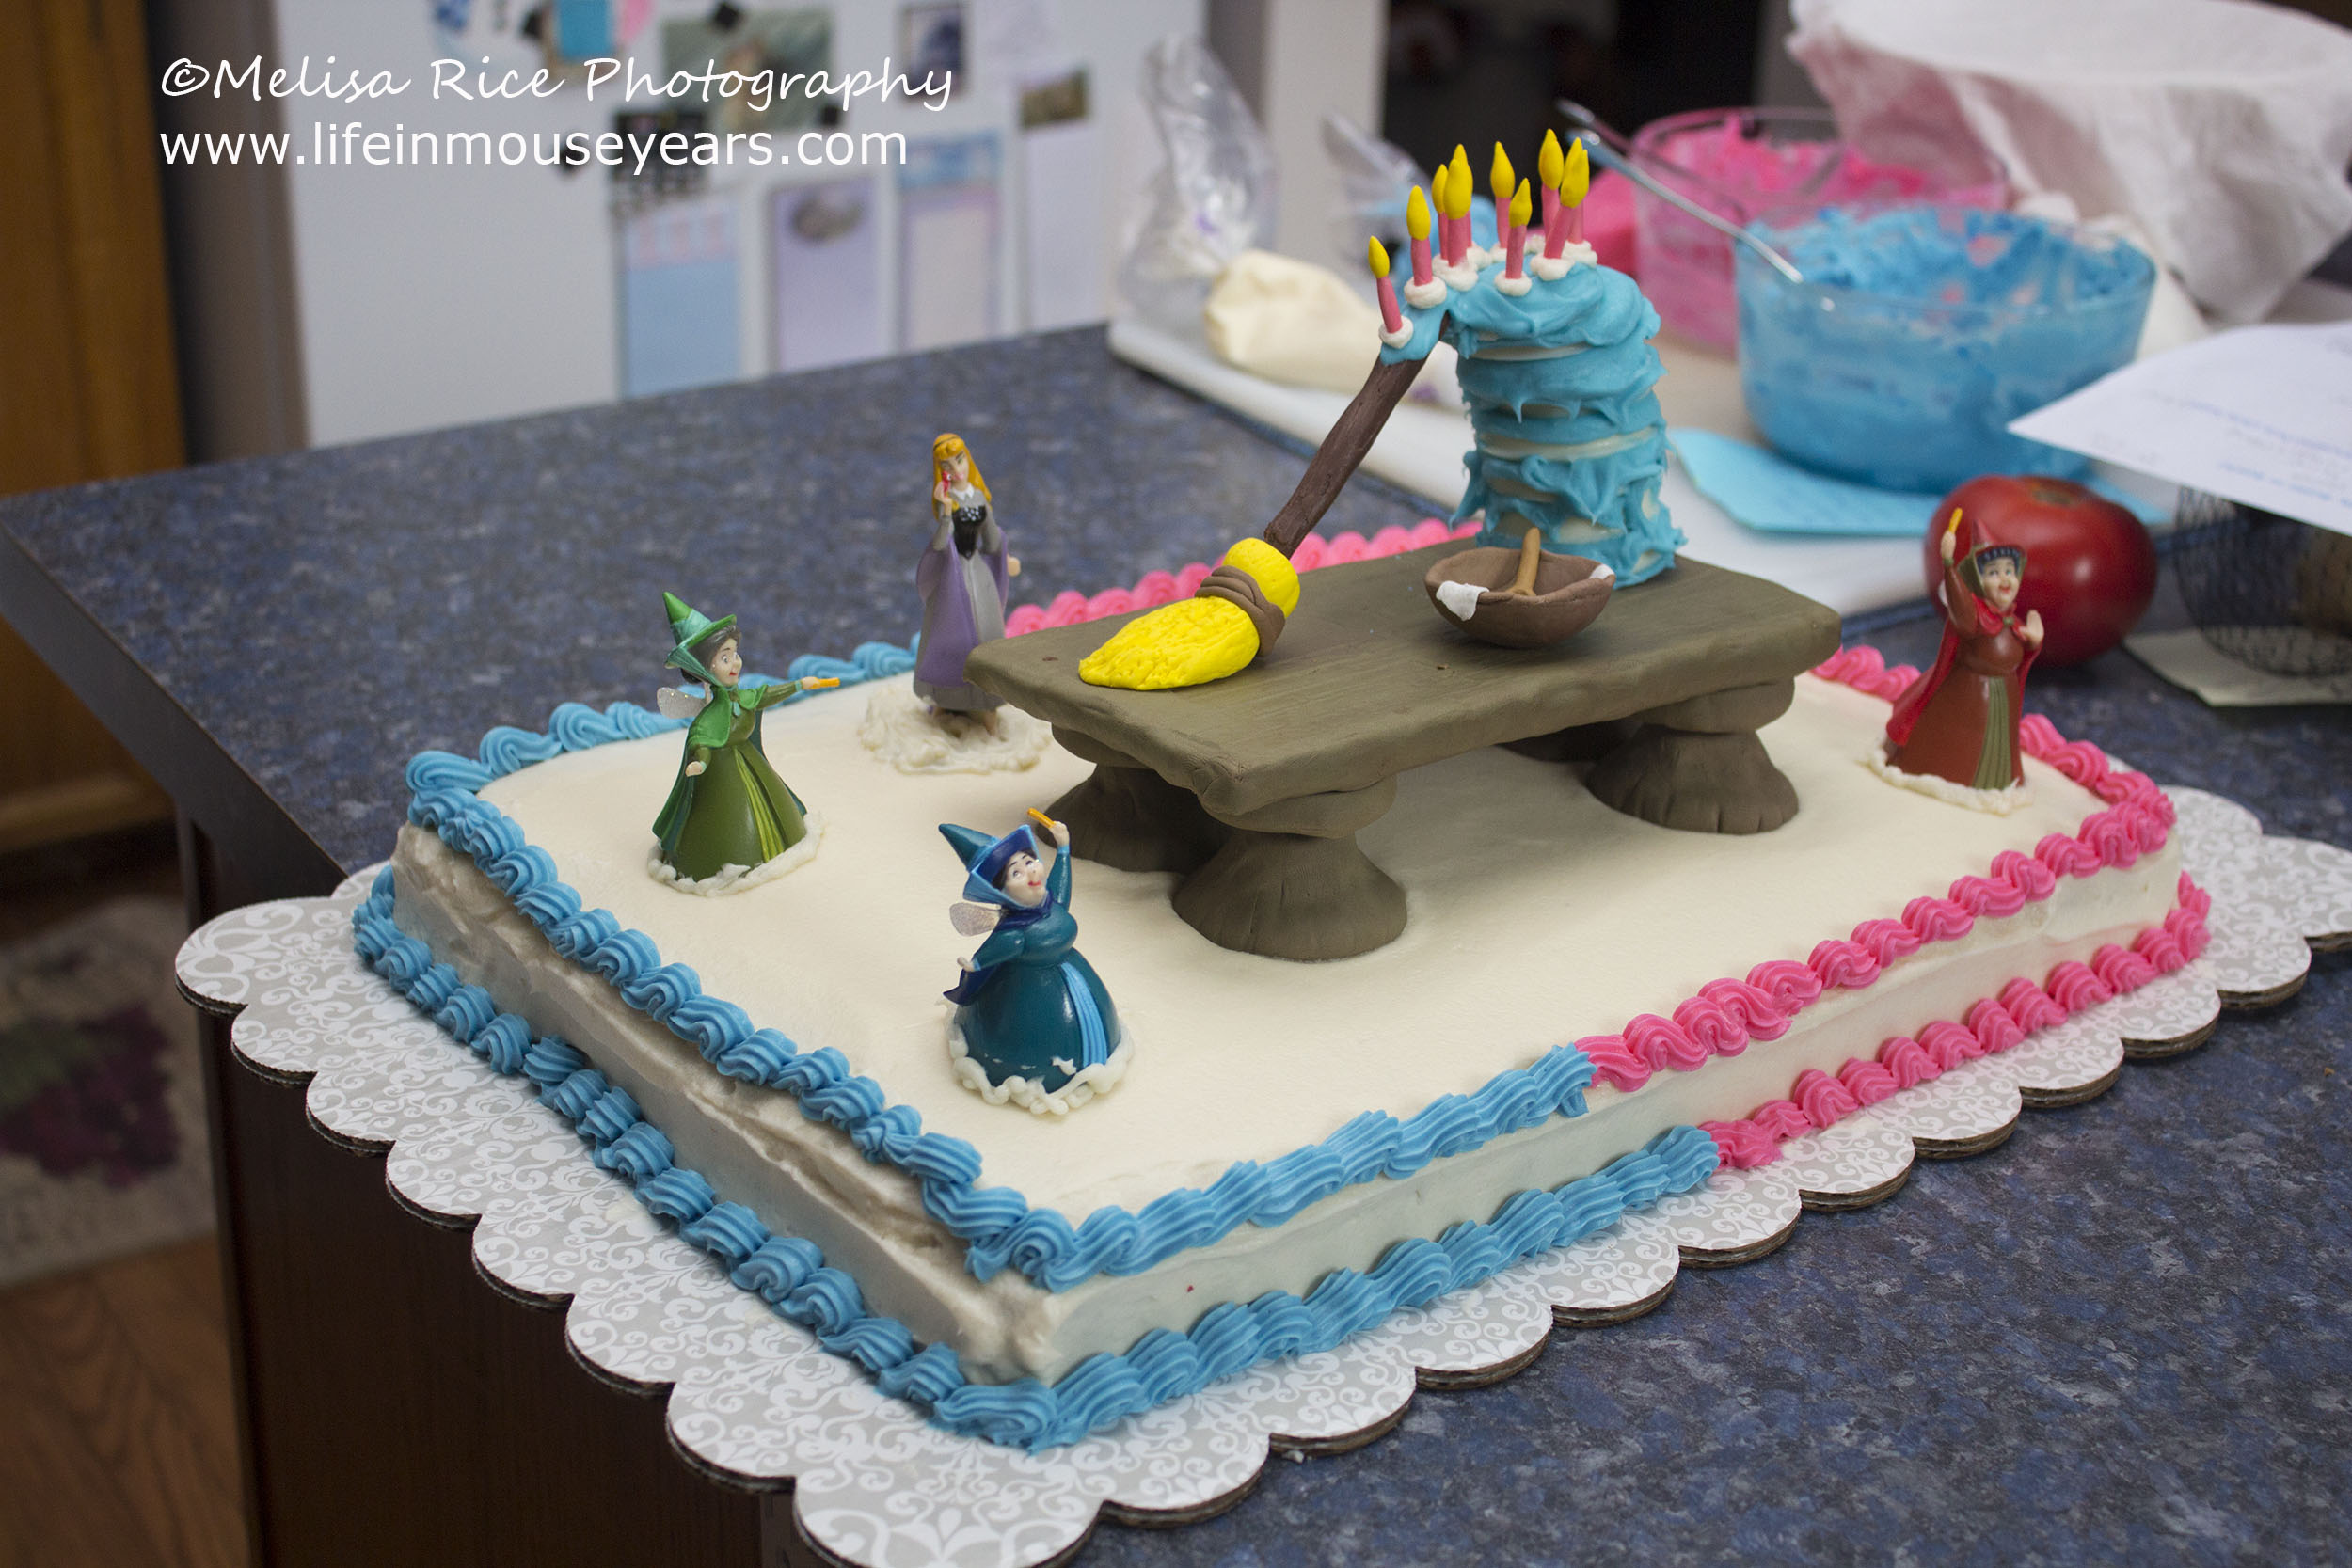
The final step is to add the figurines! Just pipe some white frosting on the spot you are wanting the figurine to be and then add that figure. Adding a bit of buttercream helps the figure to “stick” to the Sleeping Beauty cake.
Here’s the final result!

In Conclusion
If you decide to make a Sleeping Beauty cake, I hope that this post helped to give you ideas on what and how to make it.
Questions or Comments?
If you have any questions or comments on today’s post, please feel free to leave them below. I would love to help!
Thanks for stopping by Life in Mouse Years!
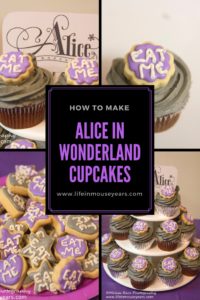
Looking for more cake ideas? Check out some of these links!

Leave a Reply