")
I recently did an article on making an Alice in Wonderland Mad Hatter Cake. In the photos for that cake, some cupcakes could be seen. Therefore, I said that I would be doing a post on the cupcakes soon. Here it is! Today’s post is how to make Alice in Wonderland Cheshire Cat Cupcakes.
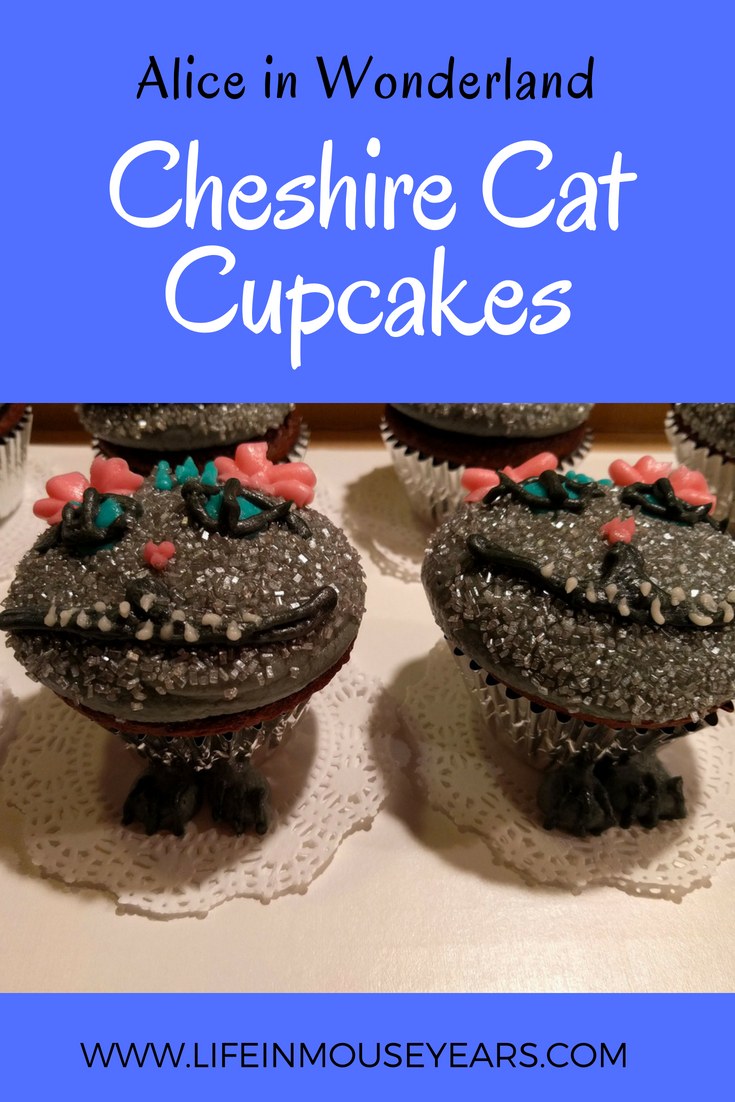
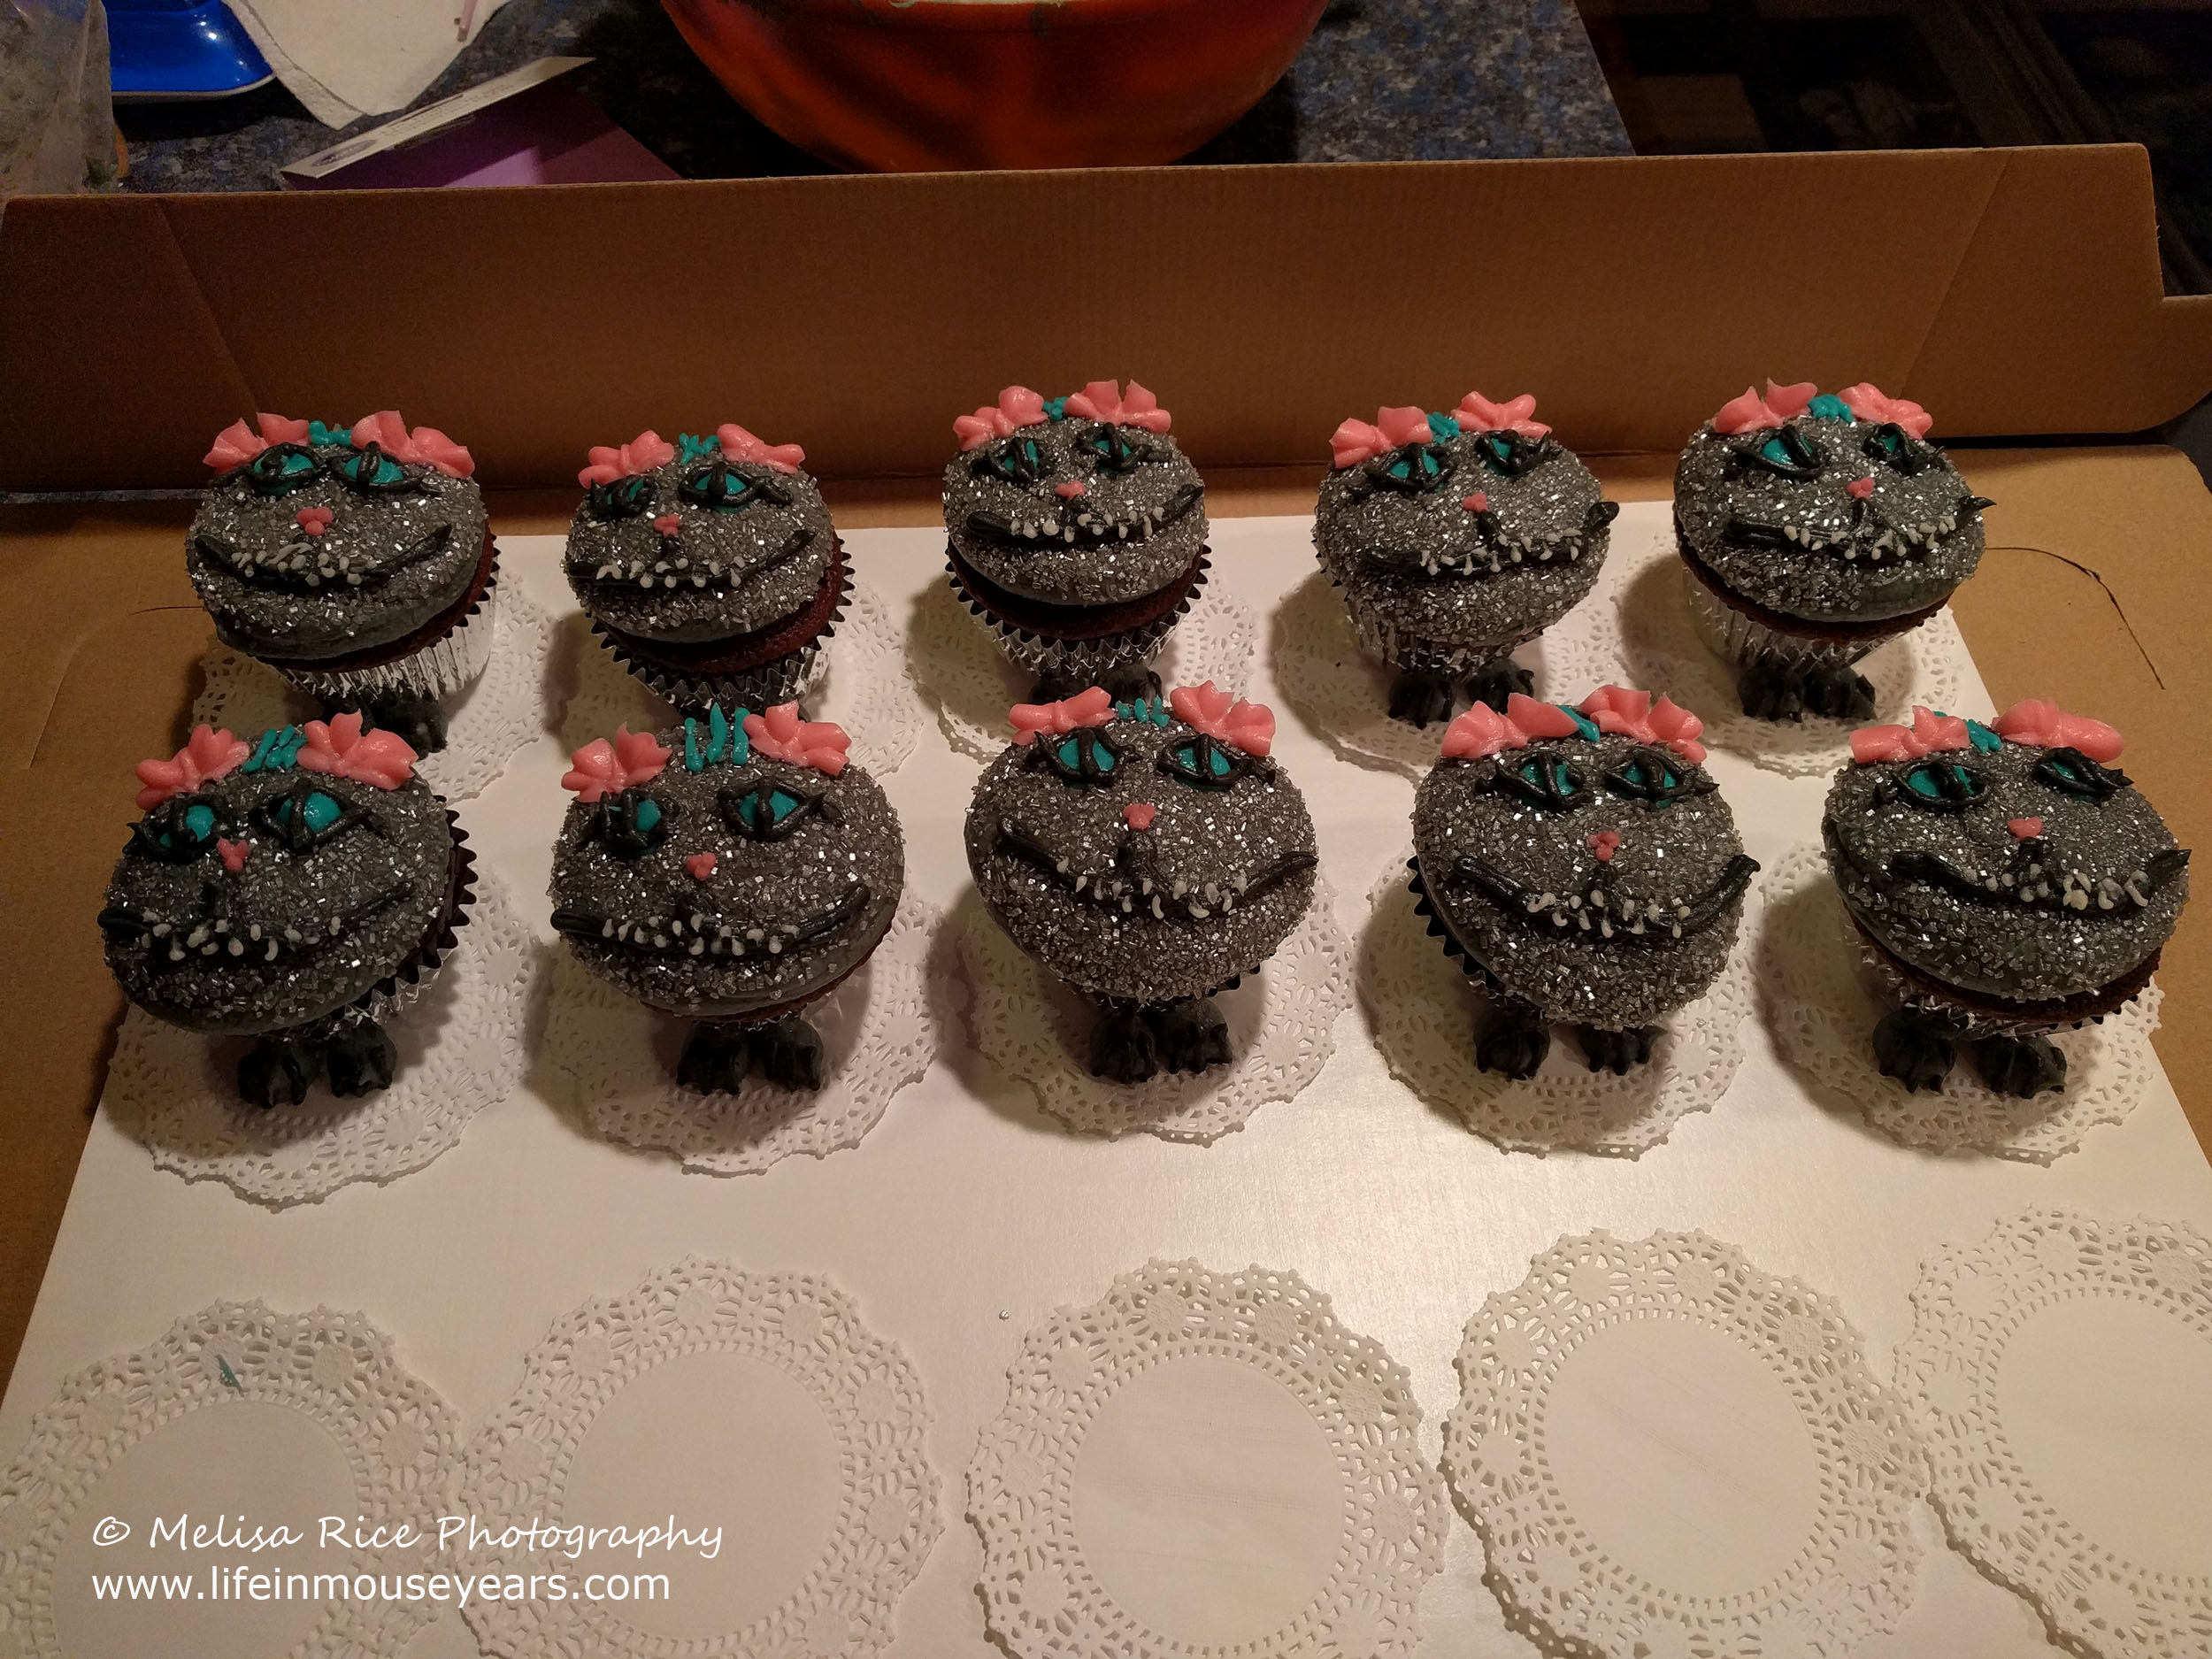
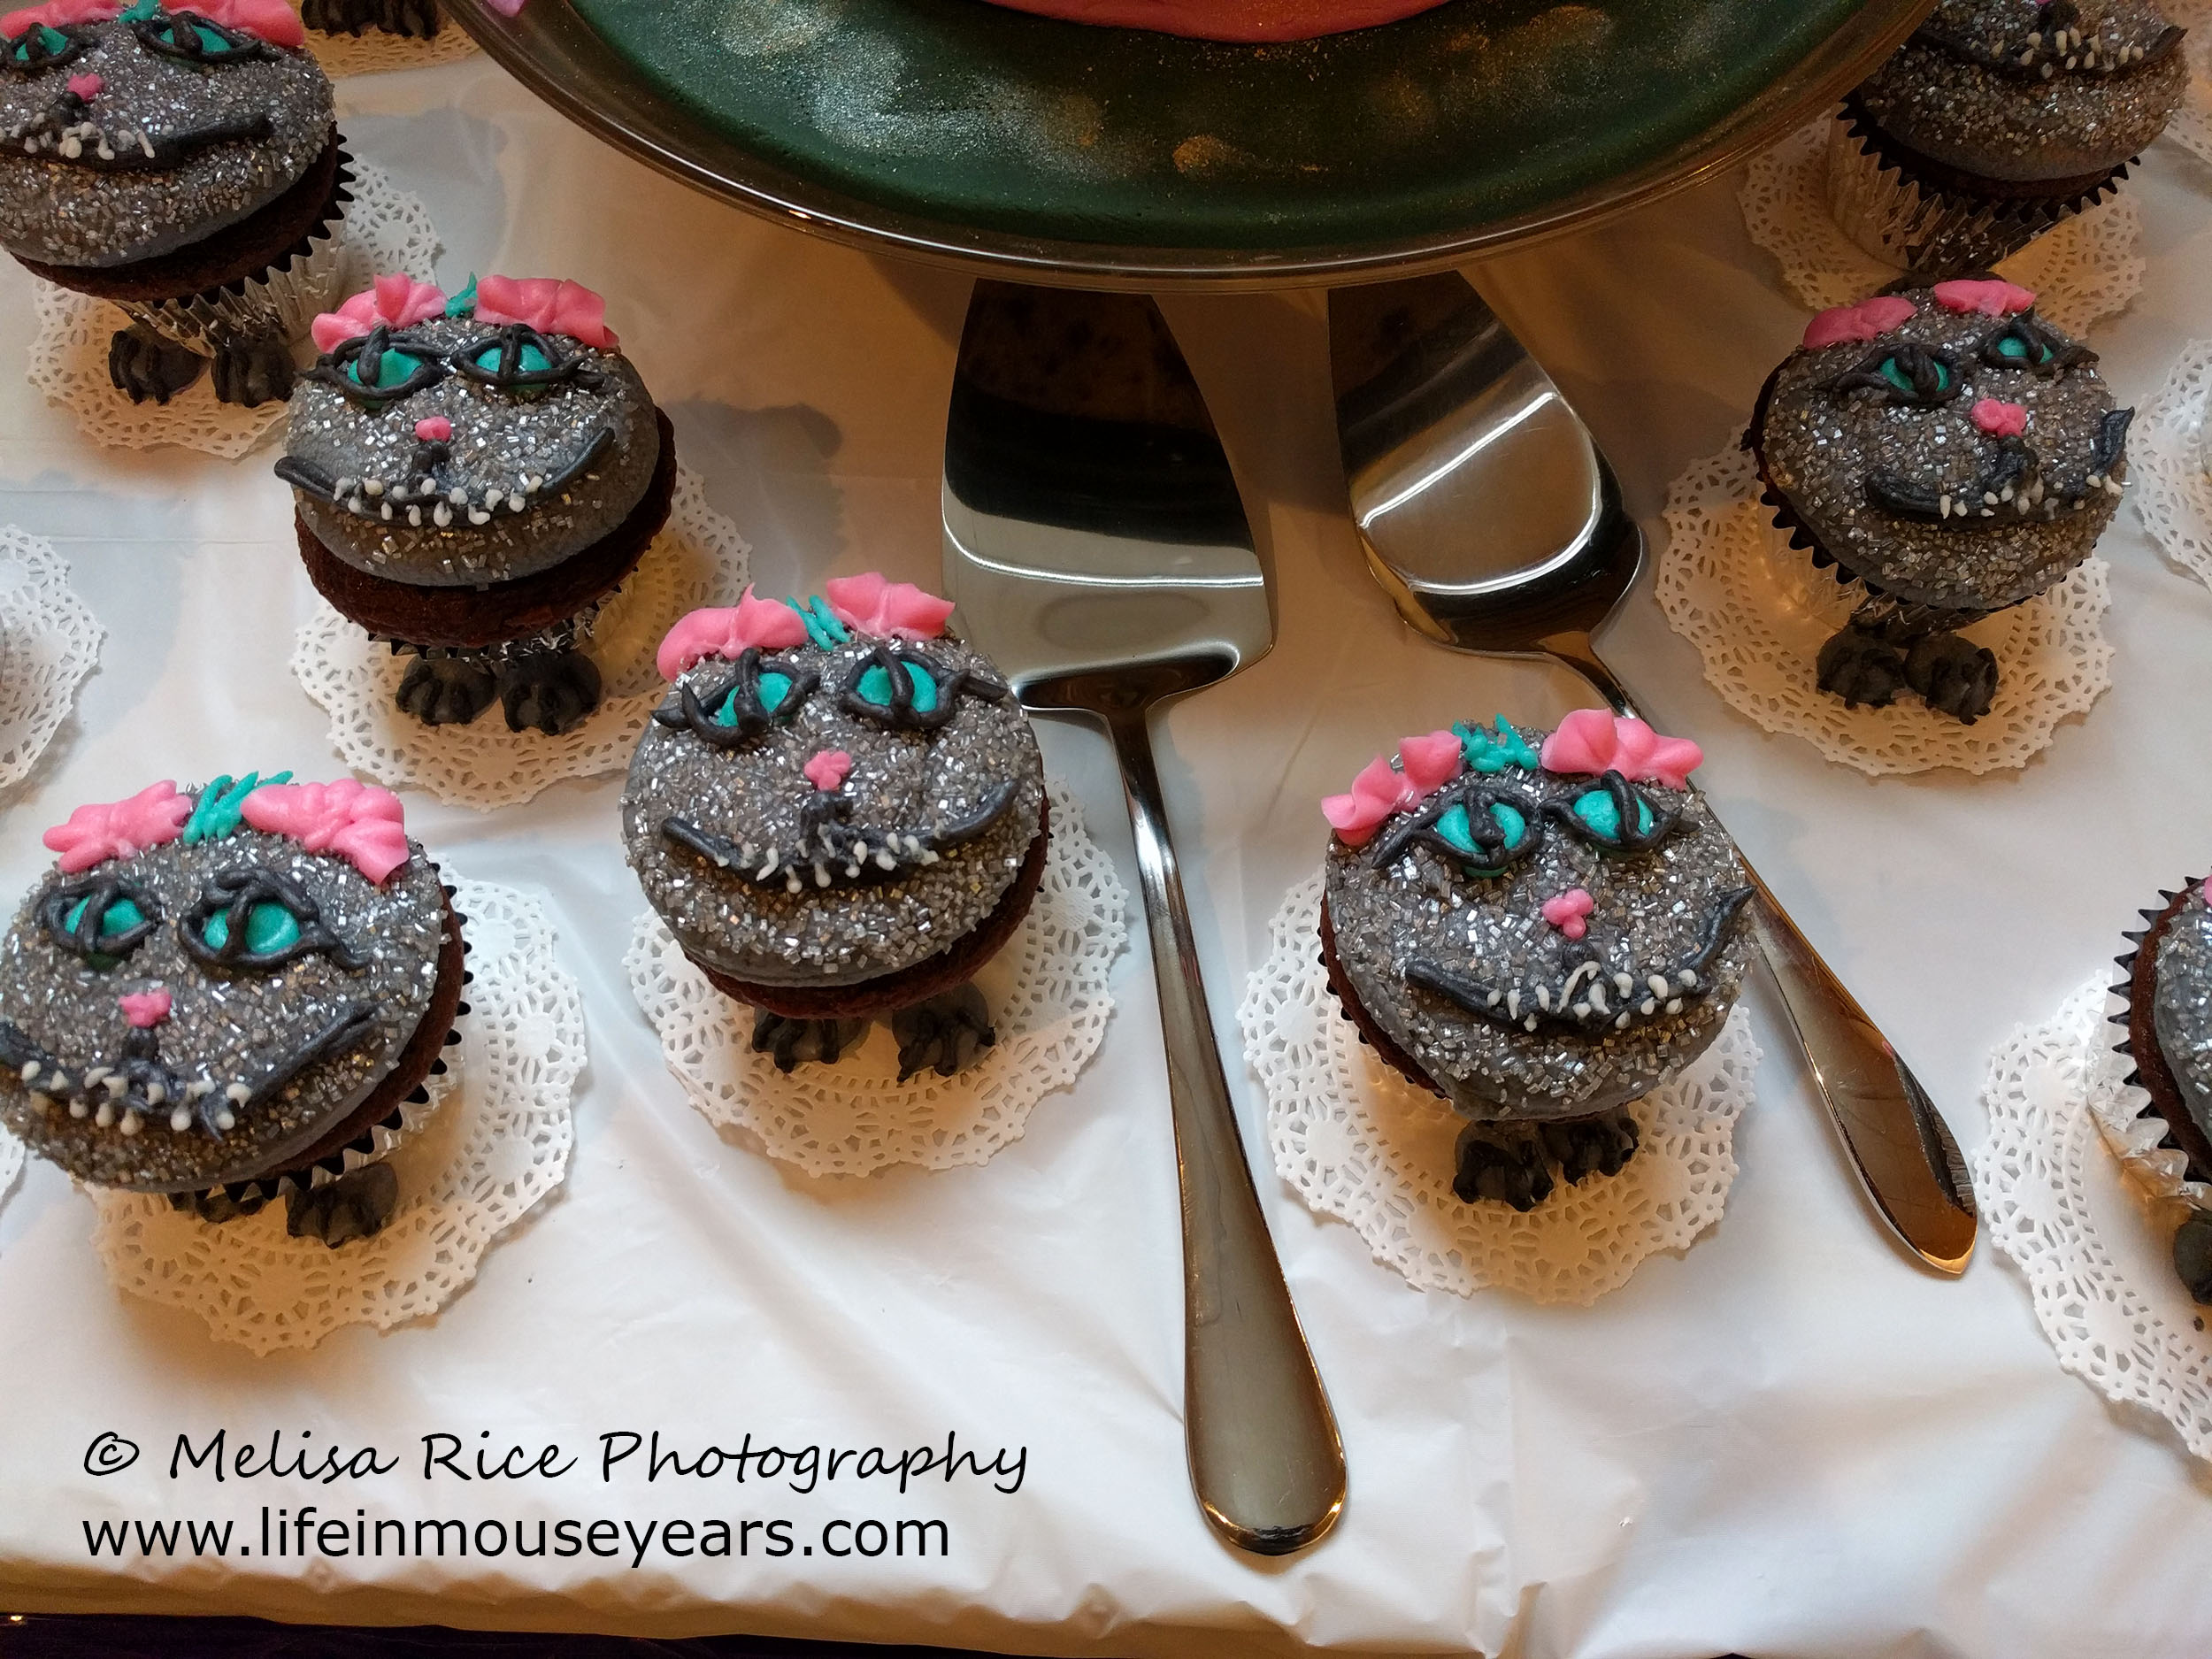
Alice in Wonderland Cheshire Cat Cupcakes
I made these cakes and cupcakes before I decided to become a blogger. As a result, I do not have step by step photos of the process. However, I do have a final result photo of the Cheshire Cat Cupcakes.
If you are interested in finding the products I used to make these cupcakes, I added some links throughout this post. Don’t worry about losing your place, all links will open in a new window for you!
Bake Cupcakes
First of all, bake the cupcakes! I used the foil cupcake liners for the Cheshire Cat Cupcakes. As a result of the liners and the mix I used, the cupcakes turned out super moist. I like to use Duncan Hines Devils Food. The other trick that I have done for years, is to use light olive oil. Light means light on flavor. If you use extra virgin olive oil it gives it a little bit of flavor that some people may notice. However, ever since I started using light olive oil, my cakes are so moist! I get complimented all the time how delicious and moist they are!
Make Frosting
Next, whip up some buttercream frosting. My go-to recipe is Wilton’s Buttercream recipe. For this cake, I used milk to make the frosting. However, I am going to share a tip I just realized with the cakes I just did this year. Use water instead of milk. I can’t explain why, but the frosting was so good using water!
As a result of using water, you don’t have to worry about the cake being out on the counter after it is given to the guests. That is a plus!
Color the Frosting
For this recipe, I was making a gray color. Being that the Mad Hatter cake and Cheshire Cat Cupcakes were based on the live-action Alice in Wonderland movie, the Cheshire Cat was a gray color.
In addition to the gray, you will also need:
- pink for the nose
- teal (light blue) for the eyes
- black (or as close as you can get it) for accents
- white for the teeth
Frost the Cupcakes
First of all, I spread a tiny bit of gray down on the Cheshire Cat Cupcakes. I knew that I would be piping a swirl onto the cupcake, however, I personally do not like to see cake under the frosting. In addition to seeing the cake around the frosting, the cupcake will dry out faster if it is not fully covered.
Next, I took a large circle tip and put it into a piping bag with the gray frosting. I piped a mound of frosting on top. Holding the tip to the center of the cupcake (just above the cake) and squeezing the piping bag, the frosting will fill up all around and make a circle of frosting. It is cool how that works. After you get the desired mound of frosting, next, as you stop squeezing the bag lift the bag up and out of the frosting.
Sprinkles!
Sprinkles are the next step to the Cheshire Cat Cupcakes. I found silver sprinkles at Hobby Lobby. Next, I put a bunch in a bowl and turned the cupcakes upside down into the bowl of sprinkles to coat the top of the frosting mound.
Eyes
In order to make the eyes of the Cheshire Cat Cupcakes, you will need to make two small holes where you would like the eyes to be. Therefore, if you have something like a small melon baller tool or small spoon, maybe even the end of a spoon handle, you can dig a small hole out.
Next, take a piping bag with a small circle tip and the teal colored frosting, pipe in the same fashion as the gray to make two round mounds (eyes).
After the teal part of the eyes, you will take the Black (dark gray) frosting color and add a line of frosting from the inside of the eye, along the top of the eye to the outer corner. Then add a line from the outside along the bottom of the eye to the inside of the eye. Connecting it to the top dark gray line that you started with.
Finally, to finish the eye, take the dark gray frosting and add a thick line in the center of the eye from top to bottom like a cat’s pupil.
Nose
The next step for these Cheshire Cat Cupcakes is to make the nose.
First, fill a frosting bag with the pink frosting. If you use couplings with the tips it will make this step easier. As a result of needing the pink for both the ears and nose, you will need two different piping tips. By using the couplings, you can easily change the tips of the bag and just use one bag. Another perk is if a tip is not creating the effect you want, you could change it out and not have to redo the entire bag. It is a lifesaver!
Well, maybe not life-saving… but time-saving!
Ears
For the ears of the Cheshire Cat Cupcakes, I used a leaf tip. Put the tip down on the cupcake where you would like the ears to be and start to squeeze the piping bag and slowly lift the piping bag up. When you reach the top stop squeezing.
Next, for the nose, you will need a small round tip. Here you will pipe three small circles into an upside-down triangle shape. Therefore, by placing two of the circles on top and one centered under the first two, it makes the nose.
Mouth
Another part of the Cheshire Cat Cupcakes is the mouth. Here I took the dark gray and starting under the nose, I piped down a little and then curved towards the right going up at the end. Next, pipe down from the nose and curve to the left this time going up at the end. Then, pipe from the left end curving down a smidge and going to the right side where you ended and connecting the frosting. Fill in the area with the dark gray.
Finally, to finish the mouth take white frosting in a piping bag with a writing tip and put little dabs of white on the dark gray mouth area. Staggering them. Making some higher and some lower to make the Cheshire Cats smile.
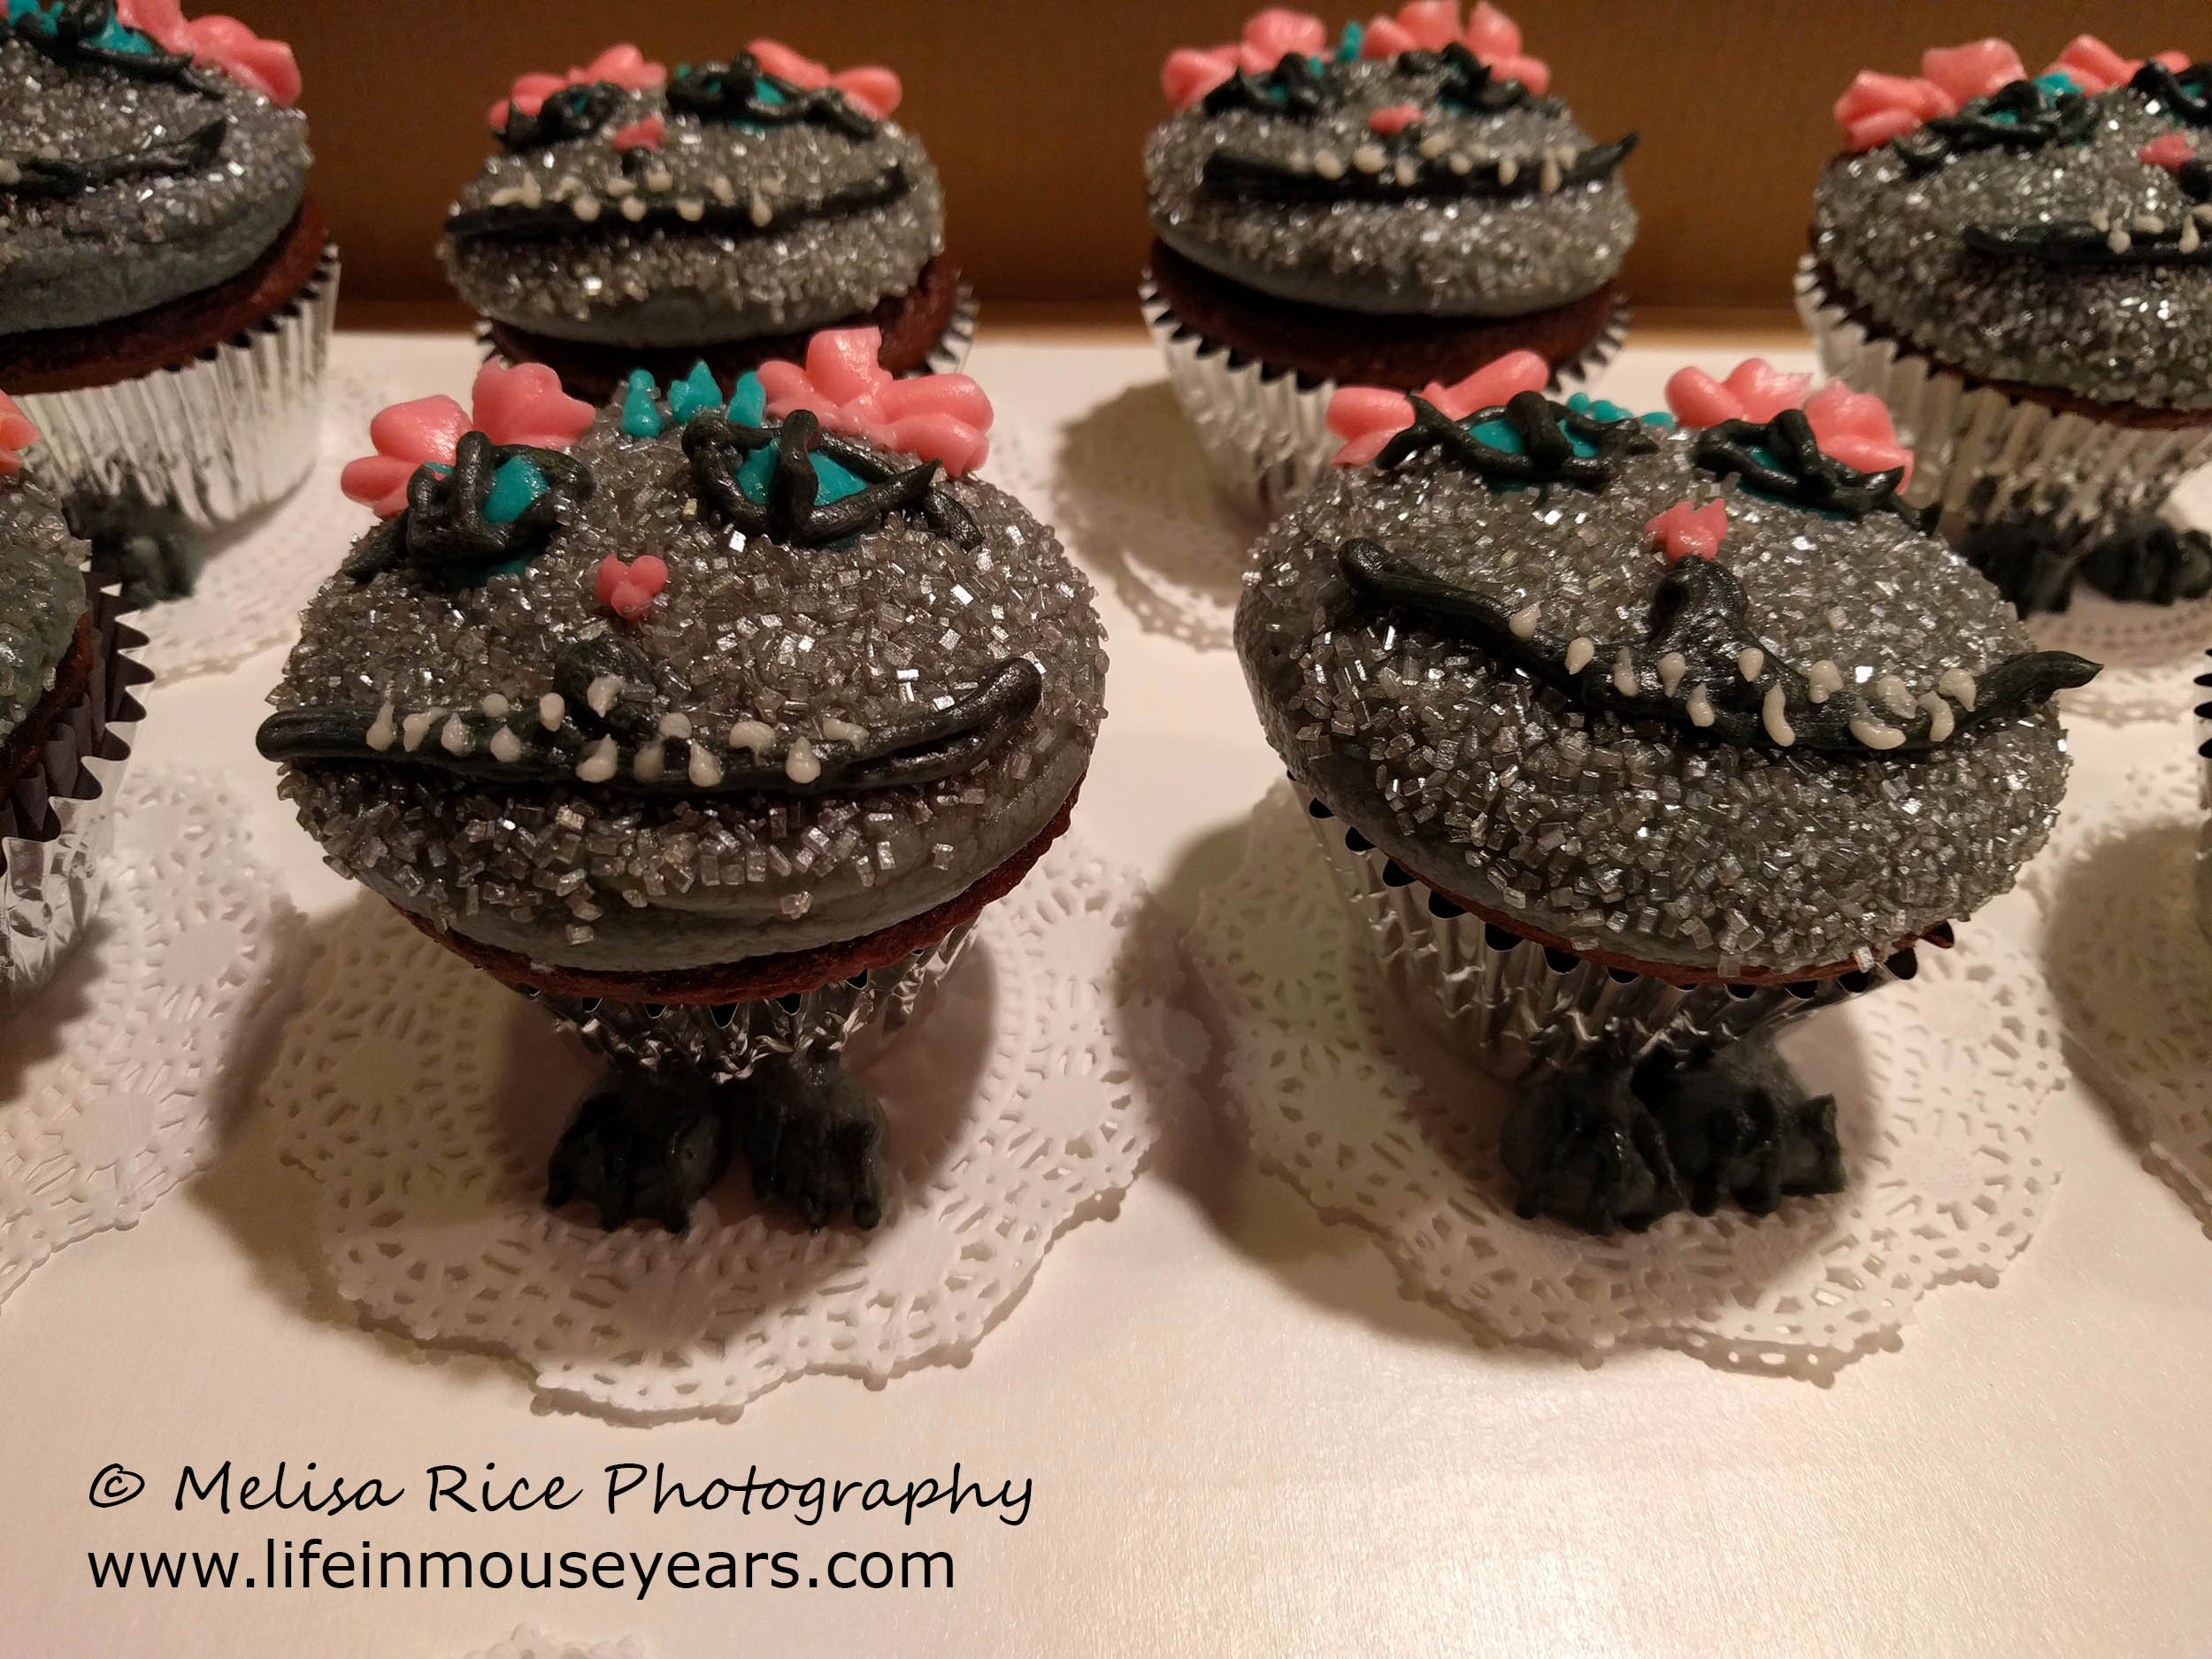
Feet
The final part of the Cheshire Cat Cupcakes are the feet. I put the cupcakes on a white paper doily. I wanted to make sure the feet stayed on the cupcakes and thought this was a good way to do that.
Next, take the gray frosting and make two mounds on the front of the cupcakes at the bottom. Then finally, take the dark gray frosting and add three lines to each paw going from top to bottom to make the toes.
Disney How-To Video
Disney put out a video on how to make these Cheshire Cat Cupcakes. If you would like a visual of the process, this is the link to check out on YouTube. As a result of how fast they show you, you may need to pause the video and rewatch it a few times.

In Conclusion
Making Cheshire Cat Cupcakes is a fun way to fit a live-action Alice in Wonderland party theme. Or, to just share with someone who is a fan of the movie. I hope that this helps you out if you decide to make them!
Questions or Comments?
If you have any questions or comments on today’s post-Alice in Wonderland Cheshire Cat Cupcakes, please feel free to leave them below. I would love to help!
Thanks for stopping by Life in Mouse Years!

Leave a Reply