")
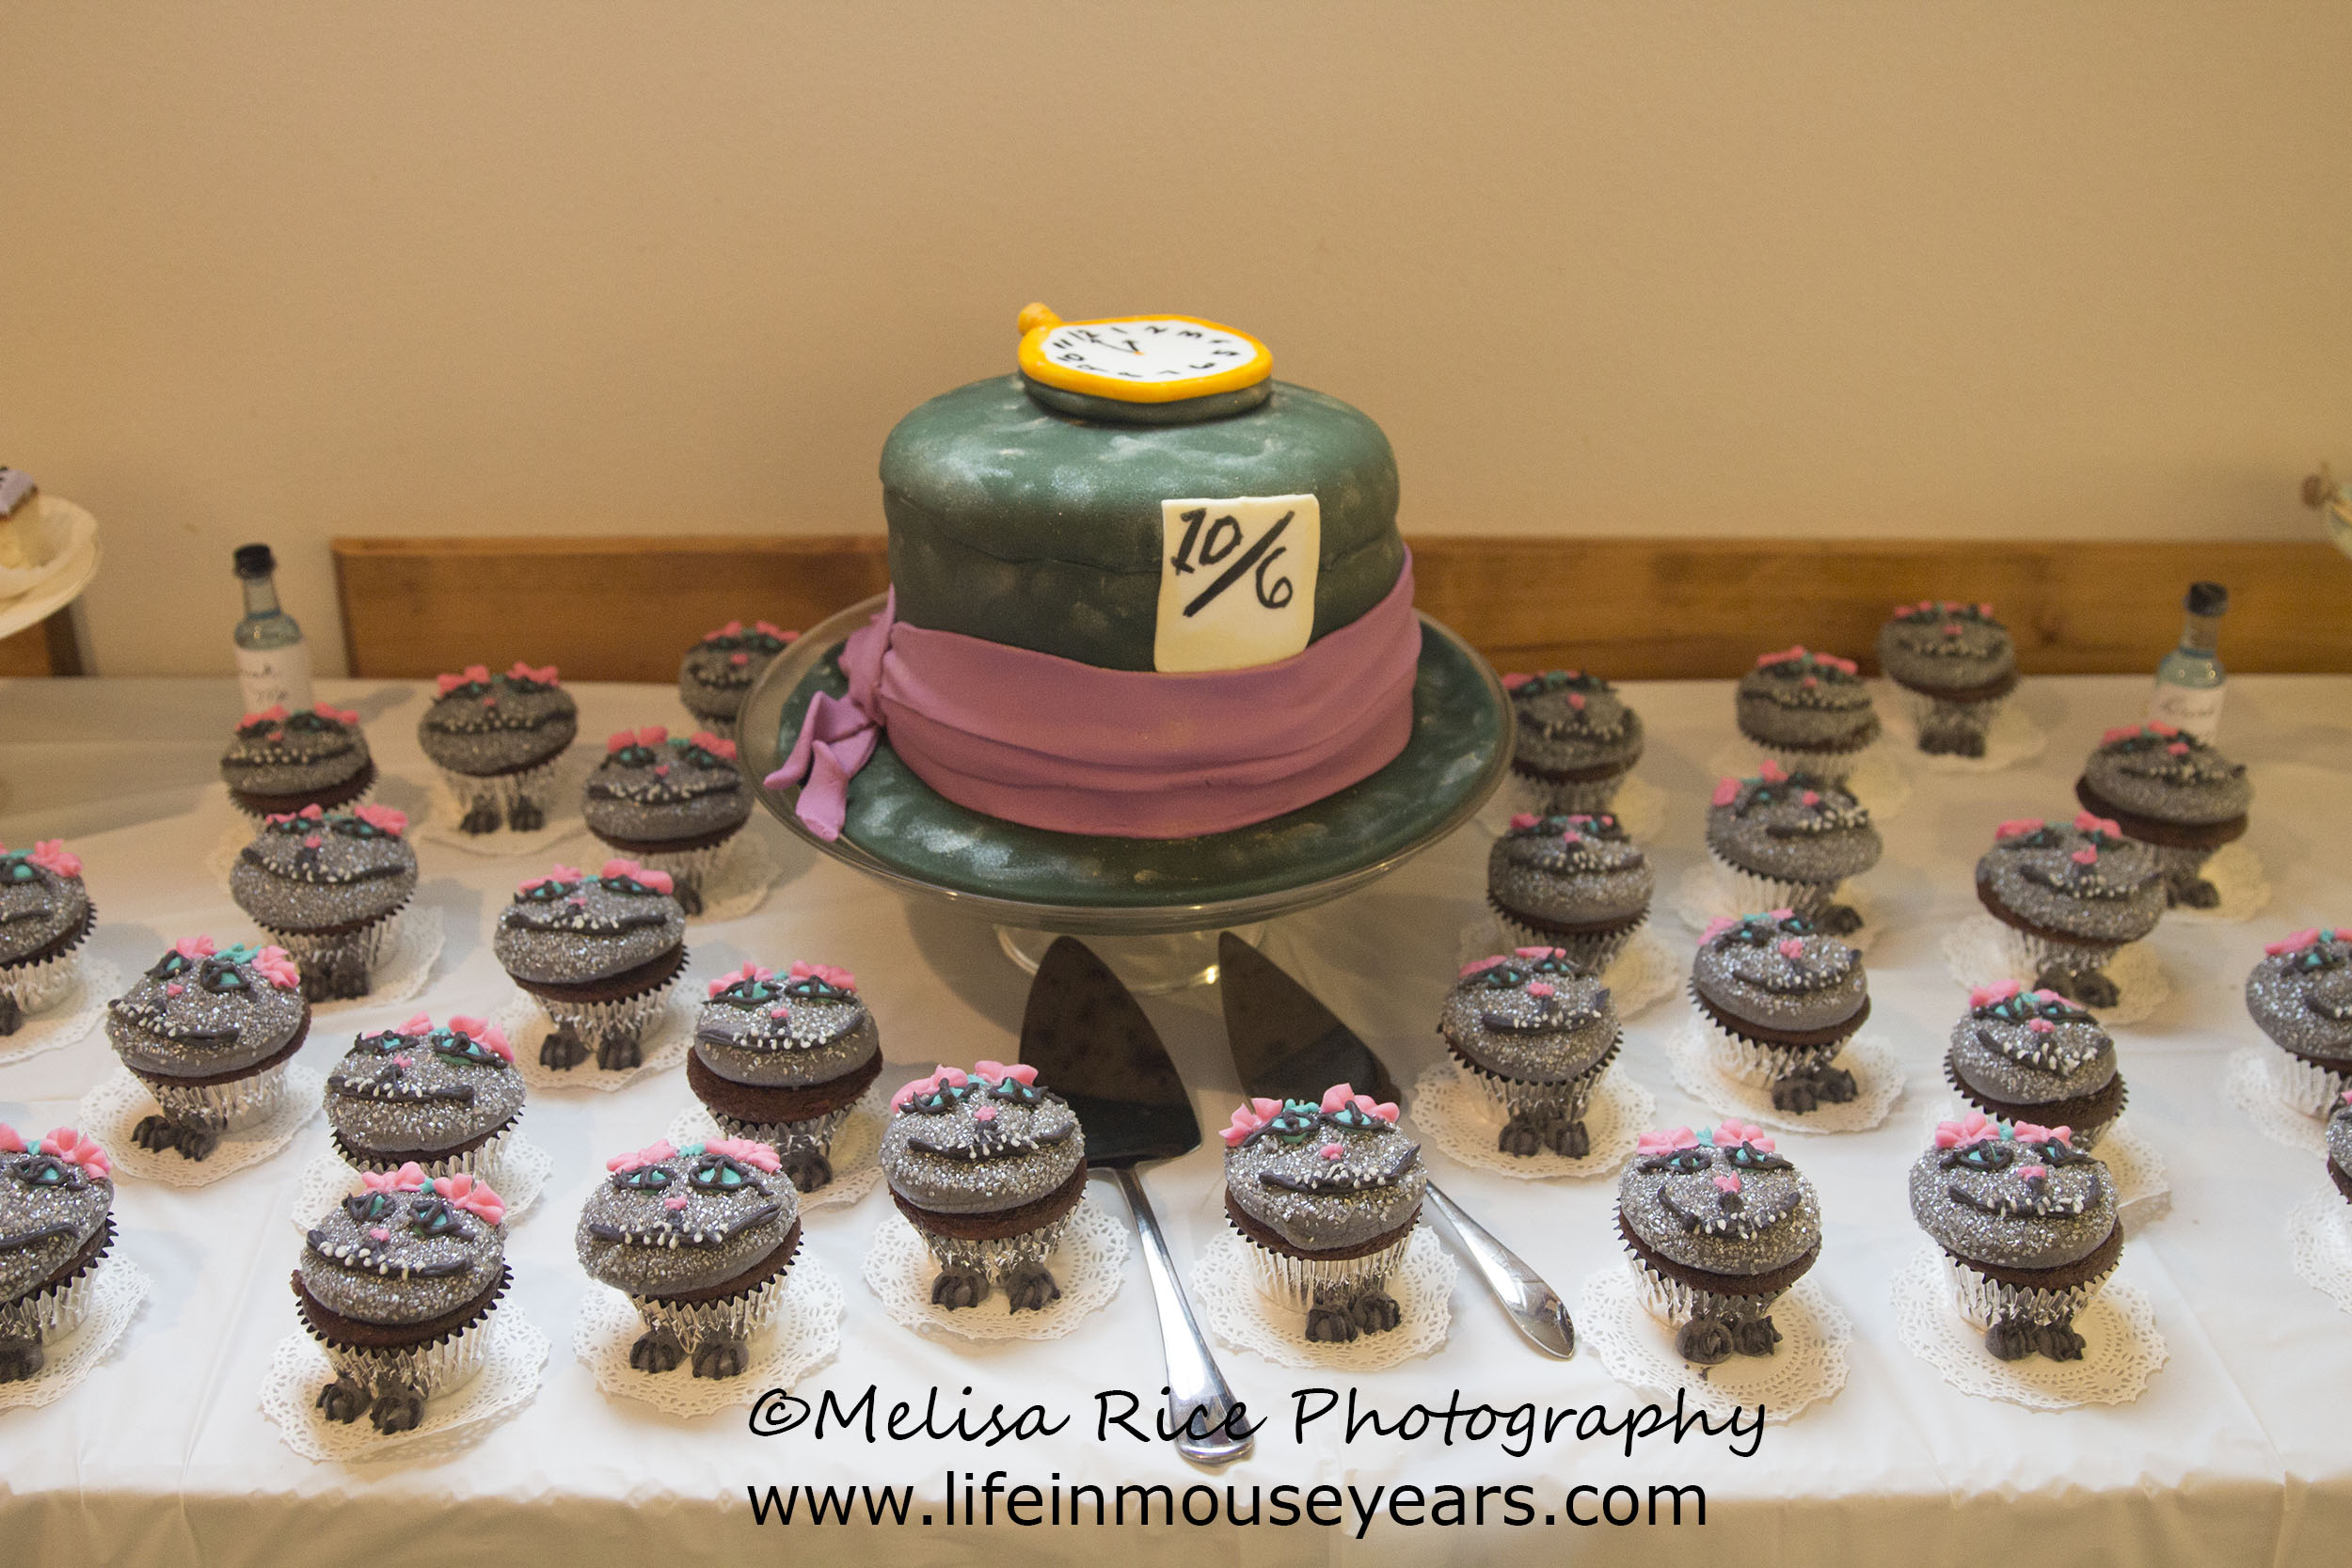
Alice in Wonderland is a fun party theme! Parties include cake… Cakes are fun and delicious! Today’s cake is based on the Live Action movie Alice in Wonderland with Johnny Depp. The Mad Hatter’s hat was the centerpiece and Cheshire Cat cupcakes all around for my friend’s Baby Shower. Today, come and see how I made the Mad Hatter cake!
Alice in Wonderland Mad Hatter Cake
Baby showers are so much fun! Especially when they are Disney themed! I love to make Disney themed cakes and cupcakes. Although it can be stressful while making them, however, in the end, it is fun! It is even more fun looking back at it later!
I am not a professional. Just a crafty DIY person that learns the hard way…
If you are interested in the classic animated Alice in Wonderland Cupcakes, here is a post I shared on those.
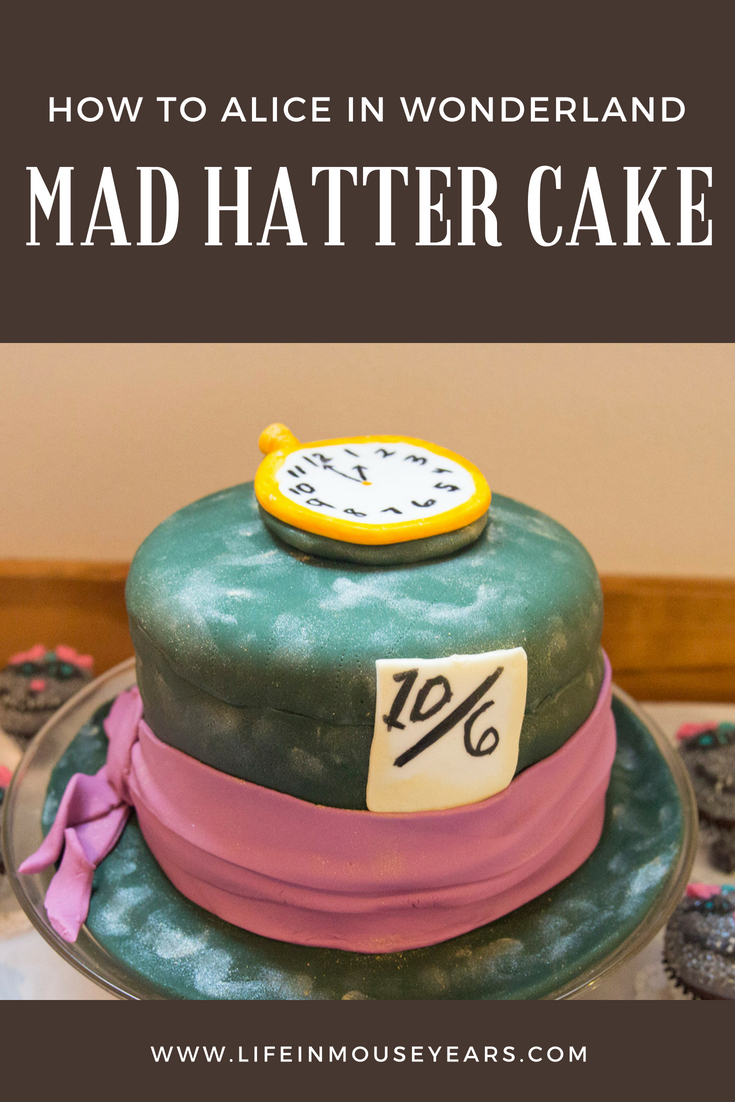
Mad Hatter Cake
First, this is the live-action movie-themed cake. While both the animated movie and the live-action are similar, they are also very different.
For this Mad Hatter cake, I attempted to replicate the hat in cake form. As I have mentioned in my other cake posts, fondant and I are not friends… However, I didn’t see how I could use buttercream frosting and still get the result I was wanting. Therefore, fondant it was.
I suppose if I would attempt it more often, maybe we could be friends.
Bake the Cake
First, bake your cake. Then let it cool before you start frosting. I used a cake mix for this cake. After having a disaster by the next morning, I learned that you need to use a batter that makes a denser cake. One that can hold up the weight of the fondant. More on my disaster in a few.
Round cake pans are the way to go to start your top hat shape.
Frost the Cake
Next is to frost the Mad Hatter cake. Yes, even though you will be adding fondant, you still need a thin layer of buttercream frosting. To make sure the layers stayed together, I added some wooden supports inside the cake.
Once the cake was frosted, I then put the cake in the fridge to harden the buttercream.
Color the Fondant
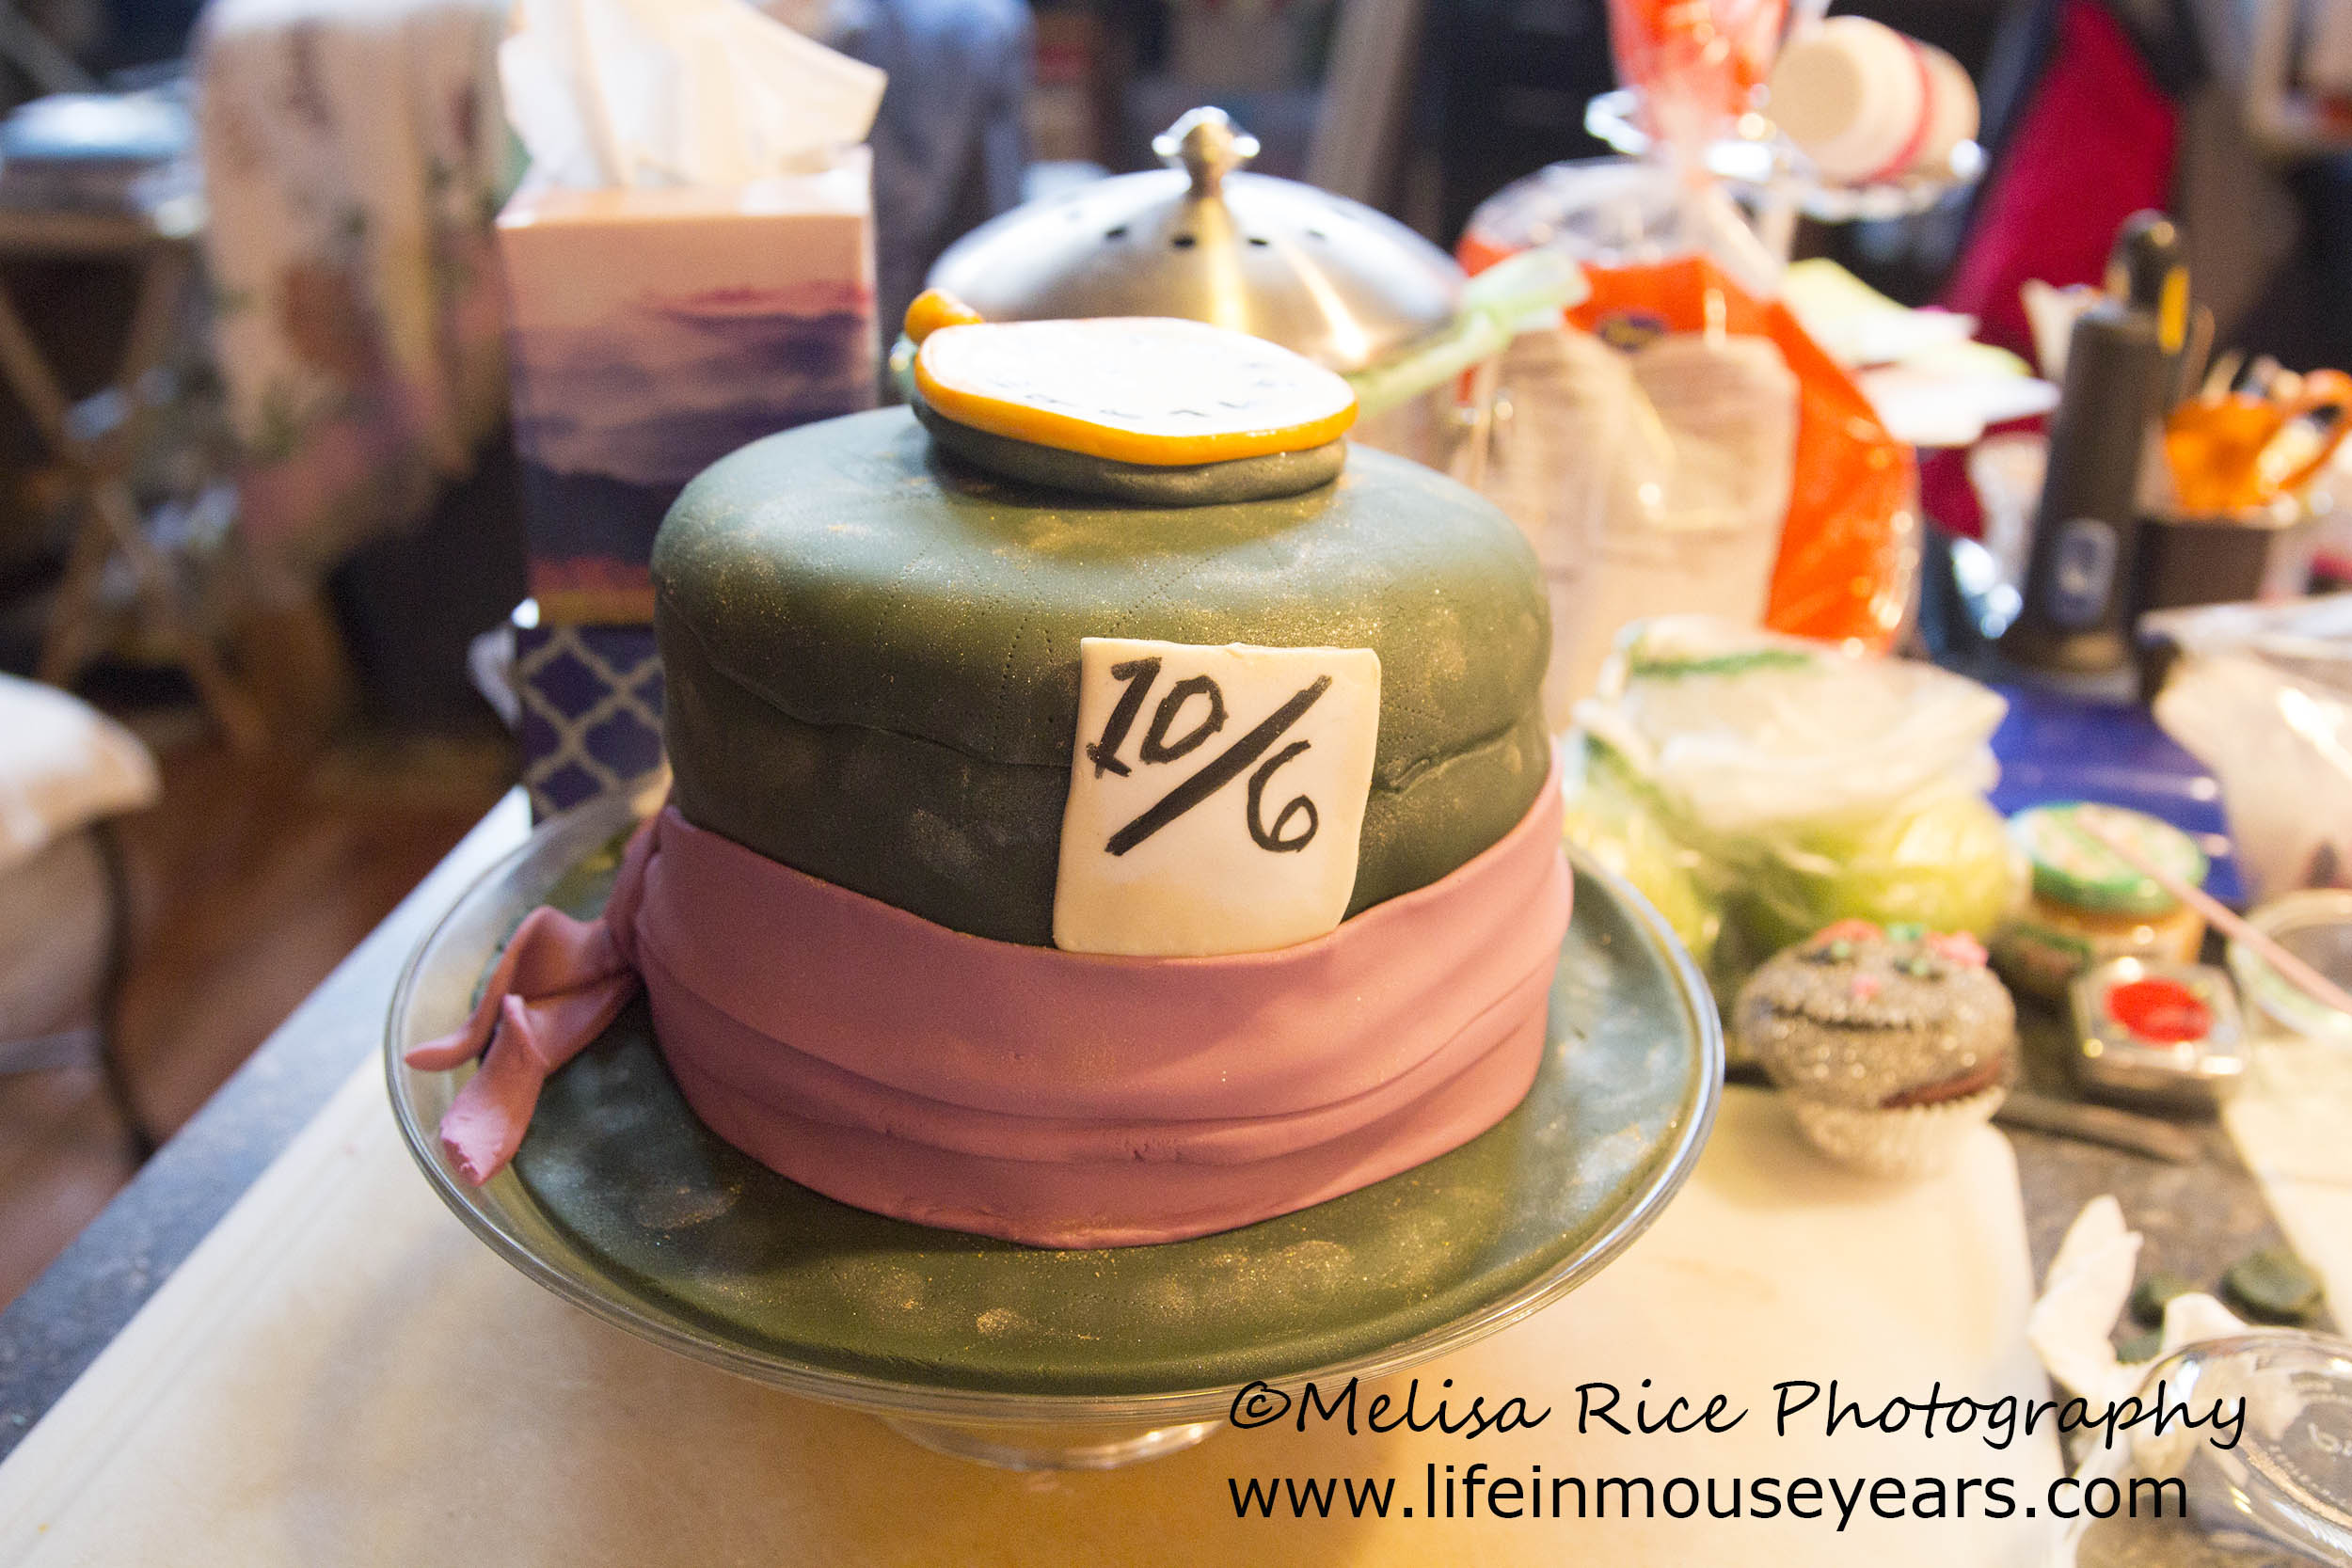
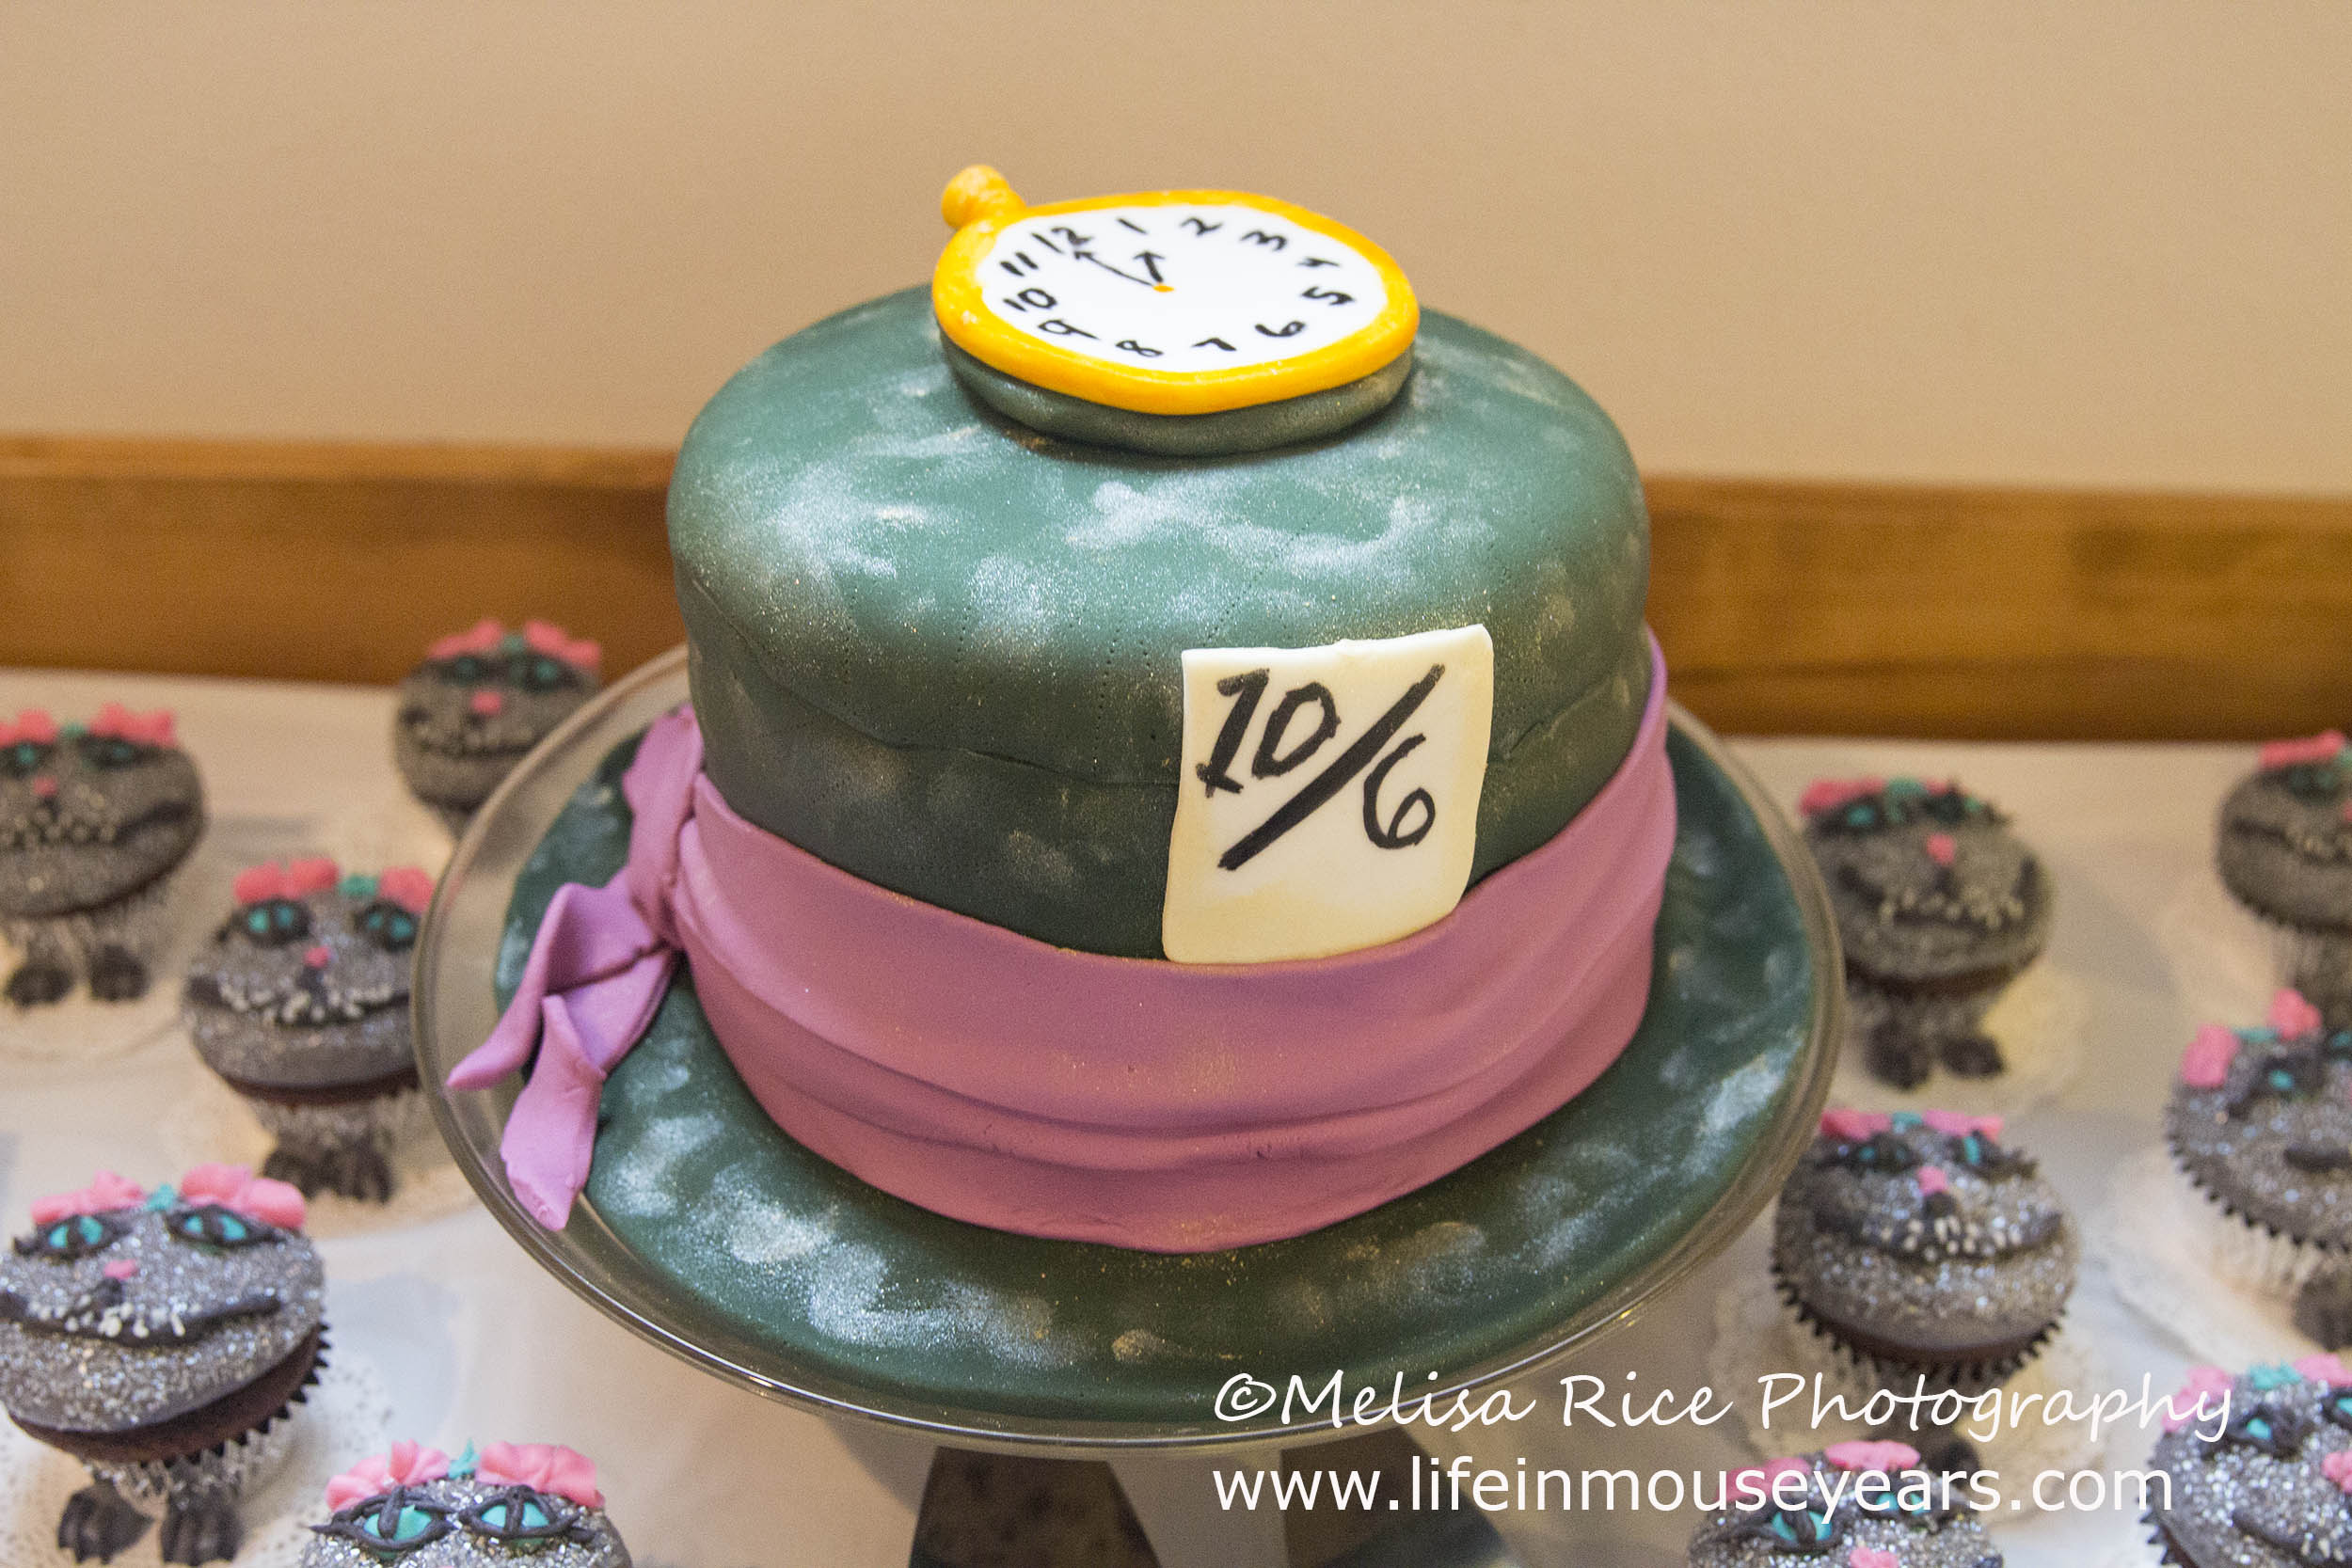
The next step for this Mad Hatter cake is color the fondant. I had purchased pre-made white fondant and started to add green gel coloring. After the green is mixed in pretty well, I then took some pre-made black fondant and added it to the green. This caused the green to turn the darker shade of green that the hat is in the movie.
Another fondant color I was going to need was a Victorian pink for the ribbon part around the hat. I added pink gel coloring to white fondant and a little purple as well.
Tip: Add a little color at a time to get the desired color you want. You can always add but you can’t take it away.
Cover the Cake
Next, I took the cake out of the fridge and rolled out the fondant. Now my first error was being afraid to use one piece to cover the entire cake. I have issues with getting it to cover the entire cake and be one solid smooth piece. I need to take control of this pesky fondant!
Therefore, because of my fear, I decided to do one piece around the side of the cake and another one on top. I went with a “stitching” effect. (At least that’s what I told myself…) In the end, that seam from the top and sides coming together ended up sinking lower than I wanted. However, I went with it.
Next, I took a long rectangle piece of the green fondant and made the brim of the hat around the bottom of the cake. I took a couple of skewers and placed them under the brim in a couple of places around the hat so it would dry leaving some curves to the brim.
Add the Ribbon
To add the pink ribbon around the hat, I rolled the pink fondant out and then cut three strips out. Approximately 2 inches wide and long enough to go all the way around the cake with plenty of extra at the end to twist together and still have a few inches to lay on the brim of the hat.
First, you take one of the pink strips and start to attach it to the cake. Leaving about 5 inches dangling from both ends of the strips. I took a food paintbrush and dipped it in some water. I brushed on a little water and gently pressed the pink ribbon to adhere it to the green hat. Next, I added the next strip around the hat using the same technique but adding it a little higher up so that the first strip is visible below the second strip. Finally, I added the strip slighter higher than the second strip for a layered look.
Once all three pink strips were around the Alice in Wonderland cake, I then took all the dangling ends and twisted them around each other then I left about 3 inches laying on the brim of the hat. I cut the ends to the length I wanted at a diagonal cut just like you would actual ribbon.
Make the Card
Another piece to make out of fondant is the card that sits on the Mad Hatters hat that says 10/6. I took a white piece of fondant and rolled it out and cut a rectangle shape out. Next, I took some black gel coloring and added it to vodka.
Tip: Vodka works better than water to paint fondant and gum paste. The vodka will evaporate faster than water and leave the coloring. It’s awesome!
I painted on the card 10/6. Next, I took edible gold glitter and painted it on the edge of the card. Finally, I used water and painted the back of the card that would be touching the cake and adhered the card to the hat-making sure the bottom of the card would tuck into the ribbon.
Add Seams
I purchased a fondant and gum paste starter kit. One of the tools in the kit has a rolling end that looks like a gear. When you use it on fondant it makes a line of holes. Not to worry, it won’t go all the way through the fondant. It just makes an impression on the fondant. The effect of this Mad Hatter cake was like the hat was stitched/sewn together. That is where my “stitching” the seam came into play. In addition to running that tool all over the hat, I ran it along that big seam I had.
Attempting to theme one of my disasters…
Lastly, I took the edible gold glitter and painted it in various spots all over the green fondant.
Disaster Struck
The next morning, the day of the party, I went to get the cake and found out that the cake had gotten squashed down by the heavy fondant! As a result, the wooden supports inside of the cake poked up the top of the hat.
Near tears, I frantically tried to think of what I could do to hide it.
Pocket Watch
I decided to try and make a pocket watch to place on top of the hat. Grabbing some white fondant, I rolled it into a circle and added small round post shape to the top of the watch for the winding part of the watch. Next, I took vodka and goldish-yellow coloring and painted the winding part and the outside of the round watch. Then I took vodka and black coloring and wrote the numbers on the face of the watch.
As a result of the posts sticking up, the watch would end up being bumpy as the fondant relaxed on the hat. Therefore, I took a piece of the cake board and I cut a circle out of it. Slightly smaller than the pocket watch. Due to the cardboard piece being visible, I took some of the leftover green fondant, rolled it out and covered the cardboard piece.
Finally, I placed the fondant covered cardboard on top of the hat and then placed the pocket watch on top of that. Posts are hidden!

Tip: Always save extra fondant, gum paste, frosting, etc. when you are making cakes. You never know what will happen before party time, while traveling etc. It comes in handy for touch-ups. Trust me!

In Conclusion
With Alice in Wonderland as a party theme, there are so many different cakes that could be made. I hope you enjoyed today’s post on making a Mad Hatter cake! If anything, I hope it inspires you with ideas and that you learn from my errors!
Questions or Comments?
If you have any questions or comments on today’s post-Alice in Wonderland Mad Hatter Cake, please feel free to leave them below! I would love to help!
Thanks for stopping by Life in Mouse Years!

Leave a Reply